http://www.imooc.com/learn/126

chkconfig
setup


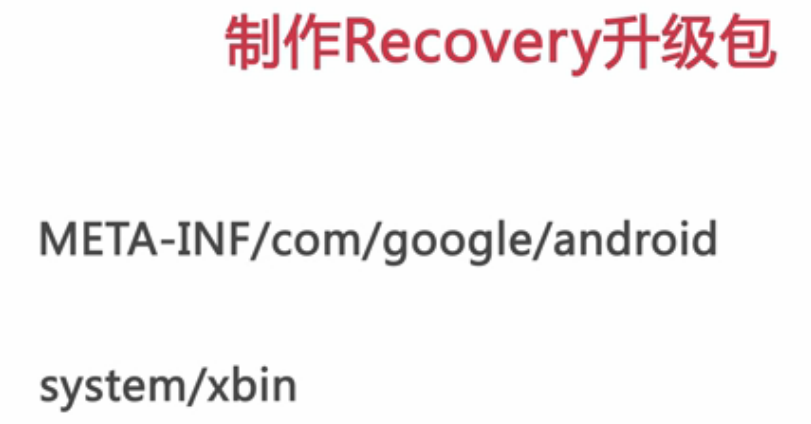
解压update.zip这个文件,可发现它一般打包了如下这几个文件:
或者没有updates而是system这个目录,不同的原因是我这里在updates里放置的是system.img等镜像文件,这些文件都由源码编译而来。而如果是system目录,这里一般放的是android系统的system目录下的内容,可以是整个android系统的system目录,也可以是其中的一部分内容,如一些so库等等,这样为补丁的发布提供了一个很好的解决办法,不需要更新整个系统,只需要更新一部分内容就可以了!
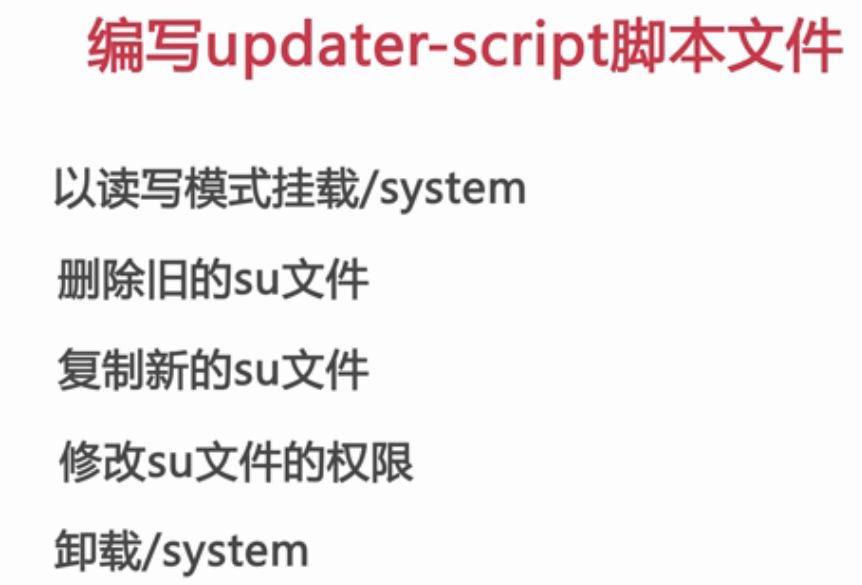
来看看META-INF/com/google/android这个目录下的内容,在这里就两个文件,一个是可执行的exe文件update-binary,这个文件在进入update状态的用于控制ROM的烧入,具体的代码在recovery下的install.c文件中的try_update_binary这个函数中;另一个是updater-script,这个文件里是一些脚本程序,具体的代码如下:
# Mount system for check figurepoint etc.
# mount("ext4", "EMMC","/dev/block/mmcblk0p2", "/system");
# Make sure Check system image figurepoint first.
# uncomment below lines to check
# assert(file_getprop("/system/build.prop", "ro.build.fingerprint") == "freescale/imx53_evk/imx53_evk/imx53_evk:2.2/FRF85B/eng.b33651.20100914.145340:eng/test-keys");
# assert(getprop("ro.build.platform) == "imx5x");
# unmount("/system");

show_progress(0.1, 5);
package_extract_dir("updates", "/tmp");
#Format system/data/cache partition
ui_print("Format disk...");
format("ext4","EMMC","/system");
format("ext4","EMMC","/data");
format("ext4","EMMC","/cache");
show_progress(0.2, 10);
# Write u-boot to 1K position.
# u-boot binary should be a no padding uboot!
# For eMMC(iNand) device, needs to unlock boot partition.
ui_print("writting u-boot...");
sysfs_file_write(" /sys/class/mmc_host/mmc0/mmc0:0001/boot_config", "1");
package_extract_file("files/u-boot.bin", "/tmp/u-boot.bin");
#ui_print("Clean U-Boot environment...");
show_progress(0.2, 5);
#simple_dd("/dev/zero","/dev/block/mmcblk0",2048);
simple_dd("/tmp/u-boot.bin", "/dev/block/mmcblk0", 2048);
#access user partition,and enable boot partion1 to boot
sysfs_file_write("/sys/class/mmc_host/mmc0/mmc0:0001/boot_config", "8");
#Set boot width is 8bits
sysfs_file_write("/sys/class/mmc_host/mmc0/mmc0:0001/boot_bus_config", "2");
show_progress(0.2, 5);
ui_print("extract kernel image...");
package_extract_file("files/uImage", "/tmp/uImage");
# Write uImage to 1M position.
ui_print("writting kernel image");
simple_dd("/tmp/uImage", "/dev/block/mmcblk0", 1048576);

ui_print("extract uramdisk image...");
package_extract_file("files/uramdisk.img", "/tmp/uramdisk.img");
# Write uImage to 1M position.
ui_print("writting uramdisk image");
simple_dd("/tmp/uramdisk", "/dev/block/mmcblk0", 6291456);
show_progress(0.2, 50);

# You can use two way to update your system which using ext4 system.
# dd hole system.img to your mmcblk0p2 partition.
package_extract_file("files/system.img", "/tmp/system.img");
ui_print("upgrading system partition...");
simple_dd("/tmp/system.img", "/dev/block/mmcblk0p2", 0);
show_progress(0.1, 5);
相应的脚本指令可在说明可对应源码可在recovery包中的install.c这个文件中找到。
在bootable/recovery/etc下有原始版的脚本代码update-script,但在recovery下的updater.c这个文件中有如下定义:
// Where in the package we expect to find the edify script to execute.
// (Note it's "updateR-script", not the older "update-script".)
#define SCRIPT_NAME "META-INF/com/google/android/updater-script"
所在使用这个原版的脚本的时候要将update-script更成updater-script,需要注意!
我们可以发现在bootable/recovery/etcMETA-INFO/com/google/android目录下少了一个update-binary的执行文件,在out/target/product/YOU_PRODUCT/system/bin下面我们可以找到updater,只要将其重名字为update-binary就可以了!
有了这些准备工作,我们就可以开始制作一个我们自己的ROM了,具体步骤如下:
*      test@ubuntu:~$ mkdir recovery
*      test@ubuntu:~$ cd recovery 然后将上面提到的bootable/recovery/etc下的所有内容拷贝到当前目录下并删掉init.rc这个文件
*      编译./META-INF/com/google/android/updater-script这个文件使达到我们想要的烧写控制,如果是烧写system.img这样的镜像文件,可以直接用我上面提到的updater-script这个脚本代码。
*      拷贝相应的需要制作成ROM的android文件到updates目录或者system目录下,这个得根据系统的需要决定。
*      test@ubuntu:~/recovery$ mkdir res
*      test@ubuntu:~/recovery$ ~/myandroid/out/host/linux-x86/framework/dumpkey.jar ~/myandroid/build/target/product/security/testkey.x509.pem > res/keys 这里创建一个目录用于存储系统的key值
*      zip /tmp/recovery.zip -r ./META-INF ./updates ./res 将所有文件打包
*      java -jar ./tools/signapk.jar -w ./tools/testkey.x509.pem ./tools/testkey.pk8 /tmp/recovery.zip update.zip 我在recovery目录下创建了一个tools目录,里面放置了sygnapk.jar、testkey.pk8、testkey.x509.pem这几个文件用于java签名时用
经过上面这几步之后就会在recovery目录生成一个update.zip的文件,这个就是我们自己制作的ROM文件,将它拷到sdcard的根目录下,在系统设置里操作进入到“固件升级状态”,等到系统重启时,就会看到已经开始自行格式化data和cache分区,稍后就开始出现进度条向相应分区里烧写uboot、kernel、android system的文件了!
http://www.cnblogs.com/xl19862005/archive/2012/03/23/2414109.html