前言
上一篇文章我们有提到Swagger做接口的定义是采用yaml语言的,当然,yaml是个啥,大家自行百度。阿福在此不做赘述了。但是,今天我们要来讲的是yaml支持比较好的Swagger-Editor开发环境的搭建。
环境准备
实际上,Swagger-Editor是基于 NodeJs 开发的,那么,就一定是需要Node的开发环境的啦!安装最新版的Node。直接去到NodeJs中文网,毕竟翻墙的梯子不是每个人都有,而且就算你有,呵呵,拖一个东西下来也不容易啊。链接如下:
下载最新版的开发环境即可,当然,这里的话你安装之后会顺便把npm安装上给你。npm是什么?这个暂时不操心,可以理解为maven一类的包管理工具。安装好后,测试下,* node -v*,你会看到当前的版本!看到了的话,恭喜你!
好了下面环境准备好了,让我们进入正式流程撒!
下载 安装
这个时候,我们需要从Github上clone最新的nodejs的包。指令如下:
git clone https://github.com/swagger-api/swagger-editor.git- 1
接下来,只需要温柔的进入到Swagger-Editor的目录里面。你就会看到如下的一个目录。

好了,我们来简单的看一下这里面都有啥?
dist里面毫无疑问放置的是一些静态的文件了,然后那个node_models放置的是你在package.json中定义的那些类库。我们只要看一下README.md就可以知道如何用了。下面,我们看看怎么去开始?
首先,* npm install *去安装需要的modules,这将会把所有依赖的包安装上,当然,会有些许的warning,这里要记住,一定下载最新版的NodeJs啊。
在很多别的教程里,会让我们在装上http-server,但是你仔细一点的话就会发现,在packge.json里面实际上是声明了http-server的啦。
好了,现在就可以启动了!
退回到上一级目录,然后http-server 目录,直接就可以看到下面的信息!
Starting up http-server, serving swagger-editor-master
Available on:
  http://192.168.253.1:8080
  http://172.18.33.1:8080
  http://127.0.0.1:8080
Hit CTRL-C to stop the server
接下来,访问那个Url,就可以看到美好得画面了!

好了,接下来就可以尽情的使用了,实际上这个编辑器是有线上的版本的,但是苦于网速实在是好坑啊!本地有一个还是比较好的。啊哈哈哈
总结
本文主要讲述了Swagger-Editor的本地安装,当然,阿福在这里实际上有句话要说,因为觉得不体系化的去写一下Swaager实在是有违天理。于是,后面的文章会按照我接下来放出的一张思维导图!

http://blog.csdn.net/wangmeng951011/article/details/67640375
SWAGGER TOOLS DOCS
The Swagger documentation contains useful reference and task-based help content to quickly get started with the Swagger tools for your API.
The Swagger Editor is an open source editor to design, define and document RESTful APIs in the Swagger Specification. The source code for the Swagger Editor can be found in GitHub.
GitHub: https://github.com/swagger-api/swagger-editor
Download
Using the Editor on the Web
The Editor works in any web browser, and can be hosted locally or accessed from the web.
Using the Editor on a local machine
You can run and use the Swagger Editor on your machine as well.
Prerequisites
The following dependencies would need to be installed on your machine before downloading and running the Swagger Editor.
Once NodeJS is installed successfully, please install all the npm dependencies using
npm install;
Setup with http-server module from GitHub
The Swagger Editor can be found in this public repository on GitHub.
Please run the following to run the Editor using the http-server module from GitHub. After downloading the latest version from Github, you will need to run these scripts on your terminal.
npm install -g http-server
wget https://github.com/swagger-api/swagger-editor/releases/download/v2.10.4/swagger-editor.zip
unzip swagger-editor.zip
http-server swagger-editor
Setup from Docker
The Swagger Editor can be found in this public repository on Docker.
Please run the following to run the Editor in your local machine from Docker.
docker pull swaggerapi/swagger-editor
docker run -p 80:8080 swaggerapi/swagger-editor
Contribute
The Swagger Editor is an open source project under the Apache license. You can contribute to the project with suggestions, ideas, bug reports and pull requests in the Swagger Editor GitHub repository.
Please run the following to to see the Editor’s source code and work on the project from your local machine.
git clone https://github.com/swagger-api/swagger-editor.git
cd swagger-editor
npm install
npm run build
npm start
Common issues:
- If
npm startdoes not work, delete the node_modules folder, then runnpm installandnpm start - If there is a problem with dist folder after cloning, go to the root and run
npm run build
Swagger Codegen Documentation
The Swagger Codegen is an open source code-generator to build server stubs and client SDKs directly from a Swagger defined RESTful API. The source code for the Swagger Codegen can be found in GitHub.
GitHub: https://github.com/swagger-api/swagger-codegen
Compatibility
| Swagger Codegen Version | Release Date | Swagger Spec Compatibility | Notes |
|---|---|---|---|
| 2.3.0 (upcoming minor release) | TBD | 1.0, 1.1, 1.2, 2.0 | Minor releases with breaking changes |
| 2.2.2 (upcoming patch release) | TBD | 1.0, 1.1, 1.2, 2.0 | Patch release (without breaking changes) |
| 2.2.1 (current stable) | 2016-08-07 | 1.0, 1.1, 1.2, 2.0 | tag v2.2.1 |
| 2.1.6 | 2016-04-06 | 1.0, 1.1, 1.2, 2.0 | tag v2.1.6 |
| 2.0.17 | 2014-08-22 | 1.1, 1.2 | tag v2.0.17 |
| 1.0.4 | 2012-04-12 | 1.0, 1.1 | tag v1.0.4 |
Installation
Prerequisites
The following dependencies would need to be installed on your machine before downloading and running the Swagger Codegen.
- Java, version 7 or higher
Installation with Homebrew
If you have a Mac or a Linux environment, then you could use Homebrew to install the Swagger Codegen.
brew install swagger-codegen
Installation from Maven Central
All versions of the Swagger Codegen project can be found on Maven Central. Visit this folder on Maven, and choose the appropriate version (we recommend the latest version).
You could download and run the executable .jar file (for example, swagger-codegen-cli-2.2.1.jar)
Alternatively, you could use the wget command as well.
wget {link address of the executable .jar file}
Example:
wget https://oss.sonatype.org/content/repositories/releases/io/swagger/swagger-codegen-cli/2.2.1/swagger-codegen-cli-2.2.1.jarUsage
For the sake of simplicity, we will assume you have the swagger-codegen-cli-2.2.1 installed. Please visit the installation section of the Swagger Codegen to learn about how to get the Codegen on your machine.
List of supported languages
To get a list of languages supported by the Swagger Codegen -
If you have Homebrew installed:
swagger-codegen
Else, you could use:
java -jar swagger-codegen-cli-2.2.1.jar
Help options in terminal
To see the various help section options of the Swagger Codegen -
If you have Homebrew installed:
swagger-codegen help
Else, you could use:
java -jar swagger-codegen-cli-2.2.1.jar help
Once you have the various help section options, you can learn about a specific topic.
If you have Homebrew installed:
swagger-codegen help <command>
Example:
swagger-codegen help generate
Else, you could use:
java -jar swagger-codegen-cli-2.2.1.jar help <command>
Example:
java -jar swagger-codegen-cli-2.2.1.jar help generate
To see the various config help section options for specific languages supported by the Swagger Codegen -
If you have Homebrew installed:
swagger-codegen config-help -l <language name>
Example:
swagger-codegen config-help -l php
Else, you could use:
java -jar swagger-codegen-cli-2.2.1.jar config-help -l <language name>
Example:
java -jar swagger-codegen-cli-2.2.1.jar config-help -l php
Generating Code
To generate code from an existing swagger specification -
If you have Homebrew installed:
swagger-codegen generate -i <path of your Swagger specification> -l <language>
Example:
swagger-codegen generate -i http://petstore.swagger.io/v2/swagger.json -l csharp
Else, you could use:
java -jar swagger-codegen-cli-2.2.1.jar generate -i <path of your Swagger specification> -l <language> ` Example:
java -jar swagger-codegen-cli-2.2.1.jar generate -i http://petstore.swagger.io/v2/swagger.json -l csharp
In the above code, we pass two arguments : - i and -l. -i is used to specify the path of your API’s specification. -l is used to specify the language you want to generate the code for your specified API’s specification
The Codegen creates a README file with all the information for running and building the API. Each language creates a different README, so please go through it to learn about how to build your Swagger defined API.
Contribute
The Swagger Codegen is an open source project under the Apache license. You can contribute to the project with suggestions, ideas, bug reports and pull requests in the GitHub repository, found here -https://github.com/swagger-api/swagger-codegen.
Guidelines
Before submitting an issue
- If you're not using the latest master to generate API clients or server stubs, please give it another try by pulling the latest master as the issue may have already been addressed. Ref: Getting Started
- Search the open issue and closed issue to ensure no one else has reported something similar before.
- File an issue ticket by providing all the required information.
- Test with the latest master by building the JAR locally to see if the issue has already been addressed.
- You can also make a suggestion or ask a question by opening an "issue".
Before submitting a PR
- Search the open issue to ensure no one else has reported something similar and no one is actively working on similar proposed change.
- If no one has suggested something similar, open an "issue" with your suggestion to gather feedback from the community.
- It's recommended to create a new git branch for the change so that the merge commit message looks nicer in the commit history.
How to contribute
Code generators
All the code generators can be found in modules/swagger-codegen/src/main/java/io/swagger/codegen/languages
Templates
All the templates (mustache) can be found in modules/swagger-codegen/src/main/resources.
For a list of variables available in the template, please refer to this page
Style guide
Code change should conform to the programming style guide of the respective languages:
- Android: https://source.android.com/source/code-style.html
- C#: https://msdn.microsoft.com/en-us/library/vstudio/ff926074.aspx
- C++: https://google.github.io/styleguide/cppguide.html
- Haskell: https://github.com/tibbe/haskell-style-guide/blob/master/haskell-style.md
- Java: https://google.github.io/styleguide/javaguide.html
- JavaScript: https://github.com/airbnb/javascript
- Groovy: http://groovy-lang.org/style-guide.html
- Go: https://github.com/golang/go/wiki/CodeReviewComments
- ObjC: https://github.com/NYTimes/objective-c-style-guide
- Perl: http://perldoc.perl.org/perlstyle.html
- PHP: https://github.com/php-fig/fig-standards/blob/master/accepted/PSR-2-coding-style-guide.md
- Python: https://www.python.org/dev/peps/pep-0008/
- Ruby: https://github.com/bbatsov/ruby-style-guide
- Scala: http://docs.scala-lang.org/style/
- Swift: https://developer.apple.com/library/prerelease/ios/documentation/Swift/Conceptual/Swift_Programming_Language/TheBasics.html
- TypeScript: https://github.com/Microsoft/TypeScript/wiki/Coding-guidelines
For other languages, feel free to suggest.
You may find the current code base not 100% conform to the coding style and we welcome contributions to fix those.
For Vendor Extensions, please follow the naming convention below:
- For general vendor extension, use lower case and hyphen. e.g.
x-is-unique,x-content-type - For language-specified vendor extension, put it in the form of
x-{lang}-{extension-name}. e.g.x-objc-operation-id,x-java-feign-retry-limit - For a list of existing vendor extensions in use, please refer to https://github.com/swagger-api/swagger-codegen/wiki/Vendor-Extensions. If you've addaed new vendor extensions as part of your PR, please update the wiki page.
Testing
To add test cases (optional) covering the change in the code generator, please refer to modules/swagger-codegen/src/test/java/io/swagger/codegen
To test the templates, please perform the following:
- Update the Petstore sample by running the shell script under
binfolder. For example, run./bin/ruby-petstore.shto update the Ruby PetStore API client undersamples/client/petstore/rubyFor Windows, the batch files can be found underbinwindowsfolder. (If you find that there are new files generated or unexpected changes as a result of the update, that's not unusual as the test cases are added to the OpenAPI/Swagger spec from time to time. If you've questions or concerns, please open a ticket to start a discussion) - Run the tests in the sample folder, e.g. in
samples/client/petstore/ruby, runmvn integration-test -rf :RubyPetstoreClientTests. (some languages may not contain unit testing for Petstore and we're looking for contribution from the community to implement those tests) - Finally, git commit the updated samples files:
git commit -a(git add -Aif added files with new test cases)
To start the CI tests, you can run mvn verify -Psamples (assuming you've all the required tools installed to run tests for different languages) or you can leverage http://travis-ci.org to run the CI tests by adding your own Swagger-Codegen repository.
Tips
- Smaller changes are easier to review
- [Optional] For bug fixes, provide a OpenAPI Spec to repeat the issue so that the reviewer can use it to confirm the fix
- Add test case(s) to cover the change
- Document the fix in the code to make the code more readable
- Make sure test cases passed after the change (one way is to leverage https://travis-ci.org/ to run the CI tests)
- File a PR with meaningful title, description and commit messages. A good example is PR-3306
Swagger UI Documentation
The Swagger UI is an open source project to visually render documentation for a Swagger defined API directly from the API's Swagger specifcation. The source code for the Swagger UI can be found in GitHub.
GitHub: https://github.com/swagger-api/swagger-ui
Compatibility
Browser Compatibility
The Swagger UI is automatically generated from any API defined in the Swagger specification, and can be viewed within a browser.
- Mozilla Firefox
- Google Chrome
- Microsoft Internet Explorer
Swagger Specification Compatibility
| Swagger UI Version | Release Date | Swagger Specification Compatibility | Notes |
|---|---|---|---|
| 2.2.5 | 2016-09-26 | 1.1, 1.2, 2.0 | tag v.2.2.5 |
| 2.1.5 | 2016-07-20 | 1.1, 1.2, 2.0 | tag v.2.1.5 |
| 2.0.24 | 2014-09-12 | 1.1, 1.2 | tag v2.0.24 |
| 1.0.13 | 2013-04-09 | 1.1, 1.2 | tag v1.0.13 |
| 1.0.1 | 2011-10-11 | 1.0, 1.1 | tag v1.0.1 |
Download
There is no need to install, build or recompile the Swagger UI. The Swagger UI can be used directly from the GitHub repository. You can use the swagger-ui code as is. Please follow the instructions below to get started with the Swagger UI
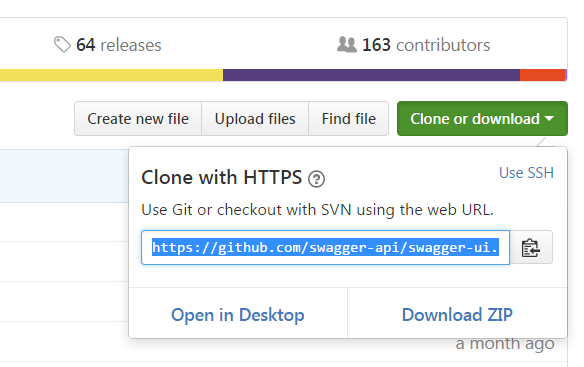
Step 1: Go to the GitHub repository of the Swagger UI project
Step 2: Clone or download the zip file of the repository
Usage
Step 1: Go to the folder containing the Swagger UI project in your local machine
Step 2: Open the dist folder
Step 3: Run the dist/index.html file on a browser or place the dist folder inside your server.
Step 4: The Swagger UI will now be live in the browser, with the default rendering of the Swagger Petstore. The JSON specifcation of the Swagger Petstore can be found here - http://petstore.swagger.io/v2/swagger.json
Note: Please remember that to load a specification and execute the UI’s try out requests, you would need to have enabled CORS (read below)
Step 5: You can mention the YAML or JSON path of any existing specification hosted on a server in the field on the top navigation bar.

For example, in the above image, the JSON specification can be found in http://petstore.swagger.io/v2/swagger.json , and its documentation can be generated in the Swagger UI.
Changing the default API
Opening the Swagger UI will render the Swagger Petstore API by default. You can change this default specification to your desired API.
In general, to do so, you would need to pass a constructor URL of the specification you wish to make as the default.
window.swaggerUi = new SwaggerUi({
 url: url, // here goes correct url
…
});
There are different ways to set a default specification to load:
-
The URL of the specification you wish to make as the default render in the Swagger UI can be passed as query parameter, as follows:
{your_host}/dist/index.html?url={specification_link}Where
{your_host}is the host of the Swagger UI, and{specification_link}is the location of the specification you wish to make as the default - In the constructor, you may pass a spec parameter (in JSON) as shown below:
    window.swaggerUi = new SwaggerUi({
     spec: {}, // the specification location ,
    validatorUrl: “” // the URL of the validator of the specification
    …
    });
If the specification is without any syntax errors, the Swagger UI will render the API as interactive documentation.
Customization
The Swagger UI is completely customizable, and can be incorporated with any user’s or organization’s branding assets. Here is an overview of what's in its various directories:
- dist: Contains a distribution which you can deploy on a server or load from your local machine.
- dist/lang: The swagger localization
- lib: Contains javascript dependencies which swagger-ui depends on
- node_modules: Contains node modules which swagger-ui uses for its development
- src/main/template: handlebars templates used to render swagger-ui
- src/main/html: the html files, some images and css
- src/main/javascript: main code
- src/main/less: the less files, to be compiled to css
Note: Once you’ve added the required customizations, all the sources must be built to get the Swagger UI with the added customizations.
If you’re launching the Swagger UI inside the custom html file, please do not forget to include the css and js files from the dist folder in the following order into your html file:
<link href='css/typography.css' media='screen' rel='stylesheet' type='text/css'/>

 <link href='css/reset.css' media='screen' rel='stylesheet' type='text/css'/>

 <link href='css/screen.css' media='screen' rel='stylesheet' type='text/css'/>

 <link href='css/reset.css' media='print' rel='stylesheet' type='text/css'/>

 <link href='css/print.css' media='print' rel='stylesheet' type='text/css'/>

 <script src='lib/object-assign-pollyfill.js' type='text/javascript'></script>

 <script src='lib/jquery-1.8.0.min.js' type='text/javascript'></script>

 <script src='lib/jquery.slideto.min.js' type='text/javascript'></script>

 <script src='lib/jquery.wiggle.min.js' type='text/javascript'></script>

 <script src='lib/jquery.ba-bbq.min.js' type='text/javascript'></script>

 <script src='lib/handlebars-4.0.5.js' type='text/javascript'></script>

 <script src='lib/lodash.min.js' type='text/javascript'></script>

 <script src='lib/backbone-min.js' type='text/javascript'></script>

 <script src='swagger-ui.js' type='text/javascript'></script>

 <script src='lib/highlight.9.1.0.pack.js' type='text/javascript'></script>

 <script src='lib/highlight.9.1.0.pack_extended.js' type='text/javascript'></script>

 <script src='lib/jsoneditor.min.js' type='text/javascript'></script>

 <script src='lib/marked.js' type='text/javascript'></script>

 <script src='lib/swagger-oauth.js' type='text/javascript'></script>
After that's done, please add the below script with Swagger UI to a page to launch it.
<script>
var swaggerUi = new SwaggerUi({
  url: 'http://petstore.swagger.io/v2/swagger.json', // url of specification
  dom_id: 'swagger-ui-container' //id of element where to render swagger-ui
});

swaggerUi.load();
</script>
Parameters
The following parameters are acceptable by the Swagger UI constructor. This can be modified to better suit your needs.
| Parameter Name | Description |
|---|---|
| url | The url pointing to swagger.json (Swagger 2.0) or the resource listing (earlier versions) as per OpenAPI Spec. |
| authorizations | An authorization object to be passed to swagger-js. Setting it here will trigger inclusion of any authorization or custom signing logic when fetching the swagger description file. Note the object structure should be { key: AuthorizationObject } |
| spec | A JSON object describing the OpenAPI Specification. When used, the url parameter will not be parsed. This is useful for testing manually-generated specifications without hosting them. Works for Swagger 2.0 specs only. |
| validatorUrl | By default, Swagger-UI attempts to validate specs against swagger.io's online validator. You can use this parameter to set a different validator URL, for example for locally deployed validators (Validator Badge). Setting it to null will disable validation. This parameter is relevant for Swagger 2.0 specs only. |
| dom_id | The id of a dom element inside which SwaggerUi will put the user interface for swagger. |
| booleanValues | SwaggerUI renders boolean data types as a dropdown. By default it provides a 'true' and 'false' string as the possible choices. You can use this parameter to change the values in dropdown to be something else, for example 0 and 1 by setting booleanValues to new Array(0, 1). |
| docExpansion | Controls how the API listing is displayed. It can be set to 'none' (default), 'list' (shows operations for each resource), or 'full' (fully expanded: shows operations and their details). |
| apisSorter | Apply a sort to the API/tags list. It can be 'alpha' (sort by name) or a function (see Array.prototype.sort() to know how sort function works). Default is the order returned by the server unchanged. |
| operationsSorter | Apply a sort to the operation list of each API. It can be 'alpha' (sort by paths alphanumerically), 'method' (sort by HTTP method) or a function (see Array.prototype.sort() to know how sort function works). Default is the order returned by the server unchanged. |
| defaultModelRendering | Controls how models are shown when the API is first rendered. (The user can always switch the rendering for a given model by clicking the 'Model' and 'Model Schema' links.) It can be set to 'model' or 'schema', and the default is 'schema'. |
| onComplete | This is a callback function parameter which can be passed to be notified of when SwaggerUI has completed rendering successfully. |
| onFailure | This is a callback function parameter which can be passed to be notified of when SwaggerUI encountered a failure was unable to render. |
| highlightSizeThreshold | Any size response below this threshold will be highlighted syntactically, attempting to highlight large responses can lead to browser hangs, not including a threshold will default to highlight all returned responses. |
| supportedSubmitMethods | An array of of the HTTP operations that will have the 'Try it out!' option. An empty array disables all operations. This does not filter the operations from the display. |
| oauth2RedirectUrl | OAuth redirect URL |
| showRequestHeaders | Whether or not to show the headers that were sent when making a request via the 'Try it out!' option. Defaults to false. |
| jsonEditor | Enables a graphical view for editing complex bodies. Defaults to false. |
All other parameters are explained in greater detail below.
HTTP Methods and API Invocation
Swagger UI supports invocation of all HTTP methods APIs including GET, PUT, POST, DELETE, PATCH, OPTIONS. These are handled in the swagger-js project, please look there for specifics on their usage.
Header Parameters
Header params are supported through a pluggable mechanism in swagger-js. You can see the index.html for a sample of how to dynamically set headers:
// add a new SwaggerClient.ApiKeyAuthorization when the api-key changes in the ui.
$('#input_apiKey').change(function() {
  var key = $('#input_apiKey')[0].value;
  if(key && key.trim() != "") {
    swaggerUi.api.clientAuthorizations.add("auth_name", new SwaggerClient.ApiKeyAuthorization("api_key", key, "header"));
  }
})
This will add the header api_key with value key on calls that have the auth_name security scheme as part of their swaggerDefinitions. You can substitute query to send the values as a query param.
Localization and translation
The localization files are in the lang directory. Note that language files and translator is not included in Swagger UI by default. You need to add them manually.
To enable translation you should append the next two lines in your Swagger's index.html (or another entry point you use)
<script src='lang/translator.js' type='text/javascript'></script>
<script src='lang/en.js' type='text/javascript'></script>
The first line script is a translator and the second one is your language lexemes.
If you wish to append support for new language you just need to create lang/your_lang.js and fill it like it's done in existing files.
To append new lexemex for translation you should do two things:
- Add lexeme into the language file. Example of new line: "new sentence":"translation of new sentence".
- Mark this lexeme in source html with attribute data-sw-translate. Example of changed source:
<anyHtmlTag data-sw-translate>new sentence</anyHtmlTag>or ``` . At this moment only inner html, title-attribute and value-attribute are going to be translated.
Build
Once you’ve added the required customizations, all the sources must be built to get the Swagger UI with the added customizations.
Build from NPM
Prerequisites
The following dependencies would need to be installed on your machine.
Run the following in your terminal -
npm install
npm run build
You should see the distribution under the dist folder. Open ./dist/index.html to launch the Swagger UI in a browser.
Build from Docker
Please run the following to build the Swagger UI from Docker.
docker build -t swagger-ui-builder .
docker run -p 127.0.0.1:8080:8080 swagger-ui-builder
This will start the Swagger UI on your local port 8080, specifically at http://localhost:8080
Common Issues
CORS support
(OR: How to deal with the common "Can't read from server. It may not have the appropriate access-control-origin settings." issue)
CORS is a technique to prevent websites from doing bad things with your personal data. Most browsers + javascript toolkits not only support CORS but enforce it, which has implications for your API server which supports Swagger. You can read about CORS here: http://www.w3.org/TR/cors. There are two cases where no action is needed for CORS support: ** Swagger UI is hosted on the same server as the application itself (same host and port).
** The application is located behind a proxy that enables the required CORS headers. This may already be covered within your organization.
Otherwise, CORS support needs to be enabled for:
- Your Swagger docs. For Swagger 2.0 it's the swagger.json and any externally
$refeddocs, and for prior version, it's the Resource Listing and API Declaration files. - For the
Try it nowbutton to work, CORS needs to be enabled on your API endpoints as well.
Testing CORS Support
You can verify CORS support with one of three techniques:
-
Curl your API and inspect the headers. For instance:
`$ curl -I "http://petstore.swagger.io/v2/swagger.json"` If you get a response as shown - ``` HTTP/1.1 200 OK Date: Sat, 31 Jan 2015 23:05:44 GMT Access-Control-Allow-Origin: * Access-Control-Allow-Methods: GET, POST, DELETE, PUT, PATCH, OPTIONS Access-Control-Allow-Headers: Content-Type, api_key, Authorization Content-Type: application/json Content-Length: 0 ``` It means that the petstore resource listing supports `OPTIONS`, and the following headers: `Content-Type`, `api_key`, `Authorization`. -
Try swagger-ui from your file system and look at the debug console. If CORS is not enabled, you'll see something like this:
```
XMLHttpRequest cannot load http://sad.server.com/v2/api-docs. No 'Access-Control-Allow-Origin' header is present on the requested resource. Origin 'null' is therefore not allowed access.
```
Swagger-UI cannot easily show this error state.
- Using the http://www.test-cors.org website. Keep in mind this will show a successful result even if
Access-Control-Allow-Headersis not available, which is still required for Swagger UI to function properly.
Enabling CORS
The method of enabling CORS depends on the server and/or framework you use to host your application. http://enable-cors.org provides information on how to enable CORS in some common web servers. Other servers/frameworks may provide you information on how to enable it specifically in their use case.
CORS and Header Parameters
Swagger lets you easily send headers as parameters to requests. The name of these headers MUST be supported in your CORS configuration as well. From our example above:
Access-Control-Allow-Headers: Content-Type, api_key, Authorization
Only headers with these names will be allowed to be sent by Swagger UI.
Contribute
The Swagger UI is an open source project under the Apache license. You can contribute to the project with suggestions, ideas, bug reports and pull requests in the GitHub repository, found here -https://github.com/swagger-api/swagger-ui.
Create your own fork of swagger-api/swagger-ui, and share your updates with a pull request.
https://swagger.io/docs/swagger-tools/#swagger-editor