项目中使用了FastDFS作为文件系统,这里记录一下安装和配置过程,个人使用部署过程中耗费了好长时间和精力,遇到了很多的坑,总结成了一篇详细的部署文档,以备下次安装使用。
项目场景
由于是测试环境,所以只提供了一台服务器,后续软件的安装和配置都在这台服务器上完成。(IP:10.129.44.128)
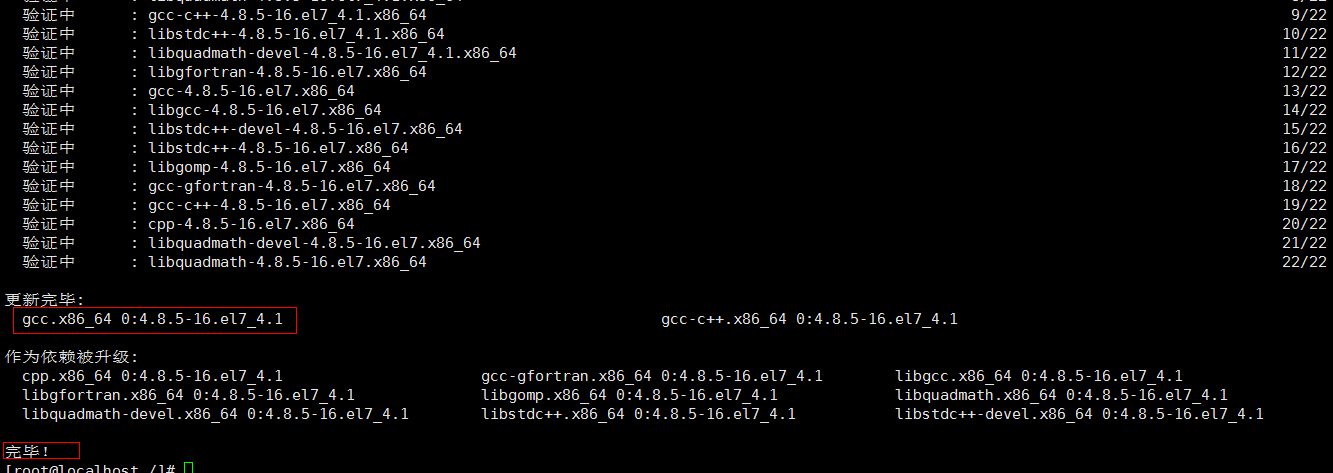
1、安装gcc(编译时需要)
FastDFS是C语言开发,安装FastDFS需要先将官网下载的源码进行编译,编译依赖gcc环境,如果没有gcc环境,需要安装gcc
yum install -y gcc gcc-c++

2、安装libevent(运行时需求)
若安装了桌面图形界面,就不需要安装;FastDFS依赖libevent库;
yum -y install libevent
3、 安装libfastcommon
libfastcommon是FastDFS官方提供的,libfastcommon包含了FastDFS运行所需要的一些基础库。
-
获取libfastcommon安装包:
wget https://github.com/happyfish100/libfastcommon/archive/V1.0.38.tar.gz -
解压安装包:tar -zxvf V1.0.38.tar.gz
-
进入目录:cd libfastcommon-1.0.38
-
执行编译:./make.sh
-
安装:./make.sh install
 

可能遇到的问题:
-bash: make: command not found
-bash: gcc: command not found

解决方案:debian通过apt-get install gcc make安装 centos通过yum -y install gcc make安装
6.libfastcommon安装好后会在/usr/lib64 目录下生成 libfastcommon.so 库文件;

注意:由于FastDFS程序引用usr/lib目录所以需要将/usr/lib64下的库文件拷贝至/usr/lib下。
cp libfastcommon.so /usr/lib
4、安装FastDFS
-
获取fdfs安装包:
wget https://github.com/happyfish100/fastdfs/archive/V5.11.tar.gz -
解压安装包:tar -zxvf V5.11.tar.gz
-
进入目录:cd fastdfs-5.11
-
执行编译:./make.sh
-
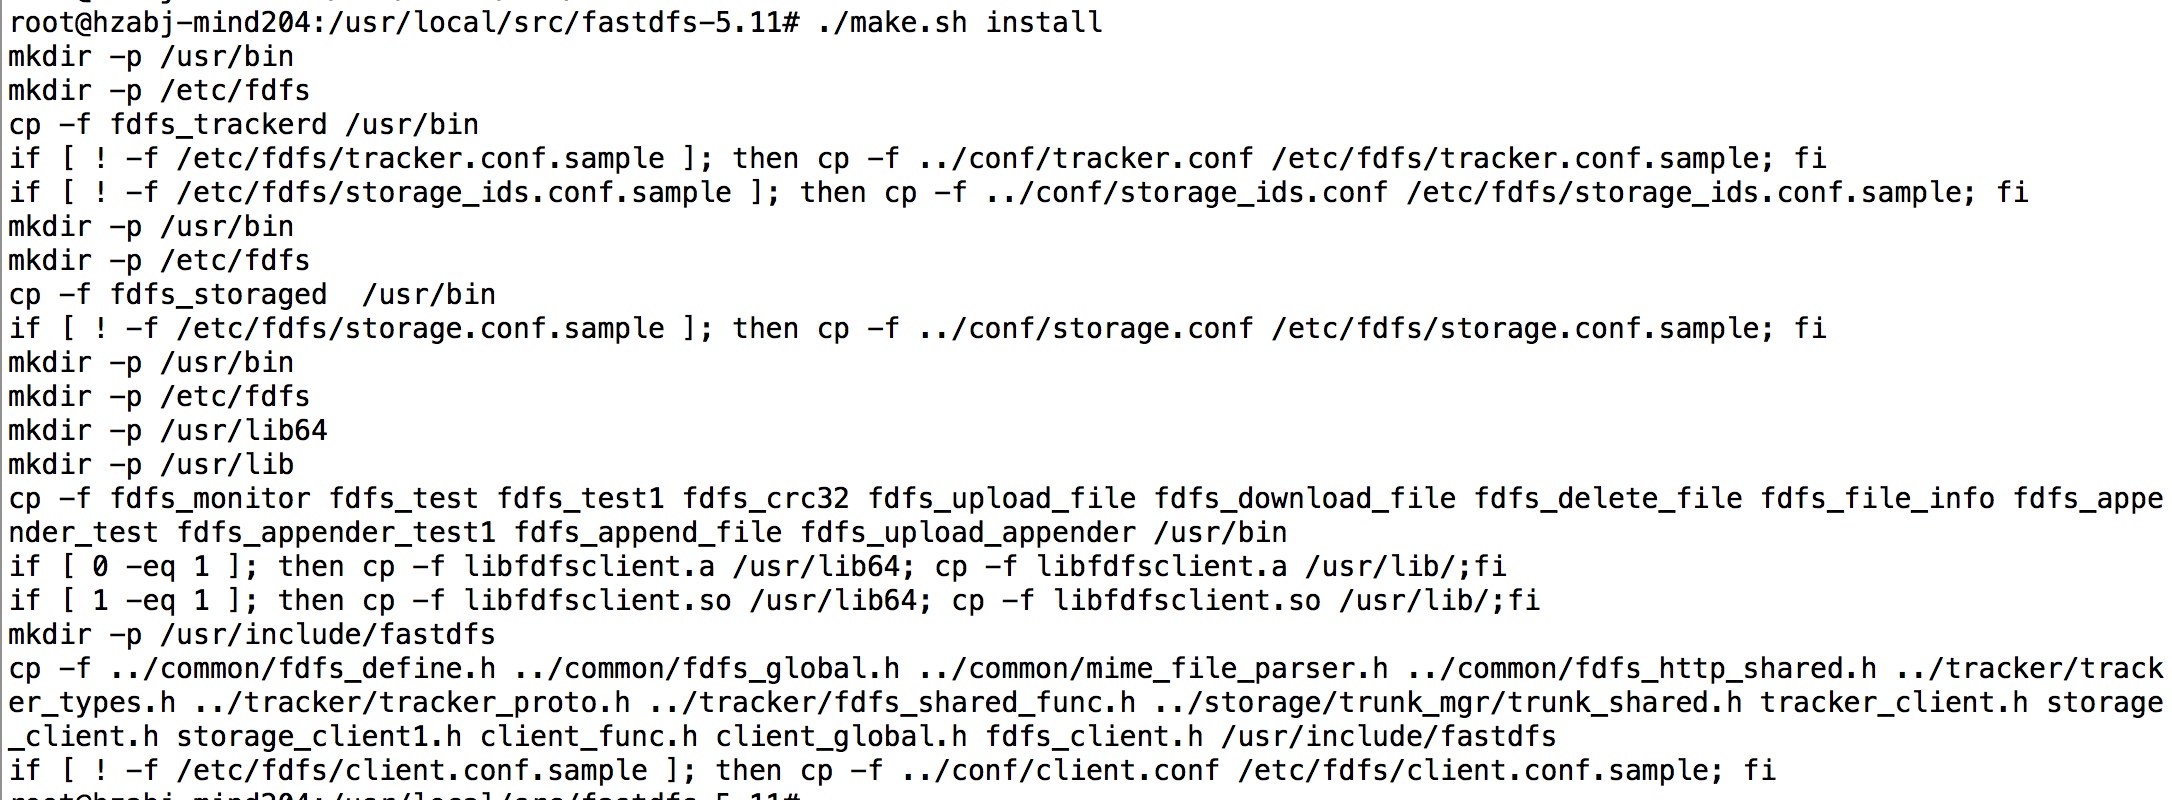
安装:./make.sh install
 

-
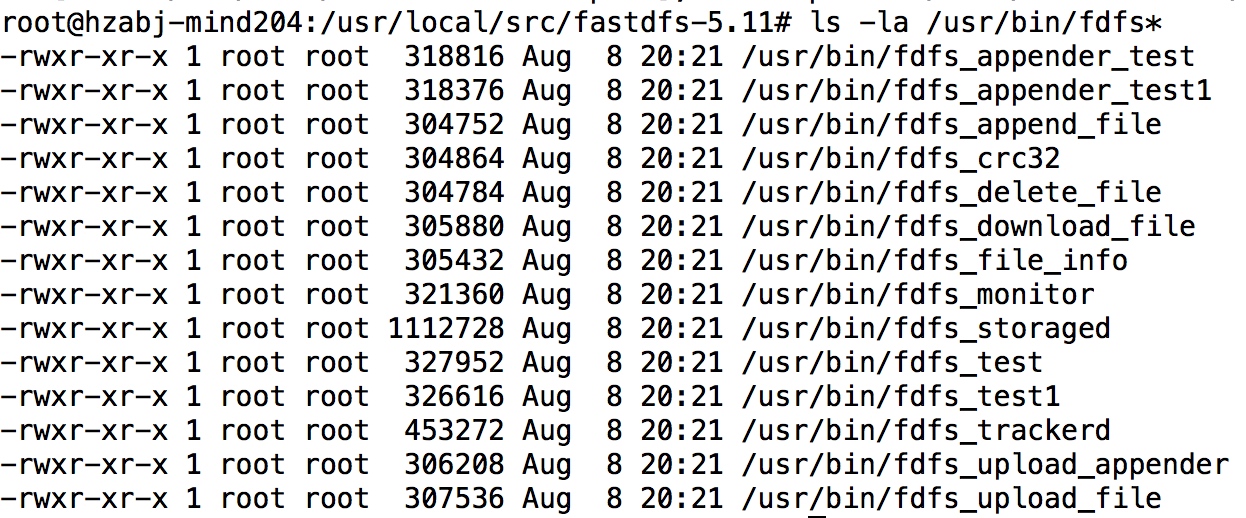
查看可执行命令:ls -la /usr/bin/fdfs*
 

5、安装tracker,配置Tracker服务
- 进入/etc/fdfs目录,有三个.sample后缀的文件(自动生成的fdfs模板配置文件),通过cp命令拷贝tracker.conf.sample,删除.sample后缀作为正式文件:
 

-
编辑tracker.conf:vi tracker.conf,修改相关参数
vi /etc/fdfs/tracker.conf # 是否禁用该配置文件 # false:开启 # true:禁用 disabled=false # 绑定地址 # 空字符表示绑定所有地址 bind_addr= # 端口设置 port=22122 # 连接超时设置 connect_timeout=30 # 网络超时设置 network_timeout=30 # 存储数据和日志的目录 base_path=/home/fastdfs/tracker # 最大并发连接数 max_connections=256 # 接受请求的线程数 accept_threads=1 # 执行请求的线程数 <= max_connections work_threads=4 # 如何选择上传文件的存储group # 0: 轮询 # 1: 制定group名称 # 2: 负载均衡, 选择空闲空间最大的存储group store_lookup=2 # 选择哪一个存储group,当store_lookup=1时,须指定存储group的名称 store_group=group1 # 如何选择上传文件的存储server # 0: 轮询 # 1: 以ip地址排序的第一个地址 # 2: 以优先级排序 store_server=0 # 选择存储server的哪一个路径(磁盘或挂载点)上传文件 # 0: 轮询 # 2: 负载均衡, 选择空闲空间最大的路径来存储文件 store_path=0 # 选择哪一个存储server下载文件 # 0: 轮询 # 1: 选择该文件上传时的那个存储server download_server=0 # 预留的存储空间 G(GB) M(MB) K(KB) 默认byte(B),% 表示比例,如下,预留的存储空间为10%,即只占用90% reserved_storage_space = 10% # log级别:alert error notice info debug log_level=info # 运行用户组,默认当前用户组 run_by_group= # 运行用户,默认当前用户 run_by_user= # 允许的host,例子如下 # "*" 表示所有 # 10.0.1.[1-15,20] # host[01-08,20-25].domain.com: # allow_hosts=10.0.1.[1-15,20] # allow_hosts=host[01-08,20-25].domain.com allow_hosts=* # 同步内存日志到磁盘的间隔时间,默认10s sync_log_buff_interval = 10 # 检查存储server存活的间隔时间,默认120s check_active_interval = 120 # 线程栈大小 >= 64KB thread_stack_size = 64KB # 当存储server变化时,是否自动调整存储server的ip storage_ip_changed_auto_adjust = true # 存储server同步文件的最大延时,默认86400s(1天) storage_sync_file_max_delay = 86400 # 存储server同步一个文件的最大时间 storage_sync_file_max_time = 300 # 是否用一个主文件存储多个小文件 use_trunk_file = false # 最小的slot大小(多个小文件之间的空隙大小),小于4k slot_min_size = 256 # 最大的slot大小(多个小文件之间的空隙大小) > slot_min_size # 当上传的文件大小 < slot_max_size时,那么该文件将合并到一个主文件 slot_max_size = 16MB # 主文件大小 >= 4MB trunk_file_size = 64MB # 是否提前创建trunk文件 trunk_create_file_advance = false # 创建trunk文件的基准时间 trunk_create_file_time_base = 02:00 # 创建trunk文件的间隔时间,默认86400s(1天) trunk_create_file_interval = 86400 # 创建trunk文件的阈值空间 trunk_create_file_space_threshold = 20G # 当加载trunk空间空间时,是否检查trunk空间占用情况,设置为true,启动会变慢 trunk_init_check_occupying = false # 是否忽略storage_trunk.dat trunk_init_reload_from_binlog = false # 压缩trunk binlog文件的间隔时间 # 0表示不压缩 trunk_compress_binlog_min_interval = 0 # 是否使用storage ID,而不是ip地址 use_storage_id = false # 定义storage ids文件,相对或绝对路径 storage_ids_filename = storage_ids.conf # 存储id类型,当use_storage_id=true时有效 ## ip: 存储server的IP ## id: 存储server的ID id_type_in_filename = ip # 是否使用链接文件存储slave文件 store_slave_file_use_link = false # 是否滚动错误日志文件 rotate_error_log = false # 滚动错误日志文件的时间点 error_log_rotate_time=00:00 # 当错误日志文件超出该值时,滚动错误日志文件 rotate_error_log_size = 0 # 保存日志文件的天数 # 0表示不删除日志文件 log_file_keep_days = 0 # 是否使用连接池 use_connection_pool = false # 连接最大空闲时间 connection_pool_max_idle_time = 3600 # tracker的http端口 http.server_port=8080 # 检查http server存活的时间间隔 http.check_alive_interval=30 # 检查http sever存活的类型 # tcp : 仅连接http端口,不发请求 # http: 发http请求,并需返回200 # default value is tcp http.check_alive_type=tcp # 检查http server的uri http.check_alive_uri=/status.html -
注意一下存放数据和日志的目录,启动后需要查看日志信息
刚刚配置的目录可能不存在,我们创建出来
mkdir -p /home/fastdfs/tracker -
启动tracker(支持start|stop|restart):支持以下方式启动
-
/usr/bin/fdfs_trackerd /etc/fdfs/tracker.conf start -
fdfs_trackerd /etc/fdfs/tracker.conf -
可以采用熟悉的服务启动方式:
service fdfs_trackerd start # -
启动fdfs_trackerd服务,停止用stop另外, -
我们可以通过以下命令,设置tracker开机启动:
sudo chkconfig fdfs_trackerd on
-
查看tracker启动日志:进入刚刚指定的base_path(/home/fastdfs/tracker)中有个logs目录,查看tracker.log文件cd /home/fastdfs/tracker/logs
-
cat trackerd.log

6.查看端口情况:netstat -apn|grep fdfs
 
![]()
可能遇到的报错:
/usr/bin/fdfs_trackerd: error while loading shared libraries: libfastcommon.so: cannot open shared object file: No such file or directory

解决方案:建立libfastcommon.so软链接
ln -s /usr/lib64/libfastcommon.so /usr/local/lib/libfastcommon.so
ln -s /usr/lib64/libfastcommon.so /usr/lib/libfastcommon.so
6、配置和启动storage
由于上面已经安装过FastDFS,这里只需要配置storage就好了;
(1)切换目录到: /etc/fdfs/ 目录下;
(2)拷贝一份新的storage配置文件
cp storage.conf.sample storage.conf
(3)修改storage.conf ;
vi /etc/fdfs/storage.conf

## 是否禁用该配置文件# false:开启
# true:禁用
disabled=false
# 组名称
group_name=group1
# 绑定地址
# 空字符表示绑定所有地址
bind_addr=
# 当连接其他存储server时,是否绑定地址
client_bind=true
# 存储server端口
port=23000
# 连接超时
connect_timeout=30
# 网络超时
network_timeout=60
# 心跳
heart_beat_interval=30
# 磁盘使用报道的时间间隔
stat_report_interval=60
# 数据和日志目录
base_path=/home/fastdfs/storage
# 最大并发连接数
max_connections=256
# 接收和发送数据的缓冲区大小
buff_size = 256KB
# 接受请求的线程数
accept_threads=1
# 执行请求的线程数
work_threads=4
# 磁盘读写是否分开
disk_rw_separated = true
# 每个存储基路径的读线程数
disk_reader_threads = 1
# 每个存储基路径的写线程数
disk_writer_threads = 1
# 当没有进行同步时, 多少毫秒后读取binlog
sync_wait_msec=50
# 当同步完一个文件后, 暂停多少毫秒
# 0 表示不调用usleep
sync_interval=0
# 每天存储同步的开始时间
sync_start_time=00:00
# 每天存储同步的结束时间
sync_end_time=23:59
# 同步多少个文件后,写入mark文件
write_mark_file_freq=500
# 路径(磁盘或挂载点)数
store_path_count=1
# 存储路径
store_path0=/home/fastdfs/storage
# 子目录数
subdir_count_per_path=256
# tracker地址,可以配置多个tracker_server
tracker_server=10.129.44.128:22122
# tracker_server=10.163.174.222:22122
# 日志级别:alert error notice info debug
log_level=debug
# 运行进程的用户组,默认当前用户组
run_by_group=
# 运行进程的用户,默认当前用户
run_by_user=
# 允许的host,例子如下# "*" 表示所有
# 10.0.1.[1-15,20]
# host[01-08,20-25].domain.com:
# allow_hosts=10.0.1.[1-15,20]
# allow_hosts=host[01-08,20-25].domain.com
allow_hosts=*
# 文件分布模式
# 0: 轮询
# 1: 随机
file_distribute_path_mode=0
# 写多少个文件后,轮到下一个路径
file_distribute_rotate_count=100
# 当写入多大文件时,调用fsync
# 0: 不调用
# other: 文件大小(byte)
fsync_after_written_bytes=0
# 同步内存日志到磁盘的间隔时间,默认10s
sync_log_buff_interval=10
# 同步binlog到磁盘的间隔时间,默认10s
sync_binlog_buff_interval=10
# 同步存储状态信息到磁盘的间隔时间,默认300s
sync_stat_file_interval=300
# 线程栈大小 >= 512KB
thread_stack_size=512KB
# 上传文件的优先级,tracker中使用
upload_priority=10
# the NIC alias prefix, such as eth in Linux, you can see it by ifconfig -a
# multi aliases split by comma. empty value means auto set by OS type
# default values is empty
if_alias_prefix=
# 是否检查文件重复
check_file_duplicate=0
# 文件签名方法
## hash: hash
## md5: MD5
file_signature_method=hash
# 存储文件索引的命名空间,check_file_duplicate=true时
key_namespace=FastDFS
# 设置与FastDHT保持长连接的数目,0表示使用短连接
keep_alive=0
# FastDHT server列表,需要安装FastDHT
##include /home/yuqing/fastdht/conf/fdht_servers.conf
# 是否记录访问日志
use_access_log = true
# 是否每天滚动访问日志文件
rotate_access_log = true
# 访问日志滚动时间点
access_log_rotate_time=00:00
# 是否每天滚动错误日志文件
rotate_error_log = true
# 错误日志滚动时间点
error_log_rotate_time=00:00
# 访问日志滚动大小
rotate_access_log_size = 0
# 错误日志滚动大小
rotate_error_log_size = 0
# 日志保留天数
log_file_keep_days = 7
# 同步文件时是否跳过无效的文件
file_sync_skip_invalid_record=false
# 是否使用连接池
use_connection_pool = false
# 连接最大空间时间
connection_pool_max_idle_time = 3600
# 域名
http.domain_name=
# http端口
http.server_port=8888
注意tracker的地址配置是否正确,否则启动时会报错
2、启动Storage
fdfs_storaged /etc/fdfs/storage.conf我们也可以使用sh /etc/init.d/fdfs_storaged启动,同样我们可以用服务启动方式:
service fdfs_storaged start  # 启动fdfs_storaged服务,停止用stop

另外,我们可以通过以下命令,设置tracker开机启动:
chkconfig fdfs_storaged on3、查看日志
cd /home/fastdfs/storage/logs
cat storaged.log

[2017-09-14 15:18:19] INFO - FastDFS v5.10, base_path=/mnt/fastdfs, store_path_count=1, subdir_count_per_path=256, group_name=group1, run_by_group=, run_by_user=, connect_timeout=30s, network_timeout=60s, port=23000, bind_addr=, client_bind=1, max_connections=256, accept_threads=1, work_threads=4, disk_rw_separated=1, disk_reader_threads=1, disk_writer_threads=1, buff_size=256KB, heart_beat_interval=30s, stat_report_interval=60s, tracker_server_count=1, sync_wait_msec=50ms, sync_interval=0ms, sync_start_time=00:00, sync_end_time=23:59, write_mark_file_freq=500, allow_ip_count=-1, file_distribute_path_mode=0, file_distribute_rotate_count=100, fsync_after_written_bytes=0, sync_log_buff_interval=10s, sync_binlog_buff_interval=10s, sync_stat_file_interval=300s, thread_stack_size=512 KB, upload_priority=10, if_alias_prefix=, check_file_duplicate=0, file_signature_method=hash, FDHT group count=0, FDHT server count=0, FDHT key_namespace=, FDHT keep_alive=0, HTTP server port=8888, domain name=, use_access_log=1, rotate_access_log=1, access_log_rotate_time=00:00, rotate_error_log=1, error_log_rotate_time=00:00, rotate_access_log_size=0, rotate_error_log_size=0, log_file_keep_days=7, file_sync_skip_invalid_record=0, use_connection_pool=0, g_connection_pool_max_idle_time=3600s
[2017-09-14 15:18:19] INFO - file: storage_param_getter.c, line: 191, use_storage_id=0, id_type_in_filename=ip, storage_ip_changed_auto_adjust=1, store_path=0, reserved_storage_space=10.00%, use_trunk_file=0, slot_min_size=256, slot_max_size=16 MB, trunk_file_size=64 MB, trunk_create_file_advance=0, trunk_create_file_time_base=02:00, trunk_create_file_interval=86400, trunk_create_file_space_threshold=20 GB, trunk_init_check_occupying=0, trunk_init_reload_from_binlog=0, trunk_compress_binlog_min_interval=0, store_slave_file_use_link=0
[2017-09-14 15:18:19] INFO - file: storage_func.c, line: 257, tracker_client_ip: 10.129.44.128, my_server_id_str: 10.129.44.128, g_server_id_in_filename: -2144567030
[2017-09-14 15:18:19] DEBUG - file: storage_ip_changed_dealer.c, line: 241, last my ip is 10.163.174.222, current my ip is 10.129.44.128
[2017-09-14 15:18:19] DEBUG - file: fast_task_queue.c, line: 227, max_connections: 256, init_connections: 256, alloc_task_once: 256, min_buff_size: 262144, max_buff_size: 262144, block_size: 263288, arg_size: 1008, max_data_size: 268435456, total_size: 67401728
[2017-09-14 15:18:19] DEBUG - file: fast_task_queue.c, line: 284, malloc task info as whole: 1, malloc loop count: 1
[2017-09-14 15:18:19] DEBUG - file: tracker_client_thread.c, line: 225, report thread to tracker server 10.129.44.128:22122 started
[2017-09-14 15:18:19] INFO - file: tracker_client_thread.c, line: 310, successfully connect to tracker server 10.129.44.128:22122, as a tracker client, my ip is 10.129.44.128
[2017-09-14 15:18:50] INFO - file: tracker_client_thread.c, line: 1263, tracker server 10.129.44.128:22122, set tracker leader: 10.129.44.128:22122
出现上述信息表示Storage已启动成功
4、遇到的问题
Storage启动后,如果改了Storage的配置文件想要重新启动,执行启动命令后发现日志中报错
[2017-09-14 15:28:09] INFO - FastDFS v5.10, base_path=/mnt/fastdfs, store_path_count=1, subdir_count_per_path=256, group_name=group1, run_by_group=, run_by_user=, connect_timeout=30s, network_timeout=60s, port=23000, bind_addr=, client_bind=1, max_connections=256, accept_threads=1, work_threads=4, disk_rw_separated=1, disk_reader_threads=1, disk_writer_threads=1, buff_size=256KB, heart_beat_interval=30s, stat_report_interval=60s, tracker_server_count=1, sync_wait_msec=50ms, sync_interval=0ms, sync_start_time=00:00, sync_end_time=23:59, write_mark_file_freq=500, allow_ip_count=-1, file_distribute_path_mode=0, file_distribute_rotate_count=100, fsync_after_written_bytes=0, sync_log_buff_interval=10s, sync_binlog_buff_interval=10s, sync_stat_file_interval=300s, thread_stack_size=512 KB, upload_priority=10, if_alias_prefix=, check_file_duplicate=0, file_signature_method=hash, FDHT group count=0, FDHT server count=0, FDHT key_namespace=, FDHT keep_alive=0, HTTP server port=8888, domain name=, use_access_log=1, rotate_access_log=1, access_log_rotate_time=00:00, rotate_error_log=1, error_log_rotate_time=00:00, rotate_access_log_size=0, rotate_error_log_size=0, log_file_keep_days=7, file_sync_skip_invalid_record=0, use_connection_pool=0, g_connection_pool_max_idle_time=3600s
[2017-09-14 15:28:09] INFO - file: storage_param_getter.c, line: 191, use_storage_id=0, id_type_in_filename=ip, storage_ip_changed_auto_adjust=1, store_path=0, reserved_storage_space=10.00%, use_trunk_file=0, slot_min_size=256, slot_max_size=16 MB, trunk_file_size=64 MB, trunk_create_file_advance=0, trunk_create_file_time_base=02:00, trunk_create_file_interval=86400, trunk_create_file_space_threshold=20 GB, trunk_init_check_occupying=0, trunk_init_reload_from_binlog=0, trunk_compress_binlog_min_interval=0, store_slave_file_use_link=0
[2017-09-14 15:28:09] INFO - file: storage_func.c, line: 257, tracker_client_ip: 10.129.44.128, my_server_id_str: 10.129.44.128, g_server_id_in_filename: -2144567030
[2017-09-14 15:28:09] DEBUG - file: storage_ip_changed_dealer.c, line: 241, last my ip is 10.129.44.128, current my ip is 10.129.44.128
[2017-09-14 15:28:09] ERROR - file: sockopt.c, line: 864, bind port 23000 failed, errno: 98, error info: Address already in use.
[2017-09-14 15:28:09] CRIT - exit abnormally!
这是因为此时Storage已经启动了,再执行启动命令就会报错地址已被使用,此时可以执行restart命令进行重启
fdfs_storaged /etc/fdfs/storage.conf restart
或者
ps -ef | grep storage
#杀死对应的进程号
kill -9 xxxx
fdfs_storaged /etc/fdfs/storage.conf最后,通过ps -ef | grep fdfs 查看进程:

7、安装Nginx和fastdfs-nginx-module模块
-
下载Nginx安装包
wget http://nginx.org/download/nginx-1.15.2.tar.gz -
下载fastdfs-nginx-module安装包
wget https://github.com/happyfish100/fastdfs-nginx-module/archive/V1.20.tar.gz -
解压nginx:tar -zxvf nginx-1.15.2.tar.gz
-
安装nginx的依赖库
yum install pcre
yum install pcre-devel
yum install zlib
yum install zlib-devel
yum install openssl
yum install openssl-devel
-
-
解压fastdfs-nginx-module:tar -xvf V1.20.tar.gz
-
)将fastdfs-nginx-module/src下的mod_fastdfs.conf拷贝至/etc/fdfs/下
cp mod_fastdfs.conf /etc/fdfs/
(6)并修改 /etc/fdfs/mod_fastdfs.conf 的内容;vi /etc/fdfs/mod_fastdfs.conf
更改下面几处配置的内容:
base_path=/home/fastdfs

tracker_server=10.129.44.128:22122
#tracker_server=192.168.172.20:22122 #(多个tracker配置多行)

url_have_group_name=true        #url中包含group名称

store_path0=/home/fastdfs/storage  #指定文件存储路径(上面配置的store路径)
(7)将libfdfsclient.so拷贝至/usr/lib下
cp /usr/lib64/libfdfsclient.so /usr/lib/
(8)创建nginx/client目录
mkdir -p /var/temp/nginx/client
-
-
进入nginx目录:cd nginx-1.10.1
- 配置,并加载fastdfs-nginx-module模块:
./configure --prefix=/usr/local/nginx --add-module=/opt/fastdfs-nginx-module-1.20/src/ 编译安装make & make installfastdfs安装好了,nginx安装好了, 到了安装fastdfs-nginx-module的时候, 编译报错了
安装成功后查看生成的目录,如下所示:

-
拷贝配置文件到 /etc/fdfs 下;
cd /opt/fastdfs-5.11/conf/
cp http.conf mime.types /etc/fdfs/
-
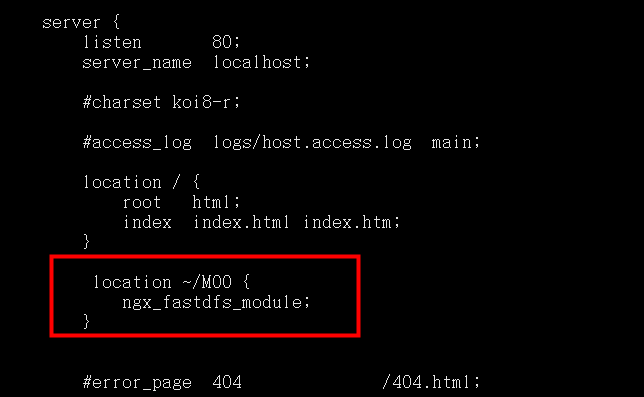
修改nginx配置文件
-
mkdir /usr/local/nginx/logs # 创建logs目录
cd /usr/local/nginx/conf/
 vim nginx.conf
做如下的修改:

说明:
location /group1/M00/:group1为nginx 服务FastDFS的分组名称,M00是FastDFS自动生成编号,对应store_path0=/home/fdfs_storage,如果FastDFS定义store_path1,这里就是M01
注意: 如若安装fastdfs-nginx-module的时候遇到如下报错:
/usr/local/include/fastdfs/fdfs_define.h:15:27: 致命错误:common_define.h:没有那个文件或目录
解决方法:
编辑 fastdfs-nginx-module-1.20/src/config 文件vim fastdfs-nginx-module-1.20/src/config改变的文件内容
ngx_module_incs="/usr/include/fastdfs /usr/include/fastcommon/"
CORE_INCS="$CORE_INCS /usr/include/fastdfs /usr/include/fastcommon/"
再重新到nginx目录下./configure --prefix=/usr/local/nginx --add-module=/opt/fastdfs-nginx-module-1.20/src/make & make install
成功解决 -
-
查看安装路径:whereis nginx

- 启动、停止:
cd /usr/local/nginx/sbin/./nginx./nginx -s stop #此方式相当于先查出nginx进程id再使用kill命令强制杀掉进程./nginx -s quit #此方式停止步骤是待nginx进程处理任务完毕进行停止./nginx -s reload验证启动状态:wget "http://127.0.0.1"
 

- 查看此时的nginx版本:发现fastdfs模块已经安装好了

