使用三方账号登录应用应该对大家来说已经不是什么新鲜事儿了,但是今天为什么还要在这里跟大家聊这个话题呢,原因很简单 Windows Azure Mobiles Service Authentication 身份验证可以方便的帮你在应用中集成此功能。
此前我曾介绍过 Mobile Service的推送功能,其优势是可以方便的向不同的平台设备推送消息通知(Windows、IOS、Android),并且不用担心服务器过载问题。然而基于Windows Azure Mobile Service的身份验证依然保留了这个优势, 可以方便开发者的在不同平台的客户端上配置三方登录,经过新浪的同学们的努力今天我们终于与实现了与Windows Azure Mobile Service集成,成为第一个中国本土支持Mobile Service三方登录身份验证的提供商。
今天我在这里介绍一下如何使用Mobile Service的登录验证。首先既然我们使用新浪微博作为应用的三方登录入口我们要先在新浪微博注册我们的应用。
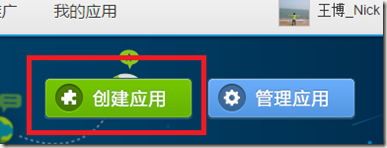
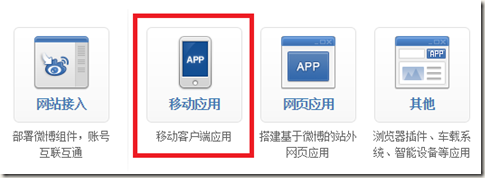
打开微博开放平台网站 http://open.weibo.com/, 登录你的微博账号,或注册微博开放平台账号。随后点击“微链接”- “创建应用” - “移动应用”
微链接
创建应用
移动应用
具体申请上线等步骤请详见:移动客户端接入接入指南
还有新手指南: 新手指南
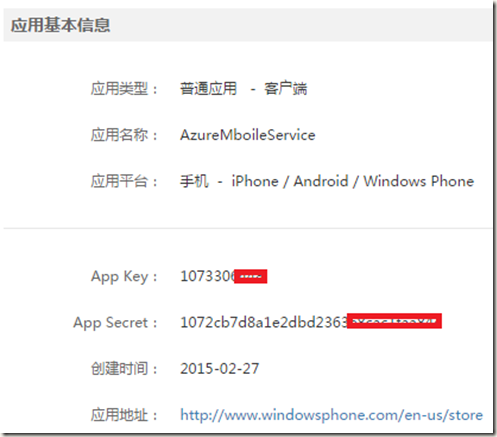
注册完成应用后我们会得到应用的 App Key 和 App Secret 这两个字符串非常重要在配置 Mobile Service 的时候需要用到识别应用。
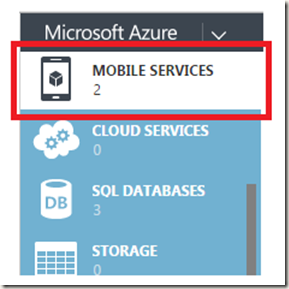
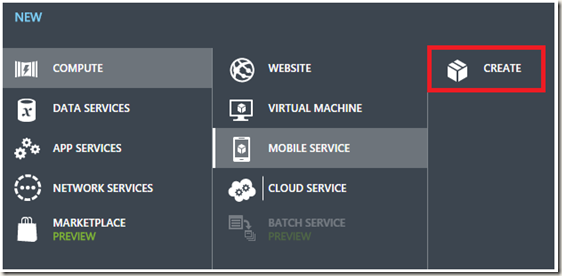
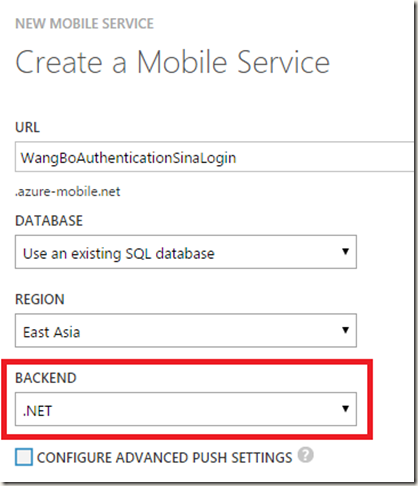
随后我们登录 Windows Azure 建一个新的 Mobile Service http://manage.windowsazure.com/
这里的Backed我们需要选择.Net 我们可以选择新建数据库或加载到已有数据库中去。
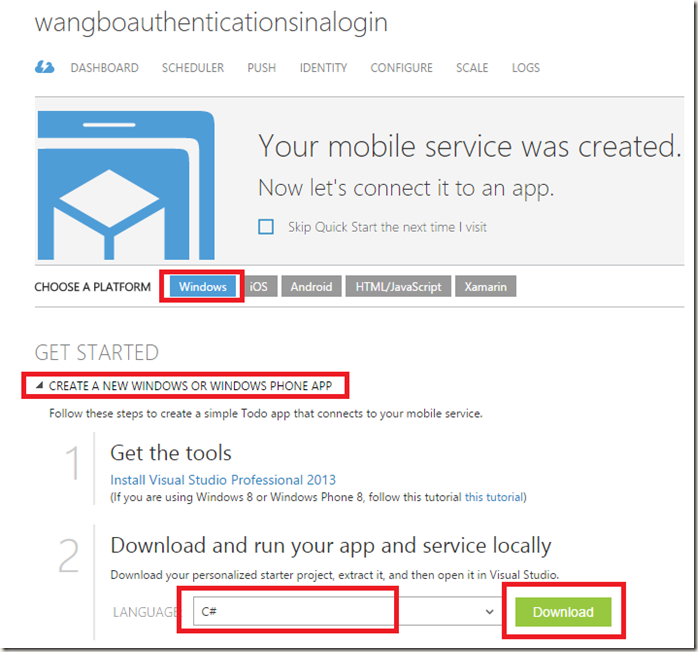
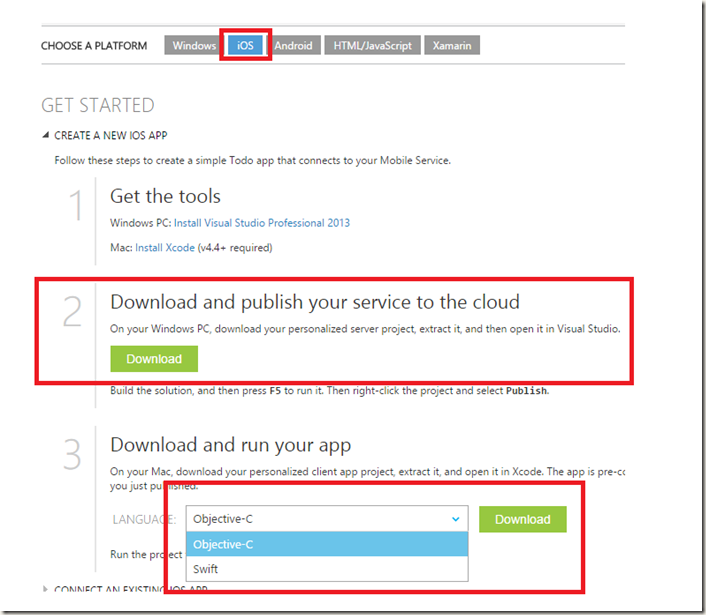
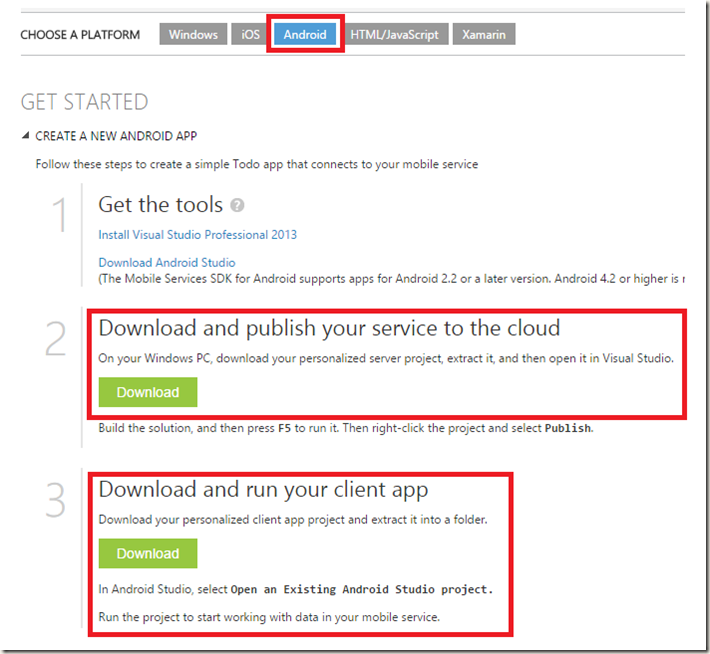
随后我们可以看到新建好的 Mobile Service,并展开一个创建新的 Windows 或 Windows Phone App标签,下载实例代码 我这里以全新项目搭建流程为大家展示。当然如果你是非 Windows 平台开发者也不要担心我们也同样提供了其他平台的客户端代码模板。
请 IOS 开发者下载
请 Android 开发者下载
接下来我们引用在项目中引用 Windows Azure Mobile Service SDK 的方法有两种。(大家可以根据项目需要选择)
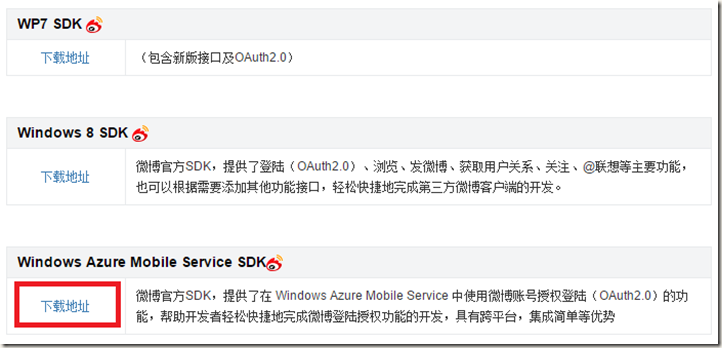
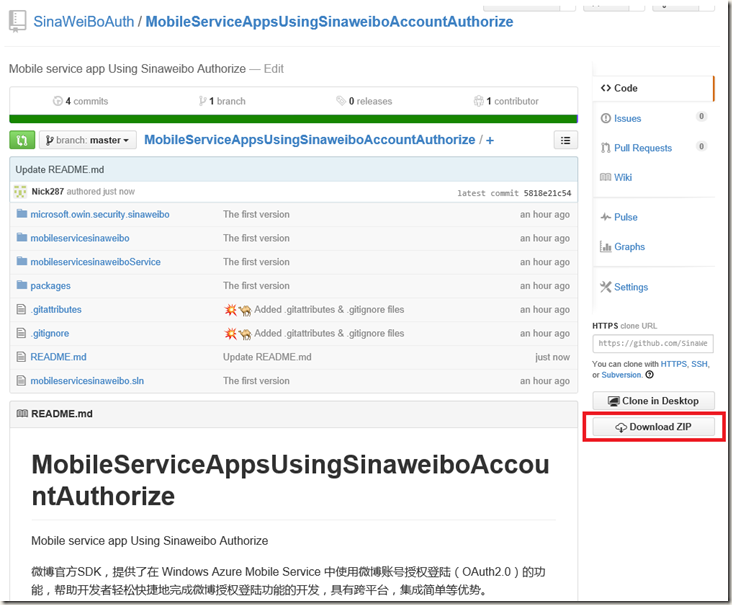
1. 新浪微博 Windows Azure Mobile Service SDK 链接:http://open.weibo.com/wiki/SDK 下载源码在项目中引用(好处是可以调试)。
2. 在VS中通过 Nuget 直接下载 DLL 使用。(这个使用方法简便,但是无法调试修改与Sina接口部分代码)
首先介绍下载SDK源码是的使用方法
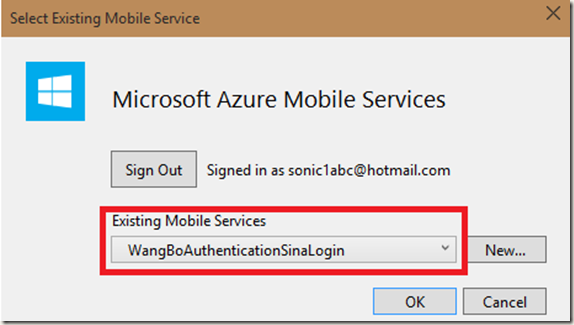
下载实例代码然后打开项目
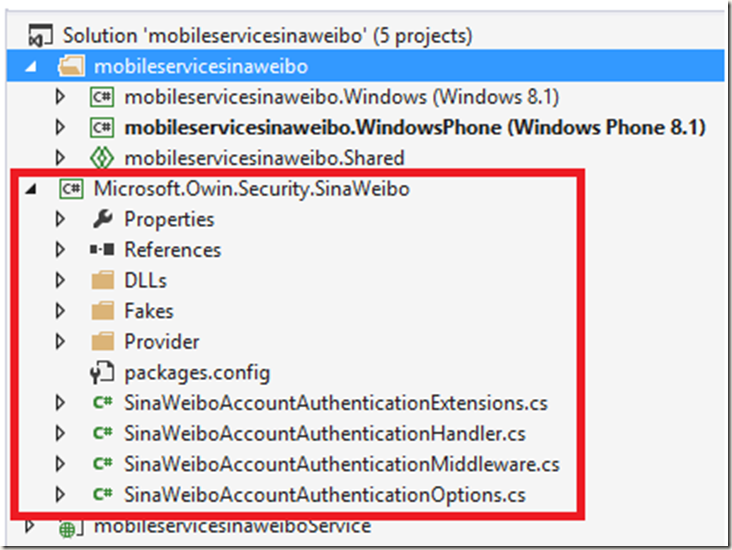
将 microsoft.owin.security.sinaweibo 项目备份出来以便我们的项目使用,另外这个SLN本身就是一个Demo,感兴趣的同学可以多多研究。
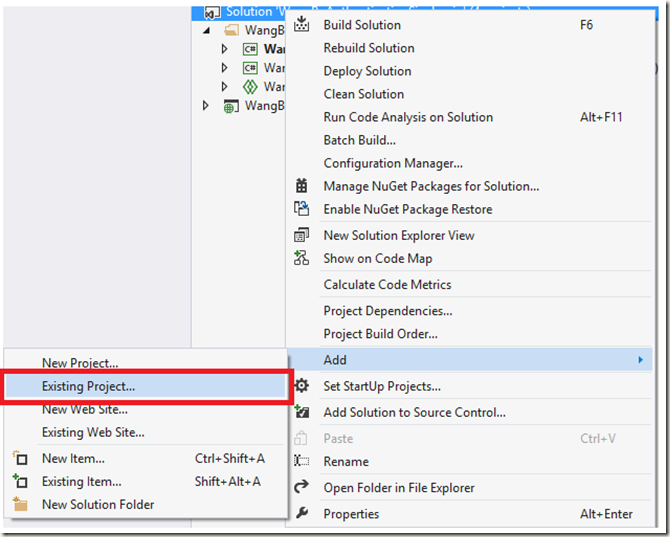
随后打开我们之从Windows Azure网站上下载的实例代码(主要是Mobile Service 网站项目)将 microsoft.owin.security.sinaweibo 引用进去。
添加项目成功
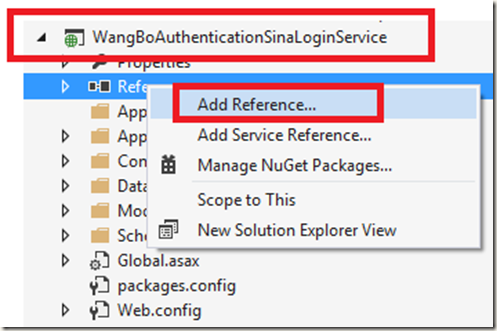
展开 Mobile Service 项目添加引用
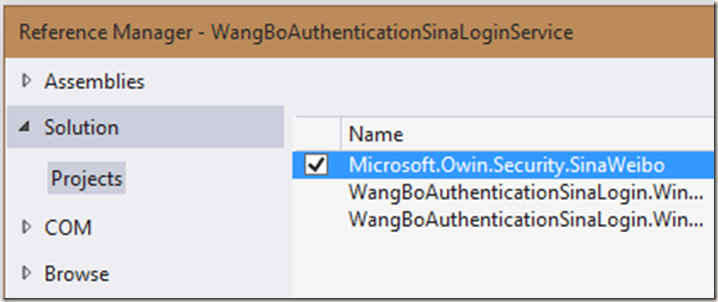
引用SinaWeibo项目 随后编译,注:这时候有可能VS会自动下载要用DLL要多等一会
另一种方法是使用 NuGet 下载DLL。
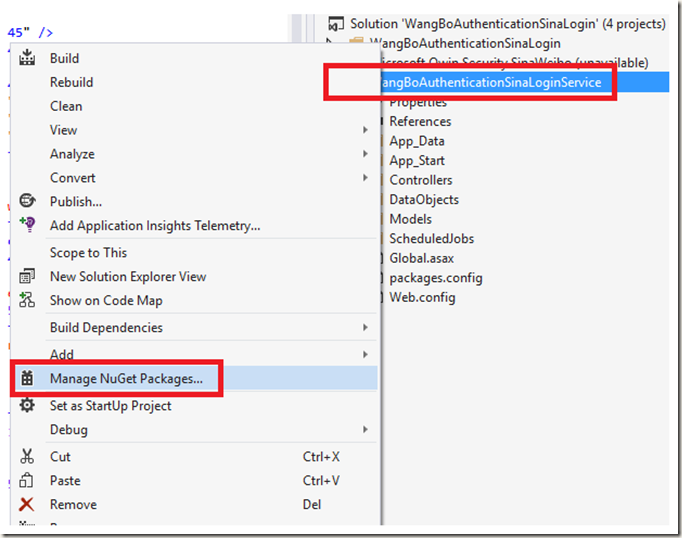
在 Mobile Service 项目中右键点击选择 Manage NeGet Packages 选项
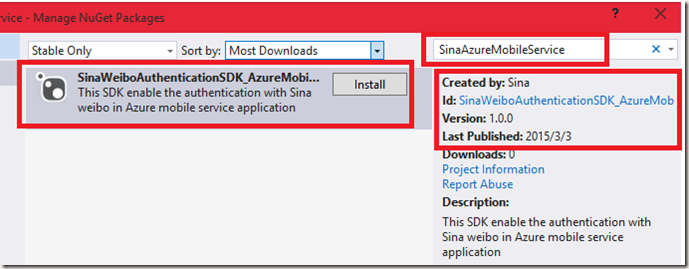
随后搜索SDK的关键字 Sina 或者 SinaAzureMobileService 可以直接安装DLL。
最后检查 microsoft.owin.security.sinaweibo 已经引用到项目中来并编译项目。
随后在 Mobile Service 站点项目中选择Web.Config 文件配置我们的 App Key 和 App Secret 如下:
    <!-- SinaWeibo App ClientID/ClientSecret-->
    <add key="SinaWeiBoClientId" value="ClientID"/>
    <add key="SinaWeiBoClientSecret" value="ClientSecret"/>
接着我们要在服务器端添加两个Class SinaWeiboLoginAuthenticationProvider 和 SinaWeiboLoginProvider 代码如下
using System;
using System.Collections.Generic;
using System.Linq;
using System.Web;
using Owin;
using Microsoft.Owin.Security.SinaWeibo;
using Microsoft.Owin.Security.SinaWeibo.Provider;
using System.Threading.Tasks;
using System.Security.Claims;
using Microsoft.WindowsAzure.Mobile.Service.Security;

namespace WangBoAuthenticationSinaLoginService
{
    public class SinaWeiboLoginAuthenticationProvider : SinaWeiboAccountAuthenticationProvider //SinaWeiBoAuthenticationProvider
    {
        public override Task Authenticated(SinaWeiboAccountAuthenticatedContext context)
        {

            context.Identity.AddClaim(
                new Claim(ServiceClaimTypes.ProviderAccessToken, context.AccessToken));

            return base.Authenticated(context);
        }
    }
}
SinaWeiboLoginProvider 代码
using System;
using System.Collections.Generic;
using System.Linq;
using System.Web;
using Owin;
using Microsoft.Owin.Security.SinaWeibo;
using Microsoft.Owin.Security.SinaWeibo.Provider;
using System.Threading.Tasks;
using System.Security.Claims;
using Microsoft.WindowsAzure.Mobile.Service.Security;

namespace WangBoAuthenticationSinaLoginService
{
    public class SinaWeiboLoginProvider : LoginProvider
    {
        internal const string ProviderName = "SinaWeibo";

        public SinaWeiboLoginProvider(IServiceTokenHandler tokenHandler)
            : base(tokenHandler)
        {

        }

        public override void ConfigureMiddleware(IAppBuilder appBuilder,
            Microsoft.WindowsAzure.Mobile.Service.ServiceSettingsDictionary settings)
        {
            SinaWeiboAccountAuthenticationOptions options = new SinaWeiboAccountAuthenticationOptions
            {
                AppId = settings["SinaWeiBoClientId"],
                AppSecret = settings["SinaWeiBoClientSecret"],
                AuthenticationType = this.Name,
                Provider = new SinaWeiboAccountAuthenticationProvider()
            };
            appBuilder.UseSinaWeiboAuthentication(options);
        }

        public override ProviderCredentials CreateCredentials(ClaimsIdentity claimsIdentity)
        {
            Claim name = claimsIdentity.FindFirst(ClaimTypes.NameIdentifier);
            Claim providerAccessToken = claimsIdentity
                .FindFirst(ServiceClaimTypes.ProviderAccessToken);

            SinaWeiboCredentials credentials = new SinaWeiboCredentials
            {
                UserId = this.TokenHandler.CreateUserId(this.Name, name != null ? name.Value : null),
                AccessToken = providerAccessToken != null ? providerAccessToken.Value : null
            };

            return credentials;
        }

        public override string Name
        {
            get { return ProviderName; }
        }

        public override ProviderCredentials ParseCredentials(Newtonsoft.Json.Linq.JObject serialized)
        {
            return serialized.ToObject<SinaWeiboCredentials>();
        }


        public class SinaWeiboCredentials : ProviderCredentials
        {
            public SinaWeiboCredentials()
                : base(SinaWeiboLoginProvider.ProviderName)
            {
            }

            public string AccessToken { get; set; }
        }

    }
}
还有一个重要的步骤是在WebApiConfig的注册方法中注册新浪登陆的API
public static class WebApiConfig
    {
        public static void Register()
        {
            // Use this class to set configuration options for your mobile service
            ConfigOptions options = new ConfigOptions();

            options.LoginProviders.Add(typeof(SinaWeiboLoginProvider));

            // Use this class to set WebAPI configuration options
            HttpConfiguration config = ServiceConfig.Initialize(new ConfigBuilder(options));

            // To display errors in the browser during development, uncomment the following
            // line. Comment it out again when you deploy your service for production use.
            // config.IncludeErrorDetailPolicy = IncludeErrorDetailPolicy.Always;

            Database.SetInitializer(new WangBoAuthenticationSinaLoginInitializer());
        }
    }
下一步是部署我们的 Mobile Service 代码,右键点击项目选址发布
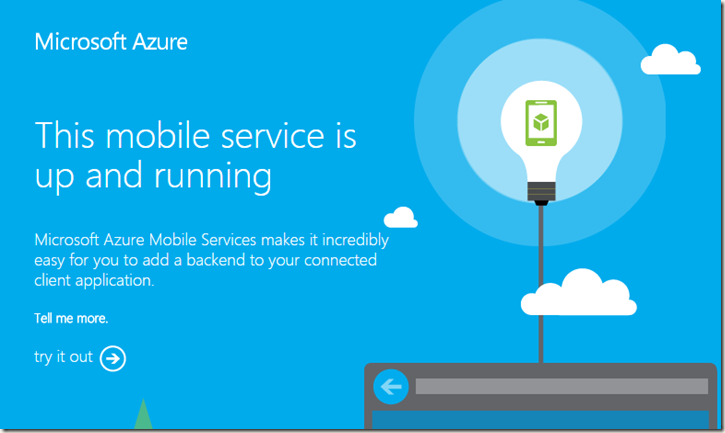
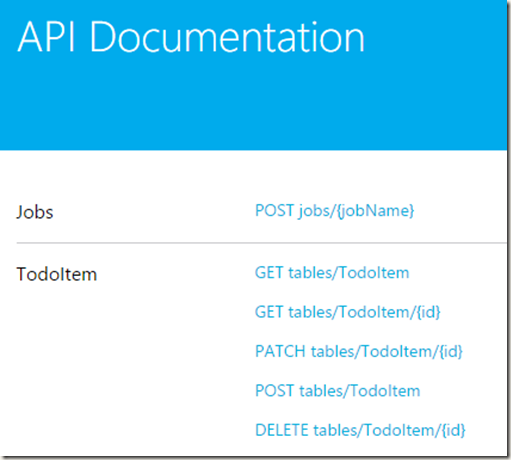
发布成功后浏览器会自动跳转到 Destination URL 随后点击Try out 输入密码就可以跳转到API的页面说明我们的 Mobile Service 是健康的。
接着我们可以通过URL在IE中来测试访问注册是否成功 例如:
https://wangboauthenticationsinalogin.azure-mobile.net/login/sinaweibo【其中wangboauthenticationsinalogin.azure-mobile.net是我的服务名称,这里需要替换成你自己的】
随后我们要回到新浪开放平台设置我们的会掉授权页面。这里需要注意的是回调授权页需要采用 https:// 协议例如:
https://wangboauthenticationsinalogin.azure-mobile.net/signin-sinaWeibo 【其中wangboauthenticationsinalogin.azure-mobile.net是我的服务名称,这里需要替换成你自己的】
接着我们开始设置客户端代码
首先打开Share Project中的 App.xaml.cs 注释掉本地调试代码使用远程服务器地址
        // This MobileServiceClient has been configured to communicate with your local
        // test project for debugging purposes.
        //public static MobileServiceClient MobileService = new MobileServiceClient(
        //    "http://localhost:58974"
        //);

        // This MobileServiceClient has been configured to communicate with your Mobile Service's url
        // and application key. You're all set to start working with your Mobile Service!
        public static MobileServiceClient MobileService = new MobileServiceClient(
            "https://wangboauthenticationsinalogin.azure-mobile.net/",
            "密码写在这里"
        );
随后打开 MainPage 添加一个验证函数 AuthenticateAsync
        private async Task AuthenticateAsync()
        {

            Microsoft.WindowsAzure.MobileServices.MobileServiceUser user = null;

            string message;

            try
            {
                user = await App.MobileService.LoginAsync("sinaweibo");

                message = string.Format("You are now logged in - {0}", user.UserId + user.MobileServiceAuthenticationToken);
            }

            catch (InvalidOperationException ex)
            {
                string exm = ex.Message;
                message = "You must log in. Login Required";
            }

            await Dispatcher.RunAsync(Windows.UI.Core.CoreDispatcherPriority.Normal, () =>
           {
               var dialog = new MessageDialog(message);

               dialog.Commands.Add(new UICommand("OK"));

               dialog.ShowAsync();
           });
        }
然后我们需要在客户端UI上添加一个登陆按钮,打开 Windows8.1 项目找到 MainPage.xaml 添加注册按钮(就在刷新按钮下面直接添加登陆了)
<Button Margin="72,0,0,0" Name="ButtonRefresh" Click="ButtonRefresh_Click">Refresh</Button>
<Button Margin="72,0,0,0" x:Name="ButtonLogin" Click="ButtonLogin_Click" Content="Login"/>
在 share project 中的 MainPage.xaml.cs 代码文件中添加事件处理函数
private async void ButtonLogin_Click(object sender, Windows.UI.Xaml.RoutedEventArgs e)
        {
            await AuthenticateAsync();
        }
最后由于在 WindowsPhone 上进行验证时应用会自动切换到后台所以我们需要处理一下OnActivated事件
protected override void OnActivated(IActivatedEventArgs args)
        {
            base.OnActivated(args);

#if WINDOWS_PHONE_APP
            if (args.Kind == ActivationKind.WebAuthenticationBrokerContinuation)
            {
                App.MobileService.LoginComplete(args as WebAuthenticationBrokerContinuationEventArgs);
            }
#endif
        }
完成后直接F5运行调试程序,下面我展示一下运行效果。
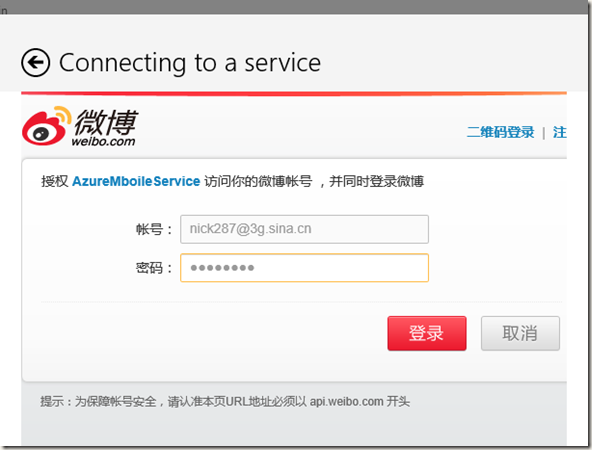
Windows 8.1 版认证过程
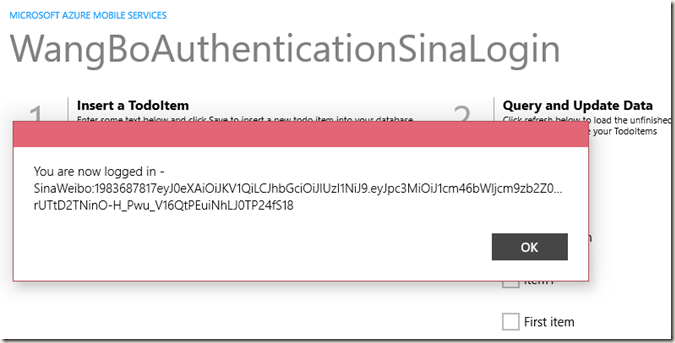
登录成功拿到Token
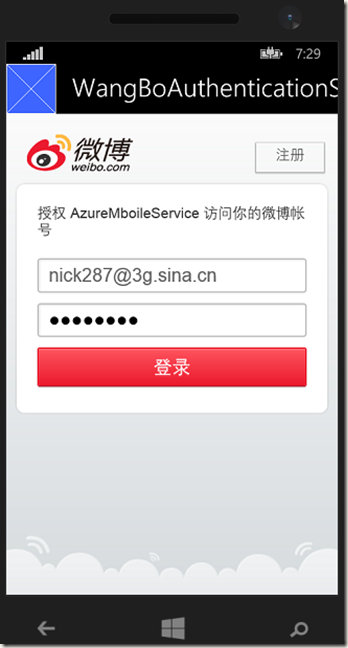
WindowsPhone 8.1版认证过程
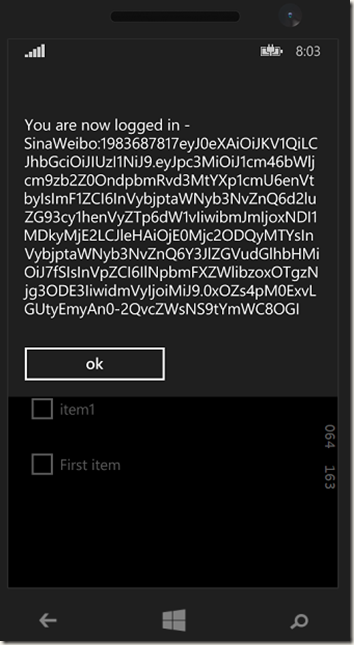
登录成功拿到Token
希望上的总结可以帮助到大家, 同时欢迎大家在这里和我沟通交流或者在新浪微博上 @王博_Nick



![image_thumb2[1] image_thumb2[1]](https://images0.cnblogs.com/blog/33251/201503/021559396767737.png)
