目录
1、DEA 集成 Maven
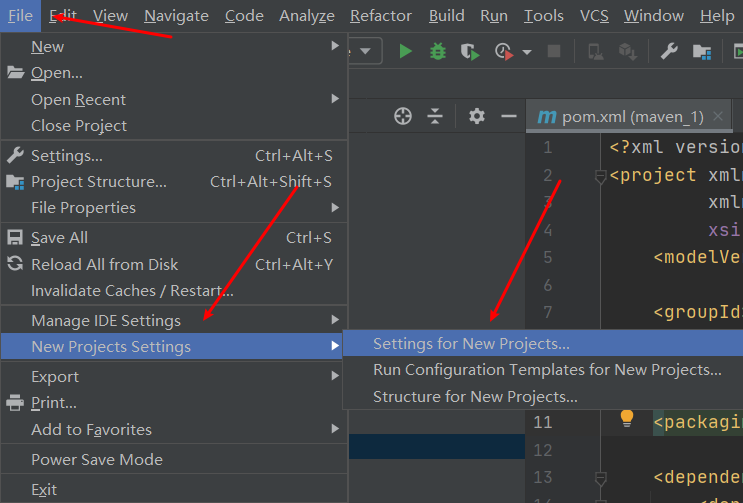
1、打开 新工程设置
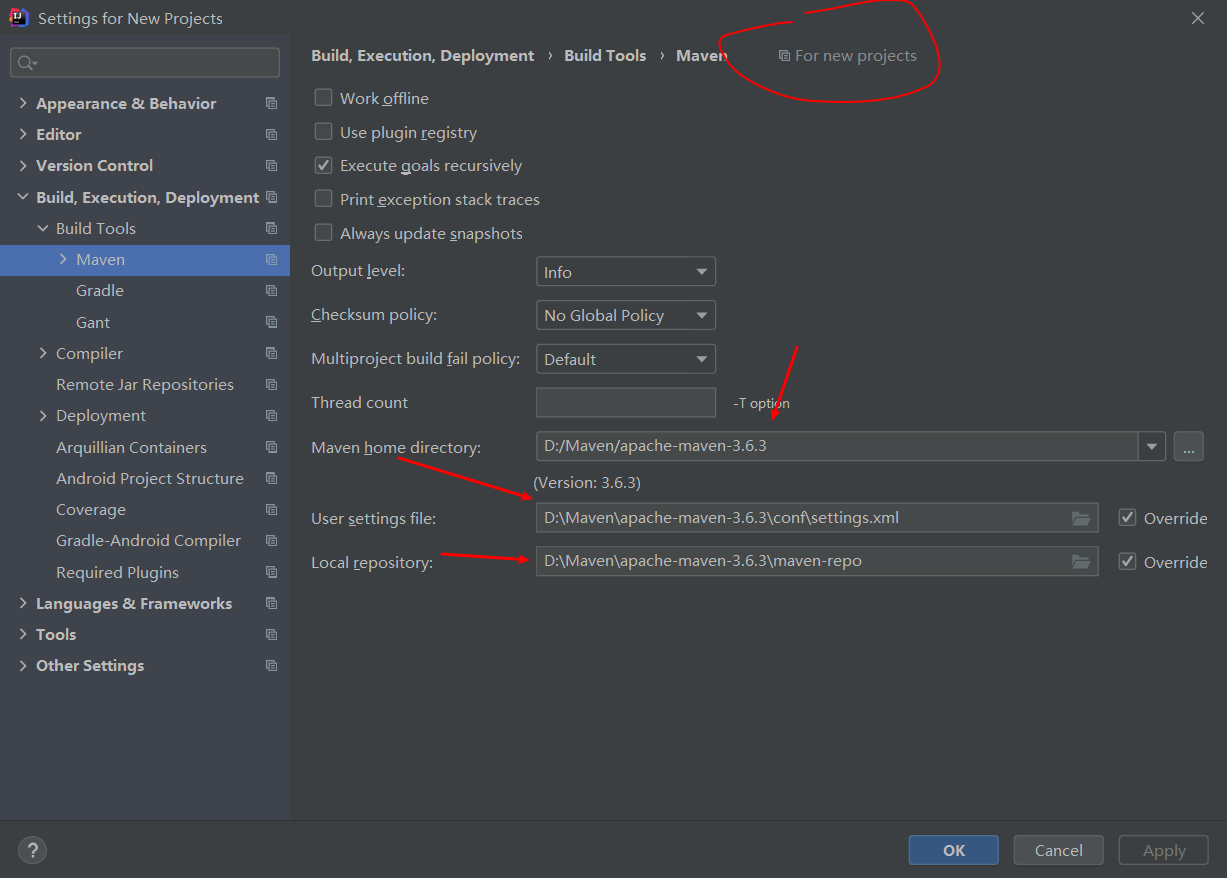
2、设置 Maven 安装主目录、 maven 的 settings.xml 文件和本地仓库所在位置
2、IDEA 创建 Maven 版 Java 工程
- File$-->$New$-->$Module:
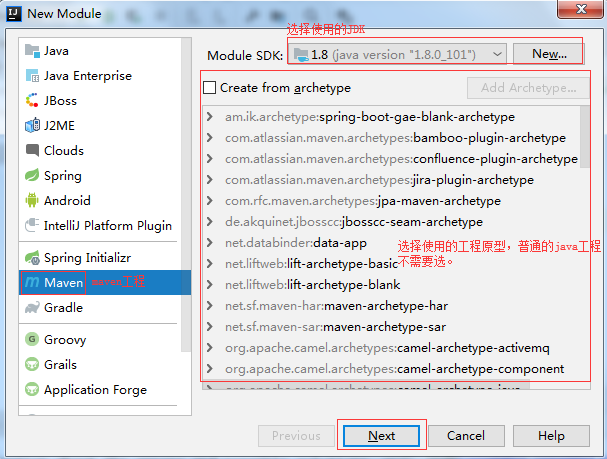
普通的Java工程也可以选择下面这个模板,但是使用模板工程的目录结构会缺少一部分
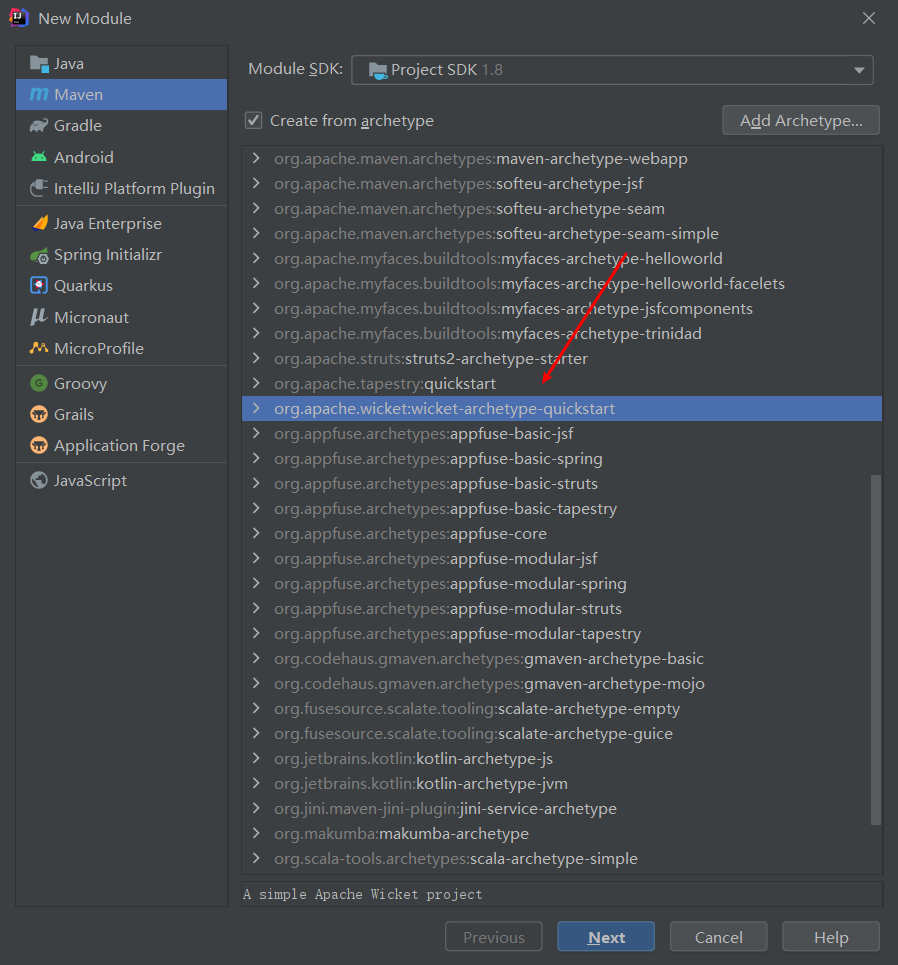
- 填写 Maven 工程名和坐标
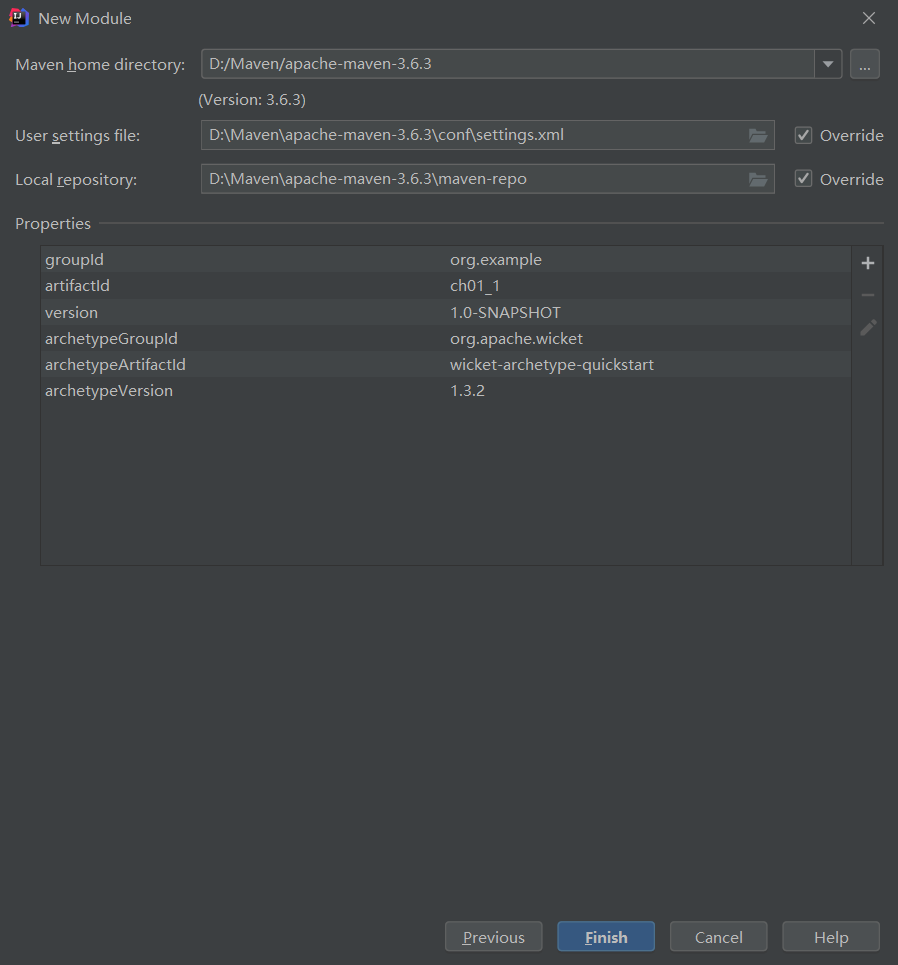
- 配置 Maven 信息
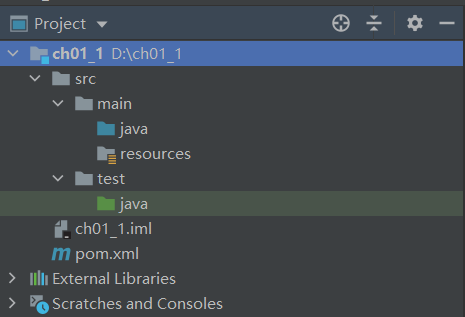
- 创建后视图
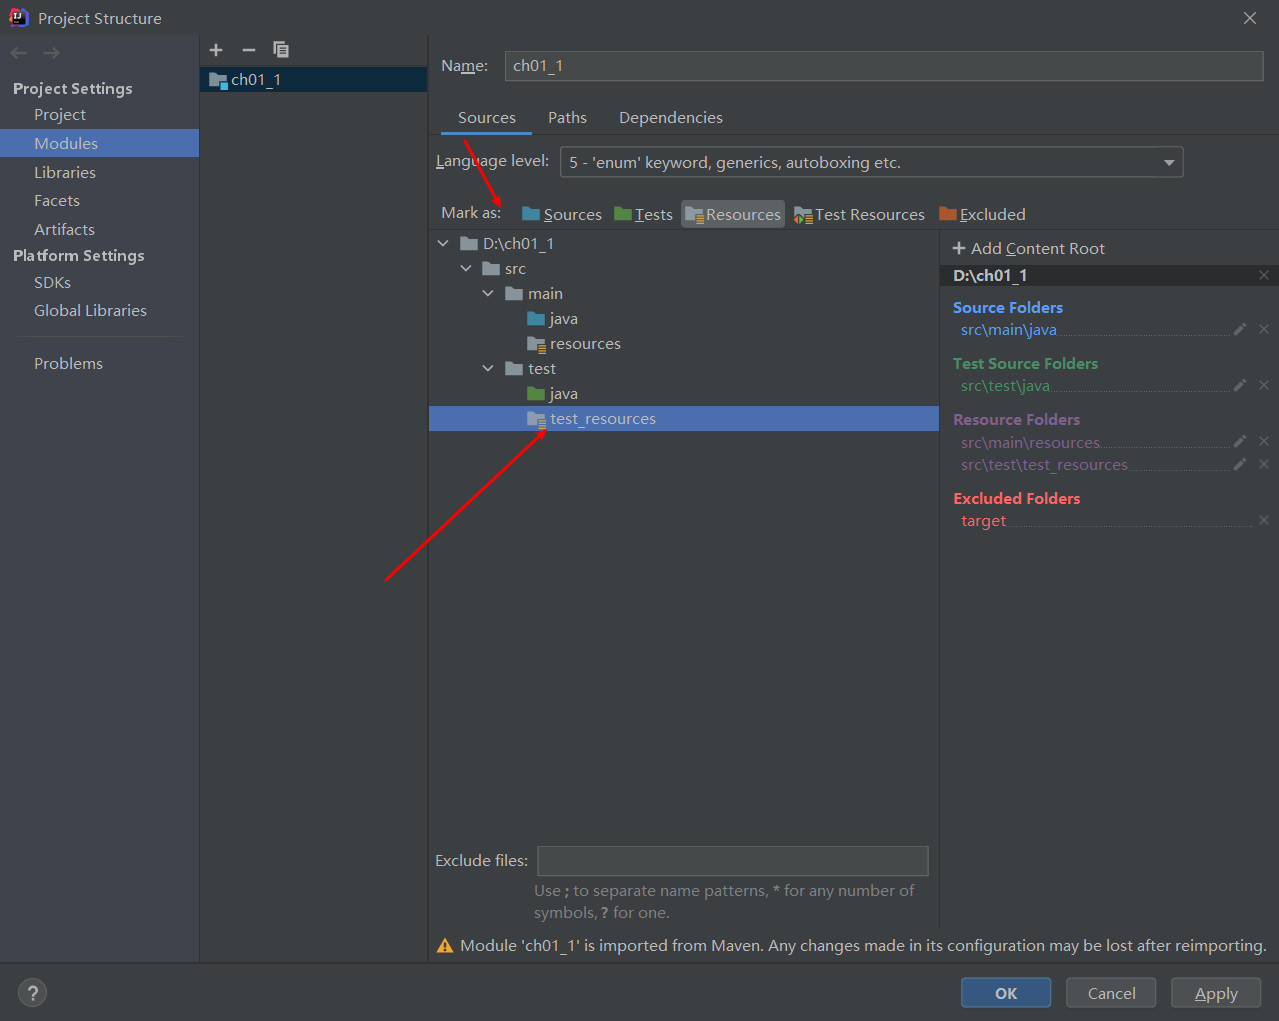
- 如果此时的Maven工程目录结构不符合自己的需求,可以右键新建文件夹,然后 mark 一下
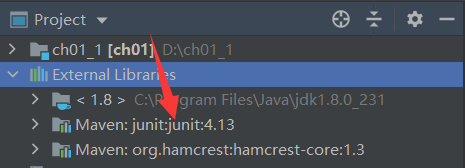
- pom.xml 中加入所需的依赖
<dependencies>
    <dependency>
        <groupId>junit</groupId>
        <artifactId>junit</artifactId>
        <version>4.13</version>
        <scope>test</scope>
    </dependency>
</dependencies>
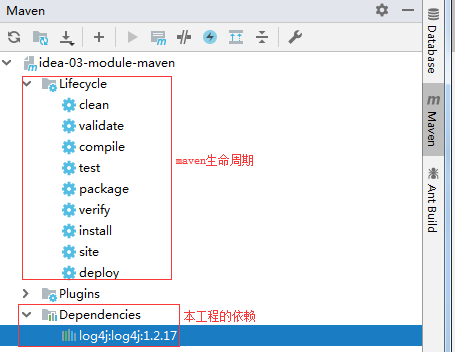
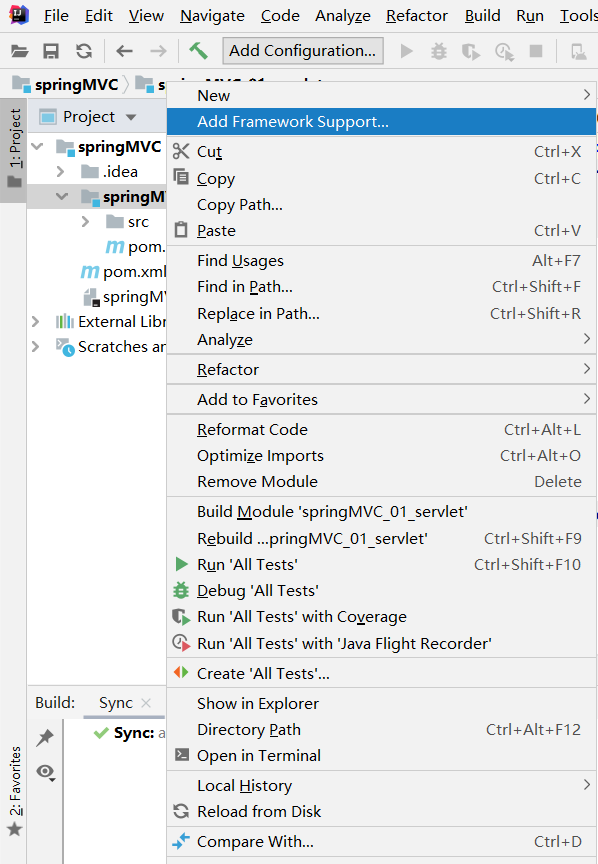
- 使用 IDEA 的 Maven 工具窗口
3、IDEA 创建 Maven 版 Web 工程
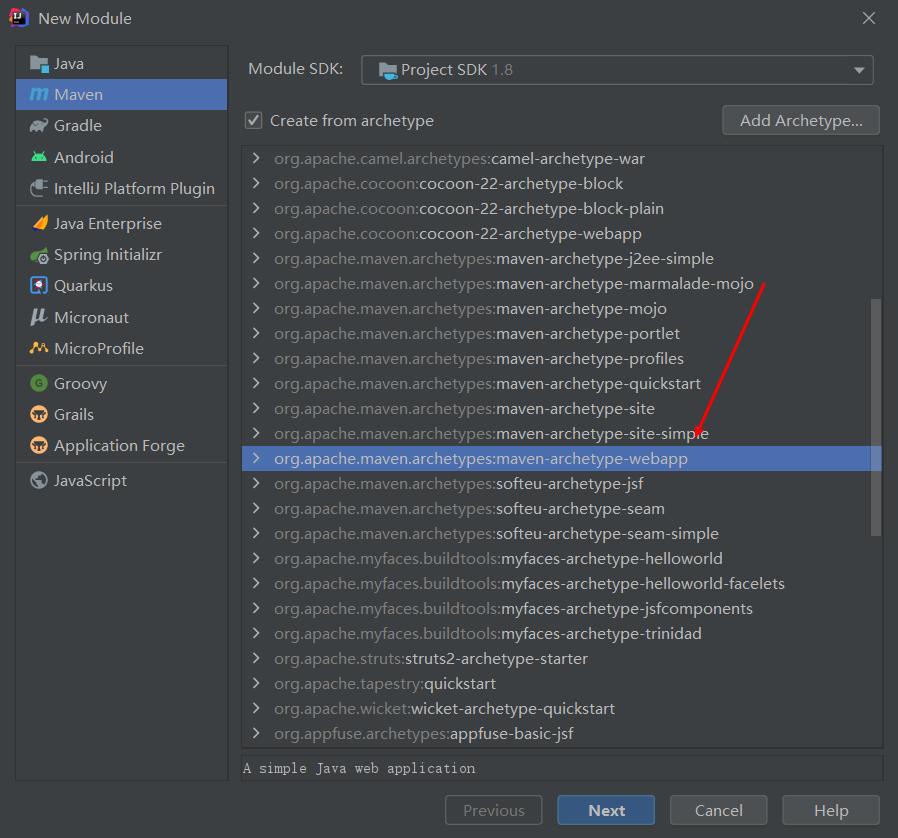
3.1、方式一:
这种方式创建出来的目录结构不全
- 新建 module,选择模板
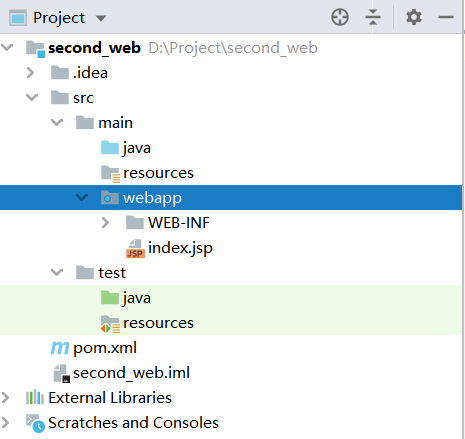
- 创建后视图

由模板创建出来的目录结构是这样的并不完整,需要手动创建缺省文件夹
- 加入 Web 的相关依赖
<dependency>
    <groupId>javax.servlet</groupId>
    <artifactId>javax.servlet-api</artifactId>
    <version>3.1.0</version>
    <scope>provided</scope>
</dependency>
<dependency>
    <groupId>javax.servlet.jsp</groupId>
    <artifactId>jsp-api</artifactId>
    <version>2.1</version>
    <scope>provided</scope>
</dependency>
3.2、方式二:
这种方式创建出来的 pom.xml 配置不全
- 创建一个普通的 Maven 工程
- 然后右键给这个普通的Maven工程添加 Web App 框架

- 加入 Web 的相关依赖
4、依赖的生效范围
<dependency>
	********
    <scope>test</scope>
</dependency>
依赖的生效范围使用 <scope> 表示,依赖的范围: compile、 test、 provided,默认采用 compile
| compile | test | provided | |
|---|---|---|---|
| 对主程序是否有效 | 是 | 否 | 是 |
| 对测试程序是否有效 | 是 | 是 | 是 |
| 是否参与打包 | 是 | 否 | 否 |
| 是否参与部署 | 是 | 否 | 否 |
5、Maven 常用属性
<properties>
    <!---maven构建项目使用编码,避免中文乱码-->
    <project.build.sourceEncoding>UTF-8</project.build.sourceEncoding>
	<!--编译代码使用的jdk版本-->
    <maven.compiler.source>1.8</maven.compiler.source>
    <!--运行过程使用的jdk版本-->
    <maven.compiler.target>1.8</maven.compiler.target>
</properties>
6、Maven 全局变量
在 Maven 的 pom.xml 文件中,<properties> 用于定义全局变量, pom 中通过 ${property_name} 的形式引用变量的值。
- 在
<properties>通过自定义标签声明变量(标签名就是变量名) - 在 pom.xml 文件中的其它位置,使用 ${标签名} 使用变量的值
定义全局变量:
<properties>
	<spring.version>4.3.10.RELEASE</spring.version>
</properties>
引用全局变量:
<dependency>
    <groupId>org.springframework</groupId>
    <artifactId>spring-context</artifactId>
    <version>${spring.version}</version>
</dependency>
Maven 系统采用的变量:
<properties>
    <!--源码编译 jdk 版本-->
    <maven.compiler.source>1.8</maven.compiler.source>
    <!--运行代码的 jdk 版本-->
    <maven.compiler.target>1.8</maven.compiler.target>
    <!--项目构建使用的编码,避免中文乱码-->
    <project.build.sourceEncoding>UTF-8</project.build.sourceEncoding>
    <!--生成报告的编码-->
    <project.reporting.outputEncoding>UTF-8</project.reporting.outputEncoding>
</properties>
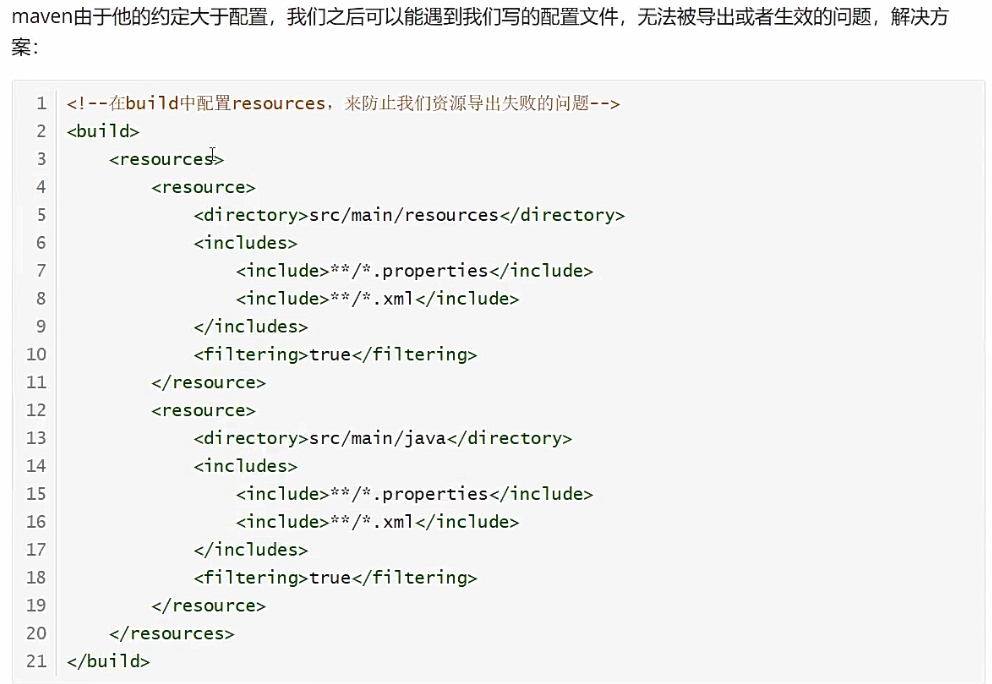
7、资源插件
src/main/java 和 src/test/java 这两个目录中的所有*.java 文件会分别在 comile 和 test-comiple 阶段被编译,编译结果分别放到了 target/classes 和 targe/test-classes 目录中,但是这两个目录中的其他文件都会被忽略掉,如果需要把 src 目录下的文件包放到 target/classes 目录,作为输出的 jar 一部分。需要指定资源文件位置。 以下内容放到 <buid> 标签中。
默认没有使用 <resources> 的时候, Maven执行编译代码时,会把 src/main/resource 目录中的资源文件拷贝到 target/classes 目录中,对于 src/main/java 目录下的非 Java 文件不处理,不拷贝到 target/classes 目录中,即忽视其他目录下的资源文件或者配置文件。
<build>
    <resources>
        <resource>
            <!--资源文件所在的目录-->
        	<directory>src/main/java</directory>
            <!--包括目录下的.properties,.xml 文件都会扫描到-->
        	<includes>
        		<include>**/*.properties</include>
        		<include>**/*.xml</include>
        	</includes>
        	<!--filtering 选项 false 不启用过滤器, *.property 已经起到过滤的作用了-->
        	<filtering>false</filtering>
        </resource>
    </resources>
</build>
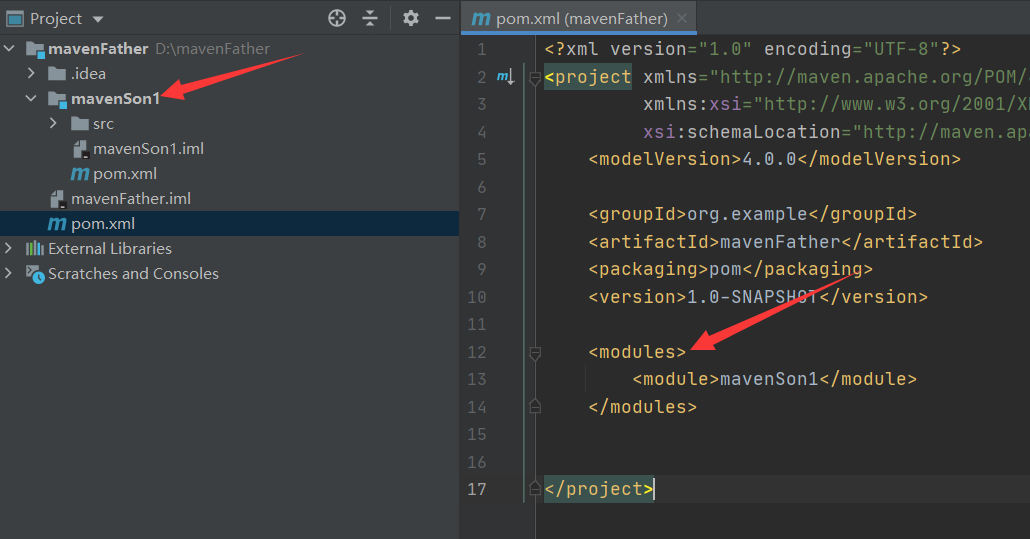
8、Maven 父子工程
- 创建一个 Maven 的普通 Java 工程,然后删掉 src 目录,这个工程作为父工程
- 然后在这个 "父" 工程中,添加 Maven 模块即可,可以有多个子模块
- 子模块所需的依赖,或者其他配置,都可以在父工程的 pom.xml 中进行配置