Drop my laptop and move all my laptop OS in the cloud with zero loss!
把你的笔记本电脑系统100%装进云服务器!
There are plenty of tutorials out there. But it was not that simple. Some issues may occur to you.
let me write what you will need.
The diagram
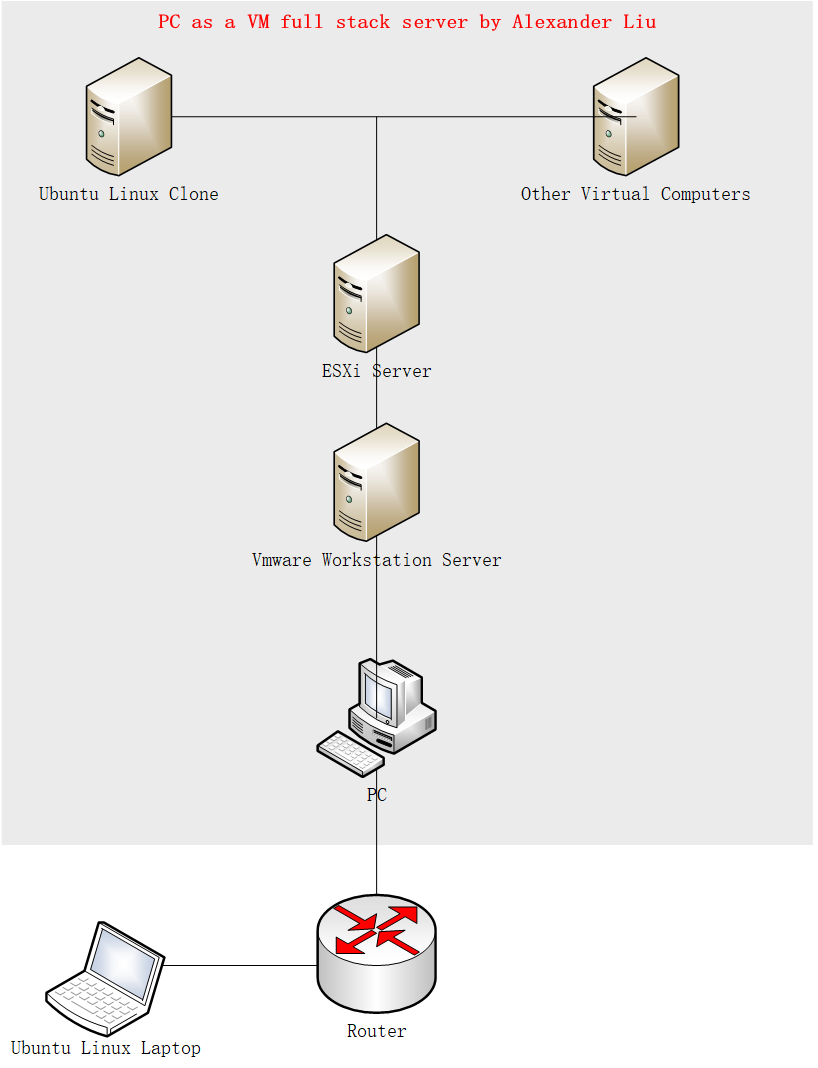
1. A running linux OS with root password ( here my laptop ubuntu 18.04 x64, installed with grub2 ,will explain later)
2. A windows OS installed with VMware vCenter Converter (only for windows platform)
3. A Windows/Linux OS installed with VMware workstation for hosting Virtual Machines ( Here I plan to run esxi as a virtual machine though this isn't ideal for production mode)
4. An Intel CPU which supports VT-D/VT-X technology or AMD-V, turn virtualization on in your motherboard BIOS
5. (optional) A ubuntu(or any Linux destro pre-installed with grub-install package) 18.04 live CD for repairing grub2 failures when migrating using VMware vCenter Converter. (Only for ubuntu 18.04+, lower version will be fine when migrating, for more information please visit https://docs.vmware.com/en/vCenter-Converter-Standalone/6.2/rn/conv_sa_62_rel_notes.html#platf )
----
1 Install VMware workstation and Create an ESXi virtual machine
Download VMware workstation Pro from vmware, and install it.
Download VMware ESXI image from vmware, here I downloaded ESXI version 7.
Then create a virtual machine, select type ESXI.
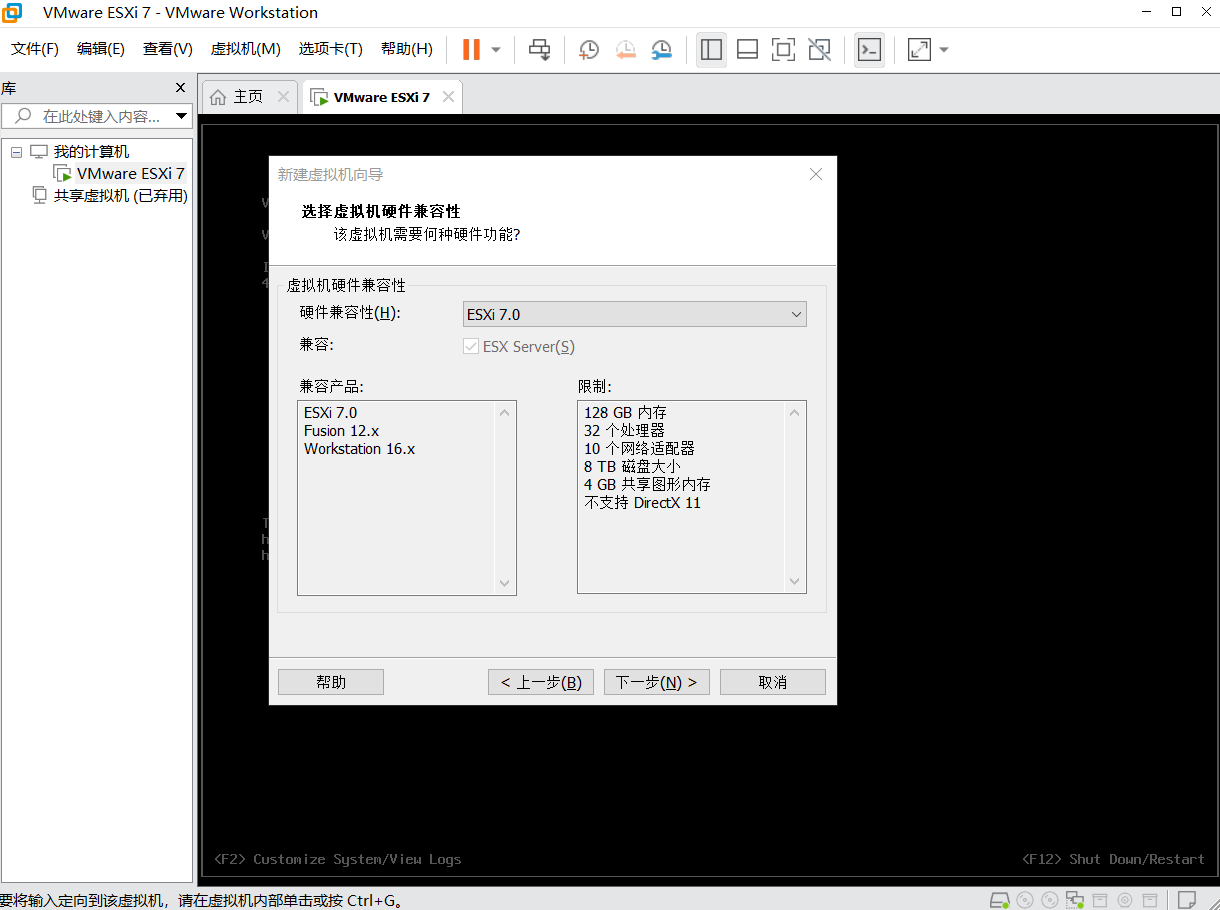
NOTICE when you are creating hard disk for the ESXi virtual machine, use SCSI controller. Because it's natively supported by VMware and easier for future extension!
Also for the network settings, I chose the bridged network for the ESXi virtual machine. This will make the ESXi virtual machine obtain an IP address directly from my router such as 192.168.x.x rather than a NAT IP such as 10.10.x.x
Because my laptop is connecting to my router directly with an IP 192.168.x.x This will make them easier for data migration.
2 Install the ESXi to the virtual machine
This step is pretty easy when using VMware Workstation. I had error when using virtualbox to create a virtual machine for ESXi because there's a small bug of virtualbox of virtual CPU specs. And it was still not fixed by the VirtualBox.
3 Migrating the Linux OS to the ESXi virtual machine using vCenter Converter
3.1) have root password on your Linux OS
3.2) enable ssh service and allow root login via SSH. configure the file /etc/ssh/sshd_config , add line
PermitRootLogin yes
Then restart the ssh service on your linux PC (source)
sudo systemctl restart ssh.service
In vCenter Converter on your windows, click convert machine
Input IP of your Linux PC, username root, and password
IP: 192.168.2.235
username: root
password: (your password)
then select the remote VMware server, here the IP of the ESXi virtual machine.
IP: 192.168.2.223
username: root
password: (your password)
Then configure if you want. Or you can configure the settings for your Ubuntu 18.04 virtual machine in ESXi admin web page later.
There is a video tutorial here: https://www.youtube.com/watch?v=B-vlWTiu5P8&t=667s
4. Wait for minutes or hours while vCenter converter is migrating
It took me 2 hours to migrate 220GB. It depends on your hardware.
You can find there is a "tar" command running in your linux laptop, crazily "tar"ing the whole volume "/" and passing it to the ESXi.
There will be no issues if your original linux, ubuntu is 16.04 or lower. But mine is 18.04.
Here's my error
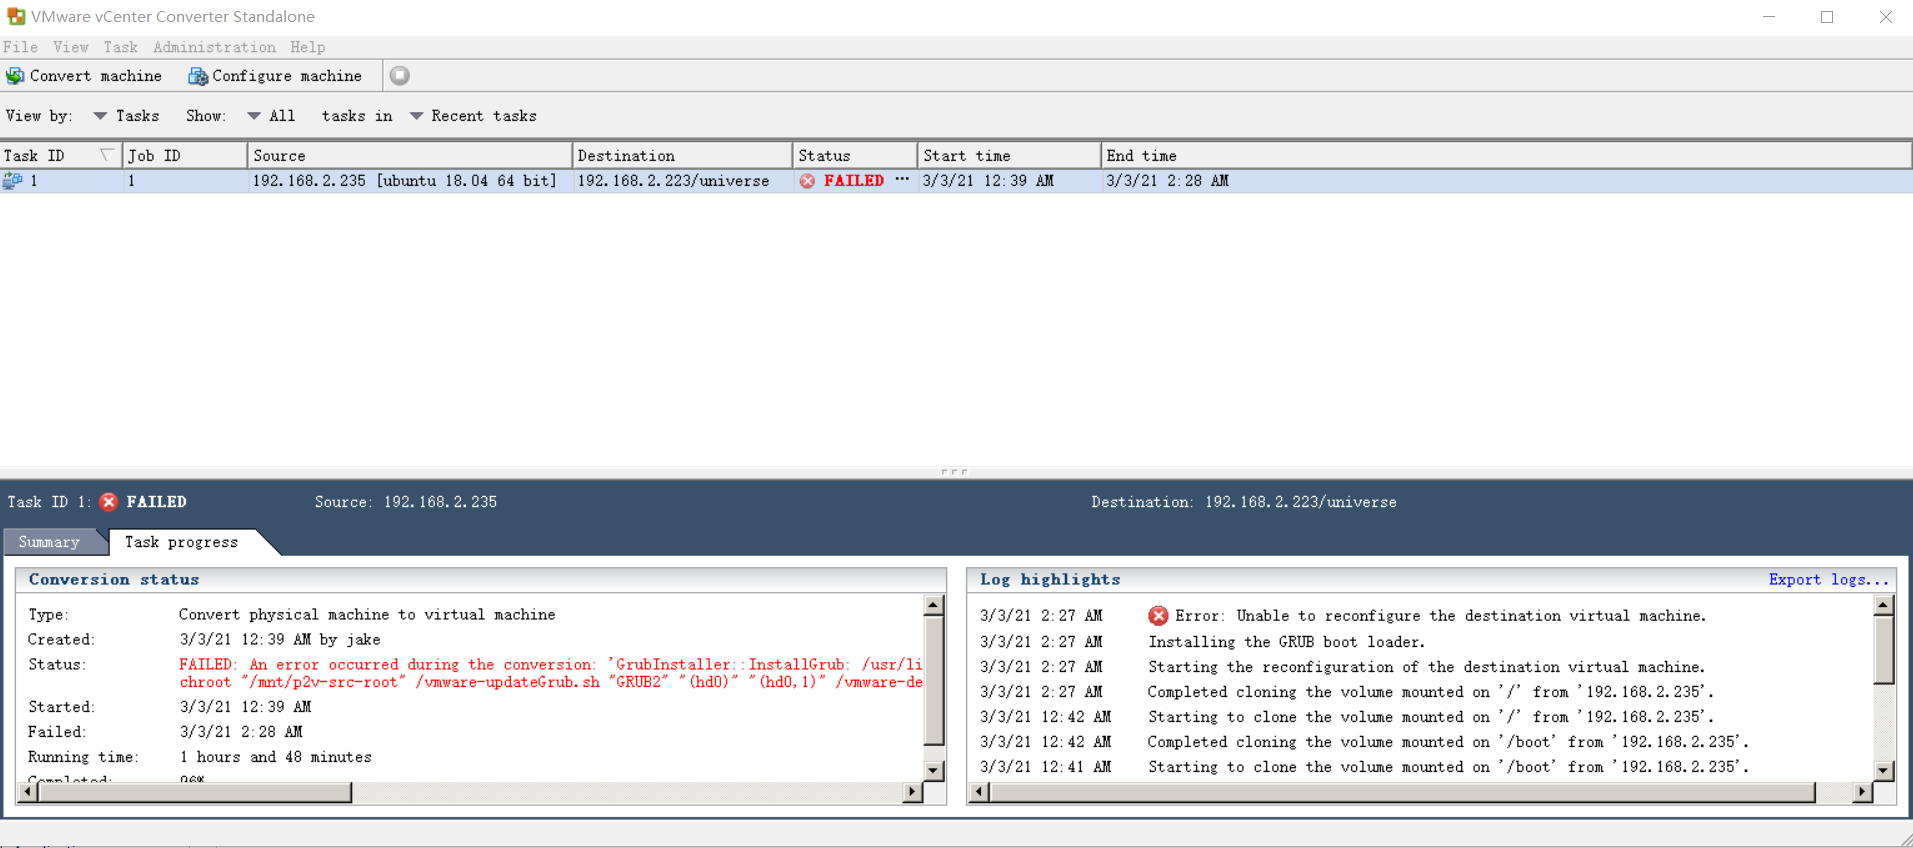
Error:
FAILED: An error occurred during the conversion: 'GrubInstaller::InstallGrub: /usr/lib/vmware-converter/installGrub.sh failed with return code: 127, and message: FATAL: kernel too old Error running vmware-updateGrub.sh through chroot into /mnt/p2v-src-root Command:
chroot "/mnt/p2v-src-root" /vmware-updateGrub.sh "GRUB2" "(hd0)" "(hd0,1)" /vmware-device.map "grub2-install" '
Reason:
vCenter converter only supports grub version 1 while migrating. But ubuntu 18.04 ships with grub 2. I will fix it manually.
(Only for ubuntu 18.04+, lower version will be fine when migrating, for more information please visit https://docs.vmware.com/en/vCenter-Converter-Standalone/6.2/rn/conv_sa_62_rel_notes.html#platf )
5. Fix the grub 2 boot failure in EXSi
5.1 ) Insert a Ubuntu/Linux live CD in VMware workstation for the EXSi virtual machine
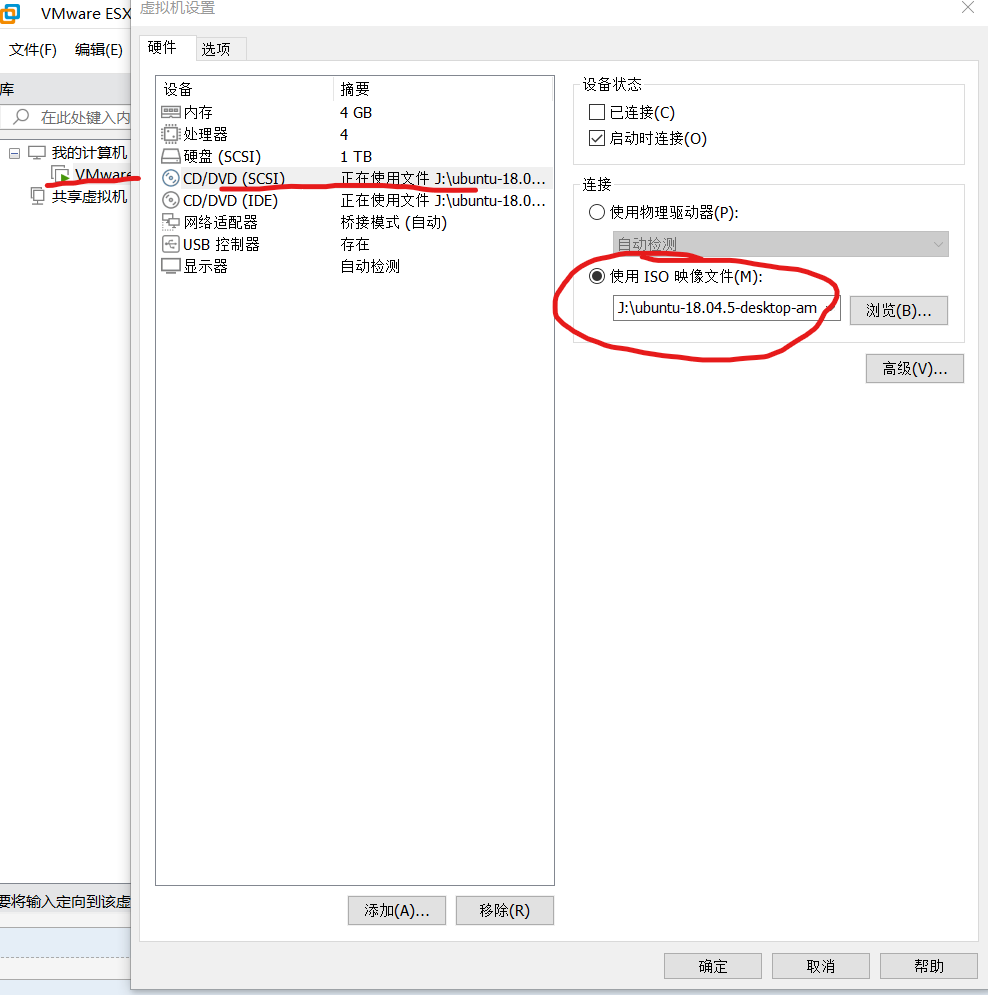
Select the Ubuntu live CD.
Then restart the ESXi in VMware workstation
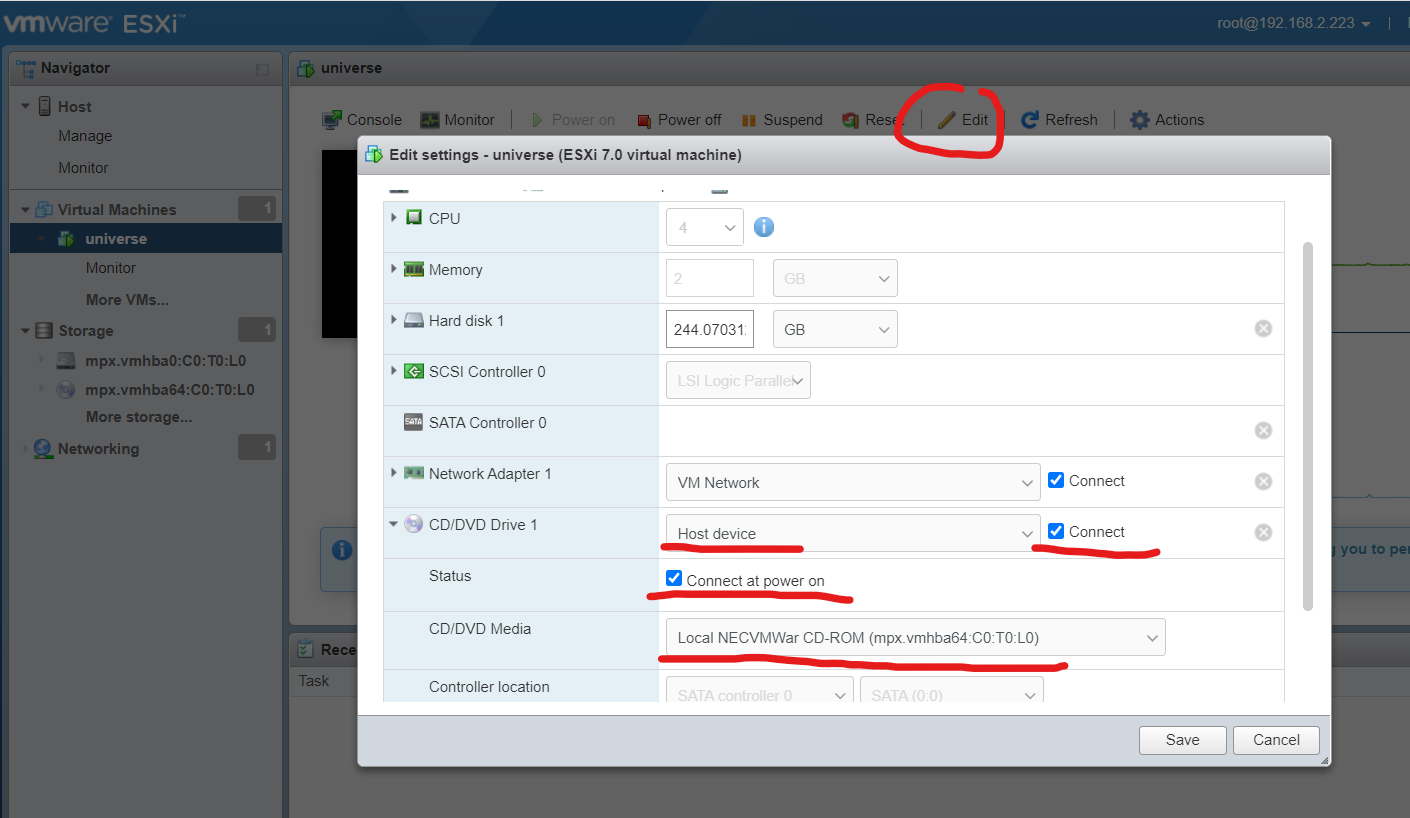
5.2) add the CD/DVD drive to the VM in your ESXi
In the ESXi web page, select edit
5.3) change boot order
Get back into the ESXi web page.
Power on the Virtual machine migrated from my linux laptop. Here it is called "universe".
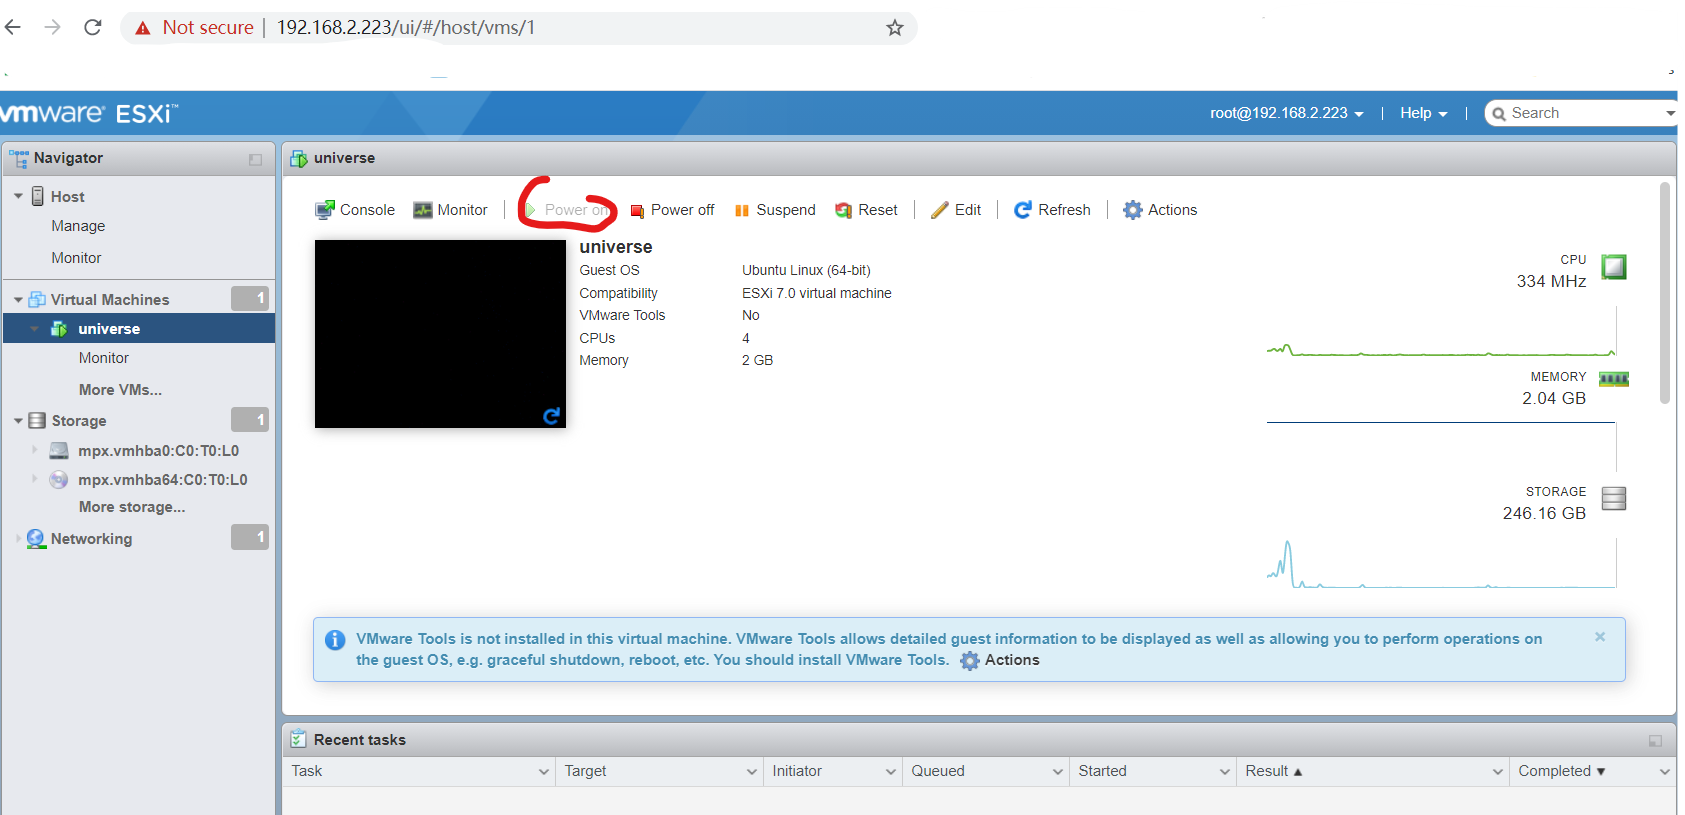
When booting the OS, quick press "ESC" button in the virtual machine window from your browser. Get into the BIOS settings for your VM in ESXi.
Then select boot sequence.
Set USB, CD/DVD-ROM before Hard drive.
Next time when you boot your VM in EXSi, it will get into the Ubuntu Live CD firstly.
When you are in the Ubuntu Live CD, select Try ubuntu without installation.
NOW we are going to fix the grub 2 boot failures!!!
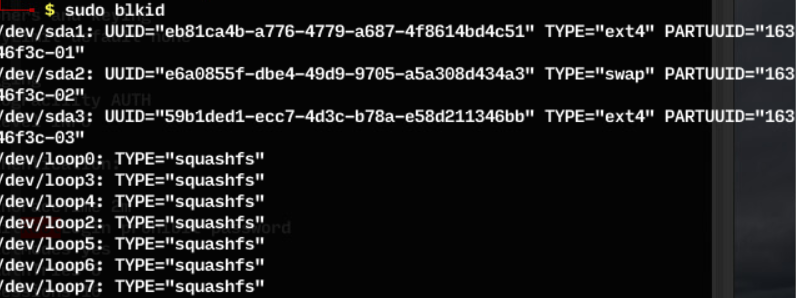
Go terminal in the live CD, get the UUID of all your partitions! (VERY important if you boot using UUID !!!!)
sudo blkid
save those uuid generated from the VM ( different from the UUID on my laptop linux)
There's a tutorial about how to fix grub using live CD: https://howtoubuntu.org/how-to-repair-restore-reinstall-grub-2-with-a-ubuntu-live-cd
Here's my version
# it only has /dev/sda disk which is the only drive that my linux laptop uses
# / is mapped to /dev/sda3
# /boot is mapped to /dev/sda1
# swap is mapped to /dev/sda2
# but the /boot is on another partition in my linux laptop
sudo mount -t ext4 /dev/sda3 /mnt
sudo mount /dev/sda1 /mnt/boot

# bind the system
sudo mount --bind /dev /mnt/dev &&
sudo mount --bind /dev/pts /mnt/dev/pts &&
sudo mount --bind /proc /mnt/proc &&
sudo mount --bind /sys /mnt/sys
chroot into the VM of my laptop clone
sudo chroot /mnt
fix the grub
grub-install /dev/sda

grub-install --recheck /dev/sda

update-grub
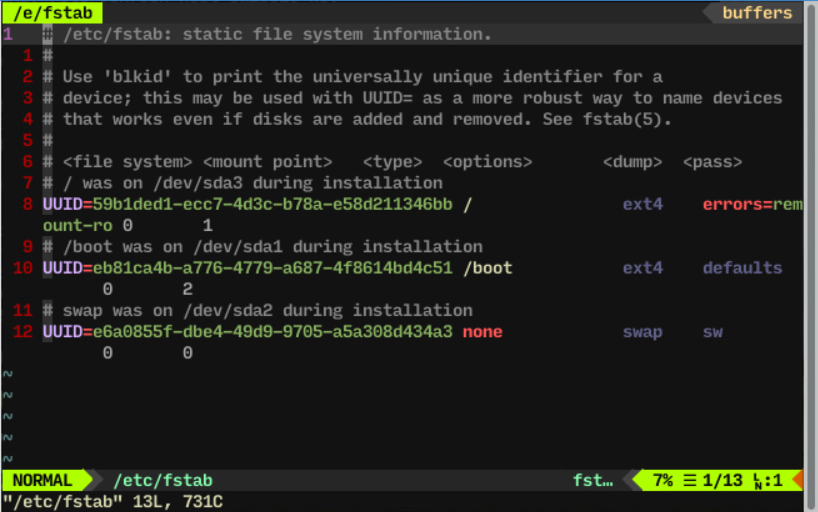
then fix the UUID in /etc/fstab, replace them with the UUID generated minites ago
Save and umount those partitions from your live CD.
exit &&
sudo umount /mnt/sys &&
sudo umount /mnt/proc &&
sudo umount /mnt/dev/pts &&
sudo umount /mnt/dev &&
sudo umount /mnt/boot

sudo umount /mnt
Then poweroff the live CD
Take out the live CD from the ESXi web page by doing so.
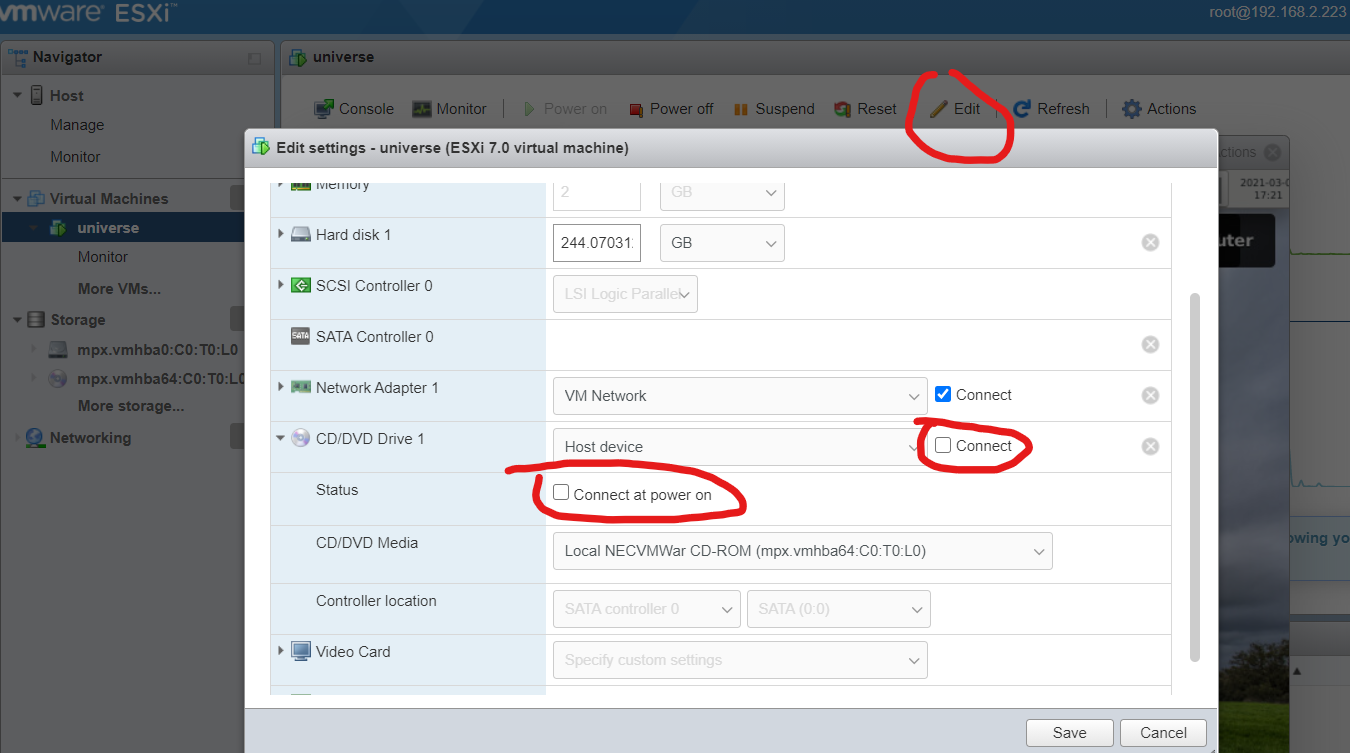
Then boot the VM in your ESXi, you will see the laptop linux running in the cloud server!!!
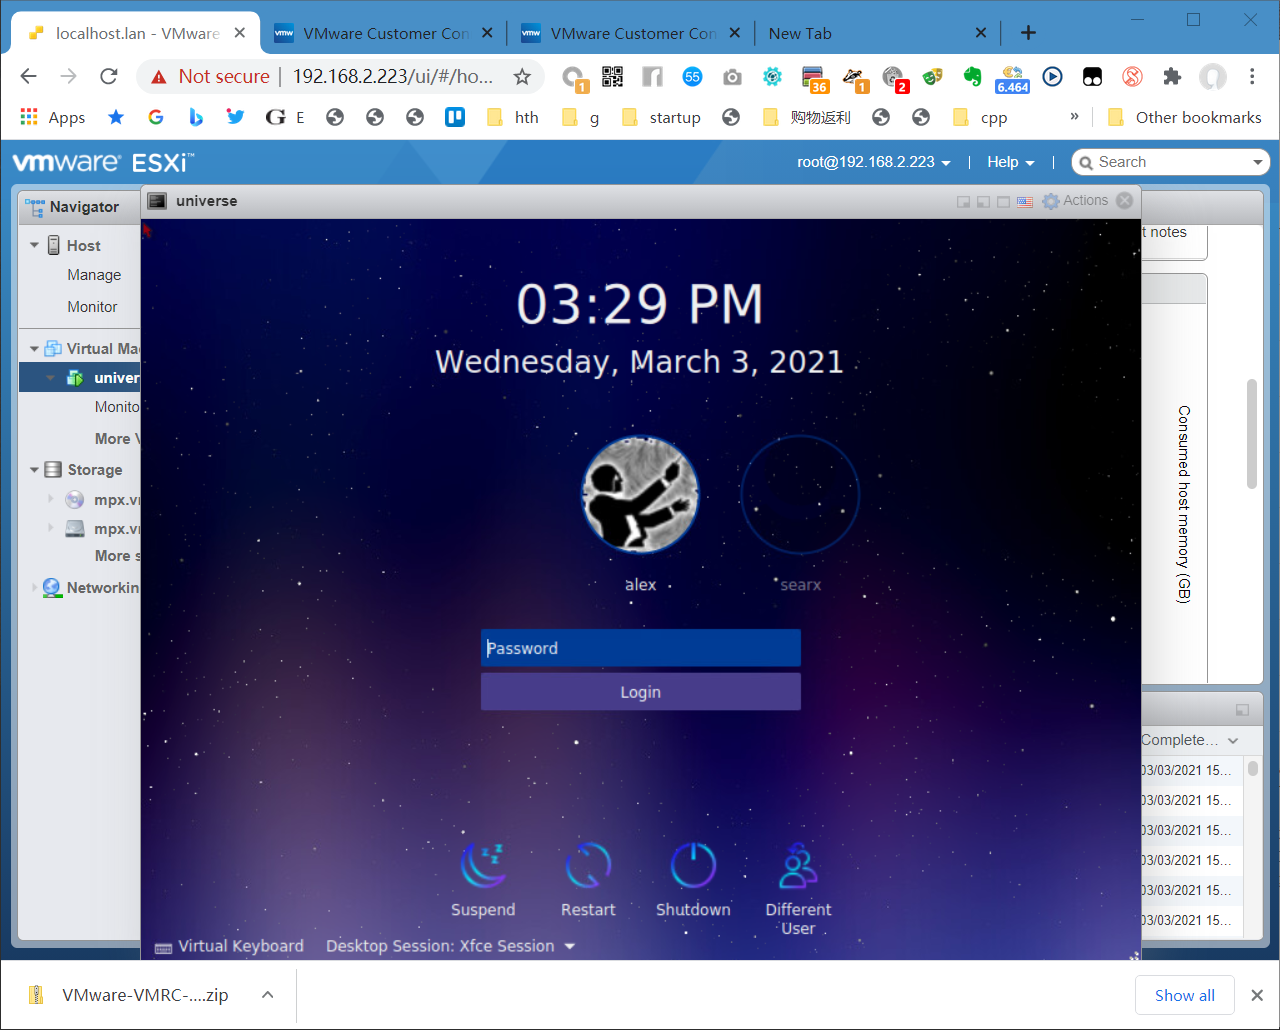
It works great. But hardware accleration is limited.

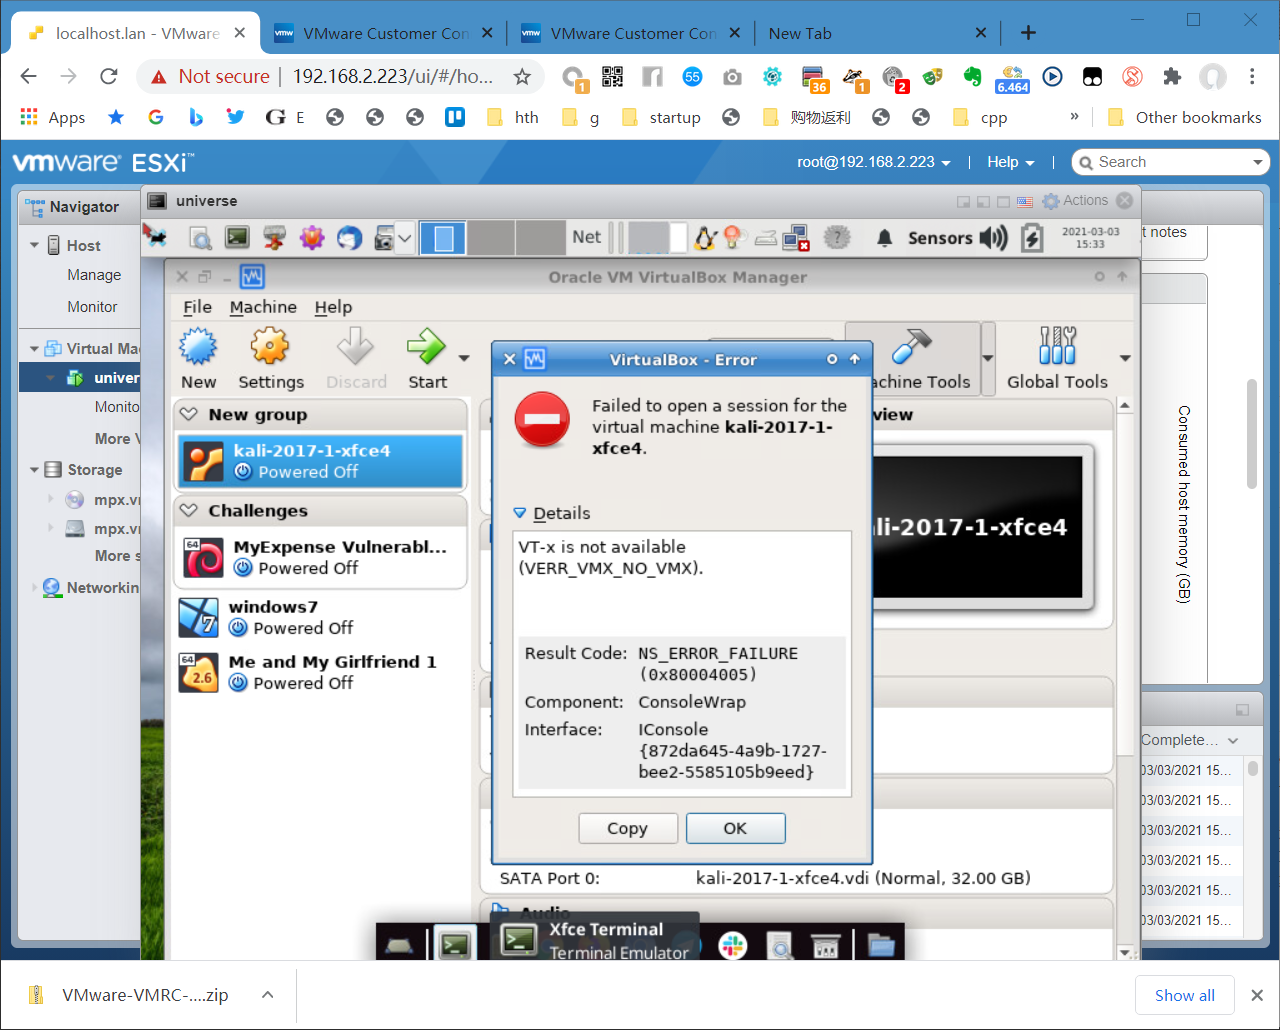
Starting Virtualbox in the VM from the ESXi running in VMware Workstation is unrealistic. LOL
haha you will see this. but it's okay.
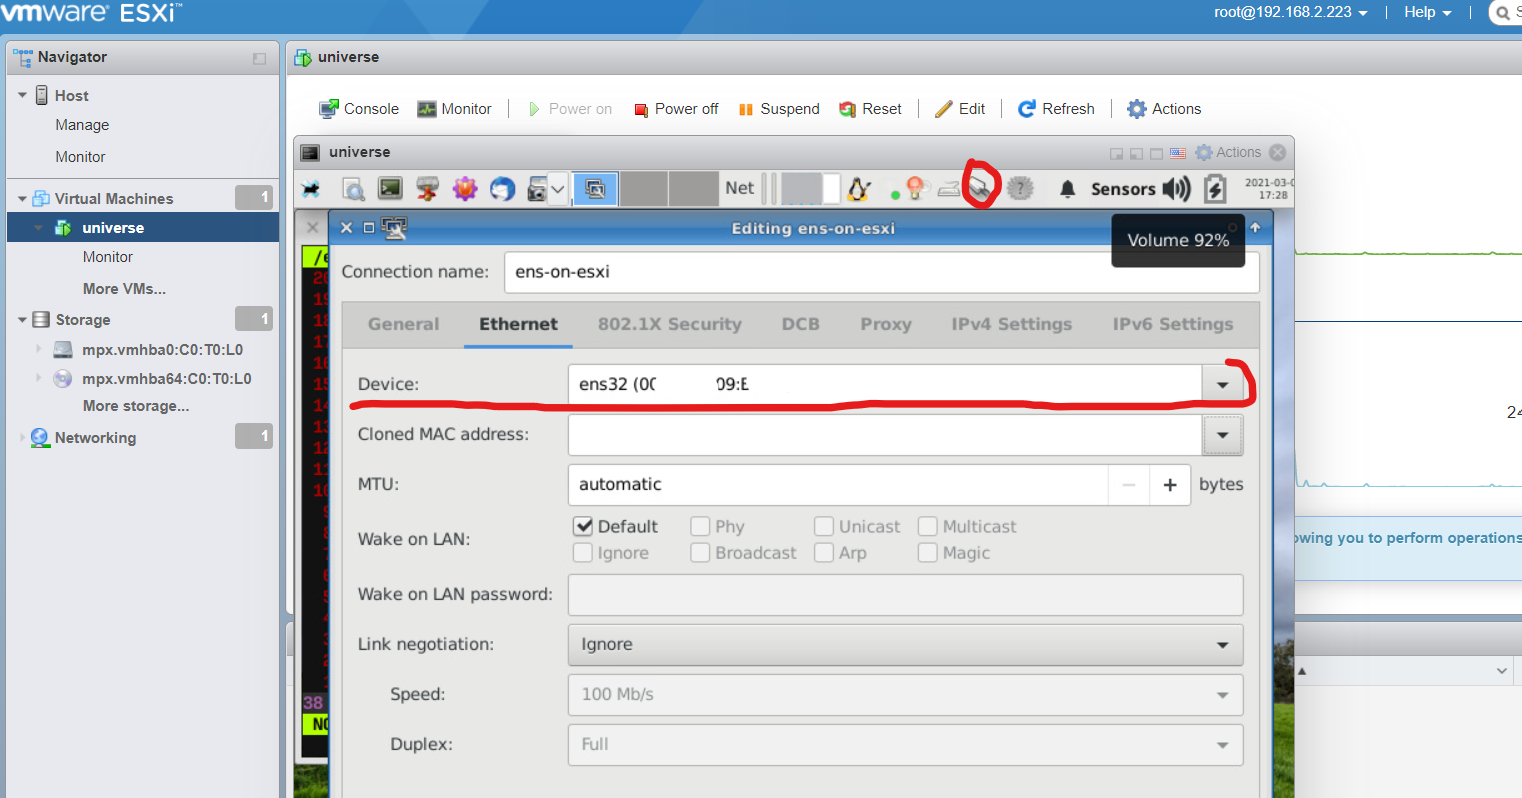
Don't forget to connect to Internet.
Internet interface devices have been changed, including MAC and etc. You should create a new Internet session.

Happy hacking
Good luck have fun