针对于Vue的生命周期进行详细的说明,方面加深对各个方法的引用。
引言:
正文:


<!DOCTYPE html>
<html lang="en">
<head>
  <meta charset="UTF-8">
  <meta name="viewport" content="width=device-width, initial-scale=1.0">
  <meta http-equiv="X-UA-Compatible" content="ie=edge">
  <title>vue生命周期</title>
  <script src="https://cdn.bootcss.com/vue/2.4.2/vue.js"></script>
</head>
<body>
  <div id="app">
    <h1>{{message}}</h1>
  </div>
</body>
<script>
  var vm = new Vue({
    el: '#app',
    data: {
      message: 'Vue'
    },
    beforeCreate: function() {
      console.group('------beforeCreate创建前状态------');
      console.log(this.$el);
      console.log(this.$data);
      console.log(this.message)
    },
    created: function() {
      console.group('------created创建完毕状态------');
      console.log(this.$el);
      console.log(this.$data);
      console.log(this.message);
    },
    beforeMount: function() {
      console.group('------beforeMount挂载前状态------');
      console.log(this.$el);
      console.log(this.$data);
      console.log(this.message);
    },
    mounted: function() {
      console.group('------mounted 挂载结束状态------');
      console.log(this.$el);
      console.log(this.$data);
      console.log(this.message);
    },
    beforeUpdate: function () {
      console.group('beforeUpdate 更新前状态===============》');
      console.log(this.$el);
      console.log(this.$data);
      console.log(this.message);
    },
    updated: function () {
      console.group('updated 更新完成状态===============》');
      console.log(this.$el);
      console.log(this.$data);
      console.log(this.message);
    },
    beforeDestroy: function () {
      console.group('beforeDestroy 销毁前状态===============》');
      console.log(this.$el);
      console.log(this.$data);
      console.log(this.message);
    },
    destroyed: function () {
      console.group('destroyed 销毁完成状态===============》');
      console.log(this.$el);
      console.log(this.$data);
      console.log(this.message)
    }
  })

</script>
</html>
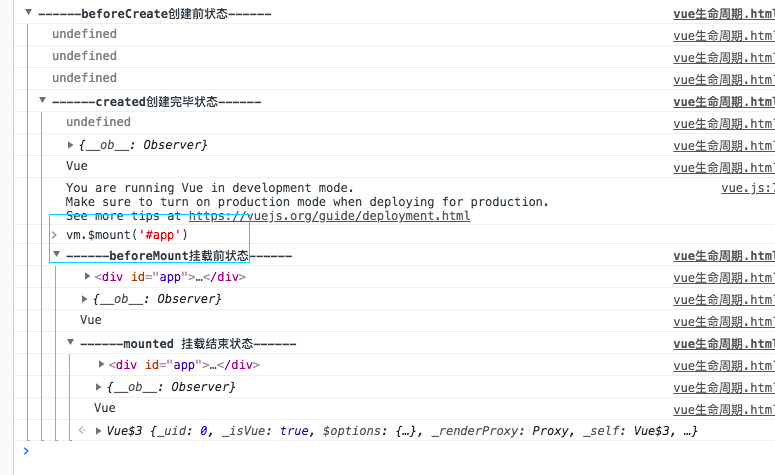
结果显示如下:

ps:因为没有更新数据和销毁数据,所以beforeUpdate,updated,beforeDestroy和destroyed等钩子函数没有触发,只打印出beforeCreate,created,beforeMount和mounted的钩子函数情况。
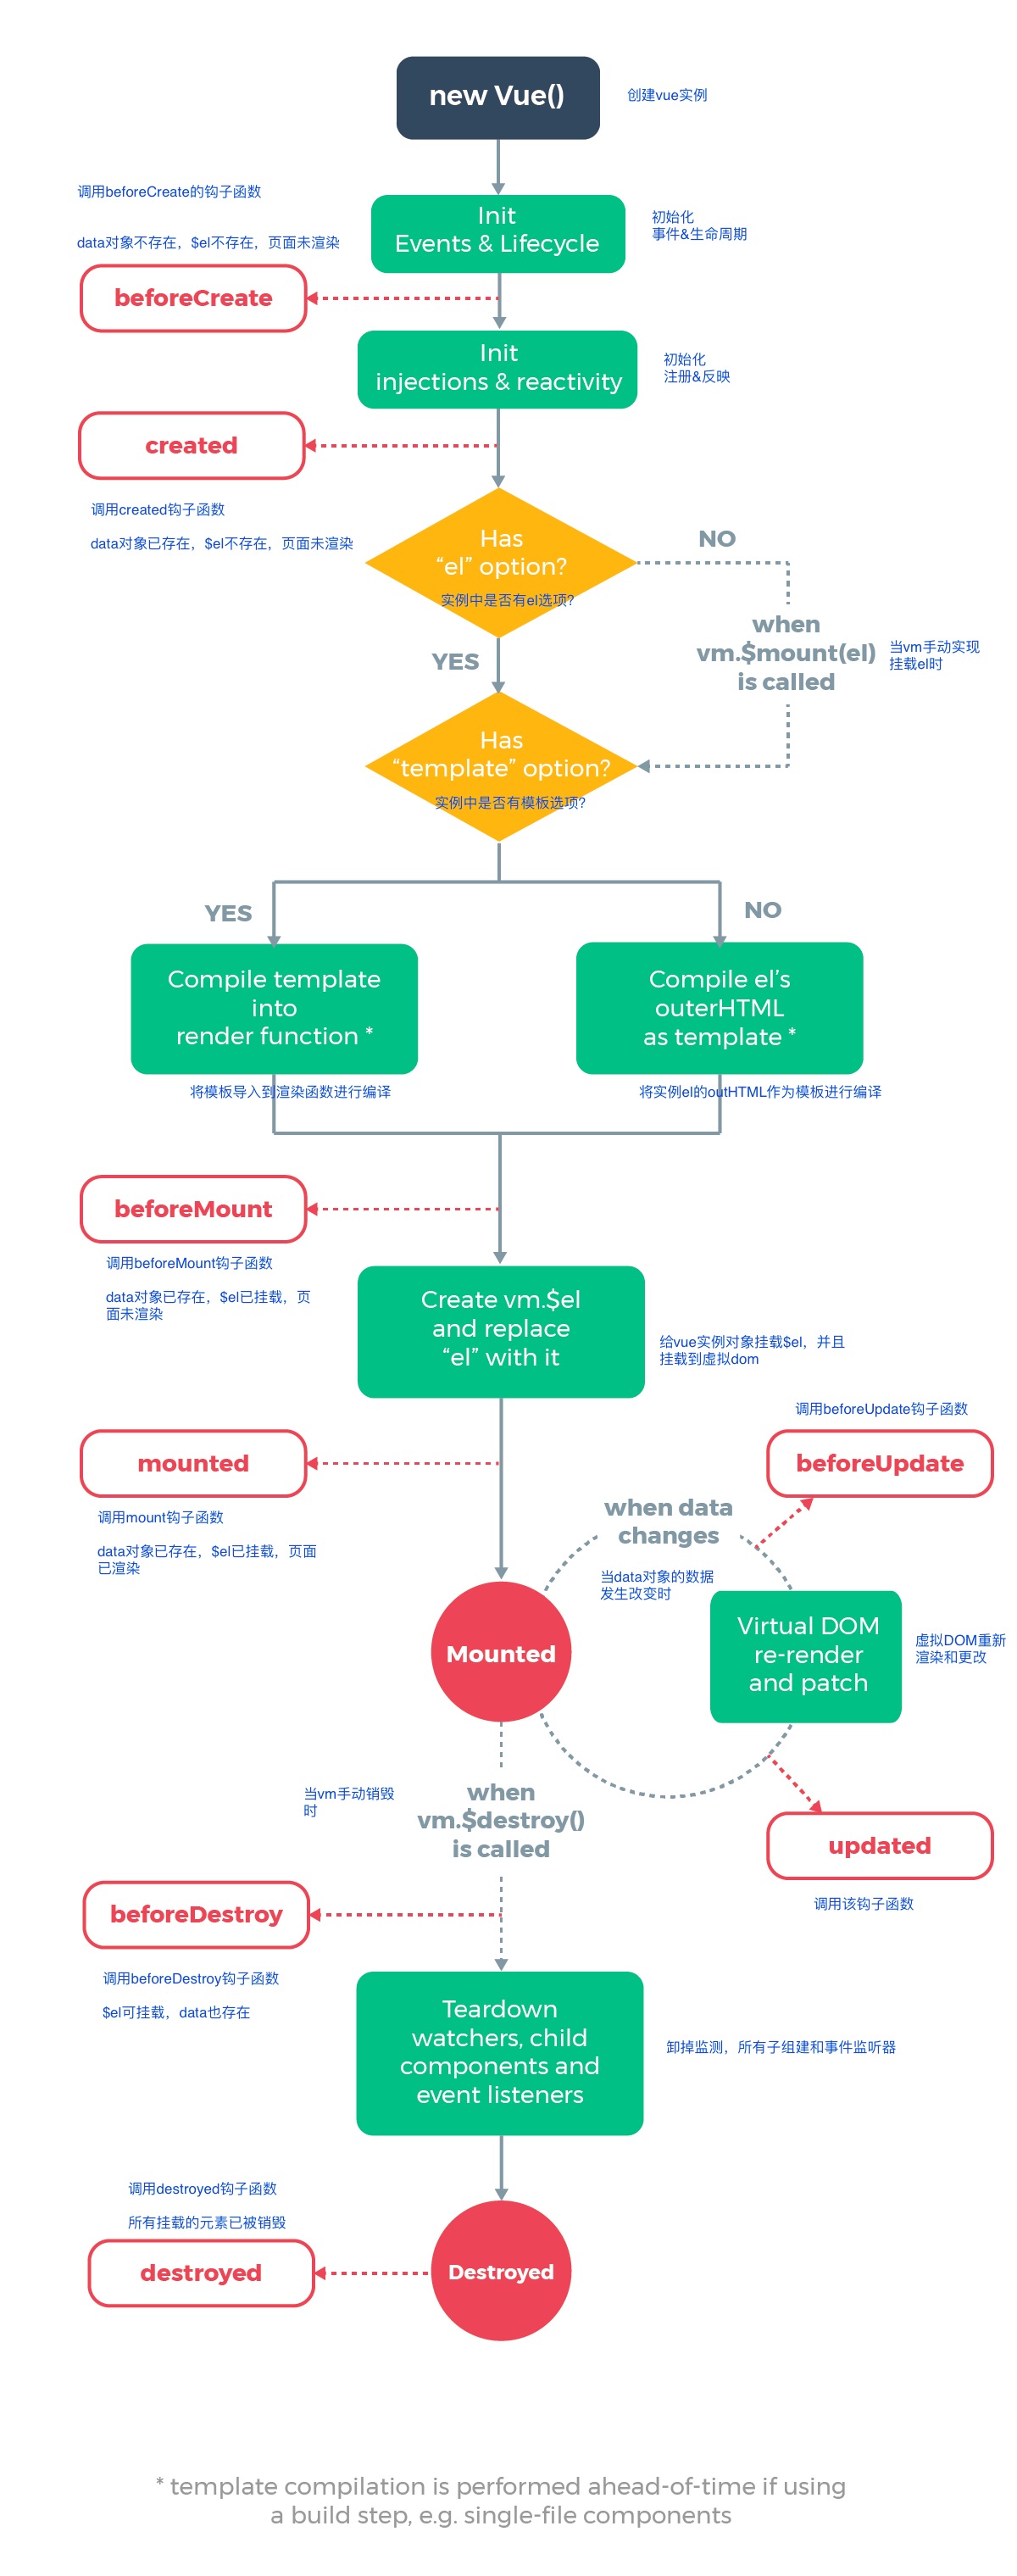
在vue生命周期图例中可知,可以分为以下几个步骤:
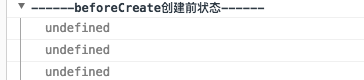
一 beforeCreate—created间的生命周期

二 created—beforeMount间的生命周期


var vm = new Vue({
    el: '#app',
    template:'<h1 style="color:red">{{message}}</h1>',
    data: {
      message: 'Vue'
    }
  })

2 当无template时:
<body>
  <div id="app">
    <h1>{{message}}</h1>
  </div>
</body>

3 当两者存在时,会优先选择template渲染函数。
<body>
  <div id="app">
    <h1>{{message}}</h1>
  </div>
</body>
<script>
  var vm = new Vue({
    el: '#app',
    template:'<h1 style="color:red">{{message}}</h1>',
    data: {
      message: 'Vue'
    }
  })
</script>

4 两者不存在时,则不渲染也不报错。
<body>
  <div id="app">
    <h1>{{message}}</h1>
  </div>
</body>
<script>
  var vm = new Vue({
    el: '#app',
    template:'<h1 style="color:red">{{message}}</h1>',
    render: function (createElement, context) {
        return createElement('h1',`${this.message}1111`)
    },
    data: {
      message: 'Vue'
    },
  })
</script>
三 beforeMount—mounted钩子函数的生命周期
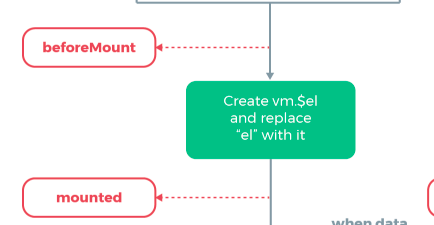
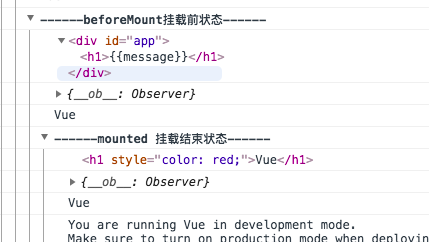
通过打印结果可知:
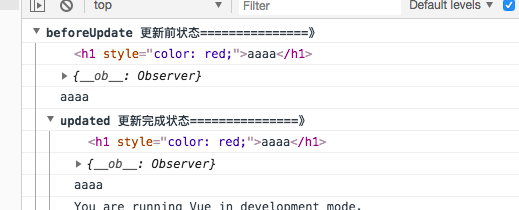
四 beforeUpdate—updated间的生命周期
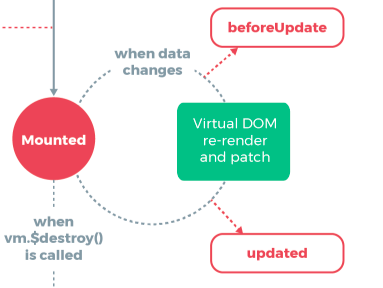
这一步是当vue的data数据发生改变,就会触发对应组件的重新渲染。然后依次触发beforeUpdate和update钩子函数。
<body>
  <div id="app">
    <!-- <h1>{{message}}</h1> -->
  </div>
</body>
<script>
  var vm = new Vue({
    el: '#app',
    // template:'<h1 style="color:red">{{message}}</h1>',
    data: {
      message: 'Vue'
    },
    beforeUpdate: function () {
      console.group('beforeUpdate 更新前状态===============》');
      console.log(this.$el);
      console.log(this.$data);
      console.log(this.message);
    },
    updated: function () {
      console.group('updated 更新完成状态===============》');
      console.log(this.$el);
      console.log(this.$data);
      console.log(this.message);
    },
  })
  vm.message = 'aaaa';
</script>
结果可知:没有触发钩子函数。

当把template的注释去掉,结果如下:触发了更新前后的钩子函数。
五 beforeDestroy—destroyed间的生命周期

  var vm = new Vue({
    el: '#app',
    template:'<h1 style="color:red">{{message}}</h1>',
    data: {
      message: 'Vue'
    },
    beforeDestroy: function () {
      console.group('beforeDestroy 销毁前状态===============》');
      console.log(this.$el);
      console.log(this.$data);
      console.log(this.message);
    },
    destroyed: function () {
      console.group('destroyed 销毁完成状态===============》');
      console.log(this.$el);
      console.log(this.$data);
      console.log(this.message)
    }
  })
  vm.$destroy();
  vm.message='11111'
</script>
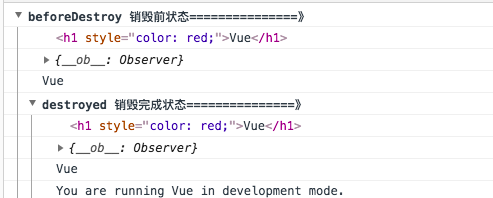
ps:因为只有$destroy()方法,所以没法判断beforeDestroy和destroyed的区别
结果如下:发现销毁之后,再重新给message赋值,没效果。可见destroyed钩子函数在$destroy()方法实行后会销毁和当前实例有关的东西,不会再次对该实例进行操作。
结尾:
以上都是自己对vue的生命周期的理解,从一开始懵懂,到依次开发vue项目,回头再看这生命周期,就有一种“原来如此”的感觉,感到vue强大之处。
我是17号小白,我把完整代码放到gitHub里了,有需要实践的请前往clone。地址:https://github.com/sqh17/notes/blob/master/ways/vueLifecycle.html。
以上若有不对的地方,请大家能及时私信我或者下方评论,我们一起加油进步。
参考文献: