一:前提
已经正常安装了SDN环境(mininet和openswitch2.11.0和Ryu)
使用前面教程安装环境SDN实验---使用git安装Mininet
(一)测试ovs是否正常使用
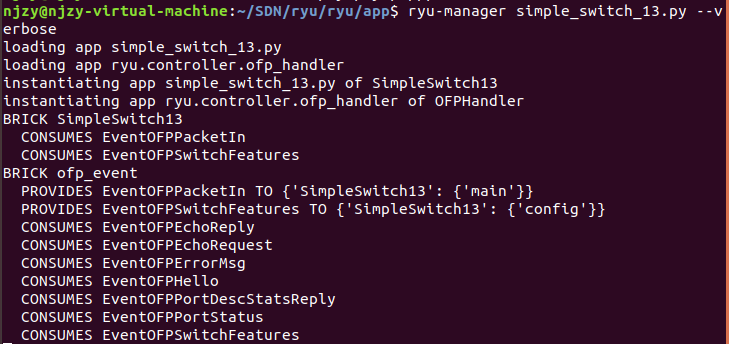
1.ryu启动
2.mn启动测试
二:原始信息


三:修改程序
(一)修改源码:在vport.c和.h中添加代码---文件写入信息《慎用》(未修改调试,出现问题)
1.vport.h文件
//custom function to log info
void send_msg(const char* filename,const char* info);
//file operation function
struct file *file_open(const char *path, int flags, int rights);

void file_close(struct file *file);

int file_read(struct file *file, unsigned long long offset, unsigned char *data, unsigned int size);

int file_write(struct file *file, unsigned long long offset, unsigned char *data, unsigned int size);
2.vport.c文件
//custom function to log info
void send_msg(const char* filename,const char* info)
{
    loff_t f_pos;
    struct file* fp = file_open(filename,O_RDWR|O_CREAT,0666);
    f_pos = fp->f_pos;
    file_write(fp,f_pos,info,strlen(info)+1);
    file_close(fp);
}

//file operation function
struct file *file_open(const char *path, int flags, int rights)
{
    struct file *filp = NULL;
    mm_segment_t oldfs;
    int err = 0;

    oldfs = get_fs();
    set_fs(get_ds());
    filp = filp_open(path, flags, rights);
    set_fs(oldfs);
    if (IS_ERR(filp)) {
        err = PTR_ERR(filp);
        return NULL;
    }
    return filp;
}

void file_close(struct file *file)
{
    filp_close(file, NULL);
}

int file_read(struct file *file, unsigned long long offset, unsigned char *data, unsigned int size)
{
    mm_segment_t oldfs;
    int ret;

    oldfs = get_fs();
    set_fs(get_ds());

    ret = vfs_read(file, data, size, &offset);

    set_fs(oldfs);
    return ret;
}

int file_write(struct file *file, unsigned long long offset, unsigned char *data, unsigned int size)
{
    mm_segment_t oldfs;
    int ret;

    oldfs = get_fs();
    set_fs(get_ds());

    ret = vfs_write(file, data, size, &offset);

    set_fs(oldfs);
    return ret;
}
3.检查日志

(二)使用日志打印(推荐)
1.使用sublime在datapath文件夹中搜索log,pr等信息,找到可用的内核输出函数pr_info("Open vSwitch switching datapath %s ", VERSION);
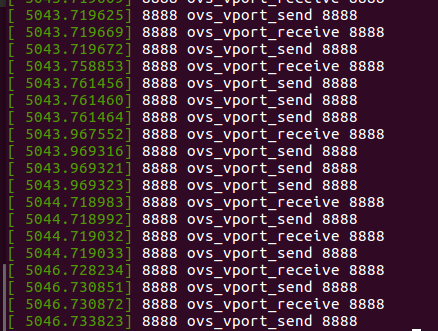
2.使用pr_info在vport.c函数中输入调试信息

3.进行下面编译方法
4.结果显示:使用dmesg方法查看即可
四:实验开始
(一)重新编译前检查
1.查看内核模块openvswitch是否正在被占用(若是被占用,不能被安装)
lsmod | grep openvswitch
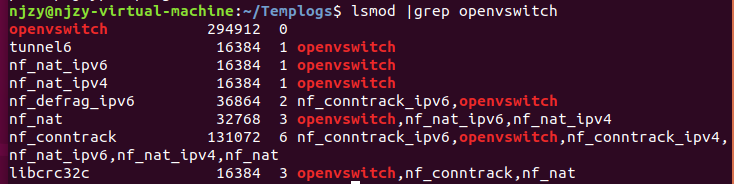
第一行,第三列为1则被占用,为0未被占用(此处未被占用)
2.若是被占用,此时使用sudo ovs-dpctl show查看内核,应该会有一个ovs-system的datapath
此时需要使用sudo ovs-dpctl del-dp ovs-system删除刚才看到的datapath。
3.使用sudo rmmod openvswitch来移除openvswitch内核模块,再使用lsmod|grep openvswitch应该就没有openvswitch字样。

(二)开始重新编译
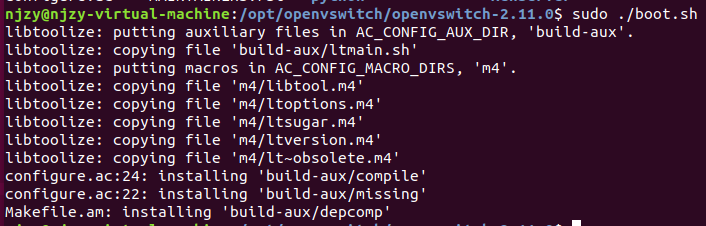
1.进入openswitch文件夹中

2.启动boot.sh脚本
3.make clean清除上次的make命令所产生的object文件(后缀为“.o”的文件)及可执行文件。
因为我们之前安装openswitch编译过一次,我们需要先清除上一次的文件。
没有错误的时候不用clean,这样编译会快很多,编译器会自动编译变动的部份。
当排除错误时就应当clean一下(当出现莫名其妙的错误时,就要想到可能是没有clean导致的)---出错可以参考上一篇文章openvswitch2.11.0修改源码后重新编译
4.使用sudo ./configure --with-linux=/lib/modules/`uname -r`/build配置
./configure是源代码安装的第一步,主要的作用是对即将安装的软件进行配置,检查当前的环境是否满足要安装软件的依赖关系,但并不是所有的tar包都是源代码的包,可以ls看看有没有configure这个文件,如果是二进制的包,解压后直接就能使用
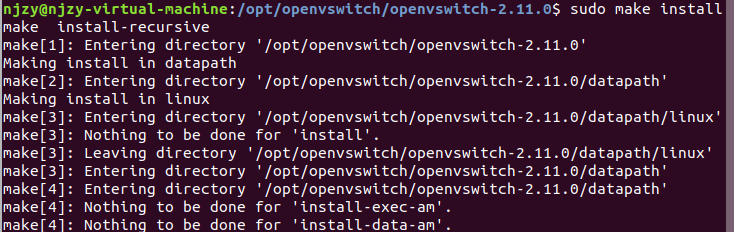
5.进行编译sudo make

6.进行sudo make install
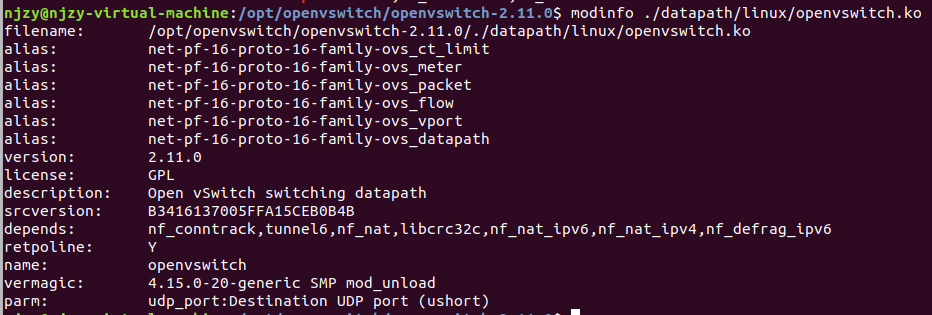
7.在编译内核模块之前,我们将之前的ko模块备份出去
查看ko文件位置 modinfo openvswitch

备份原始ko文件,删除原始文件


8.开始编译内核文件sudo make modules_install

lsmod | grep bridge    查看原始程序是否在运行(我们前面以及关闭了,这里应该没有输出信息)
lsmod | grep openvswitch
9.加载内核模块sudo modprobe openvswitch

使用lsmod | grep open查看是否加载了内核
查看内核信息
10.后面还有操作 modprobe -D openvswitch 进行内核模块插入

modinfo /lib/modules/4.15.0-20-generic/extra/openvswitch.ko


原本在二中,没有这个extra文件夹和这些内核模块。在make modules_install后出现

原始源文件中,被删除了openswitch.ko,编译后没有在这个文件中出现
11.初始化数据库配置文件---一定要做
sudo mkdir -p /usr/local/etc/openvswitch
sudo ovsdb-tool create /usr/local/etc/openvswitch/conf.db vswitchd/vswitch.ovsschema
ls /usr/local/etc/openvswitch

重点补充:若是在后面出现pr_info无法输出,说明我们编译的新的内核并没有插入到系统中,我们需要进行以下操作
首先移除原有内核
sudo rmmod openvswitch
进入ovs根目录下的datapath/linux:

然后执行insmod操作,进行插入操作:
insmod openvswitch.ko

五:后续问题
(一)使用mn进行测试,出现下面错误
*** Creating  network
*** Adding controller
*** Adding hosts:
h1 h2
*** Adding switches:
ovs-vsctl: unix:/usr/local/var/run/openvswitch/db.sock: database connection failed (No such file or directory)
ovs-vsctl exited with code 1
*** Error connecting to ovs-db with ovs-vsctl
Make sure that Open vSwitch is installed, that ovsdb-server is running, and that
"ovs-vsctl show" works correctly.
You may wish to try "service openvswitch-switch start"
(二)网上查找解决方案
ovsdb-server --remote=punix:/usr/local/var/run/openvswitch/db.sock --remote=db:Open_vSwitch,Open_vSwitch,manager_options --pidfile --detach
ovs-vsctl --no-wait init
ovs-vswitchd --pidfile --detach --log-file
(三)出现不能创建/usr/local/var/run/openvswitch/db.sock,没有这个文件或者目录

原本没有run目录,无法创建递归目录导致错误。我们使用sudo mkdir -p /usr/local/var/run/openvswitch/
解决问题
(四)将(三)上面的解决方案,设置为sh脚本
boot_ovs.sh就是,sudo chmod 777 ./boot_ovs.sh
启动即可
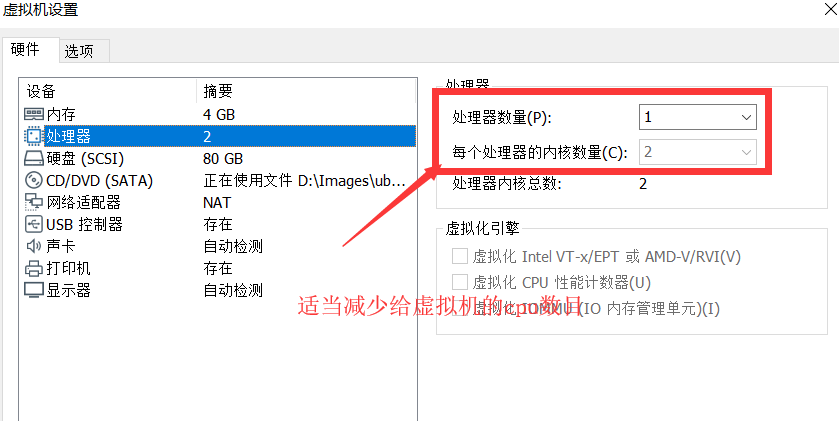
(五)启动过程中,因为在虚拟机中启动,可能出现客户端禁用cpu,导致Ubuntu系统卡死---修改内核出错导致
之前我给了2个cpu,一个2核。应该适当降低
其实:这里应该是因为我们上面使用的内核文件操作函数有问题,导致的。因为后面发现一使用复杂拓扑就失效了,依旧出现CPU禁用现象
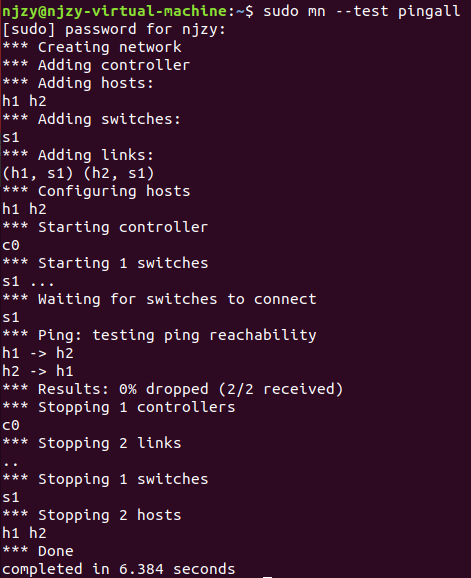
五:测试结果
(一)开启mn
sudo mn --test pingall