用法一:
在开发应用程序的时候,经常会遇到这样的情况,会在运行时动态根据条件来决定显示哪个View或某个布局。那么最通常的想法就是把可能用到的View都写在上面,先把它们的可见性都设为View.GONE,然后在代码中动态的更改它的可见性。这样的做法的优点是逻辑简单而且控制起来比较灵活。但是它的缺点就是耗费资源。虽然把View的初始可见View.GONE但是在Inflate布局的时候View仍然会被Inflate,也就是说仍然会创建对象,会被实例化,会被设置属性。也就是说,会耗费内存等资源。
推荐的做法是使用Android.view.ViewStub,ViewStub是一个轻量级的View,占用资源非常小的控件。在Inflate布局的时候,只有ViewStub会被初始化,然后当ViewStub被设置为可见的时候(默认是不可见的),或是调用了ViewStub.inflate()的时候,ViewStub所向的布局就才会被Inflate和实例化。
但ViewStub也不是万能的,下面总结下ViewStub能做的事儿和什么时候该用ViewStub,什么时候该用可见性的控制。
首先来说说ViewStub的一些特点:
(1) ViewStub只能Inflate一次,之后ViewStub对象会被置为空。按句话说,某个被ViewStub指定的布局被Inflate后,就不会够再通过ViewStub来控制它了。
(2) ViewStub只能用来Inflate一个布局文件,而不是某个具体的View,当然也可以把View写在某个布局文件中。
基于以上的特点,那么可以考虑使用ViewStub的情况有:
(1) 在程序的运行期间,某个布局在Inflate后,就不会有变化,除非重新启动。
因为ViewStub只能Inflate一次,之后会被置空,所以无法指望后面接着使用ViewStub来控制布局。所以当需要在运行时不止一次的显示和隐藏某个布局,那么ViewStub是做不到的。这时就只能使用View来控制了。
(2) 想要控制显示与隐藏的是一个布局文件,而非某个View。
因为设置给ViewStub的只能是某个布局文件的Id,所以无法让它来控制某个View。
所以,如果想要控制某个View(如Button或TextView)的显示与隐藏,或者想要在运行时不断的显示与隐藏某个布局或View,只能使用View来控制。
下面来看一个实例
在这个例子中,要显示二种不同的布局,一个是用TextView显示一段文字,另一个则是用ImageView显示一个图片。这二个是在onCreate()时决定是显示哪一个,这里就是应用ViewStub的最佳地点。
先来看看布局,一个是主布局,里面只定义二个ViewStub,一个用来控制TextView一个用来控制ImageView,另外就是一个是为显示文字的做的TextView布局,一个是为ImageView而做的布局:
 1 <?xml version="1.0" encoding="utf-8"?>
 2 <LinearLayout
 3     xmlns:android="http://schemas.android.com/apk/res/android"
 4     android:orientation="vertical"
 5     android:layout_width="fill_parent"
 6     android:layout_height="fill_parent"
 7     android:gravity="center_horizontal">
 8     <ViewStub
 9         android:id="@+id/viewstub_demo_text"
10         android:layout_width="wrap_content"
11         android:layout_height="wrap_content"
12         android:layout_marginLeft="5dip"
13         android:layout_marginRight="5dip"
14         android:layout_marginTop="10dip"
15         android:layout="@layout/viewstub_demo_text_layout"/>
16     <ViewStub
17         android:id="@+id/viewstub_demo_image"
18         android:layout_width="wrap_content"
19         android:layout_height="wrap_content"
20         android:layout_marginLeft="5dip"
21         android:layout_marginRight="5dip"
22         android:layout="@layout/viewstub_demo_image_layout"/>
23 </LinearLayout>
 1 // ...
 2 @Override
 3 public void onCreate(Bundle savedInstanceState) {
 4      super.onCreate(savedInstanceState);
 5      setContentView(R.layout.viewstub_demo_activity);
 6      if ((((int) (Math.random() * 100)) & 0x01) == 0) {
 7      ViewStub stub = (ViewStub) findViewById(R.id.viewstub_demo_text); // 获取布局
 8      stub.inflate(); // 实例化
 9
10      TextView text = (TextView) findViewById(R.id.viewstub_demo_textview);
11      text.setText("Hello World");
12      } else {
13           ViewStub stub = (ViewStub) findViewById(R.id.viewstub_demo_image);
14           stub.inflate();
15
16           ImageView image = (ImageView) findViewById(R.id.viewstub_demo_imageview);
17           image.setImageResource(R.drawable.img);
18      }
19 }
20 //  ...
还有类似新内容、新功能提示,这种只会显示一次,且不会发生变化的ViewStub都是挺适合的。
用法二:
ViewStub还有类似于<include>标签的用法,只不过<ViewStub>是不可见的控件。当布局文件使用<ViewStub>标签来引用其他布局文件时并不会马上装载引用的布局文件,只会在调用了ViewStub.inFlate获ViewStub.setVisibility(View.VISIBLE)方法后,ViewStub才会装载引用的控件。而<include>会把引用的所以布局文件一次性的全部加载,造成资源的浪费。下面看个实例:
custom.xml
 1 <?xml version="1.0" encoding="utf-8"?>
 2 <LinearLayout
 3     xmlns:android="http://schemas.android.com/apk/res/android"
 4     android:orientation="vertical"
 5     android:layout_width="match_parent"
 6     android:layout_height="match_parent">
 7    <Button
 8        android:layout_width="match_parent"
 9        android:layout_height="warp_parent"
10         android:text="我是按钮1"
11         android:onclick="onClick_Button">
12    <Button
13        android:layout_width="match_parent"
14        android:layout_height="warp_parent"
15         android:text="我是按钮2"
16         android:onclick="onClick_Button">
17 </LinearLayout>
采用<include>引用:
 1 <?xml version="1.0" encoding="utf-8"?>
 2 <LinearLayout
 3     xmlns:android="http://schemas.android.com/apk/res/android"
 4     android:orientation="vertical"
 5     android:layout_width="match_parent"
 6     android:layout_height="match_parent">
 7     <Button
 8         android:layout_width="match_parent"
 9         android:layout_height="warp_parent"
10         android:text="我是按钮"
11         android:onclick="onClick_Button">
12      <include layout="@layout/custom"/>
13 </LinearLayout>
图一:采用<include>引用后显示的效果
采用<ViewStub>引用:
 1 <?xml version="1.0" encoding="utf-8"?>
 2 <LinearLayout
 3     xmlns:android="http://schemas.android.com/apk/res/android"
 4     android:orientation="vertical"
 5     android:layout_width="match_parent"
 6     android:layout_height="match_parent">
 7     <Button
 8         android:layout_width="match_parent"
 9         android:layout_height="warp_parent"
10         android:text="我是按钮"
11         android:onclick="onClick_Button">
12      <ViewStub
13         android:id="@+id/viewstub"
14         android:inflatedId="@+id/button_layout"
15         layout="@layout/custom"
16         android:layout_width="match_parent"
17         android:layout_height="warp_parent"/>
18 </LinearLayout>

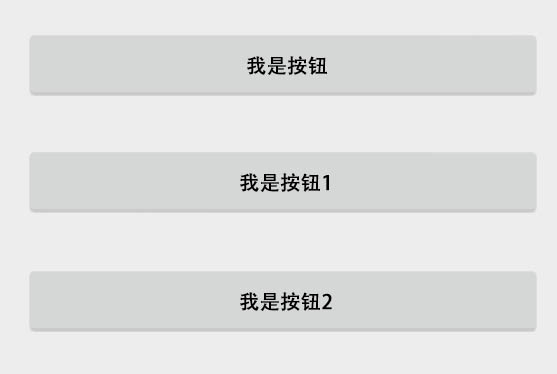
图二:采用<ViewStub>引用后显示的效果
在使用<ViewStub>标签引用布局文件后,还需要调用ViewStub.inflate或ViewStub.setVisibility(View.VISIBLE)方法才能装载所引用的空间,代码如下:
 1 public void onClick_Button(View v) {
 2     // ViewStub 控件只能获得1次,第2次再使用findViewById获得该ViewStub对象,则返回null
 3     View view = findViewById(R.id.viewstub);
 4     if(view !=  null) {
 5         // 或者调用ViewStub.inflate方法
 6         // view = ((ViewStub)  view).inflate();
 7         // 装载ViewStub引用的custom.xml文件的控件
 8         ((ViewStub) view).setVisibility(View.VISIBLE);
 9     } else {
10          setTitle("view is null");
11     }
12 }
单击“我的按钮”后,会显示在custom.xml文件中定义的两个按钮,效果如图二所示。
| 注意:<ViewStub>与<include>标签一样,也可以设置引用布局文件中根节点所有与布局相关的熟悉。所不同的是<include>标签的 android:id 属性直接覆盖了所引用的布局文件中的根节点的 android:id 属性值,而<ViewStub>标签的 android:id 属性与普通控件标签的 android:id 属性一样,用于在代码中引用控件,在<ViewStub>标签中需要使用 android:inflatedId 属性覆盖所引用布局文件中根节点的 android:id 属性值。 |