一、父组件向子组件传值
通过props来实现,子组件通过props来接收父组件传过来的值!
1、逻辑梳理
父组件中:
第一步:引入子组件;
1 import sonShow from '@/component/son.vue';
第二步:在components中对子组件进行注册;
1 components: {
2     sonShow
3 },
4
第三步:以标签的形式载入;通过数据绑定的形式进行传值~
1 <son-show :reciveUserInfo="userInfo"></son-show>
子组件中:
通过props接收父组件中传过来的值;
1 props:["reciveUserInfo"],
2、代码展示
父组件index.vue
 1 <template>
 2     <view class="content">
 3         <son-show :reciveUserInfo="userInfo"></son-show>
 4     </view>
 5 </template>
 6
 7 <script>
 8     import sonShow from '../../component/son.vue';
 9     export default {
10         components: {
11             sonShow
12         },
13         data() {
14             return {
15                 userInfo: [{
16                         "userName": "kaliwo",
17                         "age": "19"
18                     },
19                     {
20                         "userName": "lihuahua",
21                         "age": "39"
22                     }
23                 ]
24             }
25         }
26     }
27 </script>
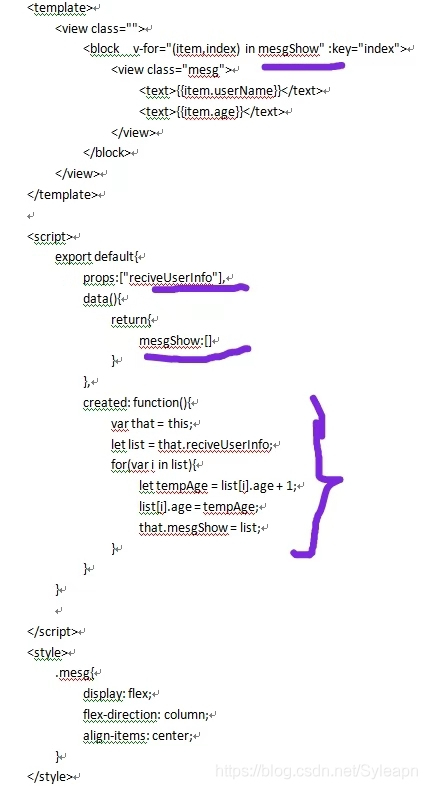
子组件son.vue
 1 <template>
 2     <view class="">
 3         <block  v-for="(item,index) in reciveUserInfo" :key="index">
 4             <view class="mesg">
 5                 <text>{{item.userName}}</text>
 6                 <text>{{item.age}}</text>
 7             </view>
 8         </block>
 9     </view>
10 </template>
11
12 <script>
13     export default{
14         props:["reciveUserInfo"],
15     }
16 </script>
17 <style>
18     .mesg{
19         display: flex;
20         flex-direction: column;
21         align-items: center;
22     }
23 </style>
24
25
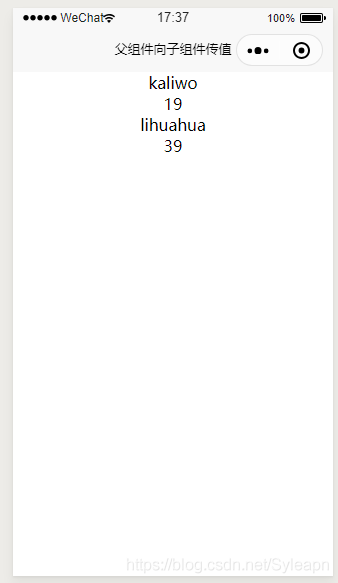
3、结果
四、说明
对于一些详情页,比如有时我们需要点赞数量+1,-1的效果;但是,由于子组件不能改变父组件的值,所以直接操作从父组件接收的值进行更改是没有效果的!就像如下:
1      let list = that.reciveUserInfo;
2         for(var i in list){
3         let tempAge = list[i].age + 1;
4         list[i].age = tempAge;
5         that.reciveUserInfo = list;
6     }
年龄还是没有改变。所以应该怎么做了?
把从父组件接收到的值reciveUserInfo赋给一个新的变量mesgShow,对这个新的变量进行操作,然后用对齐进行渲染即可!
1 let list = that.reciveUserInfo;
2     for(var i in list){
3        let tempAge = list[i].age + 1;
4        list[i].age = tempAge;
5        that.mesgShow = list;
6 }
附加:改变的代码:
二、子组件向父组件传值
父组件index.vue 在父类引用标签上写上在子类$emit里面定义的方法名:send, 以及接收方法
 1 <template>
 2     <view class="content">
 3         <son-show @send="getSonValue"></son-show>
 4     </view>
 5 </template>
 6
 7 <script>
 8     import sonShow from '../../component/son.vue';
 9     export default {
10         components: {
11             sonShow
12         },
13         methods:{
14             getSonValue: function(res){
15                 console.log("res=========",res)
16             }
17         }
18     }
19 </script>
子组件;
 1 <template>
 2     <view class="" @click="sendMegToIndex">
 3         点我向父组件传值
 4     </view>
 5 </template>
 6
 7 <script>
 8     export default{
 9         methods:{
10             sendMegToIndex: function(){
11                 // 向父组件传值  第一个参数是方法名:send   第二个参数是传递的值:我是来自子组件的值
12                 this.$emit("send","我来自子组件")
13             }
14         }
15     }
16
17 </script>
18
19
三. 兄弟组件传值
定义一个eventBus.js文件,导出一个空的vue对象,在兄弟组件中引入bus.js的文件,在A组件通过bus.e m i t ( ) 传 递 , 在 B 组 件 中 的 c r e a t e d 函 数 中 ,
使 用 b u s . emit()传递,在B组件中的created函数中,使用bus.emit()传递,在B组件中的created函数中,使用bus.on接受
根组件如下:
 1 <template>
 2   <div id="app">
 3     <ChildA/>
 4     <ChildB/>
 5   </div>
 6 </template>
 7
 8 <script>
 9   import ChildA from './components/ChildA' // 导入A组件
10   import ChildB from './components/ChildB' // 导入B组件
11
12   export default {
13     name: 'App',
14     components: {ChildA, ChildB} // 注册A、B组件
15   }
16 </script>
兄弟A组件如下:
 1 <template>
 2   <div id="childA">
 3     <h1>我是A组件</h1>
 4     <button @click="transform">点我让B组件接收到数据</button>
 5     <p>因为你点了B,所以我的信息发生了变化:{{BMessage}}</p>
 6   </div>
 7 </template>
 8
 9 <script>
10   export default {
11     data() {
12       return {
13         AMessage: 'Hello,B组件,我是A组件'
14       }
15     },
16     computed: {
17       BMessage() {
18         // 这里存储从store里获取的B组件的数据
19         return this.$store.state.BMsg
20       }
21     },
22     methods: {
23       transform() {
24         // 触发receiveAMsg,将A组件的数据存放到store里去
25         this.$store.commit('receiveAMsg', {
26           AMsg: this.AMessage
27         })
28       }
29     }
30   }
31 </script>
兄弟B组件如下
 1 <template>
 2   <div id="childB">
 3     <h1>我是B组件</h1>
 4     <button @click="transform">点我让A组件接收到数据</button>
 5     <p>因为你点了A,所以我的信息发生了变化:{{AMessage}}</p>
 6   </div>
 7 </template>
 8
 9 <script>
10   export default {
11     data() {
12       return {
13         BMessage: 'Hello,A组件,我是B组件'
14       }
15     },
16     computed: {
17       AMessage() {
18         // 这里存储从store里获取的A组件的数据
19         return this.$store.state.AMsg
20       }
21     },
22     methods: {
23       transform() {
24         // 触发receiveBMsg,将B组件的数据存放到store里去
25         this.$store.commit('receiveBMsg', {
26           BMsg: this.BMessage
27         })
28       }
29     }
30   }
31 </script>
四. 通过vuex来实现组件传值
在src中新建一个store文件夹,在文件夹中新建一个 index.js 文件
 1 import Vue from 'vue'
 2 import Vuex from 'vuex'
 3 Vue.use(Vuex)
 4 const state = {
 5   // 初始化A和B组件的数据,等待获取
 6   AMsg: '',
 7   BMsg: ''
 8 }
 9
10 const mutations = {
11   receiveAMsg(state, payload) {
12     // 将A组件的数据存放于state
13     state.AMsg = payload.AMsg
14   },
15   receiveBMsg(state, payload) {
16     // 将B组件的数据存放于state
17     state.BMsg = payload.BMsg
18   }
19 }
20
21 export default new Vuex.Store({
22   state,
23   mutations
24 })