| ylbtech-Code:NLog |
| 1. NLog介绍使用返回顶部 |
NLog是什么
NLog是一个基于.NET平台编写的类库,我们可以使用NLog在应用程序中添加极为完善的跟踪调试代码。
NLog是一个简单灵活的.NET日志记录类库。通过使用NLog,我们可以在任何一种.NET语言中输出带有上下文的(contextual information)调试诊断信息,根据喜好配置其表现样式之后发送到一个或多个输出目标(target)中。
NLog的API非常类似于log4net,且配置方式非常简单。NLog使用路由表(routing table)进行配置,这样就让NLog的配置文件非常容易阅读,并便于今后维护。
NLog遵从BSD license,即允许商业应用且完全开放源代码。任何人都可以免费使用并对其进行测试,然后通过邮件列表反馈问题以及建议。
NLog支持.NET、C/C++以及COM interop API,因此我们的程序、组件、包括用C++/COM 编写的遗留模块都可以通过同一个路由引擎将信息发送至NLog中。
简单来说Nlog就是用来记录项目日志的组件
NLog日志输出目标
文件 比如TXT、Excel
文本控制台
Email
数据库
网络中的其它计算机(通过TCP或UDP)
基于MSMQ的消息队列
Windows系统日志
NLog使用
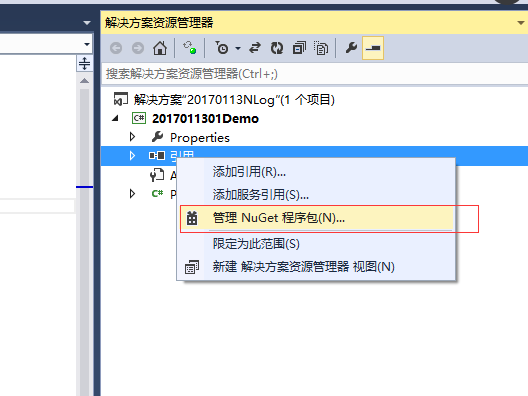
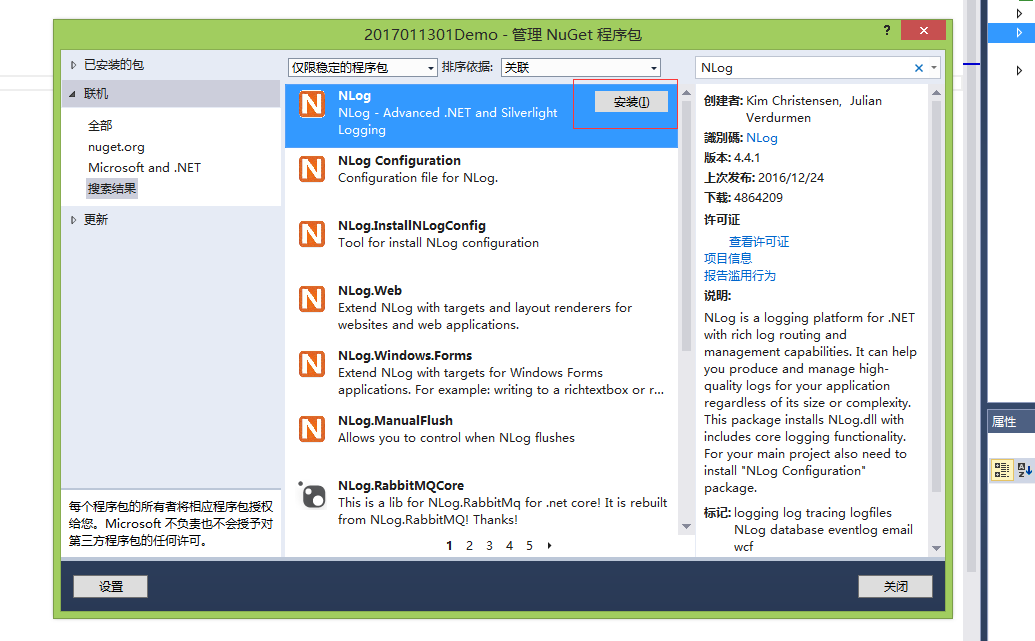
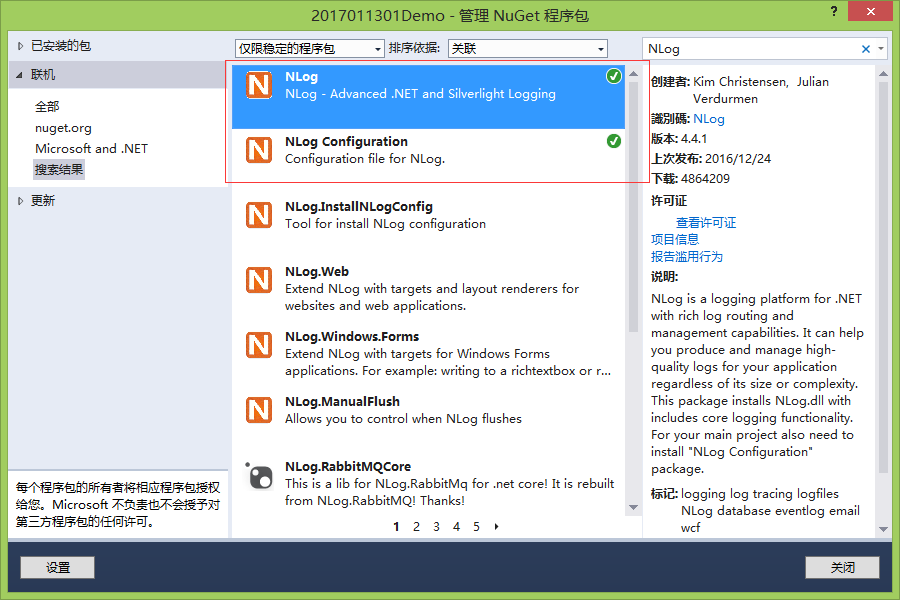
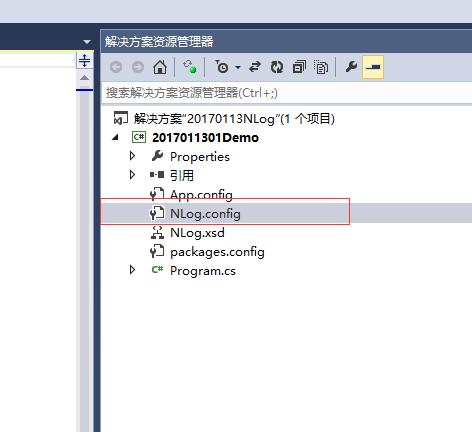
直接用NuGet安装就行了


简单的Demo
<?xml version="1.0" encoding="utf-8" ?>
<nlog xmlns="http://www.nlog-project.org/schemas/NLog.xsd"
      xmlns:xsi="http://www.w3.org/2001/XMLSchema-instance"
      xsi:schemaLocation="http://www.nlog-project.org/schemas/NLog.xsd NLog.xsd"
      autoReload="true"
      throwExceptions="false"
      internalLogLevel="Off"
      internalLogFile="c:	emp
log-internal.log">
  <variable name="myvar" value="myvalue"/>
  <targets>
    <target xsi:type="File" name="SimpleDemoFile" fileName="../../../Logs/SimpleDemo.txt" layout="${message}" encoding="UTF-8"/>
  </targets>
  <rules>
    <logger name="SimpleDemo" level="Error" writeTo="SimpleDemoFile"/>
  </rules>
</nlog>
using NLog;
using System;
using System.Collections.Generic;
using System.Linq;
using System.Text;
using System.Threading.Tasks;

namespace _2017011301SimpleDemo
{
    class Program
    {
      public static Logger logger = LogManager.GetLogger("SimpleDemo");
        static void Main(string[] args)
        {
            Console.WriteLine("执行开始");
            logger.Error("Hello World");
            Console.WriteLine("执行结束");
            Console.ReadKey();
        }
    }
}
输出到 ../../../Logs/SimpleDemo.txt 内容为 Hello World
NLog配置
<?xml version="1.0" encoding="utf-8" ?>
<nlog xmlns="http://www.nlog-project.org/schemas/NLog.xsd"
xmlns:xsi="http://www.w3.org/2001/XMLSchema-instance"
xsi:schemaLocation="http://www.nlog-project.org/schemas/NLog.xsd NLog.xsd"
autoReload="true"
throwExceptions="false"
internalLogLevel="Off“
internalLogFile="c: emp
log-internal.log">
<variable name="myvar" value="myvalue"/>
<targets> </targets>
<rules> </rules>
</nlog>
xmlns=“http://www.nlog-project.org/schemas/NLog.xsd” 这表示默认命名空间
xmlns:xsi="http://www.w3.org/2001/XMLSchema-instance" 这个命名空间里面的元素或者属性就必须要以xsi:这种方式来写
比如schemaLocation就是他的一个属性,所以写成xsi:schemaLocation
而默认命名空间不带类似xsi这种,其实xml标签名称有个专业叫法叫做QName,而如果没有前面的xsi:这种一般叫做NCName
xsi:schemaLocation="http://www.nlog-project.org/schemas/NLog.xsd NLog.xsd"
表示把定义这个命名空间的schema文件给引用进来,好让开发类型工具能够解析和验证你的xml文件是否符合语法规范
等同于
简单来说 上面是用来验证你XML格式是否正确的。
InternalLogFile="c:log
log.txt" //NLog内部日志文件位置
internalLogLevel="Debug" //日志级别
autoReload:一旦启动程序,这时候NLog.config文件被读取后,知道程序再启动都不会再读取配置文件了。假如我们不想停掉程序,比如说服务器哪能说停就停哈。这就用上这个配置了,这个配置功能是,一旦你对配置文件修改,程序将会重新读取配置文件,也就是自动再配置。
throwExceptions//NLog日志系统抛出异常
internalLogFile="c:log
log.txt" //NLog内部日志文件位置
internalLogLevel="Debug" //日志级别
<variable /> - 定义配置文件中用到的变量
<targets /> - 定义日志的目标/输出
<rules /> - 定义日志的路由规则
Layout布局
几种常见的
${var:basePath} basePath是前面自定义的变量
${longdate} 日期格式 2017-01-17 16:58:03.8667
${shortdate}日期格式 2017-01-17
${date:yyyyMMddHHmmssFFF} 日期 20170117165803866
${message} 输出内容
${guid} guid
${level}日志记录的等级
${logger} 配置的logger
NLog记录等级
Trace - 最常见的记录信息,一般用于普通输出
Debug - 同样是记录信息,不过出现的频率要比Trace少一些,一般用来调试程序
Info - 信息类型的消息
Warn - 警告信息,一般用于比较重要的场合
Error - 错误信息
Fatal - 致命异常信息。一般来讲,发生致命异常之后程序将无法继续执行。
自上而下,等级递增。
NLog等级使用
指定特定等级 如:level="Warn"
指定多个等级 如:levels=“Warn,Debug“ 以逗号隔开
指定等级范围 如:minlevel="Warn" maxlevel="Error"
Logger使用
从配置文件读取信息并初始化 两种常用的方式
根据配置的路由名获生成特定的logger Logger logger = LogManager.GetLogger("LoggerDemo");
初始化为当前命名空间下当前类的logger Logger logger = LogManager.GetCurrentClassLogger();
区别是logger的name不一样 前者是LoggerDemo,后者是当前命名空间+点+当前类名 如类比较多,并且往同一个日志文件记录,建议用GetCurrentClassLogger
Logger有以下三种常用的写入方式
logger.Error("这是DatabaseDemo的错误信息");
logger.Error(“ContentDemo {0}:{1}”,“时间”,DateTime.Now.ToString());需要拼接字符串的话推荐这种,NLog做了延迟处理,用的时候才拼接。
logger.Log(LogLevel.Error, "这是ContentDemo");
Logger发邮件参数
smtpServer=“*****” 邮件服务器 例如126邮箱是smtp.126.com
smtpPort=“25“端口
smtpAuthentication=“Basic“ 身份验证方式 基本
smtpUserName=“*****“ 邮件服务器用户名
smtpPassword=“******”邮件服务器密码
enableSsl=“false”是否使用安全连接 需要服务器支持
addNewLines=“true” 开头与结尾是否换行
from=“****” 发件邮箱
to=“XXXX@XX.com,XXXXX@XX.com”收件邮箱 多个以逗号分隔
subject=“subject:${machinename}报错“ 邮件主题
header=“---------------------开头-------------------------“ 邮件开头
body=“${newline}${message}${newline}“ 邮件内容
footer=“---------------------结尾-------------------------“ 邮件结尾
<?xml version="1.0" encoding="utf-8" ?>
<nlog xmlns="http://www.nlog-project.org/schemas/NLog.xsd"
      xmlns:xsi="http://www.w3.org/2001/XMLSchema-instance"
      xsi:schemaLocation="http://www.nlog-project.org/schemas/NLog.xsd NLog.xsd"
      autoReload="true"
      throwExceptions="true"
      internalLogLevel="Off"
      internalLogFile="c:	emp
log-internal.log">

  <!-- optional, add some variables
  https://github.com/nlog/NLog/wiki/Configuration-file#variables
  -->
  <variable name="basePath" value="C:UsersacharyDesktop练习20170113NLogLogs"/>

  <targets>
    <target xsi:type="Mail"
            name="SendMail"
            smtpServer="你的邮件服务器"
            smtpPort="你的邮件服务器端口"
            smtpAuthentication="Basic"
            smtpUserName="你的邮件服务器名"
            smtpPassword="你的邮件服务器密码"
            enableSsl="false"
            addNewLines="false"
            from="你的发件邮箱"
            to="你的收件邮箱"
            subject="subject:${machinename}报错"
            header="---------------------开头-------------------------"
            body="${newline}${message}${newline}"
            footer="---------------------结尾-------------------------"
            encoding="UTF-8"/>
  </targets>

  <rules>
    <logger name="*" level="Error"  writeTo="SendMail"></logger>
  </rules>
</nlog>
Logger写入数据库参数
<target xsi:type="Database"
name="DatabaseFile"
dbProvider=“System.Data.SqlClient”数据库类型
commandText=“Insert into ErrorLog(ID, Content, CreateTime) Values(@id, @content, @createTime);”插入操作
connectionString=“data source=.;initial catalog=NLog;user id=sa;password=******;”> 数据库连接字符串 跟我们webcofig中的一样
<parameter name=“@id” layout=“${guid}” /> 参数
<parameter name="@content" layout="${message}" />
<parameter name="@createTime" layout="${date:format=yyyy-MM-dd HH:mm:ss.fff} " />
</target>
需在数据库里提前建好表
<?xml version="1.0" encoding="utf-8" ?>
<nlog xmlns="http://www.nlog-project.org/schemas/NLog.xsd"
      xmlns:xsi="http://www.w3.org/2001/XMLSchema-instance"
      xsi:schemaLocation="http://www.nlog-project.org/schemas/NLog.xsd NLog.xsd"
      autoReload="true"
      throwExceptions="true"
      internalLogLevel="Off"
      internalLogFile="../../../Logs/nlog-internal.log">

  <targets>
    <target xsi:type="Database"
            name="DatabaseFile"
            dbProvider="System.Data.SqlClient"
            commandText="Insert into ErrorLog(ID, Content, CreateTime) Values(@id, @content, @createTime);"
            connectionString="data source=.;initial catalog=NLog;user id=sa;password=你的数据库密码;">
    <parameter name="@id" layout="${guid}" />
    <parameter name="@content" layout="${message}" />
    <parameter name="@createTime" layout="${date:format=yyyy-MM-dd HH:mm:ss.fff} " />
    </target>
  </targets>
  <rules>
    <logger name="Database" level="Error" writeTo="DatabaseFile"/>
  </rules>
</nlog>
NLog.config可以单独放,也可以放在WebConfig里。
在configuration配置
<configSections>
    <section name="nlog" type="NLog.Config.ConfigSectionHandler, NLog"/>
  </configSections>
然后把NLog.config里面放在后面就行了。
<configuration>
  <configSections>
    <section name="nlog" type="NLog.Config.ConfigSectionHandler, NLog"/>
  </configSections>
  <nlog xmlns="http://www.nlog-project.org/schemas/NLog.xsd"
      xmlns:xsi="http://www.w3.org/2001/XMLSchema-instance"
      xsi:schemaLocation="http://www.nlog-project.org/schemas/NLog.xsd NLog.xsd"
      autoReload="true"
      throwExceptions="true"
      internalLogLevel="Off"
      internalLogFile="c:	emp
log-internal.log">
    <variable name="myvar" value="myvalue"/>
    <targets async="false">
      <target xsi:type="File" name="WebDemoFile" fileName="C:UsersacharyDesktop练习20170113NLogLogs${date:yyyyMMddHHmm}WebDemo.txt" layout="${longdate} ${message}" encoding="UTF-8"/>
    </targets>
    <rules>
      <logger name="WebDemo" level="Error" writeTo="WebDemoFile"/>
    </rules>
  </nlog>
</configuration>
| 2. 常用配置返回顶部 |
<?xml version="1.0" encoding="utf-8" ?>
<nlog xmlns="http://www.nlog-project.org/schemas/NLog.xsd"
      xmlns:xsi="http://www.w3.org/2001/XMLSchema-instance">

  <!--
  See https://github.com/nlog/nlog/wiki/Configuration-file
  for information on customizing logging rules and outputs.
   -->
  <targets>
    <default-wrapper xsi:type="AsyncWrapper">
      <wrapper-target xsi:type="RetryingWrapper"/>
    </default-wrapper>
    <!-- add your targets here -->
    <target xsi:type="File" name="AllLog" fileName="${basedir}/App_Data/logs/${shortdate}/all.log" layout="${longdate} ${uppercase:${level}} [${threadid}] ${logger} - ${message} ${exception:format=tostring}" />
    <target xsi:type="File" name="DebugLog" fileName="${basedir}/App_Data/logs/${shortdate}/debug.log" layout="${longdate} [${threadid}] ${logger} - ${message} ${exception:format=tostring}" />
    <target xsi:type="File" name="DelayDebug" fileName="${basedir}/App_Data/logs/${shortdate}/debug.log" layout="${longdate}-${message} ${exception:format=tostring}" />
    <target xsi:type="File" name="ErrorLog" fileName="${basedir}/App_Data/logs/${shortdate}/error.log" layout="${longdate} [${threadid}] ${logger} - ${message} ${exception:format=tostring}" />
    <target xsi:type="File" name="FatalLog" fileName="${basedir}/App_Data/logs/${shortdate}/fatal.log" layout="${longdate} [${threadid}] ${logger} - ${message} ${exception:format=tostring}" />
    <target xsi:type="File" name="InfoLog" fileName="${basedir}/App_Data/logs/${shortdate}/info.log" layout="${longdate} [${threadid}] ${logger} - ${message} ${exception:format=tostring}" />
    <target xsi:type="File" name="TraceLog" fileName="${basedir}/App_Data/logs/${shortdate}/trace.log" layout="${longdate} [${threadid}] ${logger} - ${message} ${exception:format=tostring}" />
    <target xsi:type="File" name="WarnLog" fileName="${basedir}/App_Data/logs/${shortdate}/warn.log" layout="${longdate} [${threadid}] ${logger} - ${message} ${exception:format=tostring}" />

    <target xsi:type="NLogViewer"
            name="viewer"
            address="udp://127.0.0.1:9999"/>
  </targets>

  <rules>
    <!-- add your logging rules here -->
    <logger name="*" minlevel="Trace" writeTo="AllLog" />
    <logger name="*" level="Debug" writeTo="DelayDebug" />
    <logger name="*" level="Error" writeTo="ErrorLog" />
    <logger name="*" level="Fatal" writeTo="FatalLog" />
    <logger name="*" level="Info" writeTo="InfoLog" />
    <logger name="*" level="Trace" writeTo="TraceLog" />
    <logger name="*" level="Warn" writeTo="WarnLog" />
    <logger name="*"
                minlevel="Trace"
                writeTo="viewer" />
  </rules>
</nlog>
| 3.返回顶部 |
| 4.返回顶部 |
| 5.返回顶部 |
| 6.返回顶部 |
| 作者:ylbtech 出处:http://ylbtech.cnblogs.com/ 本文版权归作者和博客园共有,欢迎转载,但未经作者同意必须保留此段声明,且在文章页面明显位置给出原文连接,否则保留追究法律责任的权利。 |
