废话先:最近事情比较多,有些不知所措了。那就写写博客,让自己冷静下来。
在WCF中与服务器通信,可以通过共享WSDL-契约,当然在非常松散耦合的项目里,对客户端和服务端的代码有绝对的控制权,可以使用channelFactory类而不是自动创建的代理与服务器进行通信,怎么说呢,这个channelFactory是用在中间层的,它的好处就是提高了系统的性能,channelFactory对象只是为每个客户端打开一个独立的通道。
下面我们先来说说通过WSDL,客户端和服务端进行通信
在SOA的世界中呢,使用某一个特定的服务提供的服务,通常是得不到dll的,取而代之的是WSDL文档,这个文档被共享,也就是说,所有的客户端和服务都可以得到它,在WSDL里包含了所有的信息,比如:服务的操作,交换数据的结构,安全等等。客户端是通过WSDL文档与服务端交流的,至于服务端内部是怎么实现的,客户端没有必要知道,客户端也与服务端不同享任何的代码。那么我们怎么生成这个代理呢?
HOW?
首先了我们先来晚上下我们服务端的代码的编写。这是我的服务端的项目结构: 
在这里呢,我们先不管IEmployee.cs和Employee.cs。在这个项目中我们还用不到,这是关于在WCF中使用REST技术的Demo.具体的下次我会发布在我的博客园上来与大家共享。在我们的IprintStr.cs接口中呢,我们来定义如下
namespace serviceHost
{
[ServiceContract]
public interface IprintStr
{
[OperationContract]
string printStr(string name);
}
}
与之对应的printStr.cs中也就是实现上面的接口
namespace serviceHost
{
public class service:IprintStr
{
public string printStr(string name)
{
return name;
}
}
}
因为只是一个简单的测试,这里没有写得那么的复杂。
好了,到了这步,我们应该就要写配置文件了,当然了,你也可以通过代码实现配置文件中的配置信息,不过我个人觉得,这样做,有些浪费时间,有更好的方法,就用更好的方法呗。
这是我在App.config文件里的配置信息
<?xml version="1.0" encoding="utf-8" ?>
<configuration>
<system.serviceModel>
<service name="serviceHost.service" behaviorConfiguration="messageBehavior">
<host>
<baseAddresses>
<add baseAddress="http://localhost:4040/getInfo/"/>
</baseAddresses>
</host>
<endpoint address="" binding="wsHttpBinding" contract="serviceHost.IprintStr"/>
<endpoint address="net.tcp://localhost:5050/" binding="netTcpBinding" contract="serviceHost.IprintStr"/>
</service>
</services>
<behaviors>
<serviceBehaviors>
<behavior name="messageBehavior">
<serviceMetadata httpGetEnabled="true"/>
<serviceDebug includeExceptionDetailInFaults="true"/>
</behavior>
</serviceBehaviors>
</behaviors>
</system.serviceModel>
</configuration>
在配置文件中的<service>中的name属性的命名规范是:命名空间+类名,而在<endpoint>中的contract的命规范是:命名空间+接口名。这一点一定要搞清楚,娶她的也没有什么好说的,当然如果你想查看元数据,可以在<serviceMetadata>中进行配置。这里我不在多说了。最后一点就是在<service></service>中<baseAddress></baseAddress>里面可以添加多个<add></add>也就是基地址,这里要说的就是一个服务可以有多个基地址,但是呢,一个协议只能有一个基地址。使用基地址的好处就是多个终结点可以使用同一个基地址,当你定义了一个基地址比如是http://localhost:8090,这是你可以在<endpoint>中的address属性使用相对的地址比如<endpoint address="first" binding="" contract=">这样配置了后当访问这个终结点的时候的地址就是http://localhost:8090/first.
那么我们现在就启动我们的服务吧。
using (ServiceHost host = new ServiceHost(typeof(serviceHost.service)))
{
host.Open();
Console.Write("service has opened !");
Console.ReadLine();
}
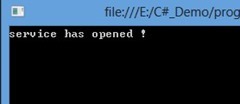
成功运行后就是这样了:
恩,就让这服务开着吧,暂时不管他。
在客户端,我们可是使用vs为我们生成代理的功能,操作如图所示:
在弹出的对话框里,我们把刚刚配置文件的地址填进去。只要服务开着,他会自动搜索。
等他完成后你会看到在你的项目里多出了一个配置文件。我这边得到的是这样的:
<?xml version="1.0" encoding="utf-8" ?>
<configuration>
<system.serviceModel>
<bindings>
<netTcpBinding>
<binding name="NetTcpBinding_IprintStr" />
</netTcpBinding>
<wsHttpBinding>
<binding name="WSHttpBinding_IprintStr" />
</wsHttpBinding>
</bindings>
<client>
<endpoint address="http://localhost:4040/getInfo/" binding="wsHttpBinding"
bindingConfiguration="WSHttpBinding_IprintStr" contract="ServiceReference1.IprintStr"
name="WSHttpBinding_IprintStr">
<identity>
<userPrincipalName value="A-Smart.NET-Smart" />
</identity>
</endpoint>
<endpoint address="net.tcp://localhost:5050/" binding="netTcpBinding"
bindingConfiguration="NetTcpBinding_IprintStr" contract="ServiceReference1.IprintStr"
name="NetTcpBinding_IprintStr">
<identity>
<userPrincipalName value="A-Smart.NET-Smart" />
</identity>
</endpoint>
</client>
</system.serviceModel>
</configuration>
好了,我们写到这里,这个HOW?就快实现了!细心的读者可能发现了,我这边的服务端和客户端的配置文件里有两个<endpoint>,而且使用的binding方式也不一样,我们为什么要这样写?在这里我是想对比下这两个绑定方式的速度。稍后大家就可以看到具体的效果了。
这是我客户端的项目结构:
我们在P_Client中这样写:
public static void getNameByWsHttpBinding()
{
/*这是第二个办法,也就是通过客户端代理与服务端进行通信*/
Console.WriteLine("======线程getNameByWsHttpBinding开始========");
ServiceReference1.IprintStrClient cl = new ServiceReference1.IprintStrClient("WSHttpBinding_IprintStr");
Stopwatch watch = new Stopwatch();
watch.Start();
string result = cl.printStr("This is about getName by wsHttpBinding");
watch.Stop();
Console.WriteLine(result + "耗时:" + watch.ElapsedMilliseconds);
            Console.WriteLine("============================================
");
}
还有一个就是这样
public static void getNameByNetTcpBinding()
{
Console.WriteLine("======线程getNameByNetTcpBinding开始========");
ServiceReference1.IprintStrClient c2 = new ServiceReference1.IprintStrClient("NetTcpBinding_IprintStr");
Stopwatch watch = new Stopwatch();
watch.Start();
string result = c2.printStr("This is about getName by nettcpBinding");
watch.Stop();
Console.WriteLine(result + "耗时:" + watch.ElapsedMilliseconds);
Console.WriteLine("============================================");
}
通过方法名大家可以看出了,我们通过代理来与服务端进行通讯,在ServiceReference1.IprintStrClient()中的字符串是客户端配置文件中的<endpoint>中的name属性。好了,配置到这,我们也该进行最后的运行了。
在program.cs中的代码如下
static void Main(string[] args)
{
Thread th1 = new Thread(new ThreadStart(p_Client.getNameByNetTcpBinding));
Thread th2 = new Thread(new ThreadStart(p_Client.getNameByWsHttpBinding));
th1.Start();
th2.Start();
Console.ReadKey();
}
运行后得到的结果如图:
通过时间的对比大家可以看出来了吧。
好,到此我们将通过代理与服务端通信的说完了,下面我们来说说通过 channelFactory来与服务器经行通信。
其它的没有什么大的变化,就是要改一点,在客户端对应的改成如下:
public static void getNameByWsHttpBinding()
{
ChannelFactory<IprintStr> printName = new ChannelFactory<IprintStr>(new WSHttpBinding(), new EndpointAddress("http://localhost:4040/getInfo/"));
var client = printName.CreateChannel();
Console.WriteLine("=========线程getNameByWsHttpBinding开始========");
Stopwatch watch = new Stopwatch();
watch.Start();
string result = client.printStr("This function is about getName by wsHttpBinding");
watch.Stop();
Console.WriteLine(result);
Console.WriteLine("The time is:{0} ms", watch.ElapsedMilliseconds);
Console.WriteLine("======================================================");
}与之对应的也就是这样了:
public static void getNameByNetTcpBinding()
{
ChannelFactory<IprintStr> printName = new ChannelFactory<IprintStr>(new NetTcpBinding(), new EndpointAddress("net.tcp://localhost:5050/"));
var client = printName.CreateChannel();
Console.WriteLine("=========线程getNameByNetTcpBinding开始==========");
Stopwatch watch = new Stopwatch();
watch.Start();
string result = client.printStr("This function is about getName by netTcpBinding");
watch.Stop();
Console.WriteLine(result);
Console.WriteLine("The time is :{0} ms", watch.ElapsedMilliseconds);
Console.WriteLine("======================================================");
}
其它的不需要进行变化,运行后的结果我这里也不再贴了,总之,通过这样的方法,所耗的时间比上面的方法要少,不管是wsHttpBinding还是netTcpBinding.最后的运行留给读者你们把。
声明
本篇博文属于原创,允许转载,但是请保留原始的连接。博文中可能有写的不对的地方,欢迎点评。


