1.不挂載volumn的方式啓動image
docker run -d -p 80:80 --name nginx-test nginx
2.拷貝文件完後停止container docker cp nginx-test:/etc/nginx/.
/usr/local/docker/nginx/conf
docker stop nginx-test
docker rm nginx-test
目錄結構如下
[centos@centos7 ~]$ tree /usr/local/docker
/usr/local/docker
└── nginx
├── conf
│ ├── conf.d
│ │ └── default.conf
│ ├── fastcgi_params
│ ├── mime.types
│ ├── nginx.conf
│ ├── scgi_params
│ └── uwsgi_params
├── html
│ └── index.html
└── logs
├── access.log
└── error.log
3.挂載本地目錄啓動container
docker run -it -p 80:80 -v /usr/local/docker/nginx/conf:/etc/nginx
-v /usr/local/docker/nginx/html:/usr/share/nginx/html
-v /usr/local/docker/nginx/logs:/var/log/nginx
--privileged=true --name mynginx nginx
nginx.conf (不變)
user  nginx;
worker_processes  auto;

error_log  /var/log/nginx/error.log notice;
pid        /var/run/nginx.pid;


events {
    worker_connections  1024;
}


http {
    include       /etc/nginx/mime.types;
    default_type  application/octet-stream;

    log_format  main  '$remote_addr - $remote_user [$time_local] "$request" '
                      '$status $body_bytes_sent "$http_referer" '
                      '"$http_user_agent" "$http_x_forwarded_for" $upstream_addr $upstream_response_time $request_time ';

    access_log  /var/log/nginx/access.log  main;

    sendfile        on;
    #tcp_nopush     on;

    keepalive_timeout  65;

    #gzip  on;

    include /etc/nginx/conf.d/*.conf;
}
default.conf
server {
    listen       80;
    listen  [::]:80;
    server_name  localhost;

    #access_log  /var/log/nginx/host.access.log  main;

    location / {
        root   /usr/share/nginx/html;
        index  index.html index.htm;
    }

    #error_page  404              /404.html;

    # redirect server error pages to the static page /50x.html
    #
    error_page   500 502 503 504  /50x.html;
    location = /50x.html {
        root   /usr/share/nginx/html;
    }

    location /apptst/ {
        proxy_pass  http://192.168.0.109:8080/;
        proxy_set_header  Host              $http_host;   # required for docker client's sake
        proxy_set_header  X-Real-IP         $remote_addr; # pass on real client's IP
        proxy_set_header  X-Forwarded-For   $proxy_add_x_forwarded_for;
        proxy_set_header  X-Forwarded-Proto $scheme;
    }
}
4.改動了/usr/local/docker/nginx/conf/conf.d/default.conf后,要重啓container才生效
docker stop mynginx
docker start mynginx
測試
curl http://192.168.0.109/apptst/health-status
5.將app啓動在兩個端口上做負載均衡
default.conf
upstream apptst_server{
  server 192.168.0.109:8080 weight=1;
  server 192.168.0.109:8081 weight=1;
}


server {
    listen       80;
    listen  [::]:80;
    server_name  localhost;

    #access_log  /var/log/nginx/host.access.log  main;

    location / {
        root   /usr/share/nginx/html;
        index  index.html index.htm;
    }

    #error_page  404              /404.html;

    # redirect server error pages to the static page /50x.html
    #
    error_page   500 502 503 504  /50x.html;
    location = /50x.html {
        root   /usr/share/nginx/html;
    }

    location /apptst/ {
        proxy_set_header  Host              $http_host;   # required for docker client's sake
        proxy_set_header  X-Real-IP         $remote_addr; # pass on real client's IP
        proxy_set_header  X-Forwarded-For   $proxy_add_x_forwarded_for;
        proxy_set_header  X-Forwarded-Proto $scheme;
       # proxy_pass http://192.168.0.109:8080/;
        proxy_pass http://apptst_server/;
    }


}
測試
curl http://192.168.0.109/apptst/health-status
=》
curl http://192.168.0.109:8080/health-status
curl http://192.168.0.109:8081/health-status
查看/usr/local/docker/nginx/logs/access.log
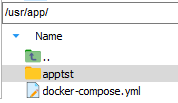
6.利用docker compose把nginx和兩個dotnet應用綁定在一起啓動

[centos@centos7 ~]$ cd /usr/app
[centos@centos7 app]$ docker-compose up -d
docker-compose.yml
version: '1.0'

services:
  nginx:
    restart: always
    image: nginx
    container_name: mynginx
    ports:
      - 80:80
      - 443:443
    volumes:
      - /usr/local/docker/nginx/conf:/etc/nginx
      - /usr/local/docker/nginx/html:/usr/share/nginx/html
      - /usr/local/docker/nginx/logs:/var/log/nginx
  apptst:
    restart: always
    image: apitest:v1
    container_name: apitest
    build:
      context: .
      dockerfile: /usr/app/apptst/Dockerfile
    ports:
      - 8080:80
  apptst1:
    restart: always
    image: apitest:v1
    container_name: apitest1
    build:
      context: .
      dockerfile: /usr/app/apptst/Dockerfile
    ports:
      - 8081:80