Setup SSH daemon
Both Hadoop scripts and Eclipse plug-in need password-less SSH to operate. This section describes how to set it up in the Cygwin environment.
Configure ssh daemon
- Open the Cygwin command prompt.
- Execute the following command:
ssh-host-config - When asked if privilege separation should be used, answer no.
- When asked if sshd should be installed as a service, answer yes.
- When asked about the value of CYGWIN environment variable, enter ntsec.
- Here is an example session of this command. Note that the input typed by the user is shown in pink and output from the system is shown in gray.
 Example of using ssh-host-config
Start SSH daemon
- Find My Computer icon either on your desktop or in the start-up menu, right-click on it and select Manage from the context menu.
- Open Services and Applications in the left-hand panel then select the Services item.
- Find the CYGWIN sshd item in the main section and right-click on it.
- Select Start from the context menu.
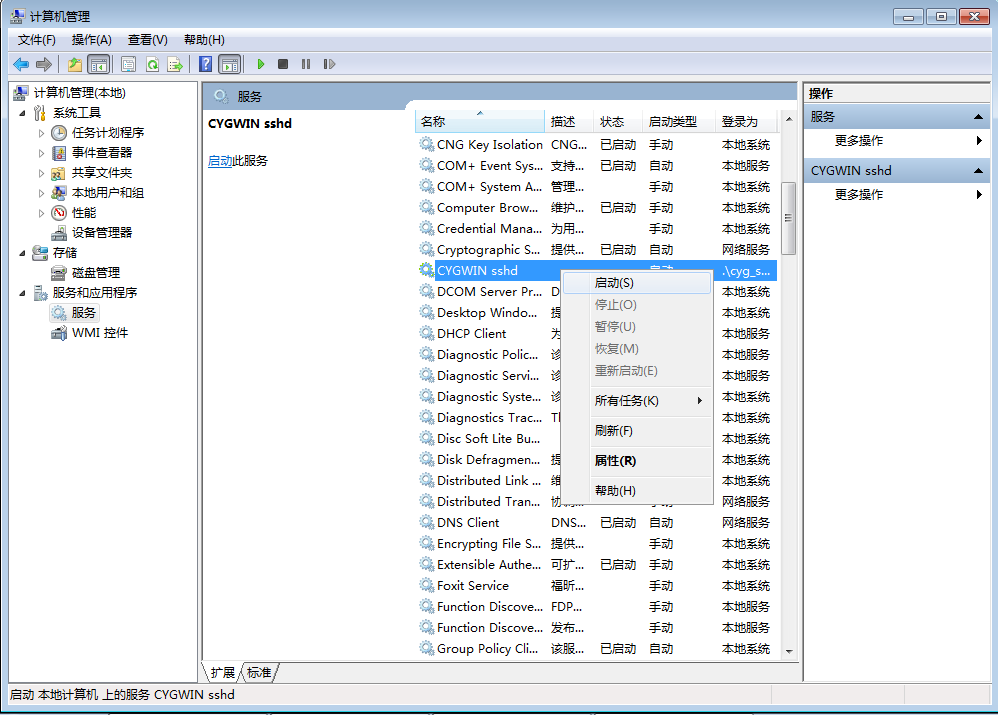
Start SSHD service
- A small window should pop-up indicating the progress of the service start-up. After that window disappears the status of CYGWIN sshd service should change to Started.
Setup authorization keys
Eclipse plug-in and Hadoop scripts require ssh authentication to be performed through authorization keys rather than passwords. The following steps describe how authorization keys are set up.
- Open cygwin command prompt
- Execute the following command to generate keys
ssh-keygen - When prompted for filenames and pass phrases press ENTER to accept default values.
- After the command has finished generating keys, enter the following command to change into your .ssh directory:
cd ~/.ssh
- Check if the keys were indeed generated by executing the following command:
ls -l
You should see two files id_rsa.pub and id_rsa with recent creation dates. These files contain authorization keys. - To register the new authorization keys enter the following command (note the sharply-angled double brackets -- they are very important):
cat id_rsa.pub >> authorized_keys
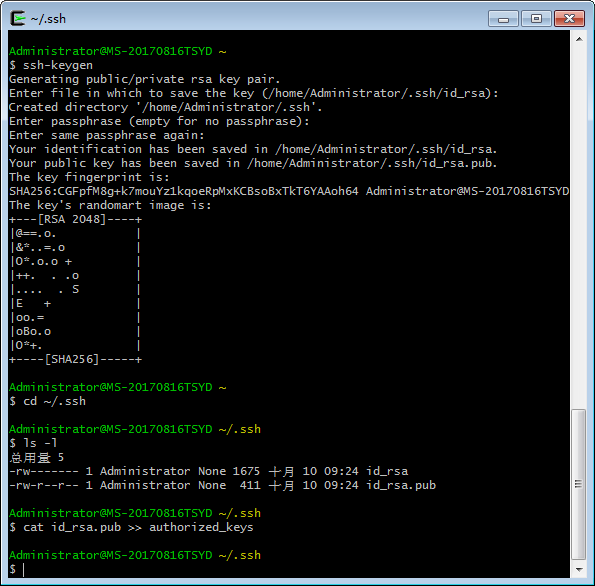 Setting up authorization keys
 - Now check if the keys were set up correctly by executing the following command:
ssh localhostSince it is a new ssh installation, you will be warned that authenticity of the host could not be established and will be asked whether you really want to connect. Answer yes and press ENTER. You should see the Cygwin prompt again, which means that you have successfully connected.
- Now execute the command again:
ssh localhost
This time you should not be prompted for anything.
