http://www.cocoachina.com/articles/18756
iOS设置圆角矩形和阴影效果
https://www.cnblogs.com/rayshen/p/4900336.html
////
iOS_使用UIBezierPath对象实现视图控件的立体阴影效果和半透明背景效果
https://blog.csdn.net/Sponge_CMZ/article/details/48498885
核心API
Class : UIBezierPath, CALayer
涉及的API:(API的官方详细注释详见本章结尾)
/** CALayer 的shadowPath属性. */
@property CGPathRef shadowPath
/** 创建UIBezierPath对象的相关类方法. */
+ (UIBezierPath *)bezierPathWithRect:(CGRect)rect
+ (UIBezierPath *)bezierPathWithRoundedRect:(CGRect)rect cornerRadius:(CGFloat)cornerRadius
+ (UIBezierPath *)bezierPathWithOvalInRect:(CGRect)rect
功能实现
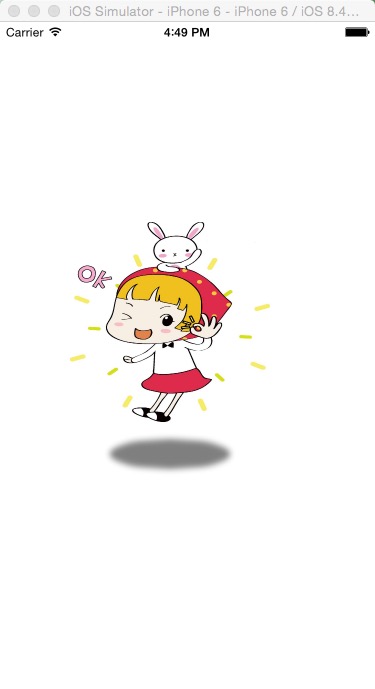
1 . 椭圆形阴影效果
效果图:
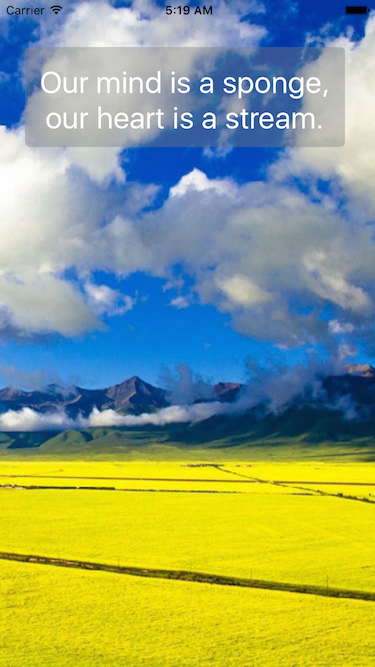
2 . 半透明背景
效果图:
Code:
1 . 椭圆形阴影效果
- (void)layoutOvalShadow
{
/** 1. 创建一个UIImageView的对象. */
UIImage *image = [UIImage imageNamed:@"1.jpg"];
UIImageView *imageView = [[UIImageView alloc] initWithFrame:CGRectMake(70, 200, 150, 200)];
imageView.image = image;
[self.view addSubview:imageView];
[imageView release];
/**
* @brief 2. 创建UIBezierPath的对象(椭圆形状).
* @param 椭圆形状位置和大小(参考的坐标系是要设置阴影的视图)
*/
UIBezierPath *path = [UIBezierPath bezierPathWithOvalInRect:CGRectMake(25, 230, 100, 20)];
/** 3. 设置imageView的阴影, 制造立体效果. */
imageView.layer.shadowPath = path.CGPath; /**< 指定path对象. */
imageView.layer.shadowOpacity = 0.5; /**< 阴影透明度.*/
imageView.layer.shadowRadius = 0; /**< 阴影模糊效果的半径. */
imageView.layer.shadowColor = [UIColor grayColor].CGColor; /**< 阴影颜色.*/
}
2 . 半透明背景
- (void)bezierPathBackground
{
/** 1. 创建一个UIImageView的对象, 当做背景图片. */
UIImage *image = [UIImage imageNamed:@"33.jpg"];
UIImageView *imageView = [[UIImageView alloc] initWithFrame:self.view.frame];
imageView.image = image;
[self.view addSubview:imageView];
[imageView release];
/** 2. 创建UILabel的对象. */
UILabel *label = [[UILabel alloc] initWithFrame:CGRectMake(25, 50, 320, 100)];
label.text = @"Our mind is a sponge, our heart is a stream.";
label.font = [UIFont systemFontOfSize:30];
label.textColor = [UIColor whiteColor];
label.backgroundColor = [UIColor clearColor];
label.numberOfLines = 0;
label.textAlignment = NSTextAlignmentCenter;
[imageView addSubview:label];
[label release];
/**
* @brief 3. 创建UIBezierPath的对象(圆角效果的矩形)
* @param 1: 矩形的位置和大小(参考的坐标系是要设置阴影的视图)
* @param 2: 圆角的半径
*/
UIBezierPath *backgroundPath = [UIBezierPath bezierPathWithRoundedRect:CGRectMake(0, 0, 320, 100) cornerRadius:5];
/** 4. 设置label的阴影, 制造半透明背景效果. */
label.layer.shadowPath = backgroundPath.CGPath;
label.layer.shadowOpacity = 0.4;
label.layer.shadowRadius = 0;
label.layer.shadowColor = [UIColor grayColor].CGColor;
}
核心API
功能实现
Code
API 官方注释
API 官方注释
/**
* @brief Creates and returns a new UIBezierPath object initialized with a rectangular path.
* @param <rect> The rectangle describing the path to create.
* @return A new path object with the rectangular path.
*/
+ (UIBezierPath *)bezierPathWithRect:(CGRect)rect
/**
* @brief Creates and returns a new UIBezierPath object initialized with an oval path inscribed in the specified rectangle
* @ param <rect> The rectangle in which to inscribe an oval.
*/
+ (UIBezierPath *)bezierPathWithOvalInRect:(CGRect)rect
/**
* @brief Creates and returns a new UIBezierPath object initialized with a rounded rectangular path.
* @param <rect> The rectangle that defines the basic shape of the path
* @param <cornerRadius> The radius of each corner oval. A value of 0 results in a rectangle without rounded corners. Values larger than half the rectangle’s width or height are clamped appropriately to half the width or height.
* @return A new path object with the rounded rectangular path.
*/
+ (UIBezierPath *)bezierPathWithRoundedRect:(CGRect)rect cornerRadius:(CGFloat)cornerRadius
---------------------
作者:Sponge_CMZ
来源:CSDN
原文:https://blog.csdn.net/Sponge_CMZ/article/details/48498885
版权声明:本文为博主原创文章,转载请附上博文链接!

