一、下载nginx
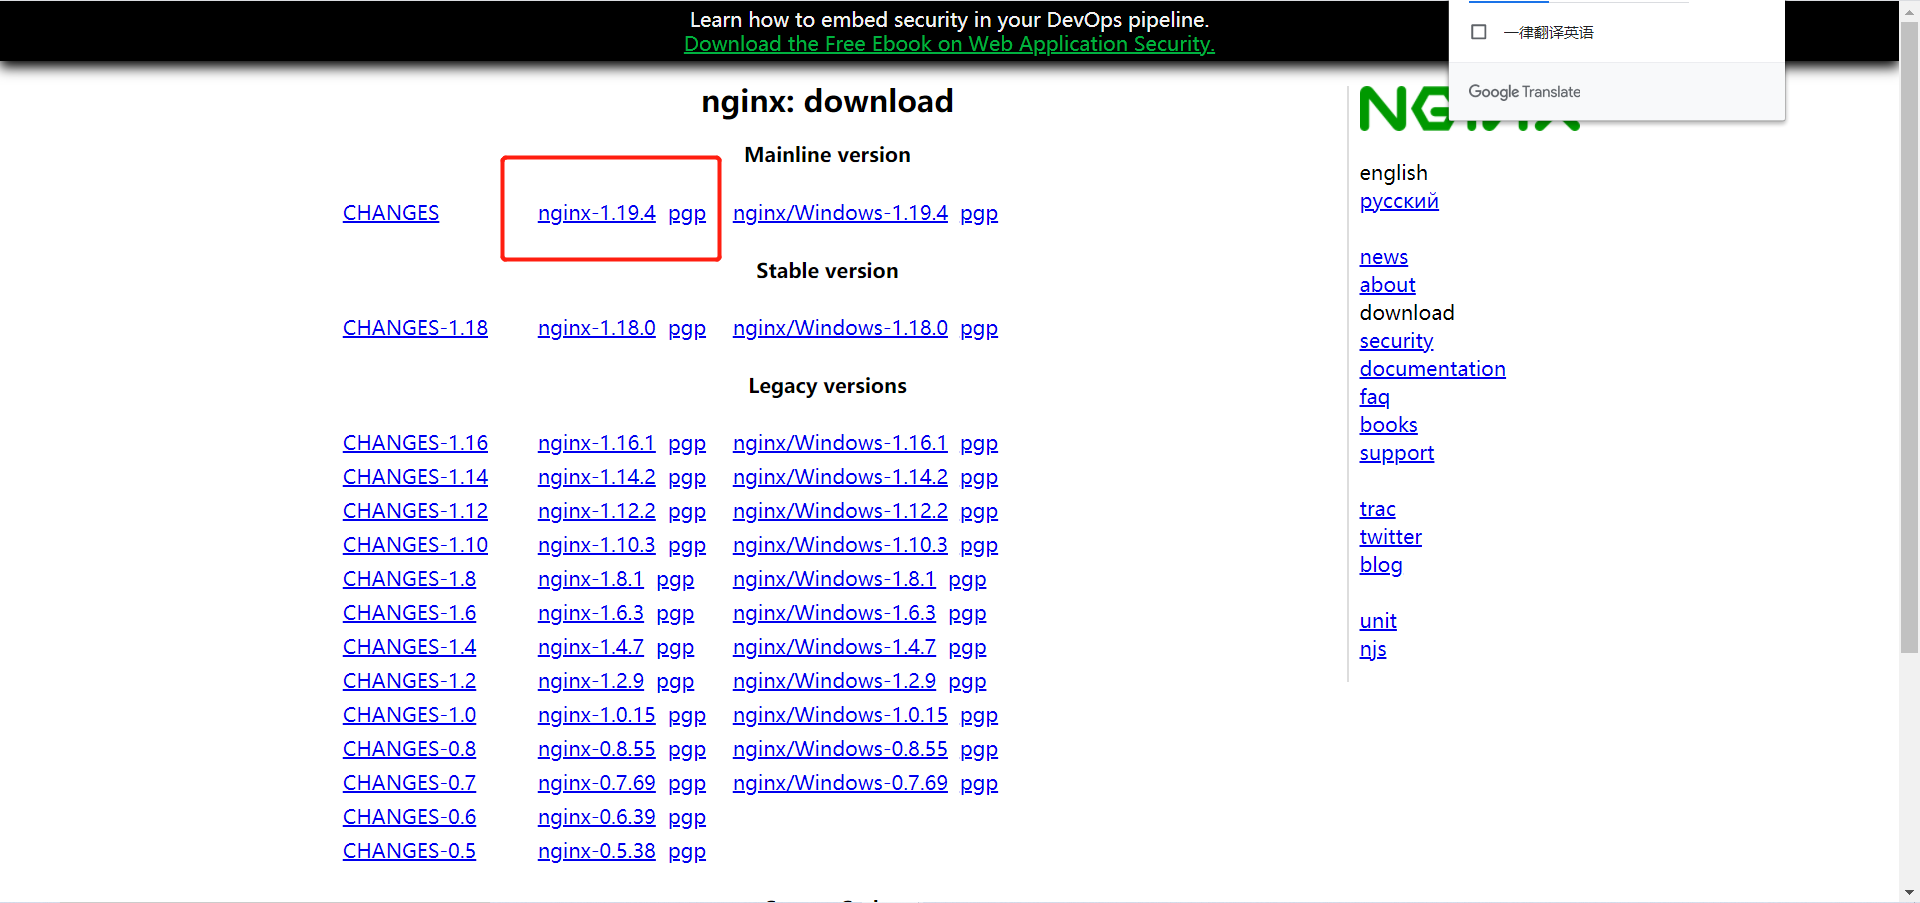
使用的版本是:nginx-1.19.4.tar.gz
官网:http://nginx.org/en/download.html
百度网盘:
链接:https://pan.baidu.com/s/1knGWwg-Sk2CxtwnTqTgqqw
提取码:t3fe
二、连接服务器(本人使用:SecureCRT)
1、创建nginx目录:mkdir nginx
2、cd nginx
3、配置nginx安装所需的环境
yum install gcc-c++
yum install -y pcre pcre-devel
yum install -y zlib zlib-devel
yum install -y openssl openssl-devel
4、使用sftp传入压缩包(SecureCRT 默认快捷键:Alt + P)
5、解压缩
tar -zxvf nginx-1.19.4.tar.gz
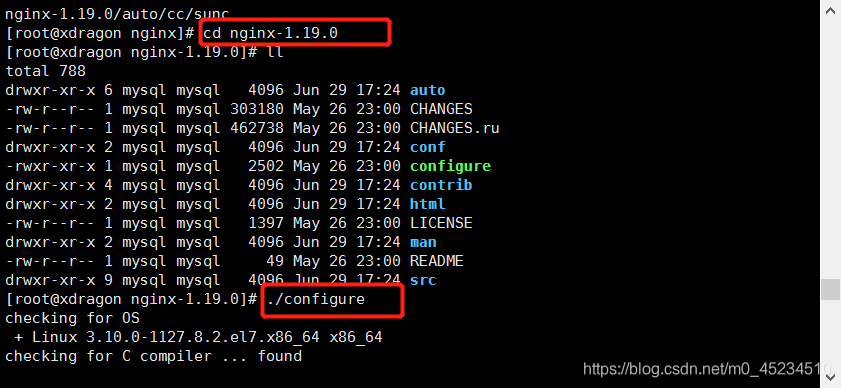
6、进入加压文件
解压之后,进入加压文件,即cd nginx-1.19.4
然后进行配置,推荐使用默认配置,直接./configure 就好了,如下图所示:
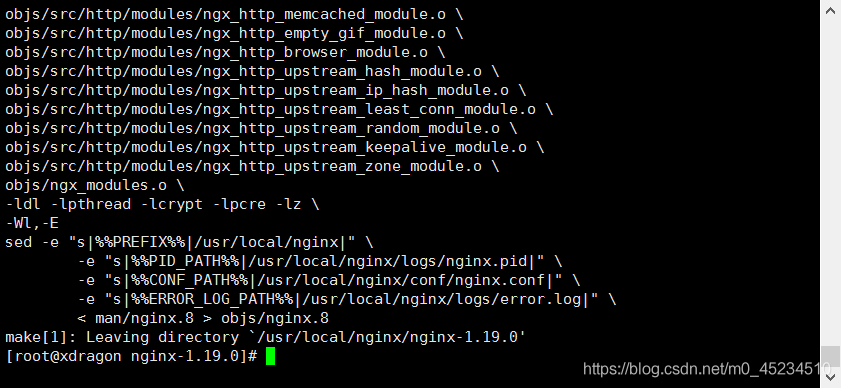
7、编译安装nginx
首先在当前目录(/usr/local/nginx-1.19.4)进行编译。输入make即可:
make
然后回车,如果编译出错,请检查是否前面的4个安装都没有问题。
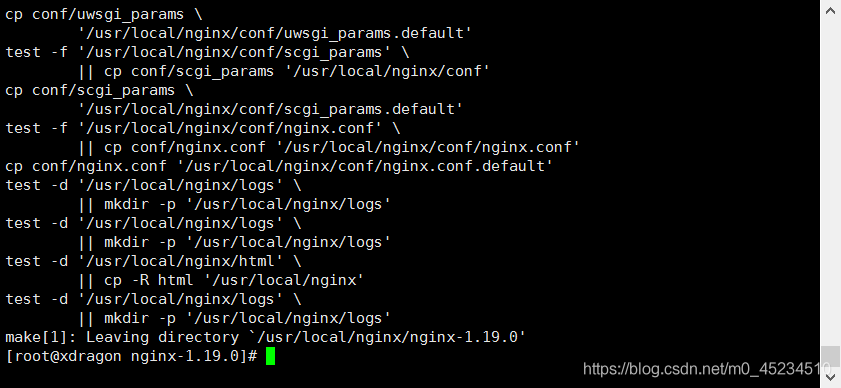
编译成功之后,就可以安装了,输入以下指令:
make install
8、启动nginx
进入/usr/local/nginx/sbin目录,输入./nginx即可启动nginx
./nginx
如果启动报错:nginx: [emerg] bind() to 0.0.0.0:80 failed (98: Address already in use),说明80端口被占用,使用如下命令:
fuser -k 80/tcp
关闭nginx
./nginx -s quit 或者 ./nginx -s stop
重启nginx
./nginx -s reload
查看nginx进程
ps aux|grep nginx
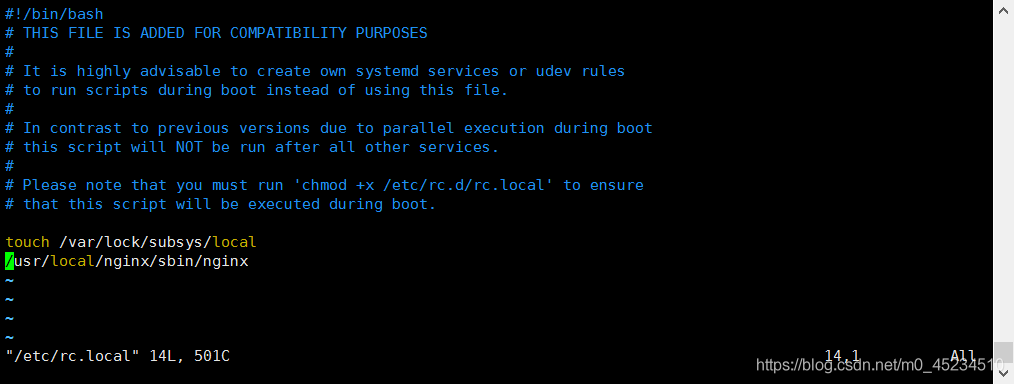
9、设置nginx开机启动
只需在rc.local增加启动代码即可。
vim /etc/rc.local
按键盘 i 然后在底部增加:
/usr/local/nginx/sbin/nginx
三、部署
1、打开vue项目,在控制台输入
npm run build
2、在SecureCRT 进入nginx/html目录,打开sftp
先删除原来的index.html,再传输
3、把生成的dist目录下的静态资源传输到服务器
4、修改配置文件
此外,进入cd /usr/local/nginx/conf目录可修改nginx的配置文件:
vim nginx.conf
按键盘i进行编辑,编辑完成按 Esc,再输入 :wq
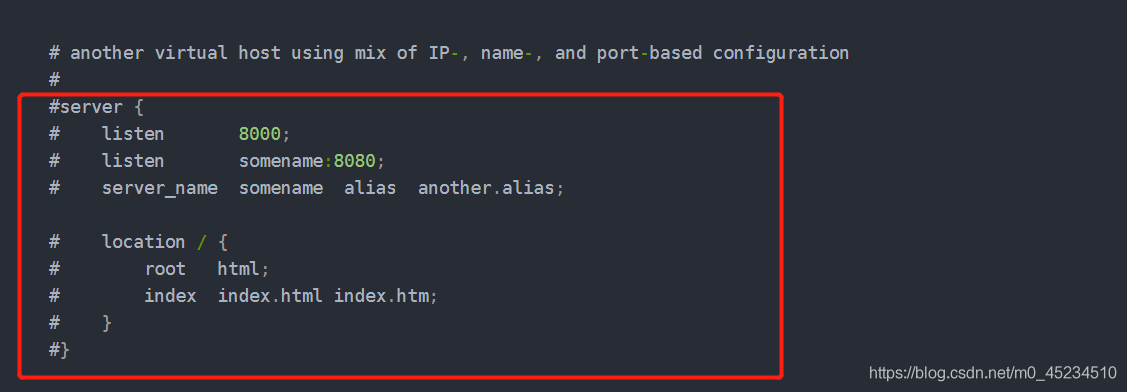
贴上一个完整版的,其中有序号标明的是注释说明,主要更改了server 的内容
#user  nobody;
worker_processes  1;

#error_log  logs/error.log;
#error_log  logs/error.log  notice;
#error_log  logs/error.log  info;

#pid        logs/nginx.pid;


events {
    worker_connections  1024;
}


http {
    include       mime.types;
    default_type  application/octet-stream;

    #log_format  main  '$remote_addr - $remote_user [$time_local] "$request" '
    #                  '$status $body_bytes_sent "$http_referer" '
    #                  '"$http_user_agent" "$http_x_forwarded_for"';

    #access_log  logs/access.log  main;

    sendfile        on;
    #tcp_nopush     on;

    #keepalive_timeout  0;
    keepalive_timeout  65;

    #gzip  on;

    server {
        listen       8080;

        # 这是你部署的ip
        server_name  127.0.0.1;

        # 这里配置你前段打包文件的映射路径
        root /work/dist;

        #charset koi8-r;

        #access_log  logs/host.access.log  main;

        location / {
            # root   html;

            try_files $uri $uri/ /index.html;

            index  index.html index.htm;
        }

        # 6、这里是解决跨域问题,将你后端的地址写在proxy_pass 后面就可以了
        location /api {
            # 下面这行也要改为api
            rewrite ^.+api/?(.*)$ /$1 break;
            proxy_pass http://127.0.0.1:8333/;
            proxy_redirect off;
            proxy_set_header Host $host;
            proxy_set_header X-Real-IP $remote_addr;
            proxy_set_header X-Forwarded-For $proxy_add_x_forwarded_for;
        }

        #error_page  404              /404.html;

        # redirect server error pages to the static page /50x.html
        #
        error_page   500 502 503 504  /50x.html;
        location = /50x.html {
            root   html;
        }

        # proxy the PHP scripts to Apache listening on 127.0.0.1:80
        #
        #location ~ .php$ {
        #    proxy_pass   http://127.0.0.1;
        #}

        # pass the PHP scripts to FastCGI server listening on 127.0.0.1:9000
        #
        #location ~ .php$ {
        #    root           html;
        #    fastcgi_pass   127.0.0.1:9000;
        #    fastcgi_index  index.php;
        #    fastcgi_param  SCRIPT_FILENAME  /scripts$fastcgi_script_name;
        #    include        fastcgi_params;
        #}

        # deny access to .htaccess files, if Apache's document root
        # concurs with nginx's one
        #
        #location ~ /.ht {
        #    deny  all;
        #}
    }
}
说明:如果需要配置多个vue项目,只需添加多个server配置即可。
把nginx下面的另外一个server的注释取消,再进行修改配置即可:
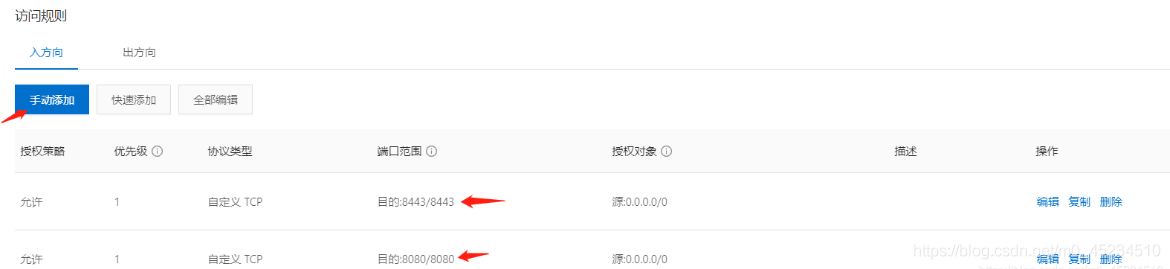
5、开放 8080 端口
1、检查防火墙状态
firewall-cmd --state
running 表示防火墙是开启的,如果你看到的是 not running,则表示防火墙关闭,需要开启 :
systemctl start firewalld.service
2、开放 8080 端口
firewall-cmd --zone=public --add-port=8080/tcp --permanent
3、重启防火墙
systemctl restart firewalld.service
4、重新载入配置
firewall-cmd --reload
6、在服务器也要开放端口
7、重启nginx
在/nginx/sbin/目录下
重启:
./nginx -s reload
查看nginx进程:
ps aux|grep nginx