jenkins介绍
jenkins安装

1.安装openjdk
[root@centos-03 ~]# yum install -y java-1.8.0-openjdk
2.安装Jenkins yum源
[root@centos-03 ~]# wget -O /etc/yum.repos.d/jenkins.repo https://pkg.jenkins.io/redhat/jenkins.repo
3.安装Jenkins key
[root@centos-03 ~]# rpm --import https://pkg.jenkins.io/redhat/jenkins.io.key
[root@centos-03 ~]#
4.yum安装
[root@centos-03 ~]# yum install -y jenkins
5.启动Jenkins
[root@centos-03 ~]# systemctl start jenkins
[root@centos-03 ~]# ps aux|grep jenkins
jenkins    3492 64.2  6.2 2252192 62356 ?       Ssl  15:38   0:21 /etc/alternatives/java -Dcom.sun.akuma.Daemon=daemonized -Djava.awt.headless=true -DJENKINS_HOME=/var/libjenkins -jar
 /usr/lib/jenkins/jenkins.war --logfile=/var/log/jenkins/jenkins.log --webroot=/var/cache/jenkins/war --daemon --httpPort=8080 --debug=5 --handlerCountMax=100 --handlerCountMaxIdle=20
root       3513  1.0  0.0 112664   936 pts/0    R+   15:39   0:00 grep --color=auto jenkins
[root@centos-03 ~]#
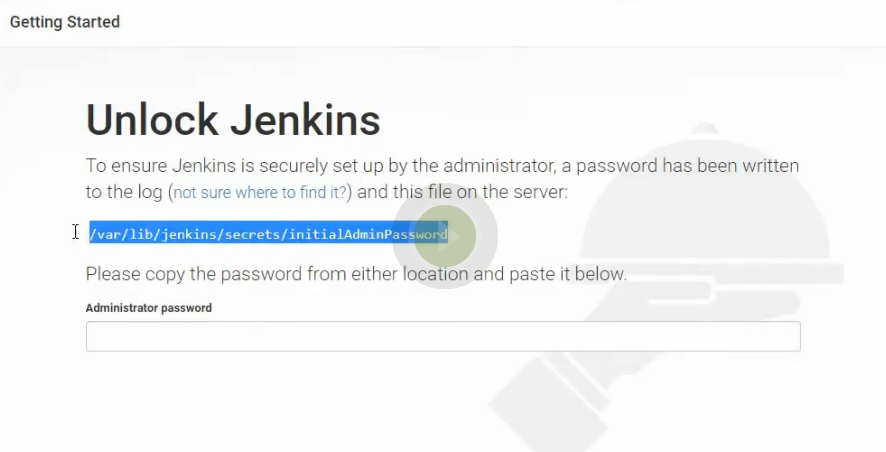
6.我们可以在Jenkins日志中查看jenkins密码,或是在initialAdminPassword文件中查看
[root@centos-03 yum.repos.d]# less /var/log/jenkins/jenkins.log
[root@centos-03 yum.repos.d]#
Jenkins initial setup is required. An admin user has been created and a password generated.
Please use the following password to proceed to installation:

8a72142953e9417f81970ffcb9366194

This may also be found at: /var/lib/jenkins/secrets/initialAdminPassword
[root@centos-03 yum.repos.d]# cat /var/lib/jenkins/secrets/initialAdminPassword
8a72142953e9417f81970ffcb9366194
[root@centos-03 yum.repos.d]#
了解jenkins
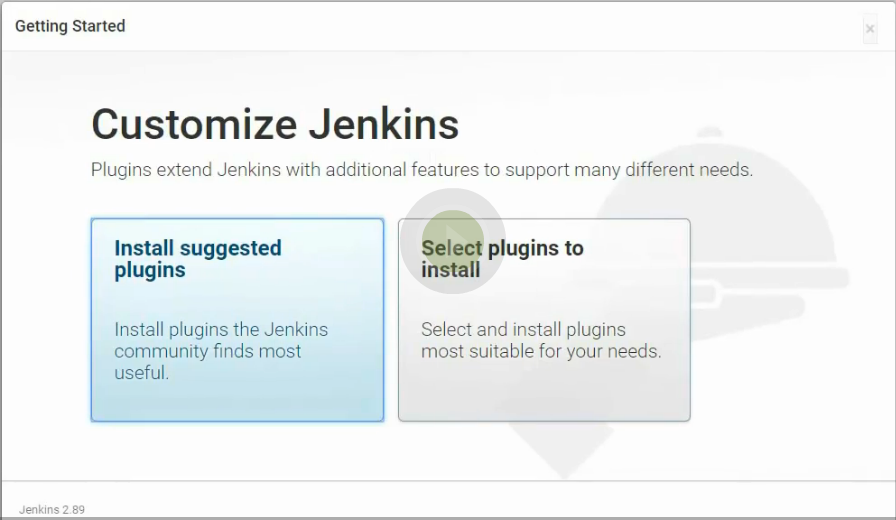
1.浏览器访问192.168.133.66:8080进入jenkins页面,填写密码,选择安装推介插件。
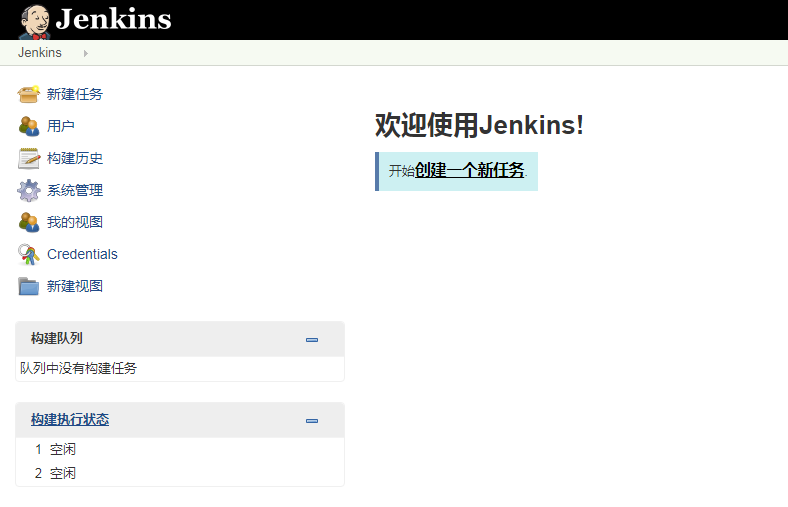
2.安装完插件后创建第一个管理员用户,下一步安装成功

3.jenkins配置文件目录
[root@centos-03 yum.repos.d]# vim /etc/sysconfig/jenkins
[root@centos-03 yum.repos.d]#
4.程序主目录(如果想备份,直接拷贝这个目录就可以了)
[root@centos-03 yum.repos.d]# cd /var/lib/jenkins/
[root@centos-03 jenkins]# ls
config.xml                                      nodeMonitors.xml
hudson.model.UpdateCenter.xml                   nodes  (多节点的时候用到的目录)
hudson.plugins.git.GitTool.xml                  plugins (插件目录)
identity.key.enc                                secret.key
jenkins.CLI.xml                                 secret.key.not-so-secret
jenkins.install.InstallUtil.installingPlugins   secrets
jenkins.install.InstallUtil.lastExecVersion     updates
jenkins.install.UpgradeWizard.state             userContent
jenkins.model.JenkinsLocationConfiguration.xml  users
jobs     (我们创建的任务所在的目录)                                       workflow-libs
logs     (日志相关目录)
[root@centos-03 jenkins]#
发布php代码(上)
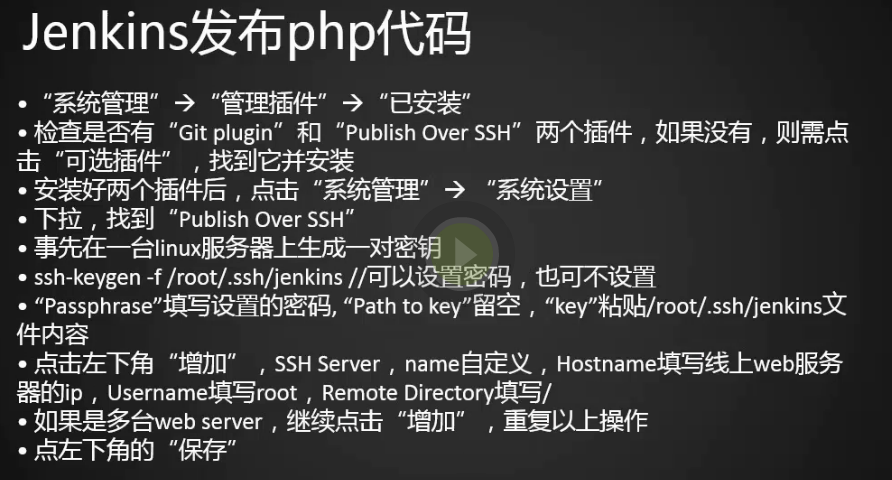
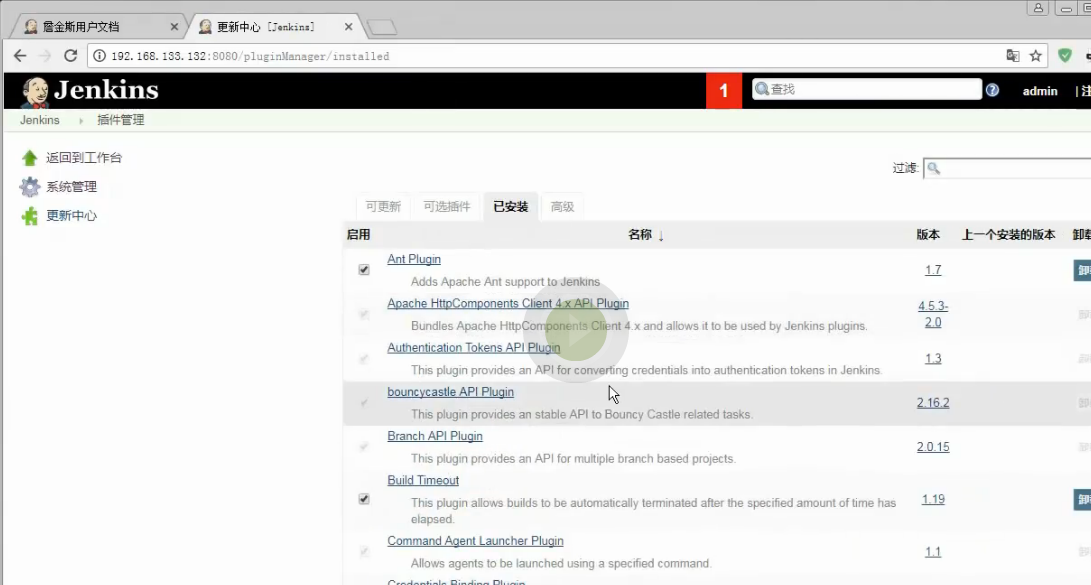
1.在创建任务之前我们需要安装必须的两个插件系统管理-》管理插件-》已安装插件列表中看是否安装了Git plugin和publish over ssh,发现没有publish over ssh我们从可选插件中安装,选中直接安装,安装完成之后,linux服务器直接重启Jenkins。
[root@centos-03 jenkins]# systemctl restart jenkins
[root@centos-03 jenkins]#
2.在配置publish over ssh之前需要生成一对秘钥,如果服务器上有默认的秘钥对可以不生成直接用
[root@centos-03 jenkins]#
[root@centos-03 jenkins]# cd /root/.ssh/
[root@centos-03 .ssh]# ls
authorized_keys  id_rsa  id_rsa.pub  known_hosts
[root@centos-03 .ssh]#
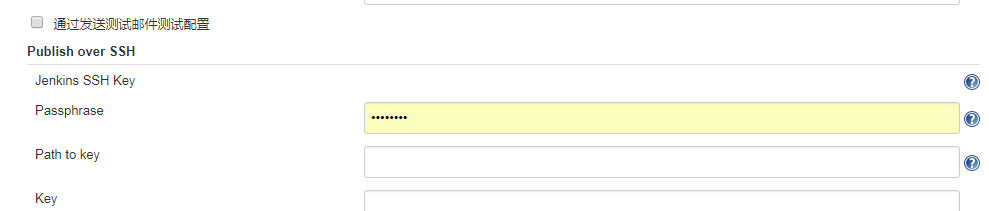
3.将私钥填到key中
[root@centos-03 .ssh]# cat id_rsa
-----BEGIN RSA PRIVATE KEY-----
MIIEogIBAAKCAQEA2M8M7nJ9SZEklwQzQGfSjQG0RS1Bp9u8Xif9x+25FwvBaXTX
3rErqBwx4N/kcS5zmu4eTNny2/04bz86ZfAQOT2Hc2Pmnao2M5Ggrm1P2I7eRr2V
dJUyTfl7MX/F+MF0LWSkHYCin/no6Oju3yJcD5sqZPZ3ekY4CqA3uObOI1h7dB7b
WAhvtiBy0/oDCnDT75BD70apzpWTBVuHun7Mmgc3z/r3pyzFPspLr5h/YN0o4dnV
BdcHd3M8WHJ8QhVm8capLh/FQFGRSfA6QYdxugsvwOP+TM6aymP8d46THym5K15J
4HJ37goPaBIU1/XDXW291FEq3PpUDW492jjJiwIDAQABAoIBAGh/w5fajxC6aIxx
ddKBODbGr4D4Q0EI5E3tsKCAsEmvXNXbf4DSnFw22sOspor2/LmcM/aOxkPKVT0p
mJgxkWBFi9fOOwWbWOyaMHxiK64RjolCL5s1nj1/FiXRlDZF6B1I+OFPcxLwfZZl
T101TnInM9PeB9Bjr/dPKgxxEsJtq7j8gqKsVZzCsIHH687dyF1ecJIjCo8PF6Vo
4MHHoA5e8NmpLeJusQnaBeK5rjOR6aZ4ra+mQBMC8L3Y5+xOAlWF/ptLcbhGBW/O
/xxDRyQb+S0XfsEtV2C1V4UHi24DpcQgiFntJpGuCUBYmRmwj3M4Bq0TfahsiiaC
i5vzOAECgYEA/ar6UdpYF/o8O0PgC52mD9HT9yVEIeuyh/bOtDZZvbdx8k8Pzd7H
e2CAji13sYD/5uIVPJLtApXRPLhd+S/x95pYPwYRUNz0Jhz6PPOc4JSlsMxYFwUJ
6mGa67ERD4aV0b/olVSUHoHPE/L3h4rv29SjD9ZEWxNi3ZtGihTFuIsCgYEA2s1S
mvAptgb3uNbuD30NfL1u52pRIyYCh+yrcW6d1JUdG0qSFX4fbvMK8y93pJCJvaLG
qz+Qxrofv14hPNhSlLCsdeGQgUKX0iaahDL1RQCsvSfTSalgUgaWXOeQR60SsKss
eHUAi63e5KYSRhgB19BPBkGGhEnAjAso0dWaUwECgYByju2/W4kfQv5CkZO0Cz08
tbkxSx4q54PYDWkqT8VVfWwzTutHQQ37tQg5rWT5v9VR0tZeZcgtu7Uj4+tkpvdy
p7yksbvONgr4z2tfbXFypw7w+kfqFXd15yCMwol+5nvwnueN0QWXhW4ch0SsbN2H
/M6rT0vNicLDa+V+ZIUqowKBgBK6xLlymX91dTsjWtmEkOT+qkGw/iUOGeVcwwhA
uc36vbUaWwrv8uzibSuIAqvZm5DaIDuEg3YfdJxDCIFW2yrTPNAScPY/pxNcLpnm
asxvVFoU0Kdbkl0zJyfowpcAH7tzy6i8C0HprkzQUnwhjfbVZA5bCZLFZXAXfHUJ
3d4BAoGABifvGGtRUiOhdOeWXbb5kdwD0dbn+33b5XDMwaHrvU8CAxV3qcC2f4yp
yGOH84LinfasLO0I6aNQ/XCCZcQ3yy1I/iiwVFmBvJEtVYO5Jfsb5TGm7coMwJe6
9YKUJ/NOBqEkaXzssVoUZhc+Kf37GQvH5VwlfHEaN5xZZ2TpOko=
-----END RSA PRIVATE KEY-----
[root@centos-03 .ssh]#
系统管理-》系统设置找到下面选项,将key填上
4.将公钥配置到远程机器上(centos-02)
[root@centos-03 .ssh]# cat id_rsa.pub
ssh-rsa AAAAB3NzaC1yc2EAAAADAQABAAABAQDYzwzucn1JkSSXBDNAZ9KNAbRFLUGn27xeJ/3H7bkXC8FpdNfesSuoHDHg3+RxLnOa7h5M2fLb/ThvPzpl8BA5PYdzY+adqjYzkaCubU/Yjt5GvZV0lTJN+Xsxf8X4wXQtZKQdgKKf+ejo6O7
fIlwPmypk9nd6RjgKoDe45s4jWHt0HttYCG+2IHLT+gMKcNPvkEPvRqnOlZMFW4e6fsyaBzfP+venLMU+ykuvmH9g3Sjh2dUF1wd3czxYcnxCFWbxxqkuH8VAUZFJ8DpBh3G6Cy/A4/5MzprKY/x3jpMfKbkrXkngcnfuCg9oEhTX9cNdbb3UUS
rc+lQNbj3aOMmL root@sunyujun02
[root@centos-03 .ssh]#
[root@centos-02 ~]# vim .ssh/authorized_keys
[root@centos-02 ~]# cat .ssh/authorized_keys
ssh-rsa AAAAB3NzaC1yc2EAAAADAQABAAABAQD810lCxBhCtMzrmSx302M6PUMKRxNK0TBrFQzwbsL8KAcgJXvH0ysc5OIw8lEFpIQirmZODVHg85I/2u3Xgz9yEf5ucF33R0xjJpcD0sq9LvMj0A2lO2RppsjgNyA4wcYcxfOg9HcYI97622l
ssO5012qWbr6k9Bv3QOD0r+F6mdoFXvXFIF2YL//60kPcPXzyPgW6ErDkA1Pum9DQOiys6iN/tH4iCa7ynRzCkLlVxt21V8mrewAldn/JOMuJVEcUtKrmtH+6wny6sJHqEStlF46xZyIH1/SeDyd8oCDwC+PU2HLTc3hishe/ny8ofm9QcC+zgb
BSPnm+I1+/vwfZ root@centos-02
##centos02
ssh-rsa AAAAB3NzaC1yc2EAAAADAQABAAABAQDYzwzucn1JkSSXBDNAZ9KNAbRFLUGn27xeJ/3H7bkXC8FpdNfesSuoHDHg3+RxLnOa7h5M2fLb/ThvPzpl8BA5PYdzY+adqjYzkaCubU/Yjt5GvZV0lTJN+Xsxf8X4wXQtZKQdgKKf+ejo6O7
fIlwPmypk9nd6RjgKoDe45s4jWHt0HttYCG+2IHLT+gMKcNPvkEPvRqnOlZMFW4e6fsyaBzfP+venLMU+ykuvmH9g3Sjh2dUF1wd3czxYcnxCFWbxxqkuH8VAUZFJ8DpBh3G6Cy/A4/5MzprKY/x3jpMfKbkrXkngcnfuCg9oEhTX9cNdbb3UUS
rc+lQNbj3aOMmL root@sunyujun02
[root@centos-02 ~]#
5.测试ssh是否能登录
[root@centos-03 .ssh]# ssh centos-02
The authenticity of host 'centos-02 (192.168.133.88)' can't be established.
ECDSA key fingerprint is bf:dc:4b:e3:1c:99:f4:12:6f:d0:a8:e0:13:8a:d0:dd.
Are you sure you want to continue connecting (yes/no)? yes
Warning: Permanently added 'centos-02' (ECDSA) to the list of known hosts.
Last login: Mon Jun 25 18:53:00 2018 from 192.168.133.1
[root@centos-02 ~]#
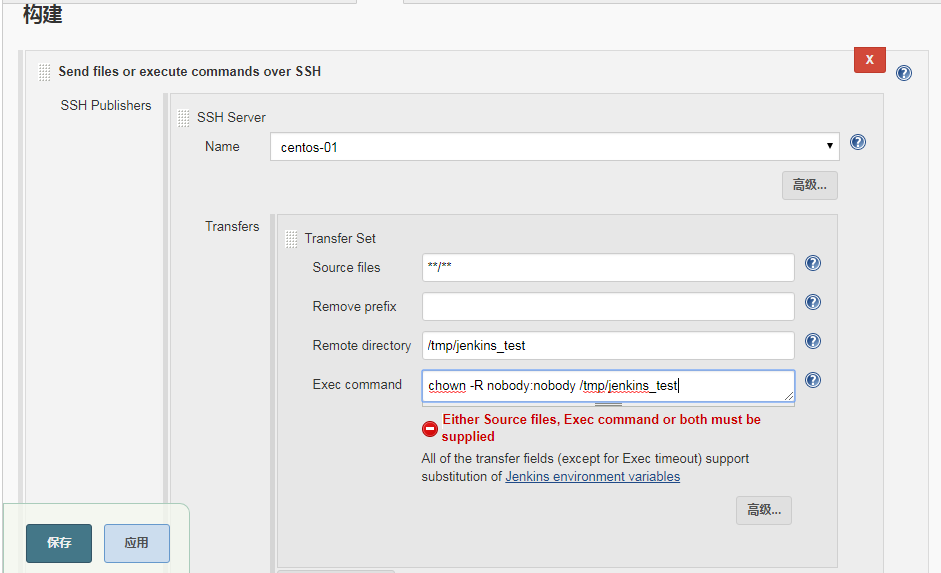
5.配置ssh server

6.点击test测试成功

7.保存即可
发布php代码(下)
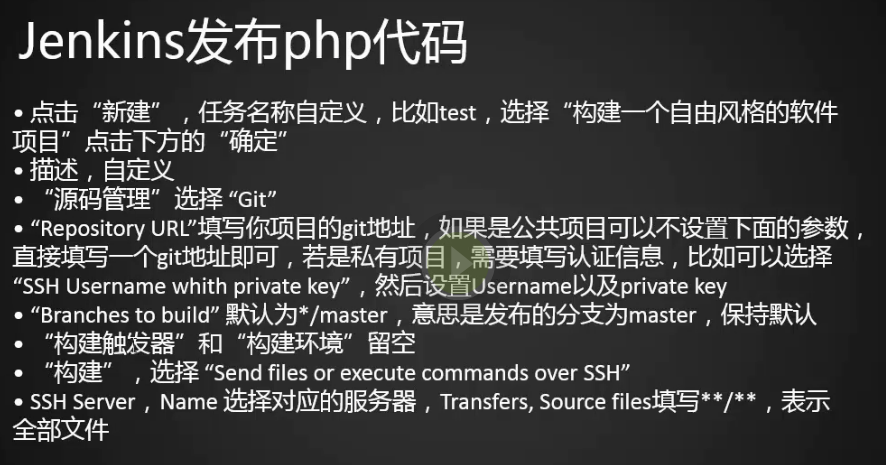
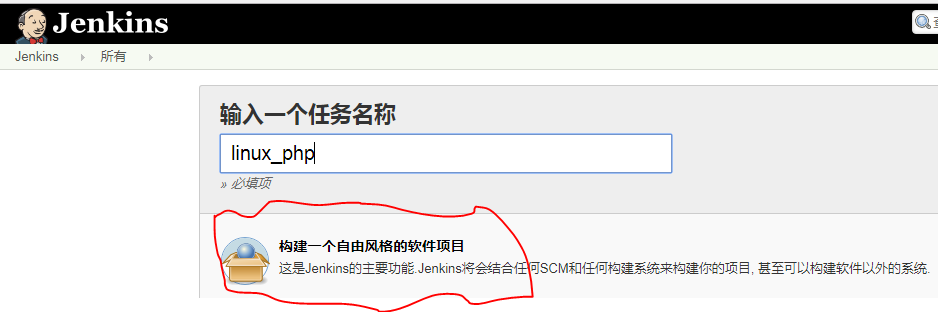
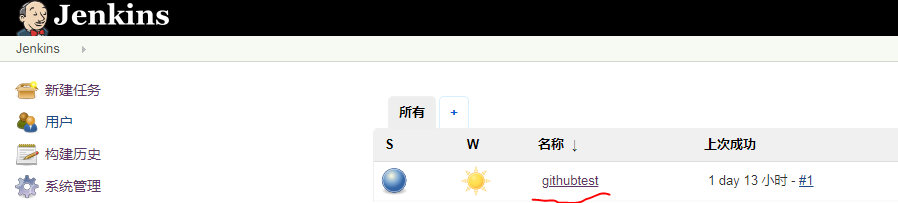
1.点击新建任务填写任务名点击构建一个自由风格的软件项目
2.填写描述,源码管理选择git

3.配置完成点击保存,构建环境

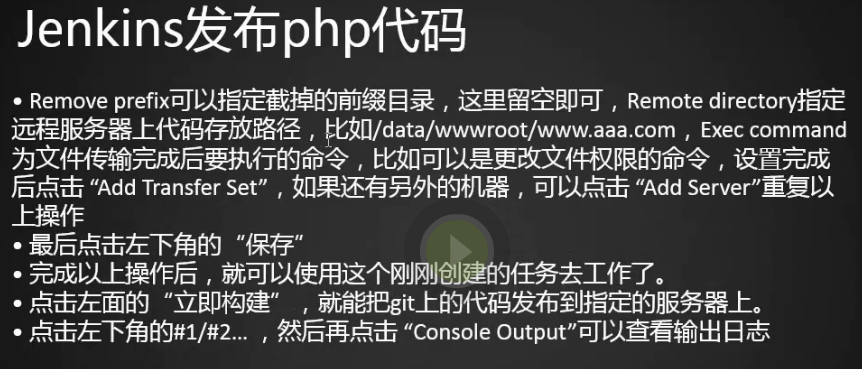
4.如图

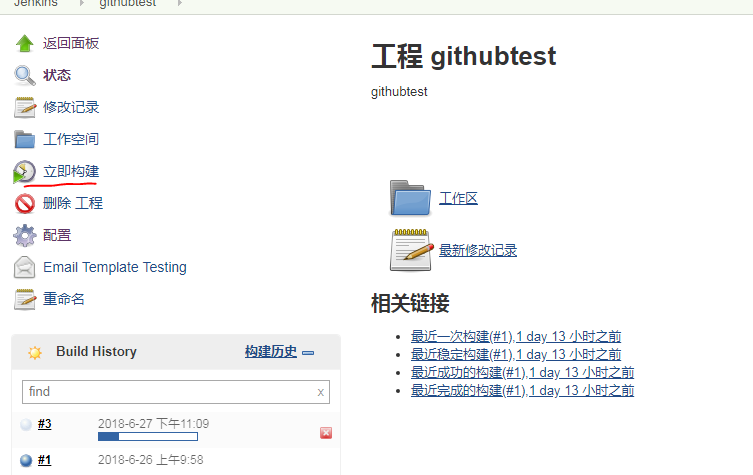
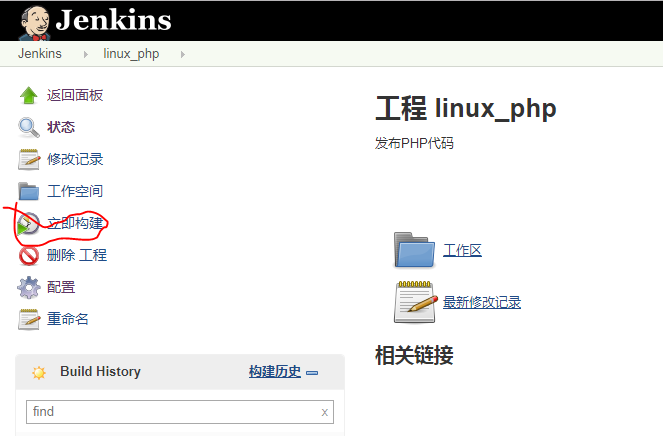
5.点击立即构建
6.构建失败,原来是服务器没有安装git,yum安装
[root@centos-03 linux_php]# yum install -y git
7.重新构建成功

8.查看日志

[root@centos-02 tmp]# pwd
/tmp
[root@centos-02 tmp]# ll
total 0
drwxr-xr-x 2 jenkins jenkins  6 Jun 25 15:48 hsperfdata_jenkins
drwxr-xr-x 2 root    root    18 Jun 25 15:27 hsperfdata_root
drwxr-xr-x 2 nobody  nobody  53 Jun 26 09:58 jenkins_test
drwxr-xr-x 2 jenkins jenkins  6 Jun 25 15:48 jna--1712433994
srwx------ 1 mongod  mongod   0 Jun 25 13:26 mongodb-27017.sock
drwx------ 3 root    root    17 Jun 25 13:26 systemd-private-300fdee71356414aa5ccdd302f8743c1-nginx.service-PCr8F5
drwx------ 3 root    root    17 Jun 25 13:25 systemd-private-300fdee71356414aa5ccdd302f8743c1-vmtoolsd.service-p87fNr
[root@centos-02 tmp]#
9.如果我们在github上修改了代码,我们再次点击立即构建就可以将修改的代码同步到线上。
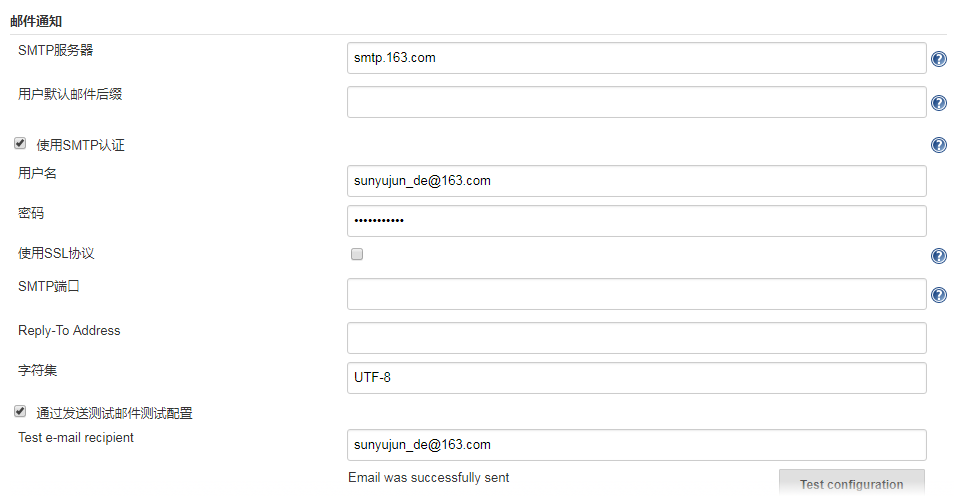
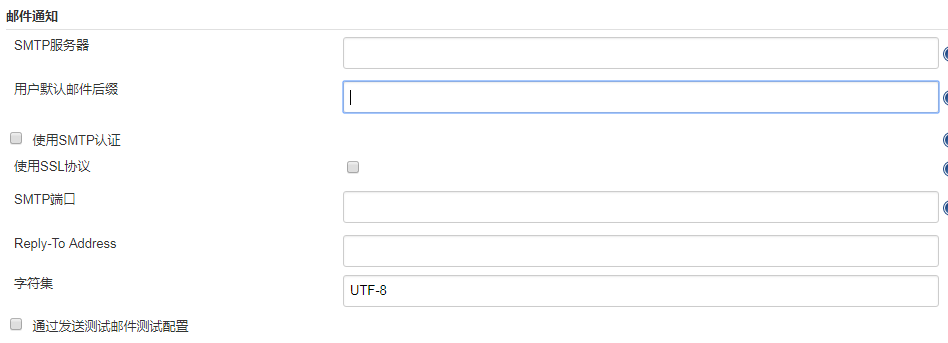
jenkins邮件配置

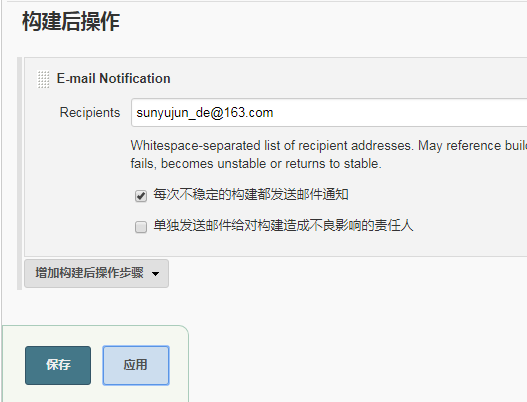
1.点击系统管理-》系统设置找到下面的邮件通知进行配置(下面两处)

2.然后到任务里做一个配置,点击构建后操作
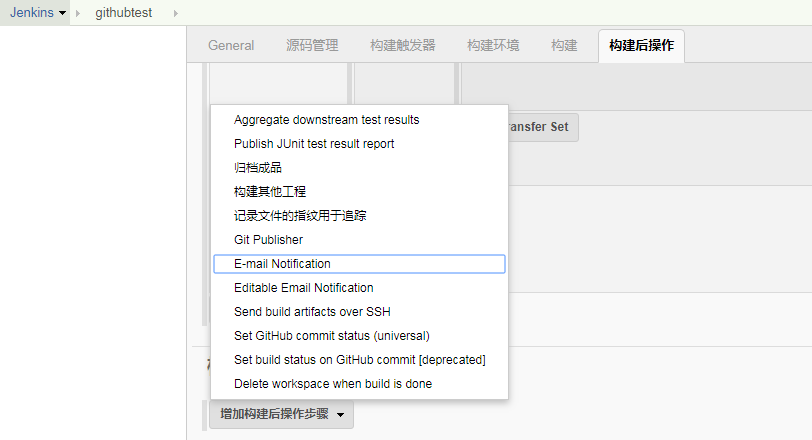
插件email-ext
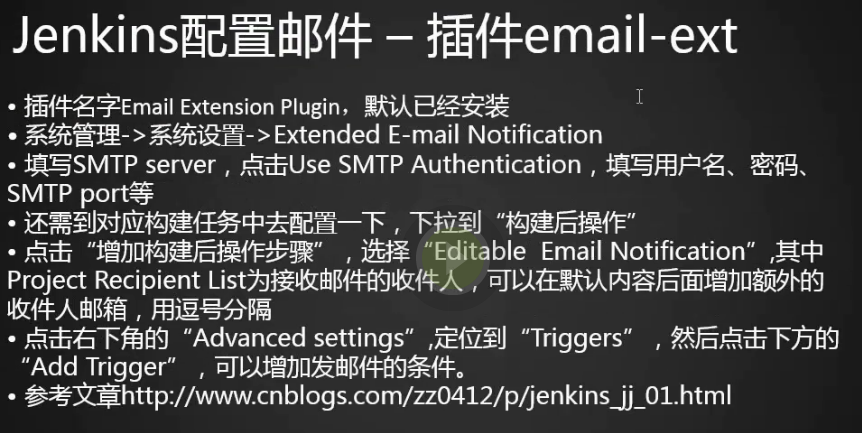
1.如果想不管失败还是成功都给某个用户发邮件需要安装email-ext,这个插件默认已经安装了,点击系统管理-》插件管理搜索 email extension plugin。
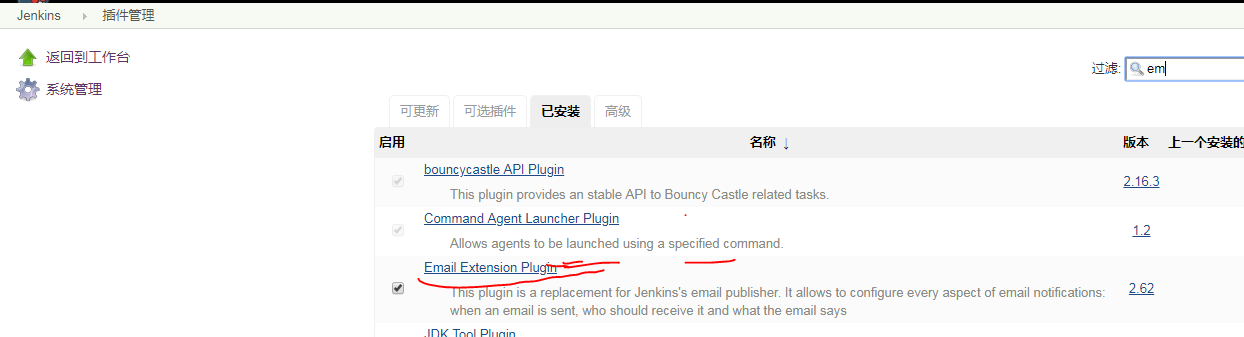
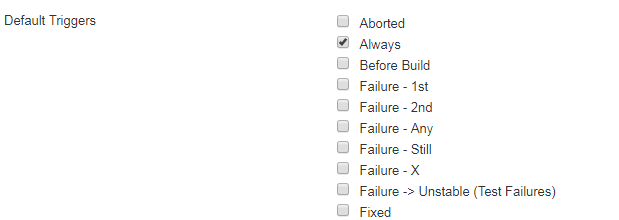
2.进入系统管理-》系统设置去掉邮件通知里面的选项,设置extension email notification选项,点击应用保存

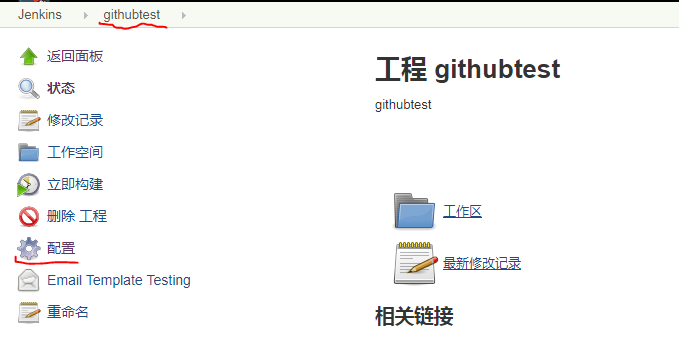
3.点击任务-》配置
4.点击构建后操作,配置邮箱保存
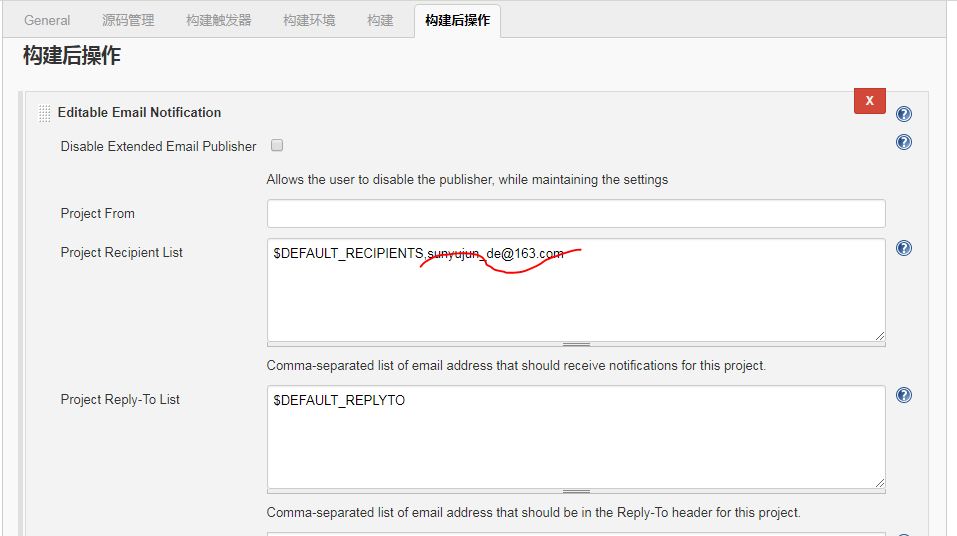
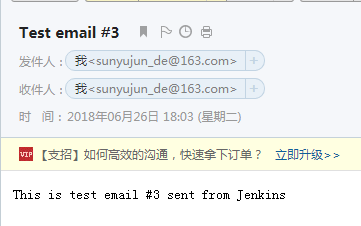
5.点击立即构建邮件发送成功。