zoukankan      html  css  js  c++  java
  • 实验 7:OpenDaylight 实验——Python 中的 REST API 调用

    一、实验目的

    对 Python 调用 OpenDaylight 的 REST API 方法有初步了解。

    二、实验任务

    本实验需要用另一种方法完成上一个实验相同的功能,即通过 Python 程序调用
    OpenDaylight 的北向接口下发关于硬超时的流表,实现拓扑内主机在一定时间
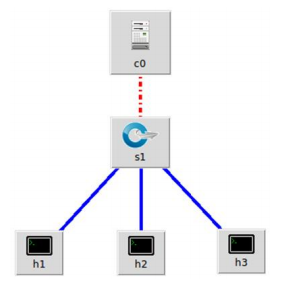
    内的网络通断。实验拓扑如下:
    三、实验步骤

    1. 实验环境

    安装了 Ubuntu 18.04.5 Desktop amd64 的虚拟机

    2. 实验过程

    (1)生成拓扑

    sudo mn --topo=single,3 --controller=remote,ip=127.0.0.1,port=6633 --switch ovsk,protocols=OpenFlow13
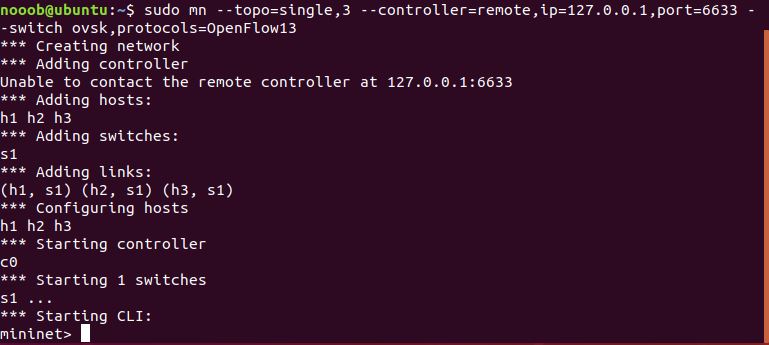
    

    生成拓扑的方法同之前的实验一致。

    (2)编写 Python 代码和 JSON 格式的请求内容

    nano odlnorth.py

    内容如下:

    #!/usr/bin/python
      
    import requests
    from requests.auth import HTTPBasicAuth
      
    def http_put(url,jstr):    
        url= url    
        headers = {'Content-Type':'application/json'}    
        resp = requests.put(url,jstr,headers=headers,auth=HTTPBasicAuth('admin', 'admin'))    
        return resp          
    if __name__ == "__main__":    
        url = 'http://127.0.0.1:8181/restconf/config/opendaylight-inventory:nodes/node/openflow:1/flow-node-inventory:table/0/flow/1'    
        with open('hardtimeout.json') as f:        
            jstr = f.read()    
        resp = http_put(url,jstr)    
        print resp.content
    

    由于是下发流表,因此需要有 http 请求的具体内容,同之前的 Postman 一样,
    也是以 JSON 格式来表示。

    编辑 hardtimeout.json 文件:
    nano hardtimeout.json
    文件中不包含 http 请求的 url 地址

    {    
        "flow": [   
            {            
            "id": "1",            
            "match": {           
                    "in-port": "1",                
                "ethernet-match": {                    
                    "ethernet-type": {                        
                        "type": "0x0800"                    
                    }
                     },                
                "ipv4-destination": "10.0.0.3/32"            
                },            
                "instructions": {                
                    "instruction": [                    
                    {                        
                    "order": "0",                        
                    "apply-actions": {                            
                        "action": [                                
                             {                                    
                            "order": "0",                                    
                            "drop-action": {}                               
                             }                           
                            ]                        
                      }                    
                    }               
                 ]
                },            
            "flow-name": "flow1",            
            "priority": "65535",           
            "hard-timeout": "10",    
                "cookie": "2",            
            "table_id": "0"       
         }    
         ]
    }
    

    (3)运行 Python 代码,完成流表下发

    python odlnorth.py
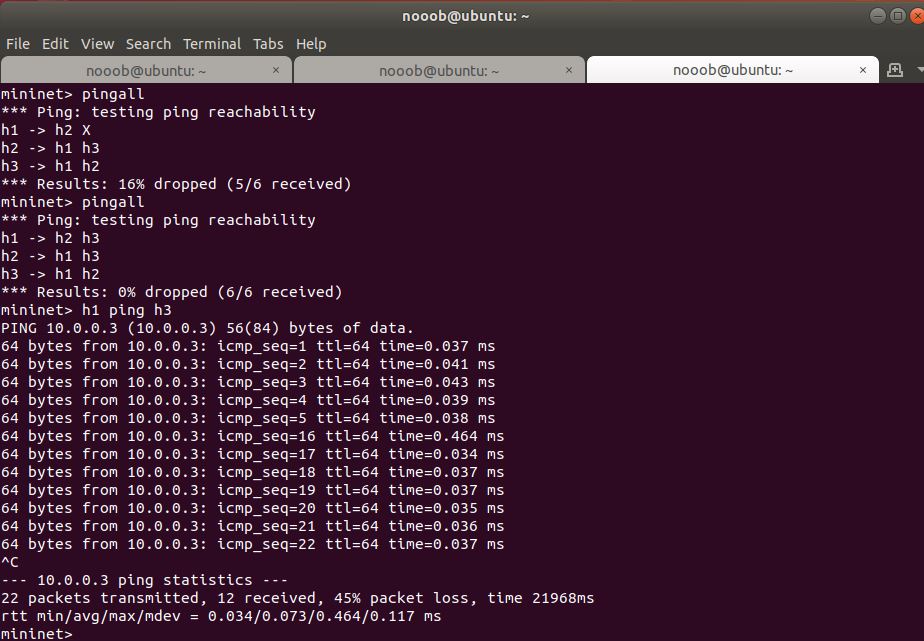

    共十次缺失

    结果验证方法同实验 6。
    提示:运行代码如果报错:ImportError: No module named requests,可尝试
    如下方法。
    sudo apt-get install python-pip //如果 pip 没装的话需要运行
    sudo pip install requests

    四、实验心得

    熟悉了下发流表的操作,并且认识了流表的作用

  • 相关阅读:
    LeetCode OJ 112. Path Sum
    LeetCode OJ 226. Invert Binary Tree
    LeetCode OJ 100. Same Tree
    LeetCode OJ 104. Maximum Depth of Binary Tree
    LeetCode OJ 111. Minimum Depth of Binary Tree
    LeetCode OJ 110. Balanced Binary Tree
    apache-jmeter-3.1的简单压力测试使用方法(下载和安装)
    JMeter入门教程
    CentOS6(CentOS7)设置静态IP 并且 能够上网
    分享好文:分享我在阿里8年,是如何一步一步走向架构师的
  • 原文地址:https://www.cnblogs.com/supernoob/p/13829095.html
Copyright © 2011-2022 走看看