1. 按照xlrd软件
pip3 install xlrd
2. POST提交文件获取数据
方法一:写入硬盘,xlrd读取xlsx文件获取文件数据
    def batch_view(self,request):
        if request.method=="GET":
            return render(request,'batch_view.html')
        else:
            from django.core.files.uploadedfile import InMemoryUploadedFile
            file_obj = request.FILES.get('xsfile')

            with open('customers.xlsx', mode='wb') as f:
                for chunk in file_obj:
                    f.write(chunk)

            import xlrd
            workbook = xlrd.open_workbook('customers.xlsx')
            sheet = workbook.sheet_by_index(0)
            maps = {
                0: 'qq',
                1: 'name',
                2: 'gender',
                3: 'education',
                4: 'graduation_school',
            }
            for index in range(1,sheet.nrows):
                row = sheet.row(index)
                # {'name':"吧唧",'qq':9898}
                row_dict = {}
                for i in range(len(maps)):
                    key = maps[i]
                    cell = row[i]
                    row_dict[key] = cell.value
                print(row_dict)
                # 自动获取ID
                # 录入客户表
                # 录入客户分配表

            return HttpResponse('上传成功')
方法二:不写入硬盘,写入内存,xlrd从内存中读取数据
    def batch_view(self,request):
        if request.method=="GET":
            return render(request,'batch_view.html')
        else:
            from django.core.files.uploadedfile import InMemoryUploadedFile
            file_obj = request.FILES.get('xsfile')

            from io import BytesIO
            f = BytesIO()

            for chunk in file_obj:
                f.write(chunk)
            import xlrd

            workbook = xlrd.open_workbook(file_contents=f.getvalue())
            # getvalue()方法用于获得写入后的str。
            sheet = workbook.sheet_by_index(0)
            maps = {
                0: 'qq',
                1: 'name',
                2: 'gender',
                3: 'education',
                4: 'graduation_school',
            }
            for index in range(1,sheet.nrows):
                row = sheet.row(index)

                row_dict = {}
                for i in range(len(maps)):
                    key = maps[i]
                    cell = row[i]
                    row_dict[key] = cell.value
                print(row_dict)
            #     # 自动获取ID
            #     # 录入客户表
            #     # 录入客户分配表

            return HttpResponse('上传成功')
打印数据:
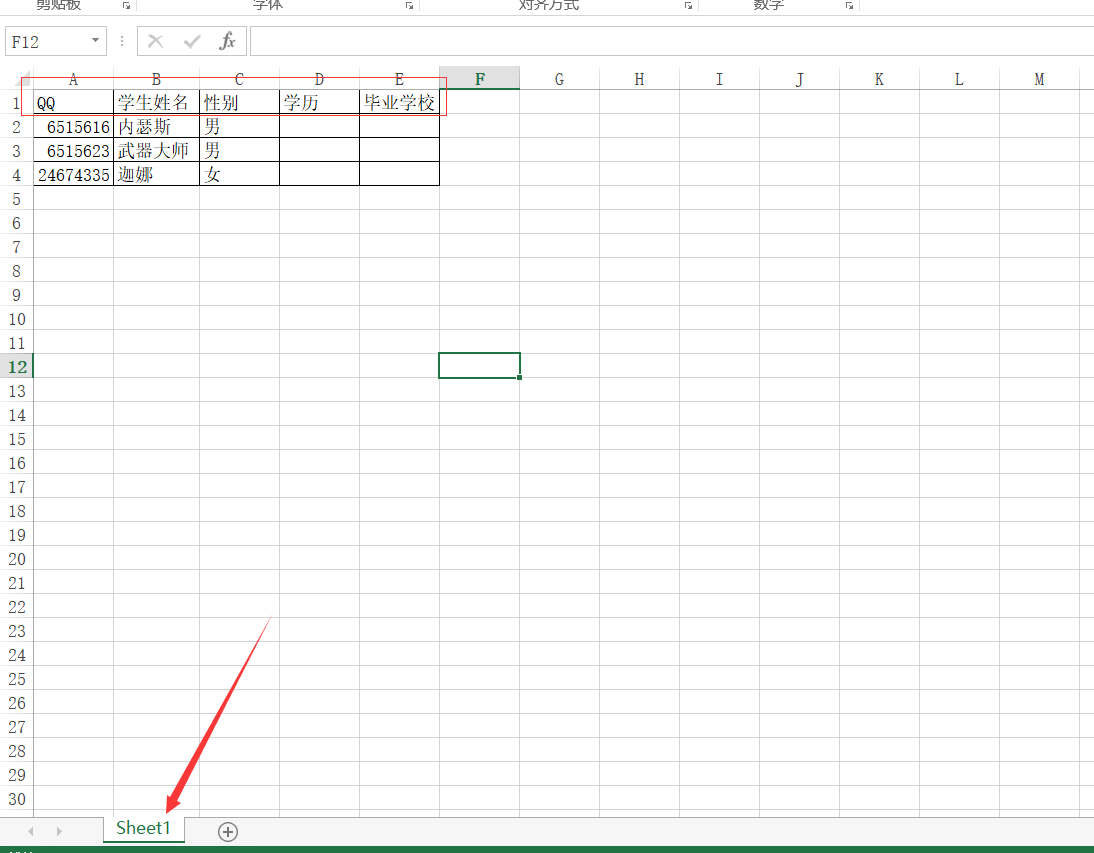
1 {'qq': 6515616.0, 'name': '内瑟斯', 'gender': '男', 'education': '', 'graduation_school': ''}
2 {'qq': 6515623.0, 'name': '武器大师', 'gender': '男', 'education': '', 'graduation_school': ''}
3 {'qq': 24674335.0, 'name': '迦娜', 'gender': '女', 'education': '', 'graduation_school': ''}
3. xlsx文件测试数据
4. 项目示例


    def batch_view(self,request):
        if request.method=="GET":
            return render(request,'batch_view.html')
        else:
            from django.core.files.uploadedfile import InMemoryUploadedFile
            file_obj = request.FILES.get('xsfile')

            # with open('customers.xlsx', mode='wb') as f:
            #     for chunk in file_obj:
            #         f.write(chunk)
            #
            from io import BytesIO
            f = BytesIO()
            for chunk in file_obj:
                f.write(chunk)
            import xlrd

            workbook = xlrd.open_workbook(file_contents=f.getvalue())
            sheet = workbook.sheet_by_index(0)
            maps = {
                0: 'qq',
                1: 'name',
                2: 'gender',
                3: 'education',
                4: 'graduation_school',
            }
            for index in range(1,sheet.nrows):
                from xxxxxx import AutoSale
                sale_id = AutoSale.get_sale_id()
                if not sale_id:
                    return HttpResponse("没有客户顾问无法分配")
                row = sheet.row(index)  # 这是通过行数获取行的内容
                dict_obj = {}  # 字典

                row_dict = {}
                for i in range(len(maps)):  # 这是获取列的数量
                    key = maps[i]       # 这是键
                    cell = row[i]       # 这是获取空格的对象
                    row_dict[key] = cell.value
                print(row_dict)
                try:
                    with transaction.atomic():
                        dict_obj['consultant_id'] = int(sale_id.decode('utf-8'))
                        ctime = datetime.datetime.now().date()
                        course_list = []
                        course_list.extend(dict_obj.pop('course').split(','))
                        print('course_list', course_list)
                        obj = models.Customer.objects.create(**dict_obj)
                        print('dict_obj', dict_obj)
                        obj.course = course_list
                        print('走到这里没')
                        models.CustomerDistribution.objects.create(user_id=sale_id, customer=obj, ctime=ctime)
                except Exception as e:
                    print(e)
                    AutoSale.rollback(sale_id)
                message.send_message('自动发送', '很,兴奋代码自动发送邮件,', 'xxxx@qq.com', '大毛')

            return HttpResponse('上传成功')