Springboot 配置接口文档swagger
往期推荐
SpringBoot系列(一)idea新建Springboot项目
本文目录
1. swagger2 介绍
1.1 简介
Swagger 是一个规范和完整的框架,用于生成、描述、调用和可视化 RESTful 风格的 Web 服务。总体目标是使客户端和文件系统作为服务器以同样的速度来更新。
随着前后端技术的日渐成熟,前后端的交互就只有接口了,前端请求接口获取数据,所以接口的格式化也就相当重要,有一个标准格式的接口文档在开发过程中是相当重要的,swagger就是这么一个在线的接口文档,在SpringBoot的集成之中也相当便利。
swagger可以自动生成在线接口文档,界面可视化的同时保证了便利的测试接口。
2. maven 配置swagger2依赖
创建一个SpringBoot web 项目,然后在pom.xml中添加如下依赖:
<dependency>
    <groupId>io.springfox</groupId>
    <artifactId>springfox-swagger2</artifactId>
    <version>2.9.2</version>
</dependency>
<dependency>
    <groupId>io.springfox</groupId>
    <artifactId>springfox-swagger-ui</artifactId>
    <version>2.9.2</version>
</dependency>
可以根据自己的SringBoot版本适当降低swagger2 的版本。
3. swagger2 配置
在Springboot启动类的同级目录下面创建一个config的包,然后创建一个配置Swagger2 的配置类。
package com.example.demoswagger.config;

import org.springframework.context.annotation.Bean;
import org.springframework.context.annotation.Configuration;
import springfox.documentation.builders.ApiInfoBuilder;
import springfox.documentation.builders.PathSelectors;
import springfox.documentation.builders.RequestHandlerSelectors;
import springfox.documentation.service.ApiInfo;
import springfox.documentation.spi.DocumentationType;
import springfox.documentation.spring.web.plugins.Docket;
import springfox.documentation.swagger2.annotations.EnableSwagger2;

/**
 * @author 全栈学习笔记
 * @date 2020/4/19 16:00
 * @description
 */
@Configuration
@EnableSwagger2
public class SwaggerConfig {
    @Bean
    public Docket createRestApi() {
        return new Docket(DocumentationType.SWAGGER_2)
                // 指定构建api文档的详细信息的方法:apiInfo()
                .apiInfo(apiInfo())
                .select()
                // 指定要生成api接口的包路径
                .apis(RequestHandlerSelectors.basePackage("com.example.demoswagger.controller"))
                //使用了 @ApiOperation 注解的方法生成api接口文档
                //.apis(RequestHandlerSelectors.withMethodAnnotation(ApiOperation.class))
                .paths(PathSelectors.any())
                //可以根据url路径设置哪些请求加入文档,忽略哪些请求
                .build();
    }

    /**
     * 设置api文档的详细信息
     */
    private ApiInfo apiInfo() {
        return new ApiInfoBuilder()
                // 标题
                .title("Spring Boot集成Swagger2")
                // 接口描述
                .description("swagger")
                // 联系方式
                .contact("微信公众号"+"全栈学习笔记"+"359076197@qq.com")
                // 版本信息
                .version("1.0")
                // 构建
                .build();
    }
}
注意其中的包,不要导错包了。
配置代码说明:
1. 使用 @Configuration 注解,标识这是一个配置类,项目启动的时候会自动调用加载,@EnableSwagger2 注解的作用是自动开启swagger2。
2. apiInfo() 方法里面的参数可以自己设定,在第一个方法中,我们除了可以根据接口所在的包对应生成接口文档还可以根据项目中是否有方法使用了 @ApiOperation注解来判断是否生成api文档。
4. controller 测试编写以及注解说明
上面我们配置好了swagger api生成的配置之后就可以编写测试的controller,创建一个与config同级的包controller,然后里面写一个TestController
单个参数
@RestController
@RequestMapping("/Test")
@Api("测试swagger接口")
public class TestController {

    @RequestMapping(path = "/getStudent",method = RequestMethod.GET)
    @ApiOperation("/根据学生id获取学生信息")
    @ApiImplicitParam(name = "id",value = "id",required = true,paramType = "query",dataType = "int")
    public Student getStudent(@RequestParam Integer id){
        Student student = new Student();
        student.setId(11);
        student.setAge(21);
        student.setName("全栈学习笔记");
        Map<Integer,Student> studentMap = new HashMap<>();
        studentMap.put(11,student);
        return studentMap.get(id);
    }
}
其中,Student类等会会贴出来。
代码说明:
- @RestController 相当于@Controller+@ResponseBody 注解,让标识的这个类返回json格式的数据。
- 类上面加上@Api的注解,说明这个类要生成api文档,并给予描述。相当于可以根据这个类作为类别的划分。在类里面的方法加上@ApiOperation 注解 用来描述这个方法(接口)是用来干嘛的;
- @ApiImplicitParam 注解是为了描述这个方法之中的参数。其中的name,value属性你应该知道。required 属性是标识在测试接口时,这个参数是否需要传,true为必须传,false为非必须。
- @ApiImplicitParam之中的paramType是标识这个参数应该在哪去获取,常用的有以下几种
- header-->放在请求头。请求参数的获取注解:@RequestHeader
- query -->常用于get请求的参数拼接。请求参数的获取注解:@RequestParam
- path -->(用于restful接口)-->请求参数的获取获取注解:@PathVariable
- body -->放在请求体。请求参数的获取注解:@RequestBody
- @ApiImplicitParam之中的dataType 是用来标识这个参数的类型,默认为String,如果是数组类型,需要加上allowMultiple=true,表示是数组类型的数据。也可以是自定义的对象类型。
多个参数的用法
@RequestMapping(path = "/getStudent",method = RequestMethod.PATCH)
@ApiOperation("/根据学生id获取学生信息")
@ApiImplicitParams({
    @ApiImplicitParam(name = "name",value = "姓名",required = true,paramType = "query",dataType = "String"),
    @ApiImplicitParam(name = "age",value = "年龄",required = true,paramType = "query",dataType = "int")
})
public Student editStudent(@RequestParam String name, @RequestParam Integer age){
    Student student = new Student();
    student.setId(12);
    student.setName(name);
    student.setAge(age);
    return student;

}
需要对多个参数进行属性说明时,需要用到 @ApiImplicitParams,然后里面再用 @ApiImplicitParam。
参数是对象的用法
controller代码
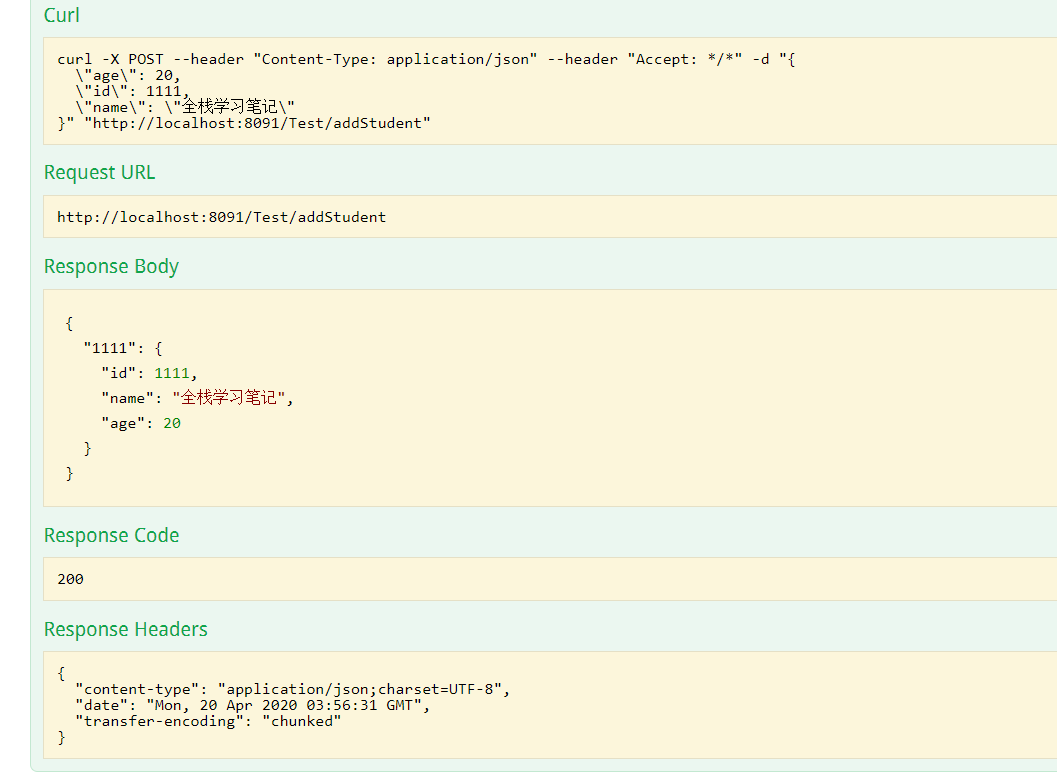
 @ApiOperation("/添加学生信息")
    @RequestMapping(path = "/addStudent",method = RequestMethod.POST)
    public Map<Integer,Student> AddStudent(@RequestBody Student student){
        Map<Integer,Student> studentMap = new HashMap<>();
        studentMap.put(student.getId(),student);
        return studentMap;
    }
entity代码:
/**
 * (Student)实体类
 *
 * @author 微信公众号:全栈学习笔记
 * @since 2020-04-14 11:39:10
 */
@ApiModel("学生类")
public class Student {

    /**
    * 唯一标识id
    */
    @ApiModelProperty("id")
    private Integer id;
    /**
    * 姓名
    */
    @ApiModelProperty("姓名")
    private String name;
    /**
    * 年龄
    */
    @ApiModelProperty(value = "年龄")
    private Integer age;
}
 省略get,set方法
 @ApiModelProperty 的属性配置相对之前那个@ApiImplicitParam的属性更多更全。
5. 接口测试
完成以上步骤,带你们看看swagger的界面如何,启动项目,浏览器输入localhost:8091/swagger-ui.html
如下:
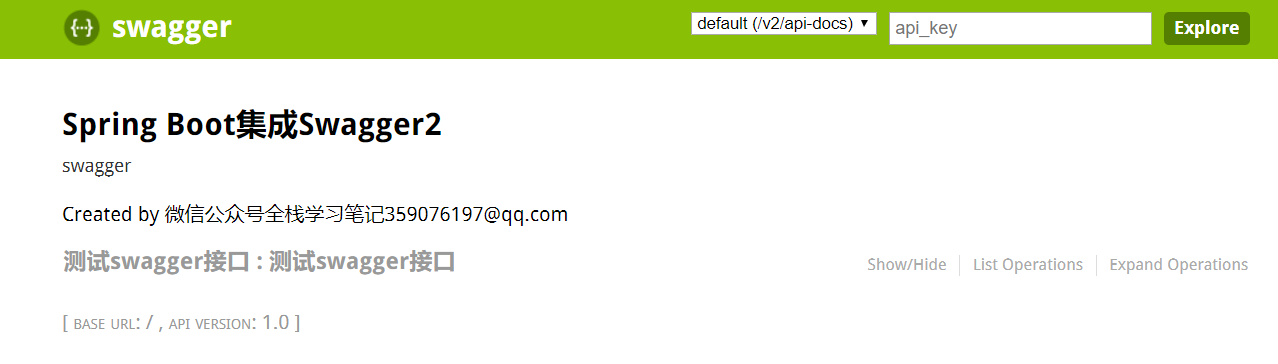
打开之后

测试一个接口

结果返回
6.总结
本期的分享就到这里,文中讲解了swagger2的配置,用法,以及测试,整个流程都讲解的较详细。如果你觉得文章有用,点个赞吧!