1.1 介绍
ngx_http_auth_basic_module模块实现让访问着,只有输入正确的用户密码才允许访问web内容。
web上的一些内容不想被其他人知道,但是又想让部分人看到。nginx的http auth模块以及Apache http auth都是很好的解决方案。
默认情况下nginx已经安装了ngx_http_auth_basic_module模块,如果不需要这个模块,可以加上 --without-http_auth_basic_module 。
nginx basic auth指令
语法: auth_basic string | off;
默认值: auth_basic off;
配置段: http, server, location, limit_except
默认表示不开启认证,后面如果跟上字符,这些字符会在弹窗中显示。
语法: auth_basic_user_file file;
默认值: —
配置段: http, server, location, limit_excep
1.2 安装服务htpasswd
如果服务器上面没有htpasswd 可以使用yum install -y httpd 进行安装
[root@linux-node1 ~]# yum install httpd -y
1.3 添加用户生成密码文件
方法一:
[root@linux-node1 conf]# printf "test1:$(openssl passwd -crypt 123456)\n" >>conf/htpasswd
[root@linux-node1 conf]# pwd
/etc/nginx/conf
[root@linux-node1 conf]# ll
total 4
-rw-r--r-- 1 root root 43 Dec 28 12:07 htpasswd
[root@linux-node1 conf]# cat htpasswd
syavingc:uu7RndQCc/s.Q
test1:myirmIogiWWeQ
方法二:
[root@linux-node1 ~]# htpasswd -c /etc/nginx/passwd.db syavingc ##syavingc 为用户名
New password: ##设置密码
Re-type new password: ##再次输入密码
Adding password for user syavingc
1.4 修改nginx配置文件
[root@linux-node1 vhost]# cat abc.conf
server {
listen 80;
server_name abc.12345.com;
location / {
root html/abc;
index index.php index.html index.htm;
auth_basic "nginx basic http test for syaving.com";
auth_basic_user_file /etc/nginx/passwd.db;
autoindex on;
}
access_log logs/access_abc.log main gzip buffer=32k flush=5s;
}
备注:一定要注意auth_basic_user_file路径,否则会不厌其烦的出现403。
生成密码
可以使用htpasswd,或者使用openssl
1.5 检测语法,重启nginx
[root@linux-node1 vhost]# nginx -t
nginx: the configuration file /etc/nginx/nginx.conf syntax is ok
nginx: configuration file /etc/nginx/nginx.conf test is successful
[root@linux-node1 vhost]# nginx -s reload
1.6 输出网址 用户名 密码
用户名 syavingc
密码 1q2w3e$R
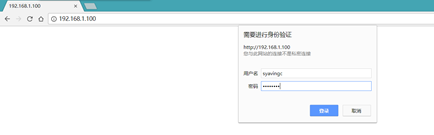
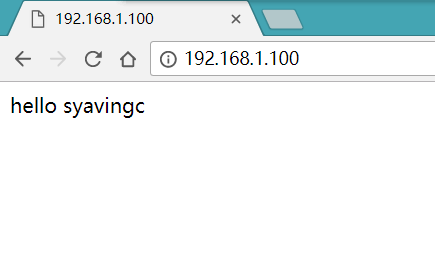
1.7 登陆之后的页面
1.8 添加一个用户
可以按照下面方式添加新用户,也可以使用上面的方法进行添加新用户
[root@linux-node1 nginx]# echo -n 'test2:' >> /etc/nginx/conf/htpasswd
1.9 设置加密密码
[root@linux-node1 nginx]# openssl passwd 111111 >>/etc/nginx/conf/htpasswd
1.10 查看
[root@linux-node1 nginx]# cat /etc/nginx/conf/htpasswd
syavingc:uu7RndQCc/s.Q
test1:myirmIogiWWeQ
test2:5q4cr0mSI5VWU
[root@linux-node1 nginx]# nginx -t
nginx: the configuration file /etc/nginx/nginx.conf syntax is ok
nginx: configuration file /etc/nginx/nginx.conf test is successful
[root@linux-node1 nginx]# nginx -s reload