使用软件和平台
1、基于平台: Vmware workstation 8.0
2、基于系统镜像: rhel-server-5.8-i386-dvd.iso
3、ISO编辑软件: UltraISO
4、自定义配置文件: ks.cfg
5、需要重新编辑的配置文件: isolinux.cfg
6、其他: 针对不需要的文件包进行删减
KickStart是一种无人职守安装方式。KickStart的工作原理是通过记录典型的安装过程中所需人工干预填写的各种参数,并生成一个名为ks.cfg的文件;在其后的安装过程中(不只局限于生成KickStart安装文件的机器)当出现要求填写参数的情况时,安装程序会首先去查找KickStart生成的文件,当找到合适的参数时,就采用找到的参数,当没有找到合适的参数时,才需要安装者手工干预。这样,如果KickStart文件涵盖了安装过程中出现的所有需要填写的参数时,安装者完全可以只告诉安装程序从何处取ks.cfg文件,然后去忙自己的事情。等安装完毕,安装程序会根据ks.cfg中设置的重启选项来重启系统,并结束安装。
第一步生成ks.cfg文件
我这里使用的远程连接工具是Xmanager Enterprise 4,可以支持在当前系统上打开远程主机的图形软件界面。
1、首先确认kickstart是否安装,没有安装的话使用yum进行安装
|
1
2
3
4
5
6
7
8
9
10
11
12
|
#检查 kickstart是否安装[root@lovelace ~]# rpm -qa | grep kickstartsystem-config-kickstart-2.6.19.9-2.el5pykickstart-0.43.9-1.el5#使用yum安装 kickstart[root@lovelace ~]# yum install system-config-kickstart -yLoaded plugins: katello, securityRepository rhel-debuginfo is listed more than once in the configurationUnable to read consumer identitySetting up Install ProcessPackage system-config-kickstart-2.6.19.9-2.el5.noarch already installed and latest versionNothing to do |
2、启动Xmanager - Passive服务,然后在终端上输入命令system-config-kickstart &
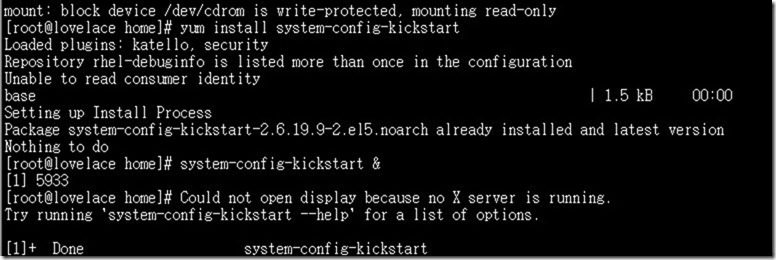
如果执行上面的命令弹出错误,请在终端输入以下两条命令

3、再次进行测试,如果还不成功,请查看服务是否开启,上面两条命令执行是否成功
注:这里为了方便大家进行配置,直接在现有系统的基础上进行编辑。
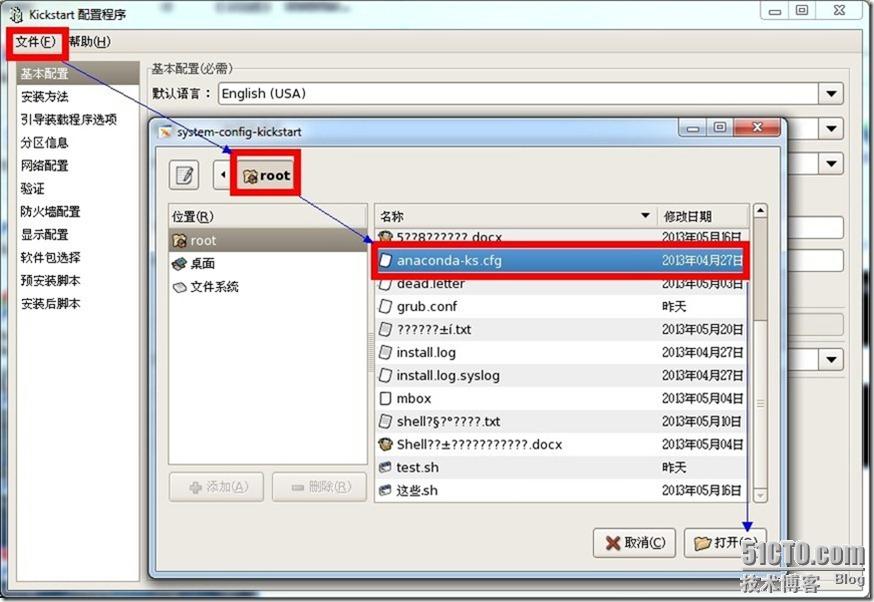
4、在弹出的图形界面点击文件---->打开文件---->root目录下---->anaconda-ks.cfg文件---->确定。
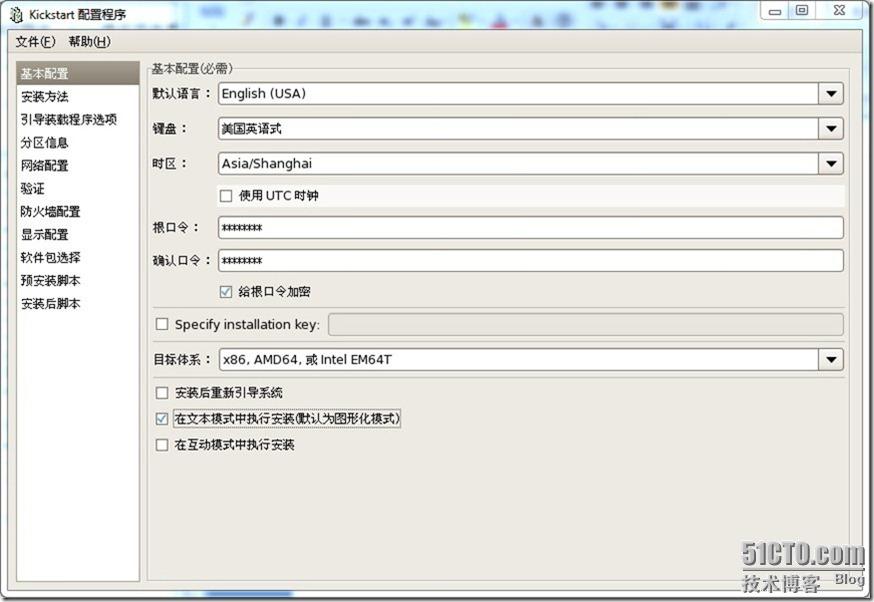
5、开始我们的ks.cfg文件编辑过程(选择语言,键盘类型,时区,设置根口令,安装后是否重启引导系统,在文本模式下进行安装)
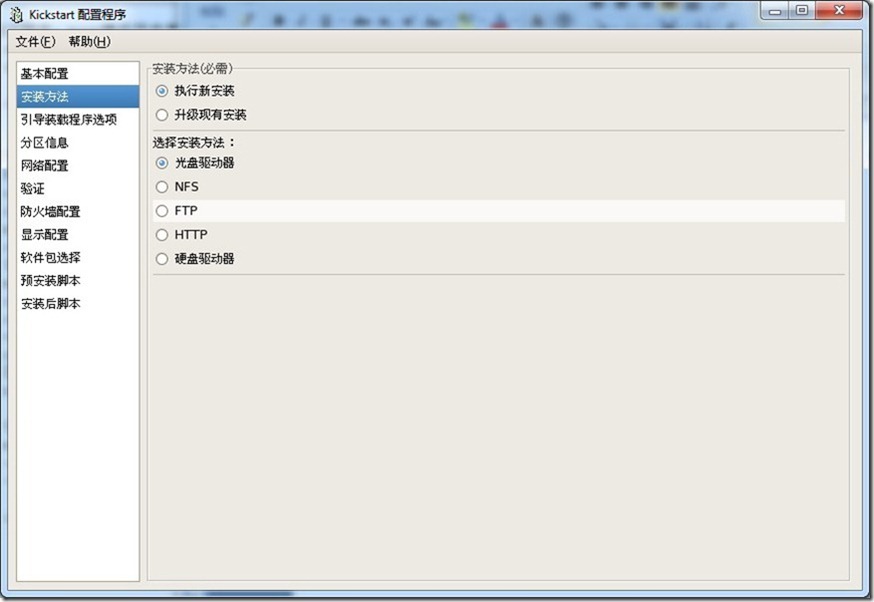
6、安装方法的选择(这里我们是对磁盘进行全新封装的,选择执行新安装,安装方法为光盘驱动器)
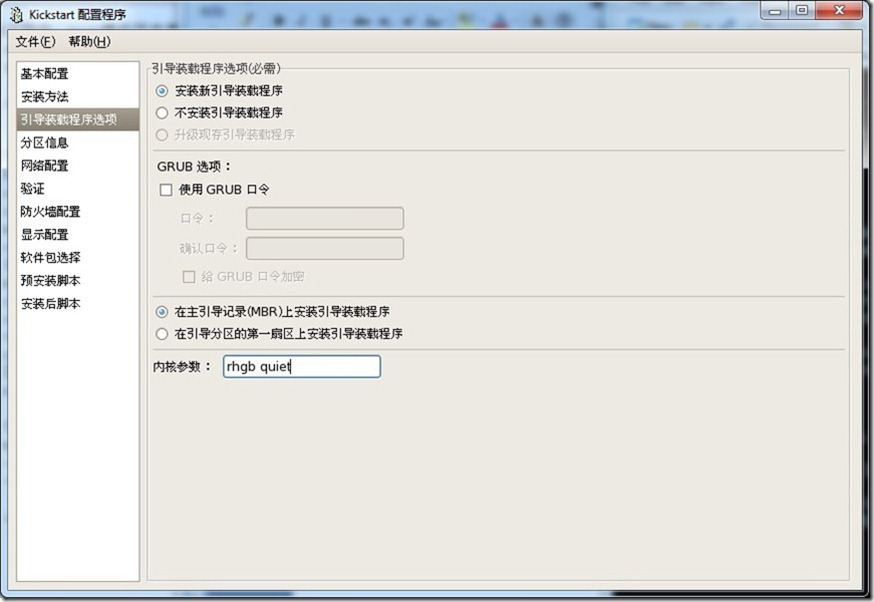
7、引导装载程序选项,(给内核传递参数rhgb quiet ,其他默认即可)
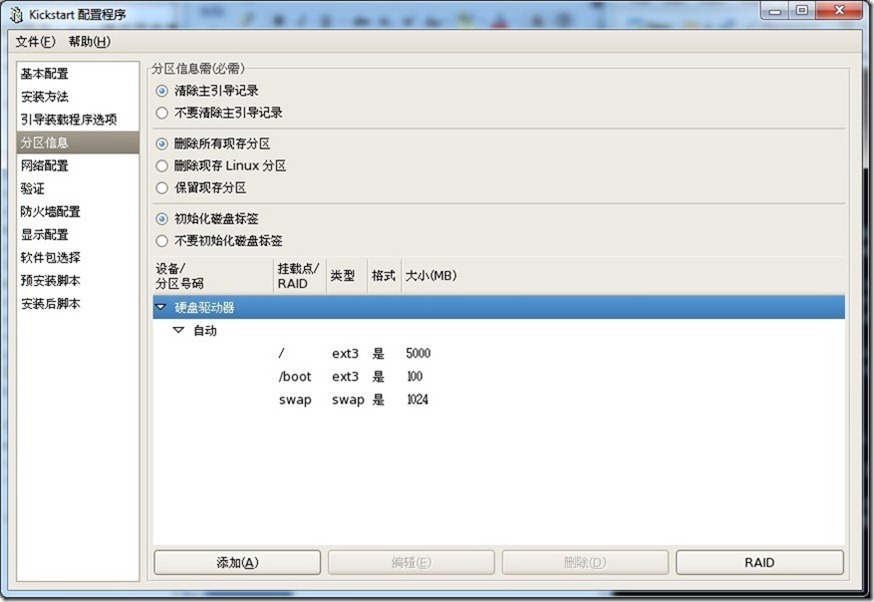
8、分区信息设置,这里我们新建三个分区(/分区:5G, /boot:200M, swap分区:1G)
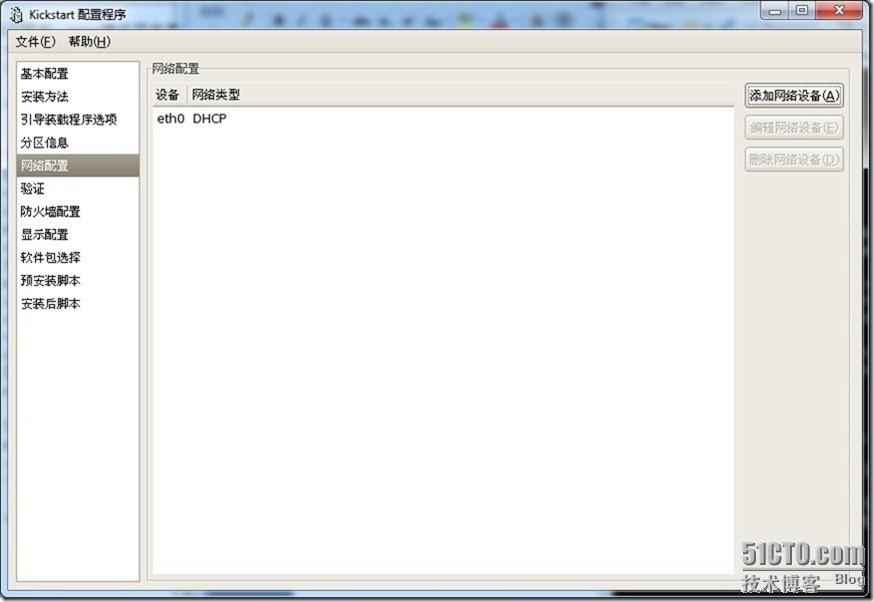
9、网络配置(这里选择添加eth0网卡,IP为dhcp自动分配)
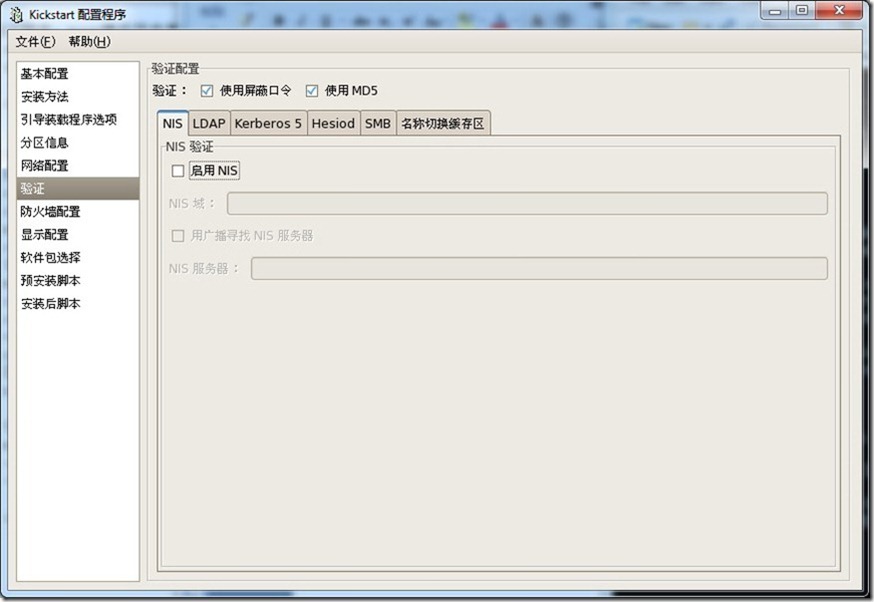
10、验证方式默认即可
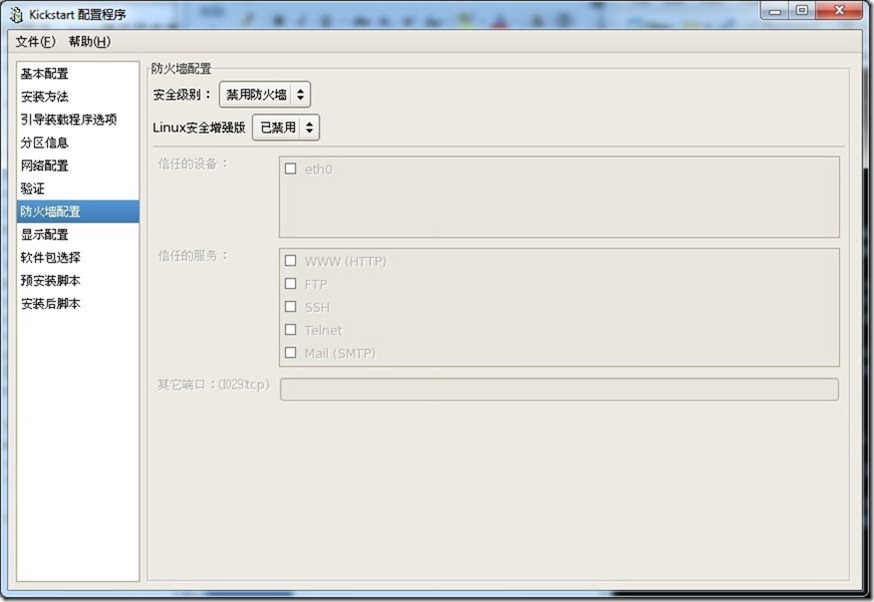
11、防火墙配置(这里选择禁用)
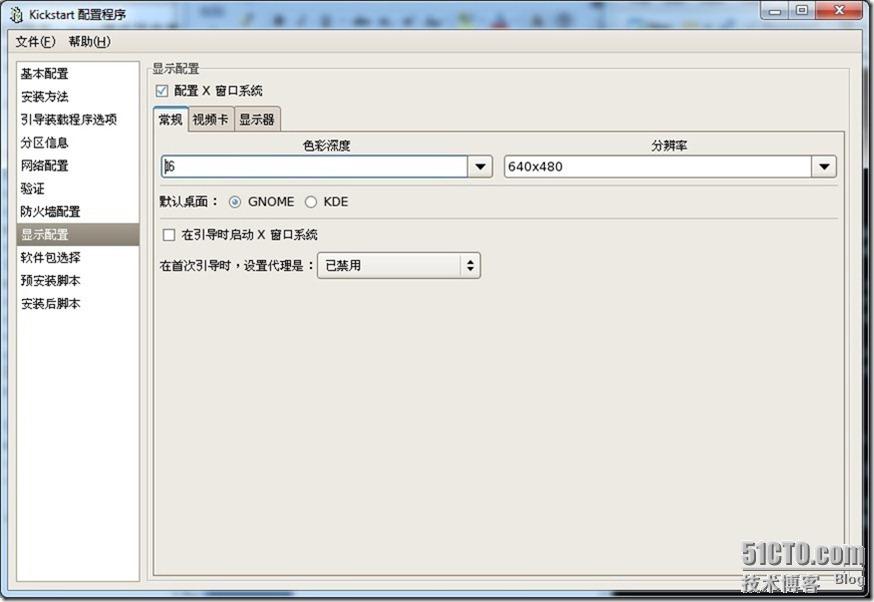
12、显示配置(这里我们选择安装X界面,色彩深度调整为16,RHEL上默认安装的是gnome)
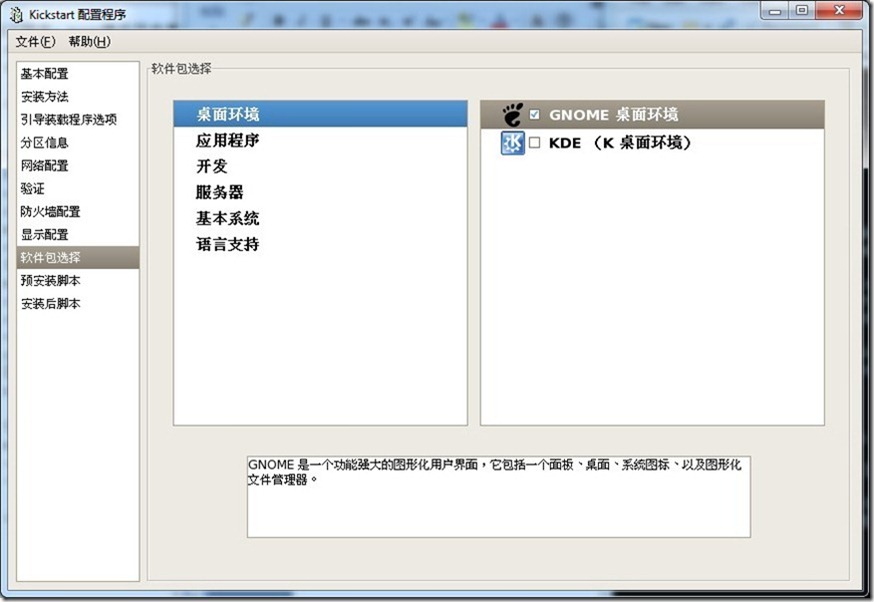
13、软件包安装选择(按需自定义选择)
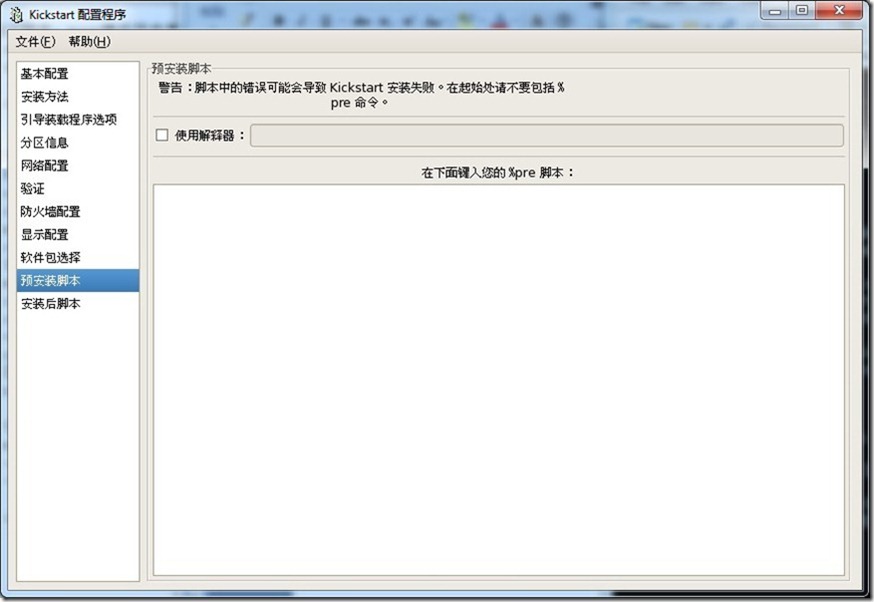
14、预安装脚本(按需进行设置)
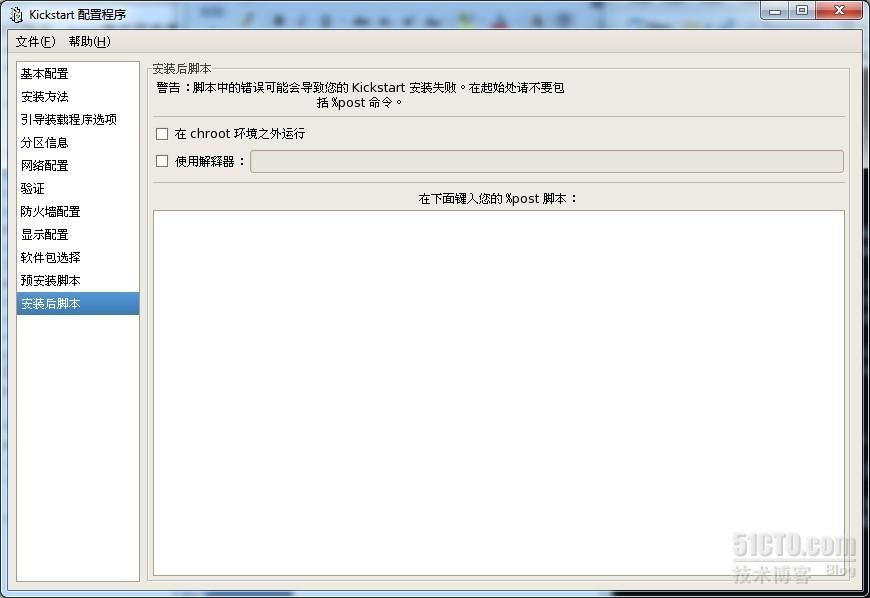
15、安装后脚本(按需进行设置)
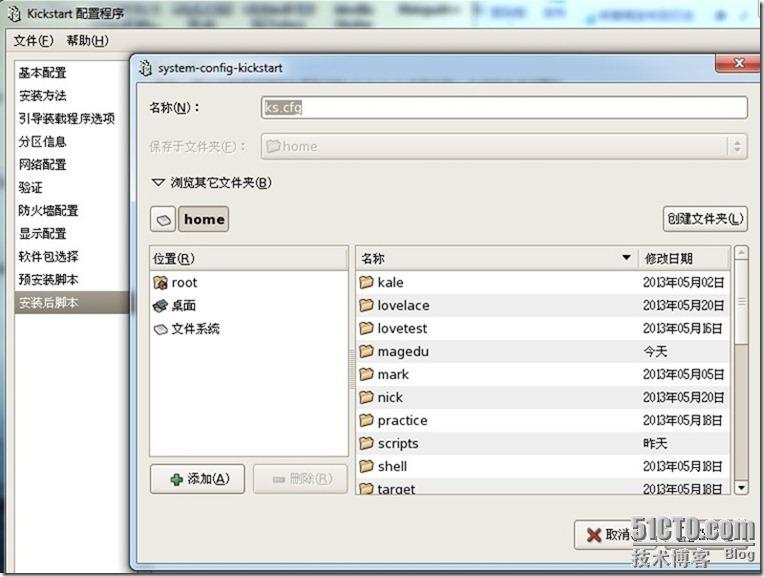
14、保存配置好的文件(可自定义存放路径,这里我们存放到/home目录下)
查看生成的ks.cfg配置文件
|
1
2
3
4
|
#验证ks.cfg文件是否存在[root@lovelace home]# pwd;ll ks.cfg/home-rw-r--r-- 1 root root 1649 05-27 04:20 ks.cfg |
查看ks.cfg文件 具体参数请查看kickstart文档
|
1
2
3
4
5
6
7
8
9
10
11
12
13
14
15
16
17
18
19
20
21
22
23
24
25
26
27
28
29
30
31
32
33
34
35
36
37
38
39
40
41
42
43
44
45
46
47
48
49
50
51
52
53
54
55
56
57
58
59
60
61
62
63
64
65
66
67
68
69
70
71
72
73
74
75
|
[root@lovelace home]# cat ks.cfg#platform=x86, AMD64, 或 Intel EM64T# System authorization informationauth --useshadow --enablemd5# System bootloader configurationbootloader --append="rhgb quiet" --location=mbr --driveorder=sda# Partition clearing informationclearpart --none# Use text mode installtext# Firewall configurationfirewall --disabled# Run the Setup Agent on first bootfirstboot --disablekey --skip# System keyboardkeyboard us# System languagelang en_US# Installation logging levellogging --level=info# Use CDROM installation mediacdrom# Network informationnetwork --bootproto=dhcp --device=eth0 --onboot=on# Reboot after installationreboot#Root passwordrootpw --iscrypted $1$/3RmiuX/$ZqpoSJEqBLYu93wL6a60R1# SELinux configurationselinux --enforcing# System timezonetimezone --isUtc Asia/Shanghai# Install OS instead of upgradeinstall# X Window System configuration informationxconfig --defaultdesktop=GNOME --depth=8 --resolution=640x480# Disk partitioning informationpart / --bytes-per-inode=4096 --fstype="ext3" --size=6000part /boot --bytes-per-inode=4096 --fstype="ext3" --size=200part swap --bytes-per-inode=4096 --fstype="swap" --size=1024%packages@base@development-libs@core@development-tools@sound-and-video@x-software-development@gnome-desktop@base-x@printing@gnome-software-development@admin-tools@legacy-software-support@editors@text-internet@dialup@graphics@office@java@graphical-internet@gameskexec-toolsiscsi-initiator-utilsfipscheckdevice-mapper-multipathsgpiopython-dmidecodeimakeemacslibsane-hpaiomesa-libGLU-develxorg-x11-utilsxorg-x11-server-Xnestxorg-x11-server-Xvfb |
第二步:修改isolinux.cfg配置文件(有多种方向进行选择,这里不再演示)
修改后内容为(Note:网上好多关于这个配置文件各不相同,只要能够实验成功就行)
|
1
2
3
4
5
6
7
8
9
10
11
12
13
14
15
16
17
18
19
20
21
22
23
24
|
[root@lovelace home]# cat isolinux.cfgdefault ksprompt 1timeout 60display boot.msgF1 boot.msgF2 options.msgF3 general.msgF4 param.msgF5 rescue.msglabel linuxkernel vmlinuzappend initrd=initrd.imglabel textkernel vmlinuzappend initrd=initrd.img textlabel kskernel vmlinuzappend ks=cdrom:/ks.cfg initrd=initrd.imglabel locallocalboot 1label memtest86kernel memtestappend - |
第三步:重新封装iso镜像文件(win下操作)
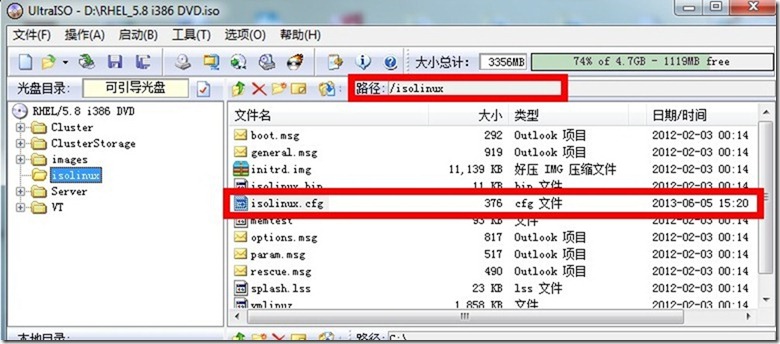
1、打开原版iso镜像文件(删除自动的isolinux.cfg文件,然后把我们重新编辑过的文件添加进去)
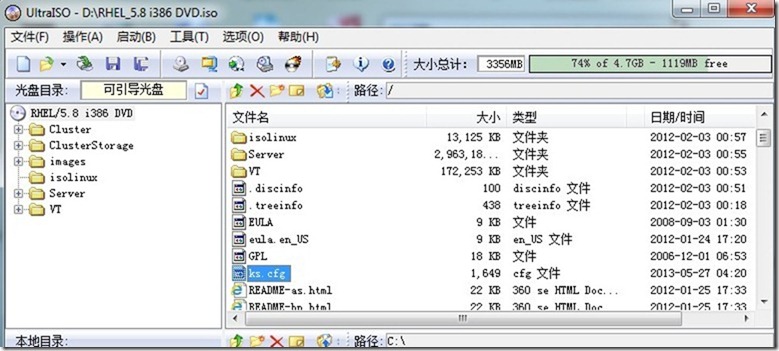
2、添加我们制作的ks.cfg文件到光盘根目录下,然后进行iso文件生成即可
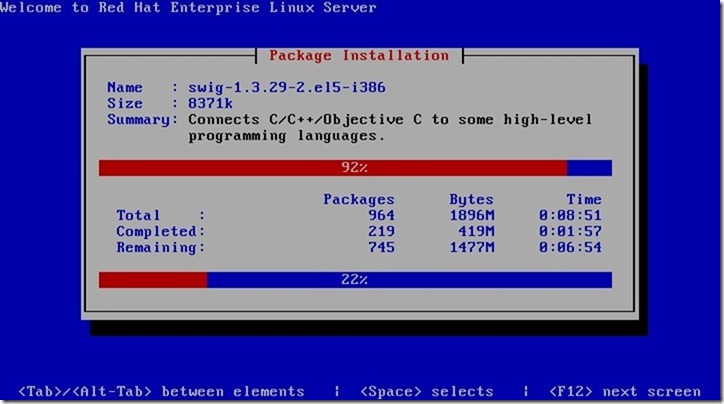
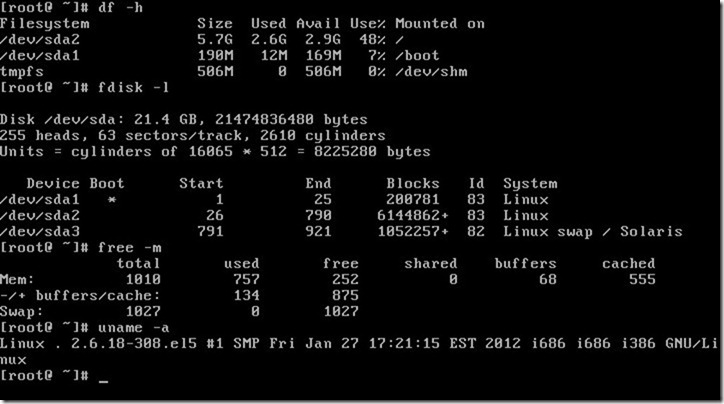
第四步:测试安装(这里截两张图验证下)
后记:其实做这个也没有多大意义,因为生产环境中都是批量部署的,这里希望大家能够了解下关于ks.cfg文件的编辑方法,如果你很熟悉的话,也可以脱离图形编辑,直接命令行进行设置…..
存在的bug:
1、安装后swap分区没有被自动挂载
2、没有对系统包和组件进行裁剪,只是添加了ks.cfg文件和对isolinux.cfg文件进行了添加和修改
3、进入系统后没有主机名为.不知道是啥情况
4、只在虚拟机上进行验证
