这里需要用到vertx-web依赖了,依然是在pom.xml里面导入
<?xml version="1.0" encoding="UTF-8"?>
<project xmlns="http://maven.apache.org/POM/4.0.0"
         xmlns:xsi="http://www.w3.org/2001/XMLSchema-instance"
         xsi:schemaLocation="http://maven.apache.org/POM/4.0.0 http://maven.apache.org/xsd/maven-4.0.0.xsd">
    <modelVersion>4.0.0</modelVersion>

    <groupId>com.javafm</groupId>
    <artifactId>vertx.helloworld</artifactId>
    <version>1.0-SNAPSHOT</version>

    <dependencies>
        <dependency>
            <groupId>io.vertx</groupId>
            <artifactId>vertx-web</artifactId>
            <version>3.3.3</version>
        </dependency>
    </dependencies>

    <build>
        <plugins>
            <plugin>
                <groupId>org.apache.maven.plugins</groupId>
                <artifactId>maven-compiler-plugin</artifactId>
                <version>3.6.0</version>
                <configuration>
                    <source>1.8</source>
                    <target>1.8</target>
                </configuration>
            </plugin>
        </plugins>
    </build>
</project>
这里只需要导入vertx-web就可以了,不需要vertx-core了,因为web依赖了core,会自动导入。而build标签里的maven-compiler-plugin是为了防止每次Import Changes的时候将jdk compiler还原到1.5而设置的。 如果不嫌麻烦,可以手动去设置jdk的编译级别,这个maven-compiler-plugin就可以不用配置了。
编写HelloRouter.java代码
package com.javafm.vertx.helloworld;

import io.vertx.core.Vertx;
import io.vertx.core.http.HttpServer;
import io.vertx.ext.web.Router;

/**
 * Created by lemontea <36634584@qq.com> on 16-12-19.
 */
public class HelloRouter {
    public static void main(String[] args) {
        Vertx vertx = Vertx.vertx();

        // 创建一个http服务
        HttpServer httpServer = vertx.createHttpServer();

        // 创建一个Router对象
        Router router = Router.router(vertx);

        // 配置一个/hello路径,对应的访问地址是http://localhost:8080/hello
        router.route("/hello").handler(routingContext -> {
            routingContext.response().putHeader("Content-Type", "text/html").
                    end("hello");
        });

        // 配置一个/router路径,对应的访问地址是 http://localhost:8080/router
        router.route("/router").handler(routingContext -> {
            routingContext.response().putHeader("Content-Type", "text/html").
                    end("router");
        });

        httpServer.requestHandler(router::accept).listen(8080);
    }
}
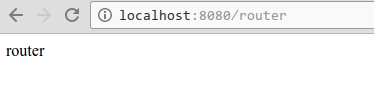
右键运行,Run "HelloRouter.main",在浏览器中分别访问。

原创文章,转载请注明出处。