一、下载
可以去官网下载最新版本,我使用apt-get的方式:
apt-get install haproxy默认情况下:
配置文件:/etc/haproxy/haproxy.cfg
二、配置haproxy.cfg
#---------------------------------------------------------------------
# Example configuration for a possible web application. See the
# full configuration options online.
#
# http://haproxy.1wt.eu/download/1.4/doc/configuration.txt
#
#---------------------------------------------------------------------
#---------------------------------------------------------------------
# Global settings
#---------------------------------------------------------------------
global
# to have these messages end up in /var/log/haproxy.log you will
# need to:
#
# 1) configure syslog to accept network log events. This is done
# by adding the '-r' option to the SYSLOGD_OPTIONS in
# /etc/sysconfig/syslog
#
# 2) configure local2 events to go to the /var/log/haproxy.log
# file. A line like the following can be added to
# /etc/sysconfig/syslog
#
# local2.* /var/log/haproxy.log
#
log 127.0.0.1 local2
chroot /var/lib/haproxy
pidfile /var/run/haproxy.pid
maxconn 4000
user haproxy
group haproxy
daemon
# turn on stats unix socket
stats socket /var/lib/haproxy/stats
#---------------------------------------------------------------------
# common defaults that all the 'listen' and 'backend' sections will
# use if not designated in their block
#---------------------------------------------------------------------
defaults
mode http
log global
option tcplog #mysql为tcplog
option dontlognull
option http-server-close
option redispatch
retries 3
timeout http-request 10s
timeout queue 1m
timeout connect 10s
timeout client 1m
timeout server 1m
timeout http-keep-alive 10s
timeout check 10s
maxconn 3000
listen mysql
bind 0.0.0.0:43306 #自己定义一个端口,用于各种程序连接
mode tcp #mysql负载均衡必须为 TCP模式
option mysql-check user haproxy #mysql健康检查haproxy,在每个服务器中创建haproxy用户,无权限,无密码
balance roundrobin #调度算法
server mysql-win 192.168.1.103:3306 weight 1 check port 3306 inter 1s rise 2 fall 2 # ip1,可以绑定中间件如mycat
server mysql-centos 192.168.32.129:3306 weight 1 check port 3306 inter 1s rise 2 fall 2 #ip2,可以绑定中间件如mycat
#inter表示检查间隔,单位为毫秒,建议不要太短,fall:检查失败2次后放弃检查;rise:连续检查成功2次后认为服务器可用。
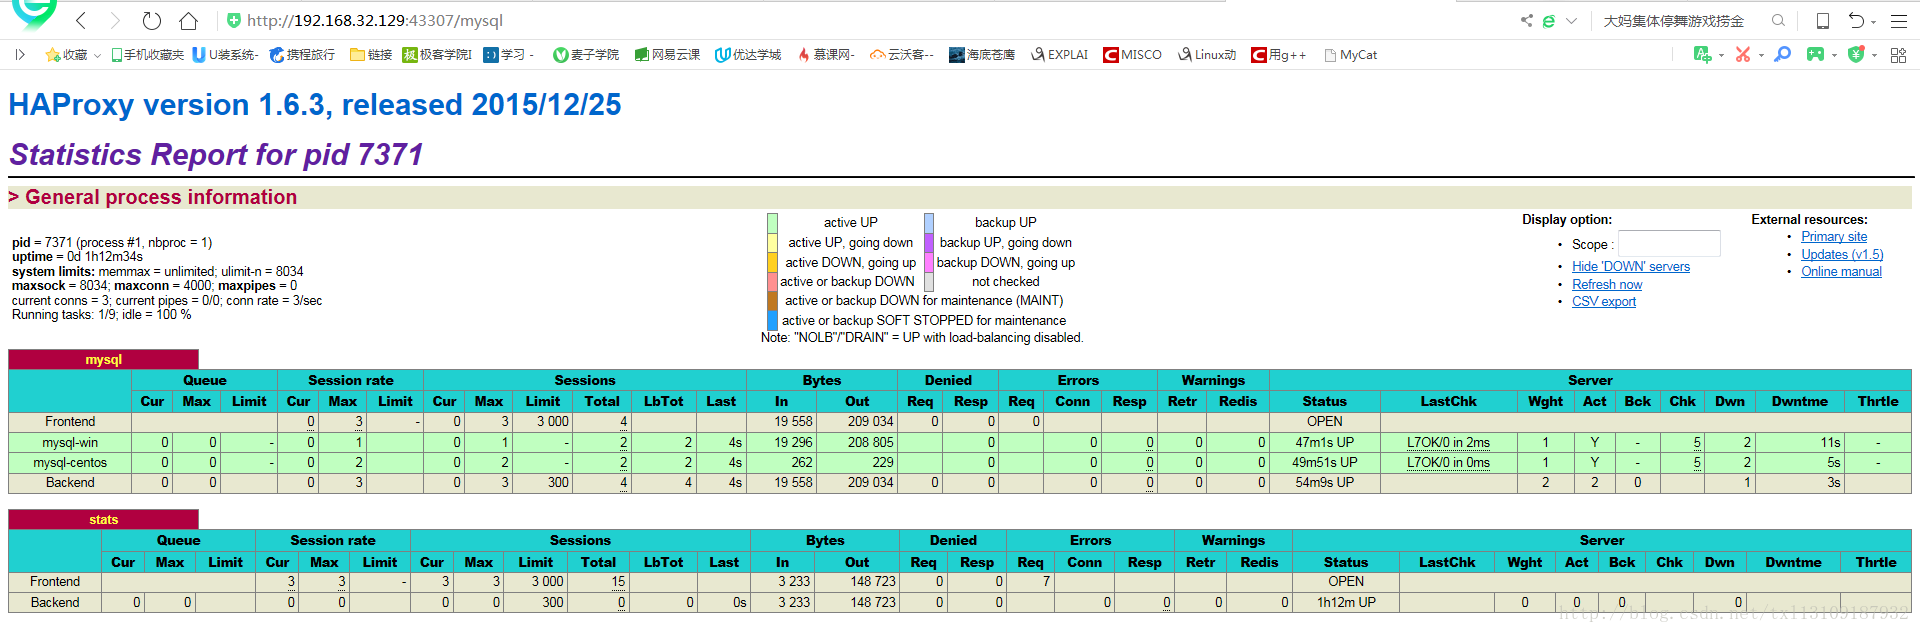
listen stats #监控
mode http
bind 0.0.0.0:43307 #后台监控 访问端口
stats enable
stats uri /mysql #后台监控页面地址
stats realm Global statistics
stats auth admin:admin #后台密码 三、启动Haproxy
sudo haproxy -f /etc/haproxy/haproxy.cfg查看监控:
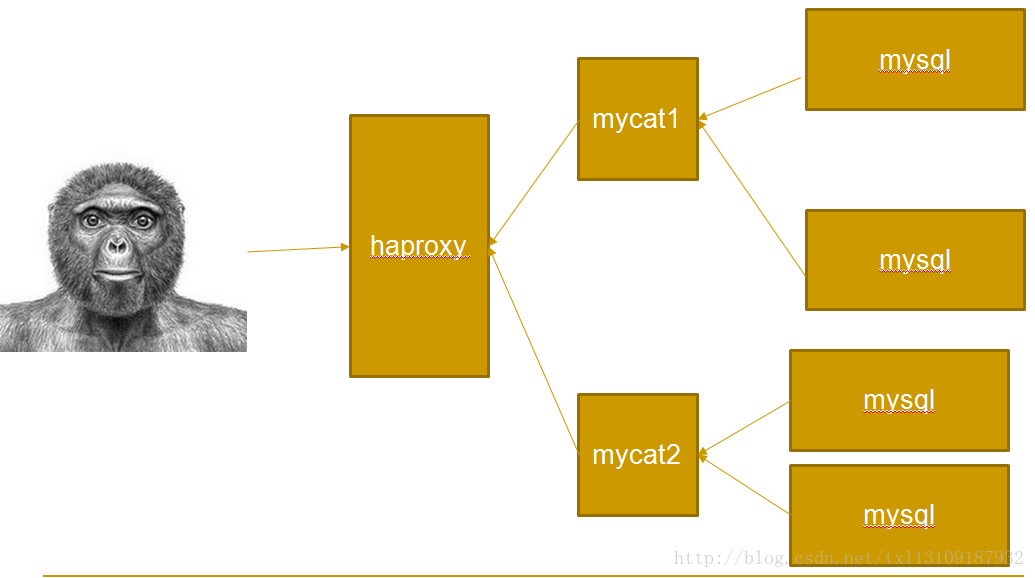
数据库架构: