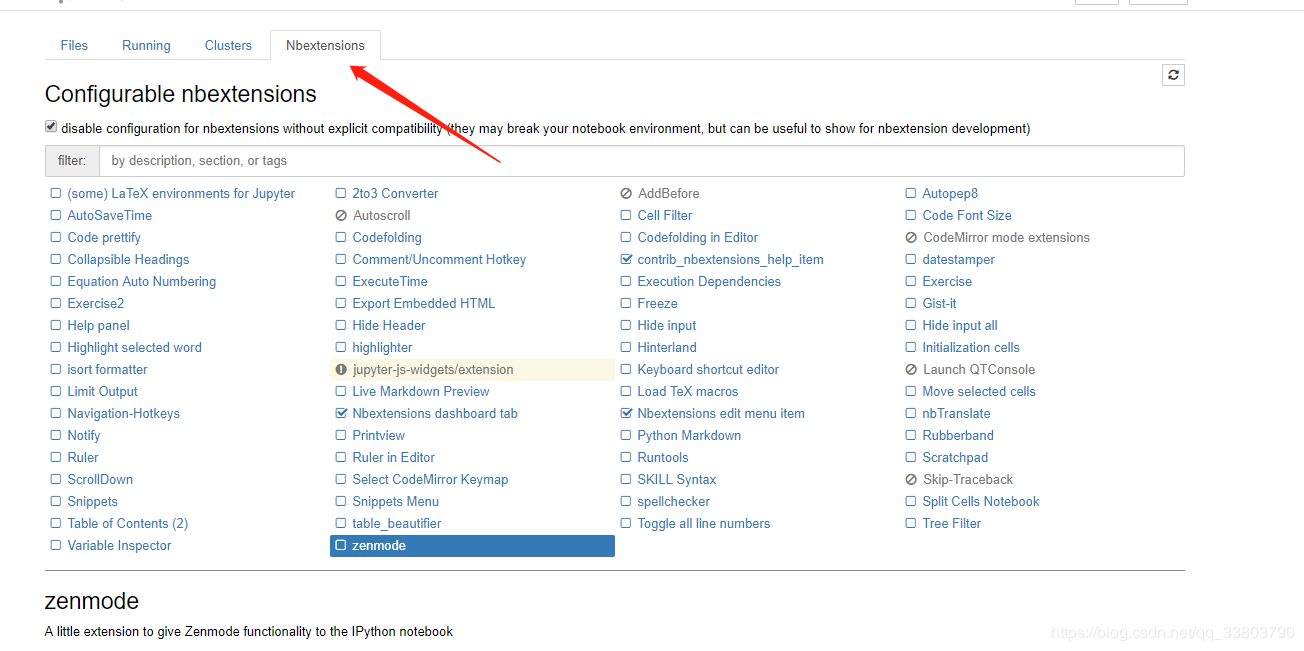
库的安装方式一般有两种:
一、 pip直接安装(或使用豆瓣源)
pip install scrapy

pip install -i https://pypi.douban.com/simple/ scrapy
pip uninstall 包名 #卸载包
二、使用whl文件安装
whl下载:https://www.lfd.uci.edu/~gohlke/pythonlibs/#
pip install xxxxx.whl #注意whl文件须在当前路径下或者whl文件名前加路径
pip install Twisted‑17.9.0‑cp36‑cp36m‑win_amd64.whl
三、使用其它镜像源
豆瓣源
pip install -i https://pypi.douban.com/simple 包名
清华源
# 百度搜索“pip清华源” https://mirrors.tuna.tsinghua.edu.cn/help/pypi/
pip install -i https://pypi.tuna.tsinghua.edu.cn/simple 包名
pip安装指定版本python包:
https://blog.csdn.net/manmanpa/article/details/74912394
四 jupyter notebook的使用
#Jupyter Notebook(此前被称为 IPython notebook)是一个交互式笔记本,支持运行 40 多种编程语言。

pip install https://pypi.douban.com/simple jupyter
jupyter notebook NbExtensions的安装
用conda安装:
conda install -c conda-forge jupyter_contrib_nbextensions

conda install -c conda-forge jupyter_nbextensions_configurator
Pip安装:
pip install jupyter_nbextensions_configurator jupyter_contrib_nbextensions

jupyter contrib nbextension install --user

jupyter nbextensions_configurator enable --user
【注】如果在安装过程中有提示“warning”,试试以管理员身份运行“anaconda prompt”,再安装
参考文章:http://www.elecfans.com/d/650252.html

代码补全: Hinterland
生成目录: Table of Contents(2)
五 爬虫的几个包
pip install Scrapy   # scrapy 框架
pip install langid  # 语言识别,处理 name
pip install scrapy-redis  # 实现 redis 分布式
pip install pymongo  # MongoDB 用到
pip install fake_useragent # 随机生成UserAgnet,最有发现有问题,没有用到
六、常用库
pip更新:
python -m pip install --upgrade pip
查看安装列表:
pip list
Anaconda更新:
conda install mingw libpython
TensorFlow
# 清华源
pip install -i https://pypi.tuna.tsinghua.edu.cn/simple tensorflow
dlib:
# https://blog.csdn.net/zmdsjtu/article/details/72642521?utm_source=itdadao&utm_medium=referral
# 首先需要Cmake以及编译C++成python程序的工具
sudo apt-get install libboost-python-dev cmake

pip install dlib
opencv:
pip install -i https://pypi.tuna.tsinghua.edu.cn/simple opencv-python
Numpy:
# NumPy( Numberical Python )是一个开源的python科学计算库,可用来存储和处理大型矩阵,比Python自身的嵌套列表(nested list structure)结构要高效的多(该结构也可以用来表示矩阵(matrix))。


pip install -i https://pypi.douban.com/simple numpy

import numpy as np
SciPy:
'''
Scipy库构建于NumPy之上,提供了一个用于在Python中进行科学计算的工具集,如数值计算的算法和一些功能函数,可以方便的处理数据。主要包含以下内容:
统计
优化
集成
线性代数
傅里叶变换
信号和图像处理
SciPy 提供了一个非常广泛的特定函数集合
'''
pip install -i https://pypi.douban.com/simple scipy
Matplotlib:
# Matplotlib 是一个 Python 的 2D绘图库,它以各种硬拷贝格式和跨平台的交互式环境生成出版质量级别的图形。
#使用matplotlib能够非常简单的可视化数据

pip install -i https://pypi.douban.com/simple matplotlib

import matplotlib.pyplot as plt
sklearn:
# sklearn是机器学习中一个常用的python第三方模块
# http://scikit-learn.org/stable/index.html
# 里面对一些常用的机器学习方法进行了封装,在进行机器学习任务时,并不需要每个人都实现所有的算法,只需要简单的调用sklearn里的模块就可以实现大多数机器学习任务。

pip install -i https://pypi.douban.com/simple sklearn
安装flask:
#Flask是一个使用 Python 编写的轻量级 Web 应用框, 可以使用Python语言快速实现一个网站或Web服务。

pip install -i https://pypi.douban.com/simple/ flask
安装Pillow与PIL:

关于Pillow与PIL

PIL(Python Imaging Library)是Python一个强大方便的图像处理库,名气也比较大。不过只支持到Python 2.7。

PIL官方网站:http://www.pythonware.com/products/pil/

Pillow是PIL的一个派生分支,但如今已经发展成为比PIL本身更具活力的图像处理库。目前最新版本是3.0.0。

Pillow的Github主页:https://github.com/python-pillow/Pillow
Pillow的文档(对应版本v3.0.0):https://pillow.readthedocs.org/en/latest/handbook/index.html
Pillow的文档中文翻译(对应版本v2.4.0):http://pillow-cn.readthedocs.org/en/latest/

Python 3.x 安装Pillow

给Python安装Pillow非常简单,使用pip或easy_install只要一行代码即可。

在命令行使用PIP安装:
pip install Pillow

或在命令行使用easy_install安装:
easy_install Pillow

安装完成后,使用from PIL import Image就引用使用库了。比如:
from PIL import Image
im = Image.open("bride.jpg")
im.rotate(45).show()
安装PyQt5/4(自动安装sip):
pip install -i https://pypi.douban.com/simple pyqt5
Cerberus:
#Cerberus是一个验证Python对象、MongoDB格式的库
#https://www.jianshu.com/p/ca852f679fcc

pip install -i https://pypi.douban.com/simple cerberus
seaborn:
# Seaborn是Python基于matplotlib的数据可视化工具。其实是在matplotlib的基础上进行了更高级的API封装,从而使得作图更加容易,在大多数情况下使用seaborn就能做出很具有吸引力的图。

# https://seaborn.pydata.org/installing.html

pip install seaborn

conda install seaborn
pandas:
# ....

pip install -i https://pypi.douban.com/simple pandas
nose:
# ....

pip install -i https://pypi.douban.com/simple nose
wxpython:
# ...

pip install -i https://pypi.douban.com/simple wxpython
使用PPA安装JDK8
https://blog.csdn.net/u012707739/article/details/78489833
selenium
pip install selenium
$ pip3 install virtualenv
$ pip3 install virtualenvwrapper
pypcap 和 dpkt
# 安装pypcap
# https://github.com/pynetwork/pypcap
# 先安装 libpcap-dev 和 python-dev ( 不用进入虚拟环境 )

sudo apt-get install libpcap-dev
sudo apt-get install python-dev

pip install pypcap


# 安装dpkt
pip install dpkt
