一 .在Gazebo中仿真差速轮式机器人
在本节,我们会对前面设计的差速轮式机器人进行仿真。
你可以在mastering_ros_robot_description_pkg/urdf文件中获取diff_wheeled_robot.xacro移动机器人的描述文件。
我们创建一个启动文件,在Gazebo中生成仿真模型。就像我们对机械臂所做的那样,我们可以创建一个ROS软件包,用
seven_dof_arm_gazebo软件包的相同依赖项启动Gazebo仿真,我是从对应的git库中下载的完整软件包。
$ git clone https://github.com/jocacace/diff_wheeled_robot_gazebo.git
进入diff_wheeled_robot_gazebo/launch文件夹,并提取diff_wheeled_gazebo.launch文件。
启动文件代码如下:
 1 <?xml version="1.0" ?>
 2 <launch>
 3
 4   <!-- these are the arguments you can pass this launch file, for example paused:=t   rue -->
 5   <arg name="paused" default="false"/>
 6   <arg name="use_sim_time" default="true"/>
 7   <arg name="gui" default="true"/>
 8   <arg name="headless" default="false"/>
 9   <arg name="debug" default="false"/>
10
11   <!-- We resume the logic in empty_world.launch -->
12   <include file="$(find gazebo_ros)/launch/empty_world.launch">
13     <arg name="debug" value="$(arg debug)" />
14     <arg name="gui" value="$(arg gui)" />
15     <arg name="paused" value="$(arg paused)"/>
16     <arg name="use_sim_time" value="$(arg use_sim_time)"/>
17     <arg name="headless" value="$(arg headless)"/>
18   </include>
19
20
21 <!-- urdf xml robot description loaded on the Parameter Server-->
22
23   <param name="robot_description" command="$(find xacro)/xacro --inorder '$(find ma   stering_ros_robot_description_pkg)/urdf/diff_wheeled_robot.xacro'" />
24
25   <!-- Run a python script to the send a service call to gazebo_ros to spawn a U   RDF robot -->
26   <node name="urdf_spawner" pkg="gazebo_ros" type="spawn_model" respawn="false"    output="screen"
27     args="-urdf -model diff_wheeled_robot -param robot_description"/>
28
29 </launch>
使用以下命令来启动此文件:
$ roslaunch diff_wheeled_robot_gazebo diff_wheeled_gazebo.launch
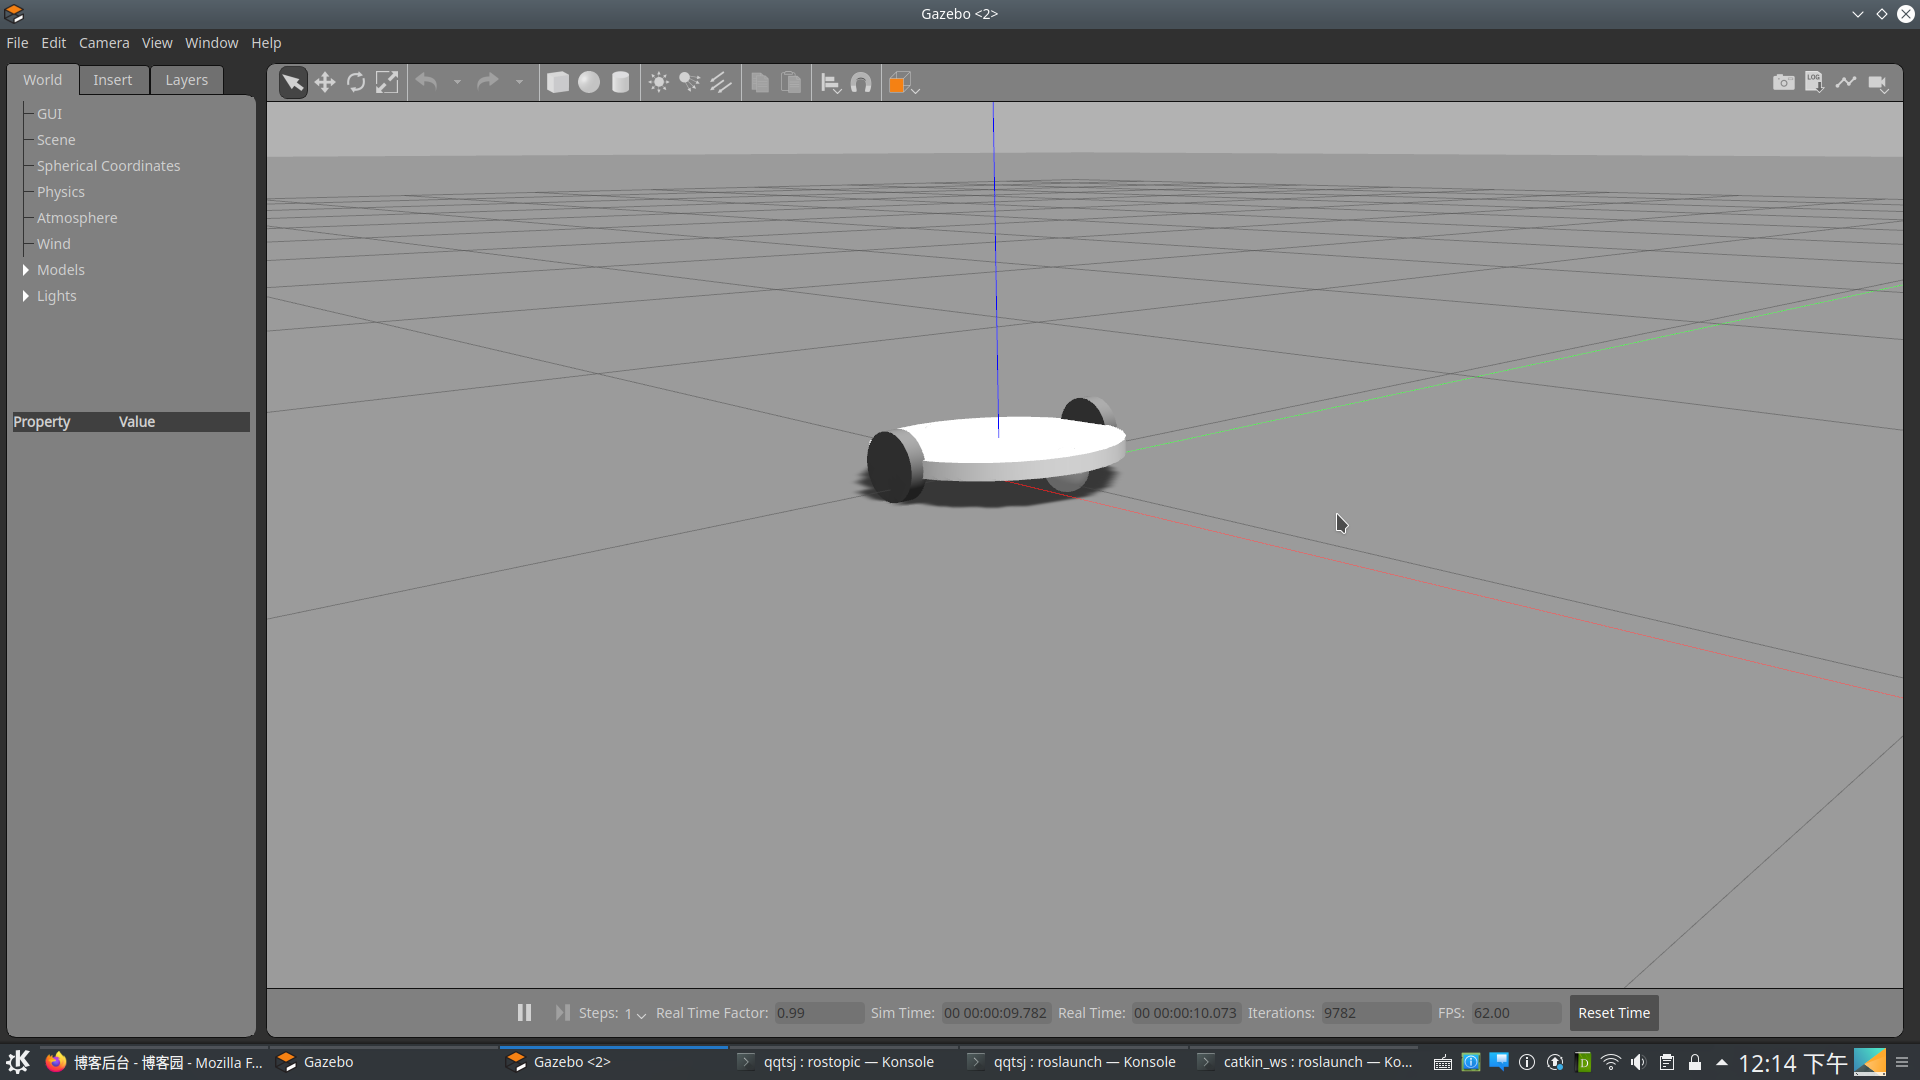
仿真模型如下:
仿真成功后,接下来我们将激光雷达添加到机器人中。
1.将激光雷达添加到机器人中
我们在机器人顶部添加了激光雷达来执行高级操作,比如用该机器人进行自主导航或地图构建。
为了将激光雷达添加到机器人中,我们应该将以下代码添加到diff_wheeled_robot.xacro文件中:
248   <link name="hokuyo_link">
249     <visual>
250       <origin xyz="0 0 0" rpy="0 0 0" />
251       <geometry>
252         <box size="${hokuyo_size} ${hokuyo_size} ${hokuyo_size}"/>
253       </geometry>
254       <material name="Blue" />
255     </visual>
256   </link>
257   <joint name="hokuyo_joint" type="fixed">
258     <origin xyz="${base_radius - hokuyo_size/2} 0 ${base_height+hokuyo_size/4}" rp    y="0 0 0" />
259     <parent link="base_link"/>
260     <child link="hokuyo_link" />
261   </joint>
262   <gazebo reference="hokuyo_link">
263     <material>Gazebo/Blue</material>
264     <turnGravityOff>false</turnGravityOff>
265     <sensor type="ray" name="head_hokuyo_sensor">
266       <pose>${hokuyo_size/2} 0 0 0 0 0</pose>
267       <visualize>false</visualize>
268       <update_rate>40</update_rate>
269       <ray>
270         <scan>
271           <horizontal>
272             <samples>720</samples>
273             <resolution>1</resolution>
274             <min_angle>-1.570796</min_angle>
275             <max_angle>1.570796</max_angle>
276           </horizontal>
277         </scan>
278         <range>
279           <min>0.10</min>
280           <max>10.0</max>
281           <resolution>0.001</resolution>
282         </range>
283       </ray>
284       <plugin name="gazebo_ros_head_hokuyo_controller" filename="libgazebo_ros_las    er.so">
285         <topicName>/scan</topicName>
286         <frameName>hokuyo_link</frameName>
287       </plugin>
288     </sensor>
289   </gazebo>
本节中,我们使用名称为libgazebo_ros_laser.so的GazeboROS插件来仿真激光雷达。
完整的代码可以在diff_wheeled_robot_with_laser.xacro描述文件中找到,该文件位于
mastering_ros_robot_description_pkg/urdf/文件夹中。
在仿真环境中添加一些物体,这样我们就可以查看激光雷达,在这里,我们在机器人周围添加
一些圆柱体,可以看到相应的激光视图。
2.在Gazebo中控制机器人的移动
我们正在使用的是一个差速机器人,配有2个轮子和2个脚轮。该机器人的完整特性应该作为Gazebo-ROS插件来仿真。
基本的差速驱动插件已经实现。
要在Gazebo中控制机器人移动,我们需要添加一个名为libgazebo_ros_diff_drive.so的Gazebo-ROS插件,从而可以生成该机器人的差速驱动动作。
以下是该插件的定义及其参数的完整代码片段:
292   <!-- Differential drive controller  -->
293   <gazebo>
294     <plugin name="differential_drive_controller" filename="libgazebo_ros_diff_driv    e.so">
295       <legacyMode>true</legacyMode>
296       <rosDebugLevel>Debug</rosDebugLevel>
297       <publishWheelTF>false</publishWheelTF>
298       <robotNamespace>/</robotNamespace>
299       <publishTf>1</publishTf>
300       <publishWheelJointState>false</publishWheelJointState>
301       <alwaysOn>true</alwaysOn>
302       <updateRate>100.0</updateRate>
303       <leftJoint>front_left_wheel_joint</leftJoint>
304       <rightJoint>front_right_wheel_joint</rightJoint>
305       <wheelSeparation>${2*base_radius}</wheelSeparation>
306       <wheelDiameter>${2*wheel_radius}</wheelDiameter>
307       <broadcastTF>1</broadcastTF>
308       <wheelTorque>30</wheelTorque>
309       <wheelAcceleration>1.8</wheelAcceleration>
310       <commandTopic>cmd_vel</commandTopic>
311       <odometryFrame>odom</odometryFrame>
312       <odometryTopic>odom</odometryTopic>
313       <robotBaseFrame>base_footprint</robotBaseFrame>
314
315
316     </plugin>
317   </gazebo>
在该插件中,我们可以提供一些参数,如机器人的车轮关节(关节应该是连续转动型的)、车轮间距、车轮直径、里程计话题等。
控制机器人移动的一个重要参数是:
<commandTopic>cmd_vel</commandTopic>
该参数是插件的速度指令话题,是ROS中一个Twist类型的消息(sensor_msgs/Twist)。我们可以将Twist消息发布到/cmd_vel话题中,我们就可以看到机器人开始从它的位置移动。
3.在启动文件中添加关节状态发布者
添加差速驱动插件之后,我们需要将关节状态发布者加入到现有的启动文件中,或者我们也可以创建一个新的启动文件。
你可以在diff_wheeled_robot_gazebo/launch下看到更新后的最终启动文件diff_wheeled_gazebo_full.launch。
启动文件包含关节状态发布者,这有助于在RViz中可视化显示。以下是在此启动文件中为关节状态发布者添加的额外代码:
24   <node name="joint_state_publisher" pkg="joint_state_publisher" type="joint_state_   publisher" ></node>
25   <!-- start robot state publisher -->
26   <node pkg="robot_state_publisher" type="robot_state_publisher" name="robot_state_   publisher" output="screen" >
27     <param name="publish_frequency" type="double" value="50.0" />
28   </node>
4.添加ROS遥控节点
ROS遥控(teleop)节点通过接收键盘的输入来发布ROSTwist命令。在该节点中,我们可以生成线速度和角速度,而且已经有了一个标准的遥控节点实现,我们可以重用该节点。
遥控节点是在diff_wheeled_robot_control软件包中实现的,脚本文件夹包含diff_wheeled_robot_key节点,它就是遥控节点。
我在相应的git库中下载了该软件包:
$git clone https://github.com/jocacace/diff_wheeled_robot_control.git
要想成功编译和使用该软件包,你需要安装joy_node软件包:
$sudo apt install ros-melodic-joy
下面是名为keyboard_teleop的启动文件,用来启动遥控节点:
 1 <launch>
 2   <!-- differential_teleop_key already has its own built in velocity smoother -->
 3   <node pkg="diff_wheeled_robot_control" type="diff_wheeled_robot_key" name="diff_w   heeled_robot_key"  output="screen">
 4
 5     <param name="scale_linear" value="0.5" type="double"/>
 6     <param name="scale_angular" value="1.5" type="double"/>
 7     <remap from="turtlebot_teleop_keyboard/cmd_vel" to="/cmd_vel"/>
 8
 9   </node>
10 </launch>
让我们开始控制机器人运动。
使用以下命令启动具有完整仿真设置的Gazebo:
$ roslaunch diff_wheeled_robot_gazebo diff_wheeled_gazebo_full.launch
启动遥控节点
$ roslaunch diff_wheeled_robot_control keyboard_teleop.launch
启动RViz可视化机器人状态和激光数据:
$ rosrun rviz rviz
在RViz中添加Fixed Frame:/odom,添加Laser Scan,话题设置为/scan以查看激光扫描数据,添加Robot model来查看机器人模型。
在遥控终端中,我们可以使用一些按键(U、I、O、J、K、L、M、“,”、“.”)进行方向调整,其他键(q、z、w、x、e、c、K、空格键)进行速度调整。
如图显示机器人使用机器人使用遥控在Gazebo中移动及其在RViz中的可视化。
我们可以从Gazebo工具栏上选择基本物体,并添加到机器人环境中,也可以在左边的面板上添加在线库的物体:
只有当我们按下遥控节点终端内相应的按键时,机器人才会移动,如果该终端处于不活动状态,按下按键机器人不会移动。
如果一切正常,我们可以使用机器人来探索该区域并在RViz中可视化激光数据。