一 request前后端交互
参考链接:https://www.cnblogs.com/xiaoyuanqujing/protected/articles/11644453.html

基本样式
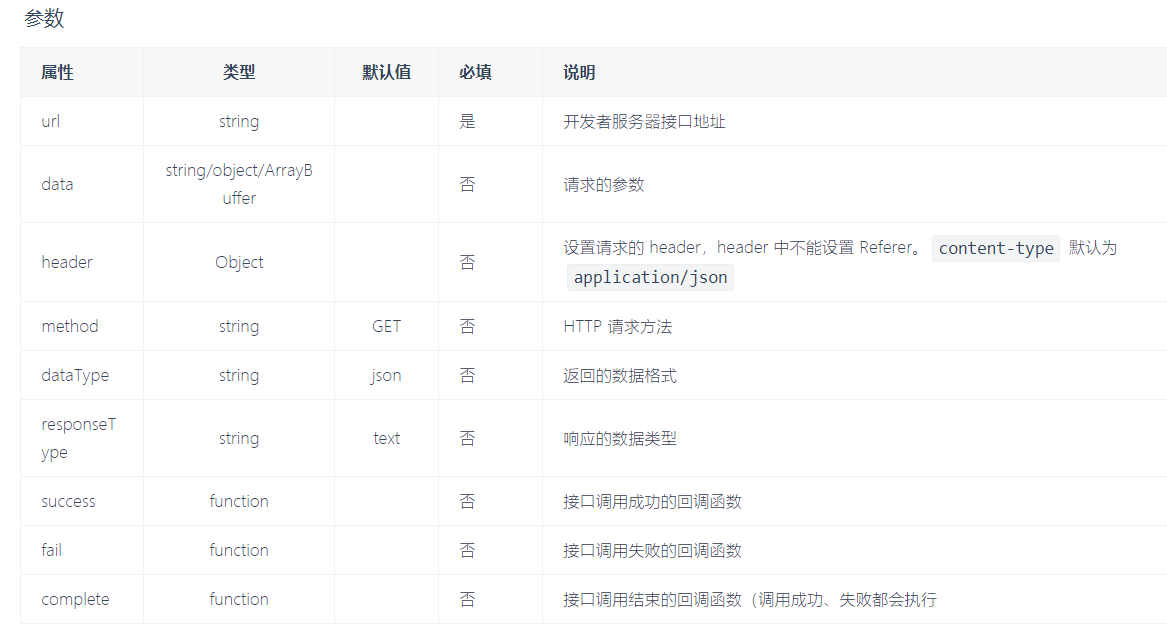
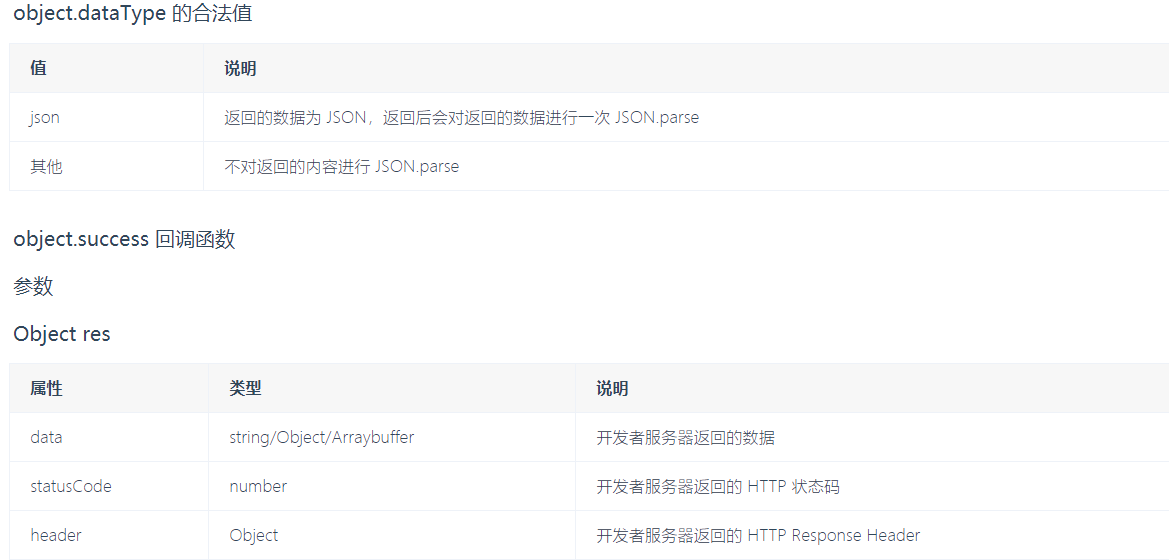
wx.request({
  url: 'test.php', // 仅为示例,并非真实的接口地址
  data: {
    x: '',
    y: ''
  },
  header: {
    'content-type': 'application/json' // 默认值
  },
  success(res) {
    console.log(res.data)
  }
})
实际示例
1.wxml文件中
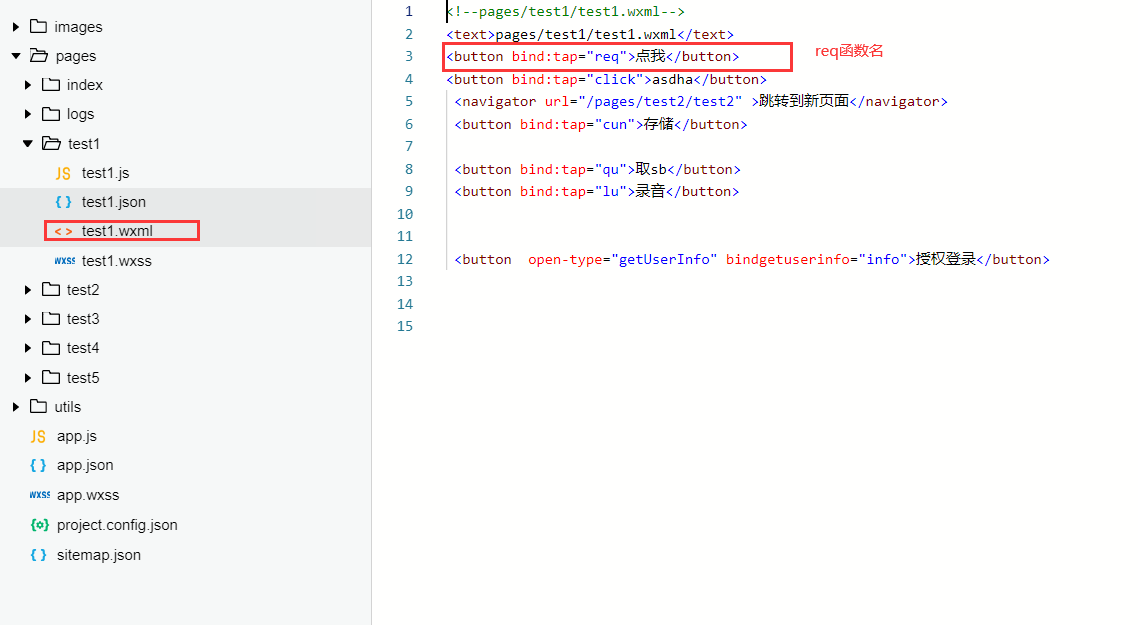
2.js文件
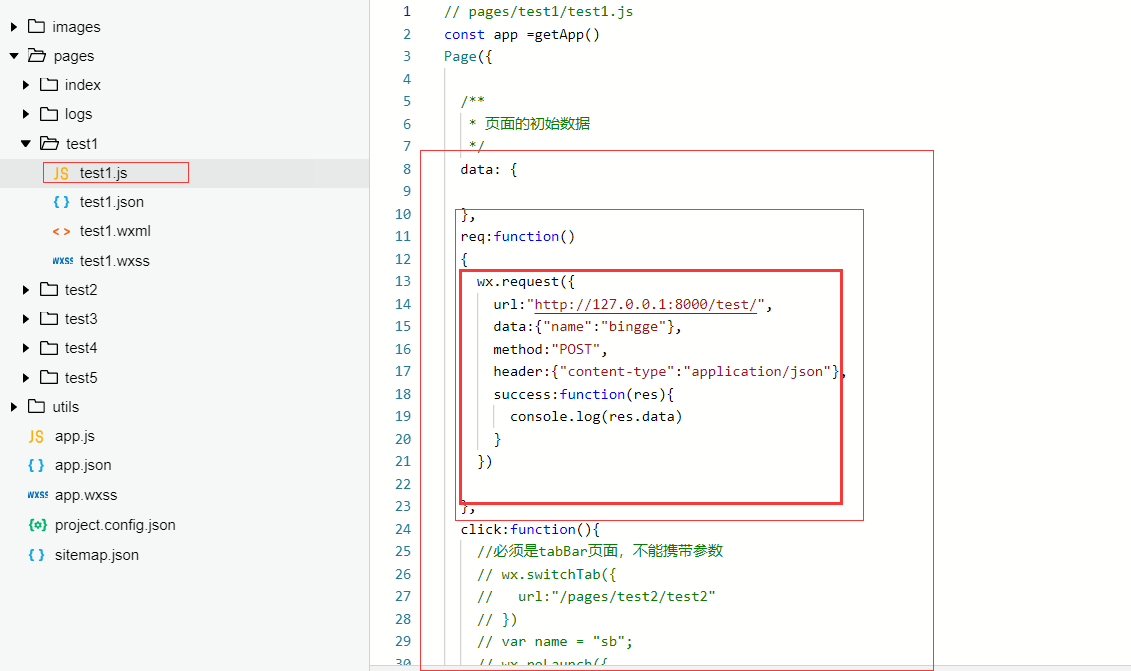
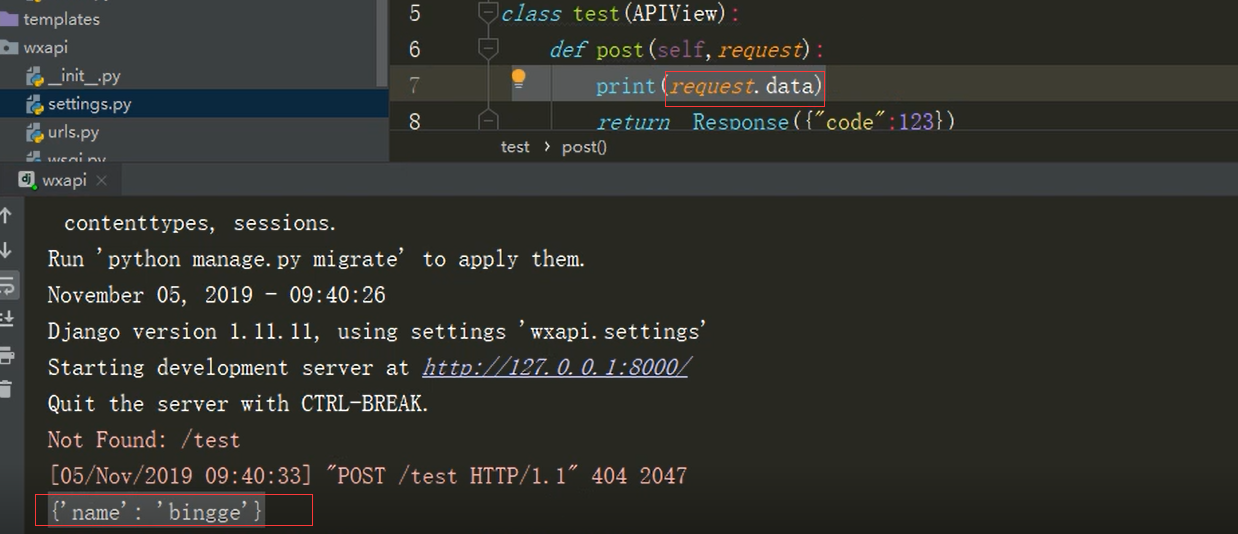
3.django后端如何获取
二 路由跳转
1.通过js事件页面之间跳转
https://www.cnblogs.com/xiaoyuanqujing/protected/articles/11644461.html
此方式需要在wxml和wxjs2个文件中同时操作

示例
全局配置文件app.json
{
  "tabBar": {
    "list": [
      {
        "pagePath": "index",
        "text": "首页"
      },
      {
        "pagePath": "other",
        "text": "其他"
      }
    ]
  }
}
pages局部js文件>Page>事件函数中
wx.switchTab({
  url: '/index' #tabar页面路径
})
实际示例
1.

2.


示例
pages局部js文件>Page>事件函数中
1.
Page({
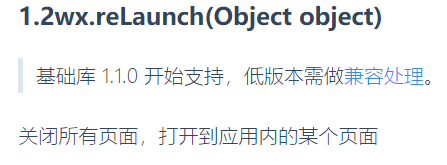
wx.reLaunch({ url: 'test?id=1' })
})
2.
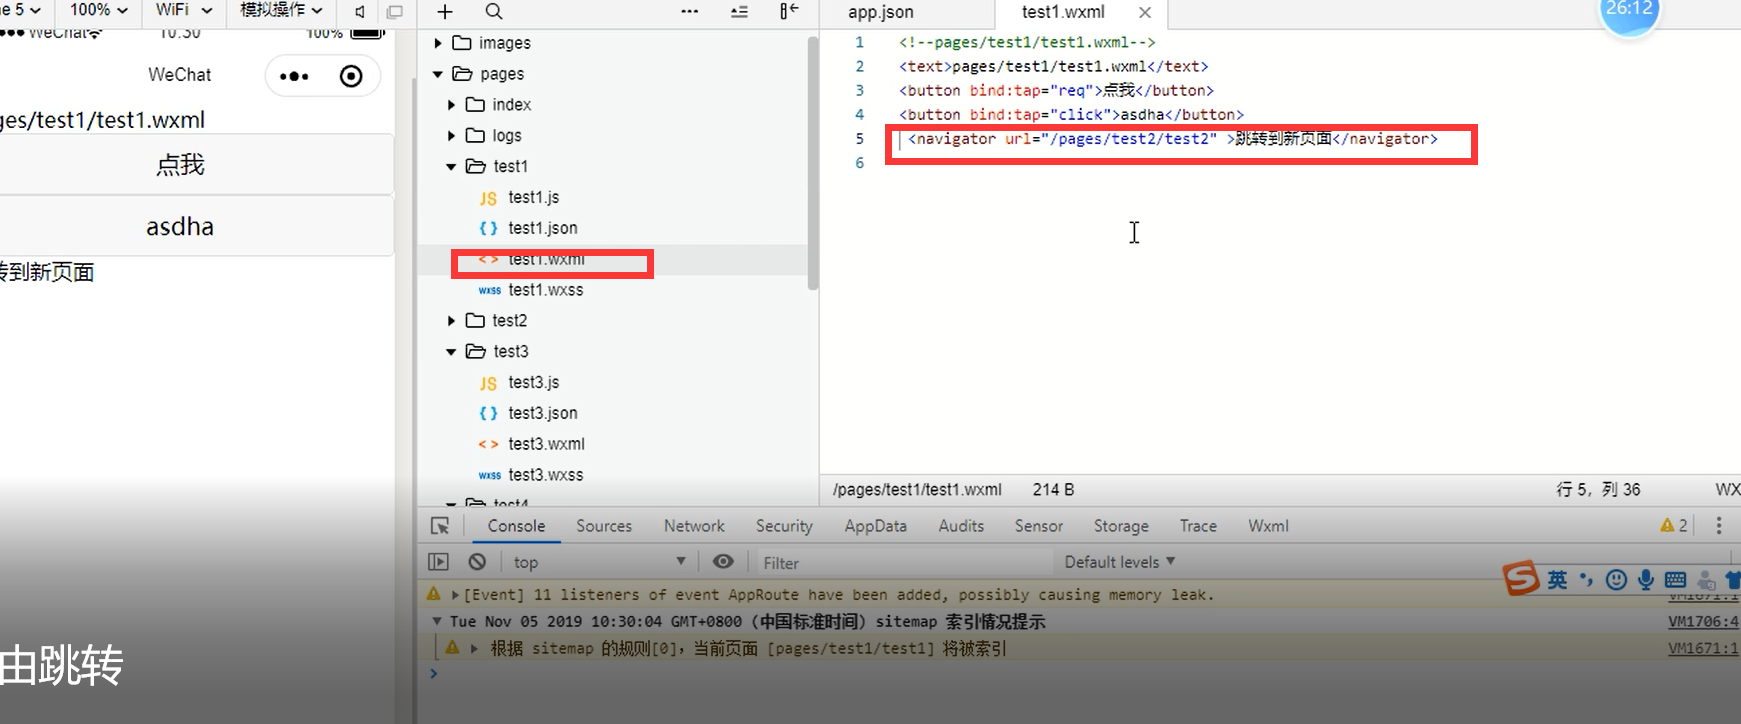
2.a标签方式跳转
https://developers.weixin.qq.com/miniprogram/dev/component/navigator.html
此方式只需要在wxml中编写即可,作用和通过js一样
三 存储数据到本地
https://www.cnblogs.com/xiaoyuanqujing/protected/articles/11644465.html
四 小程序登入
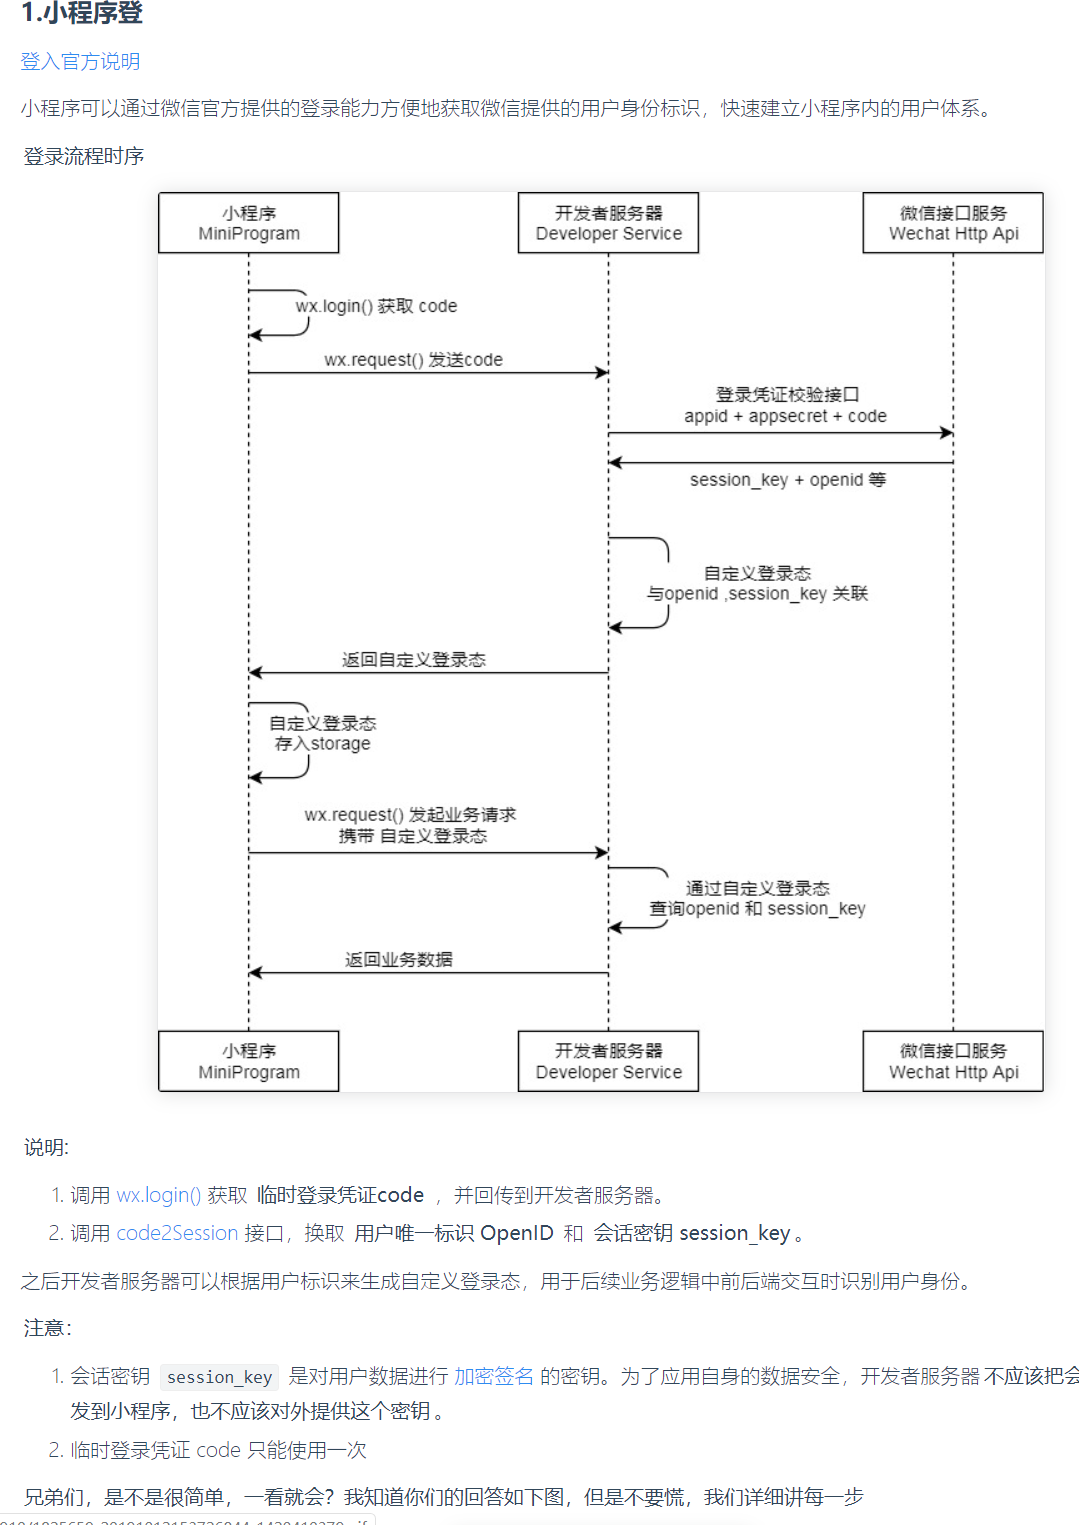
2.实际案例
2.1前端
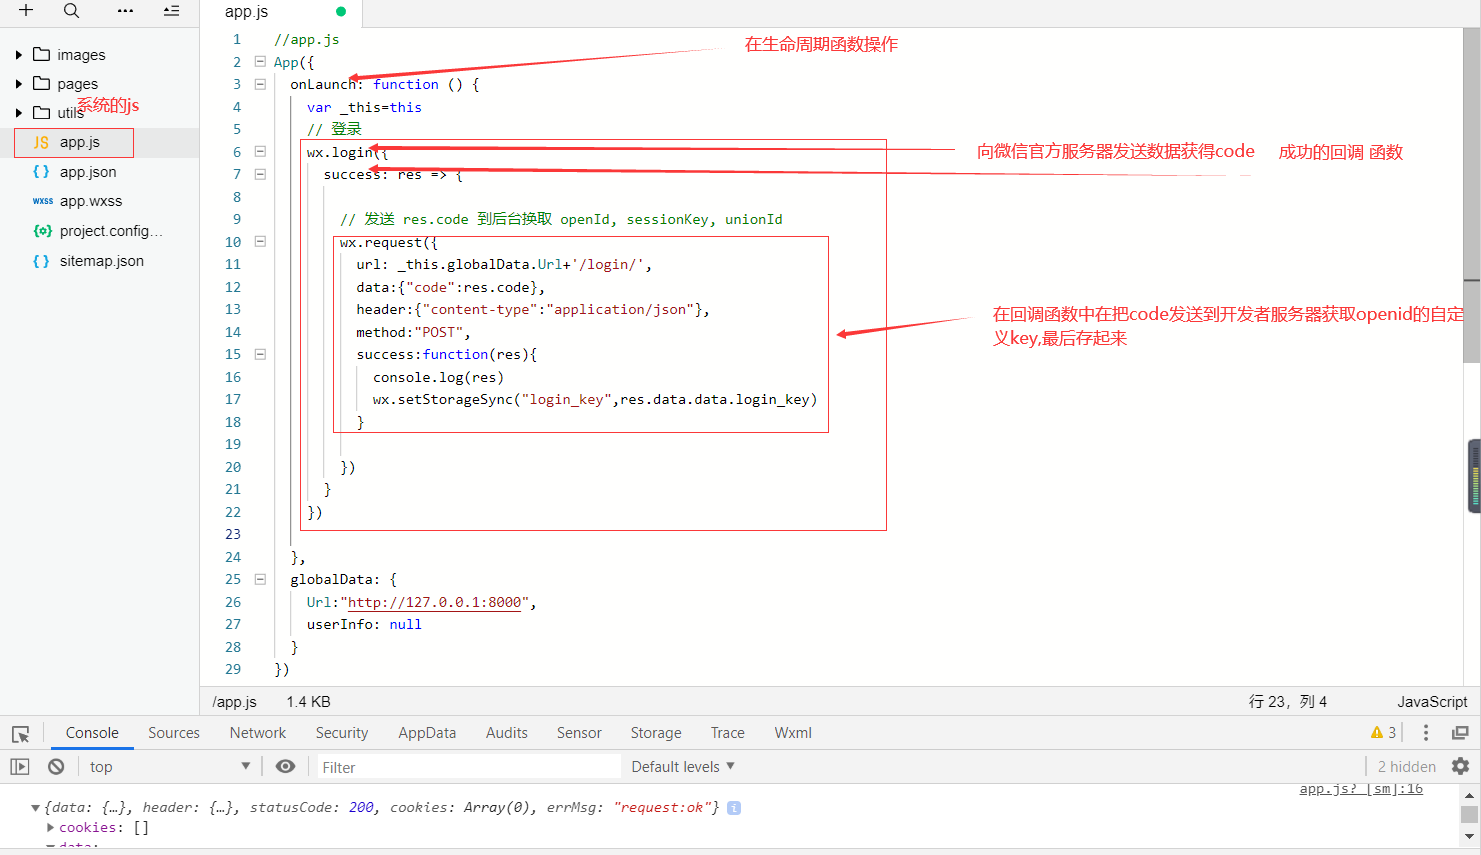
代码:
//app.js
App({
  onLaunch: function () {
    var _this=this
    // 登录
    wx.login({
      success: res => {

        // 发送 res.code 到后台换取 openId, sessionKey, unionId
        wx.request({
          url: _this.globalData.Url+'/login/',
          data:{"code":res.code},
          header:{"content-type":"application/json"},
          method:"POST",
          success:function(res){
            console.log(res)
            wx.setStorageSync("login_key",res.data.data.login_key)
          }

        })
      }
    })

  },
  globalData: {
    Url:"http://127.0.0.1:8000",
    userInfo: null
  }
})
2.2后端
1.目录结构

2.封装配置文件
1.settings.py

AppId="..."
AppSecret="..."

# 开发者服务器向官方服务器请求的网址
code2Session="https://api.weixin.qq.com/sns/jscode2session?appid={}&secret={}&js_code={}&grant_type=authorization_code"

2.wx_login.py
# 导入settings.py
from app01.wx import settings
#导入requests
import requests

def login(code):
    #1.向微信官方服务器请求数据,网址和拼接数据示例:
    #GET https://api.weixin.qq.com/sns/jscode2session?appid=APPID&secret=SECRET&js_code=JSCODE&grant_type=authorization_code
    response=requests.get(settings.code2Session.format(settings.AppId,settings.AppSecret,code))

    #2.将json字符串反序列化为字典
    data=response.json()

    if data.get("openid"):
        return data
    else:
        return False
3.cbv
models.py
from django.db import models

# Create your models here.
class Wxuser(models.Model):
    id = models.AutoField(primary_key=True)
    openid=models.CharField(max_length=255)
    name = models.CharField(max_length=50)
    avatar = models.CharField(max_length=200)
    language = models.CharField(max_length=50)
    province = models.CharField(max_length=50)
    city = models.CharField(max_length=50)
    country = models.CharField(max_length=50)
    #gender = models.CharField(max_length=50)
    creat_time = models.DateTimeField(auto_now_add=True)
    update_time = models.DateTimeField(auto_now=True)
    def __str__(self):
        return self.openid
views.py
from rest_framework.views import  APIView
from  rest_framework.response import  Response
from app01.wx import wx_login
from django.core.cache import cache
import hashlib,time
from app01 import models

class Login(APIView):
    def post(self,request):
        #获取前端数据
        param=request.data
        if param.get("code"):
            #调用wx/wx_login.py/login函数
            data=wx_login.login(param.get("code"))
            if data:
                #将openid和session_key自定义拼接
                val=data['openid']+"&"+data["session_key"]
                #自定义openid的key
                key=data["openid"]+str(int(time.time()))
                md5=hashlib.md5()
                md5.update(key.encode("utf-8"))
                key=md5.hexdigest()
                #存入redis
                cache.set(key,val)
                has_user=models.Wxuser.objects.filter(openid=data['openid']).first()
                if not  has_user:
                    #存入mysql
                    models.Wxuser.objects.create(openid=data['openid'])
                return  Response({
                    "code":200,
                    "msg":"ok",
                    "data":{"login_key":key}
                })
            else:
                return Response({"code": 200, "msg": "code无效"})
        else:
            return  Response({"code":200,"msg":"缺少参数"})
小程序登入:https://developers.weixin.qq.com/miniprogram/dev/framework/open-ability/login.html
https://developers.weixin.qq.com/miniprogram/dev/api-backend/open-api/login/auth.code2Session.html
https://www.cnblogs.com/xiaoyuanqujing/protected/articles/11646279.html
五 授权
https://developers.weixin.qq.com/miniprogram/dev/framework/open-ability/authorize.html
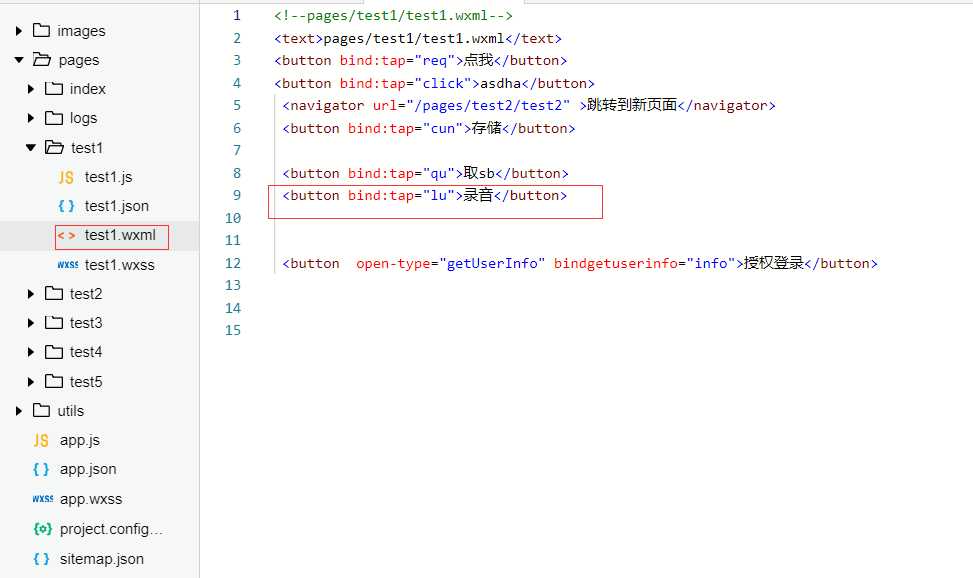
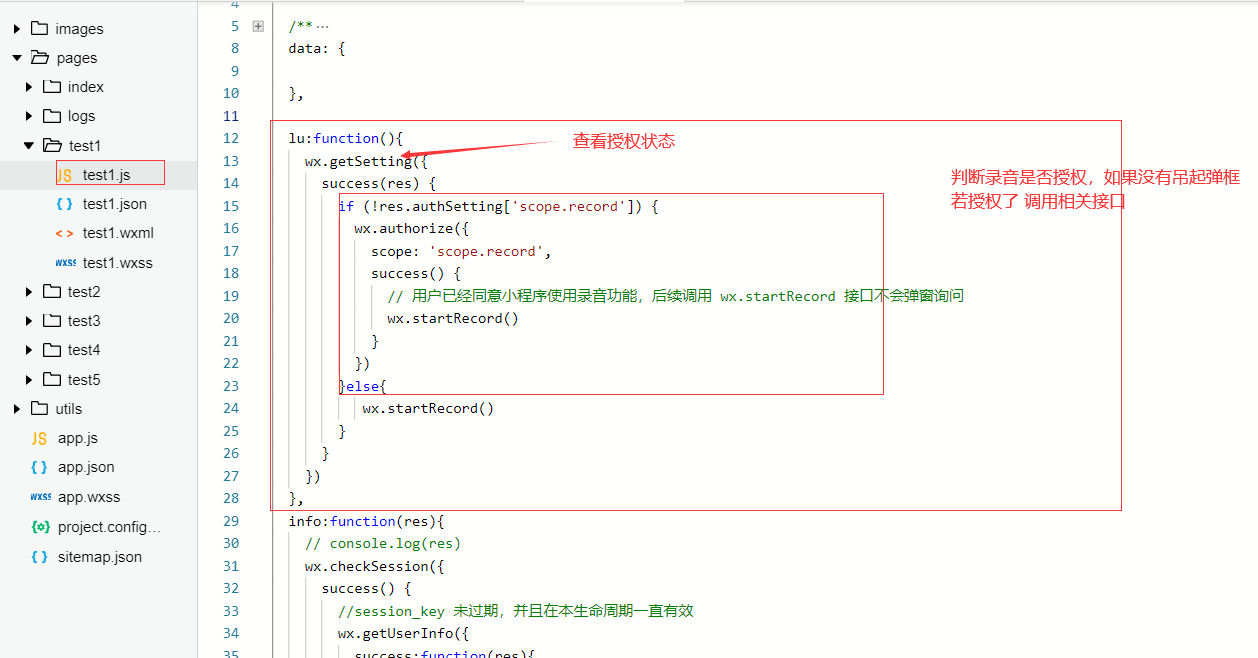
1.录音授权案例