它在Unity5中已经开始实装了的, 不过因为现在的开发在显示效果有什么需求的, 基本都是插件能找到的, 也是策划人员随大流的设计, 所以基本没有实际上的开发需求, 一直就没有关注过.
先下载它的官方样例来看看吧, 给了三个例子, 比较有意义的是第二个 DeferredCustomLights, 顺便能复习一下Unity Built-In Shader API. 这个假光照的例子, 它包含了绘制简易物体, 假光照, 以及目标渲染路径 :

这个假光照使用了一个常用的渲染思路, 使用3D物体在物理空间的位置和体积, 控制渲染范围, 然后通过屏幕空间的反向计算获取真实像素对应的实际物体的位置, 通过它再次计算光照, 某些动态贴花插件用的就是这个方法, 先不管这些, 看看它是怎样构建一个渲染流程的吧.
PS : 因为以前做类似暴风雪技能范围的显示, 用过Unity自带的投影, 那性能简直坑爹.
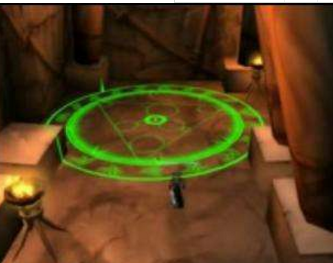 就这东西
就这东西
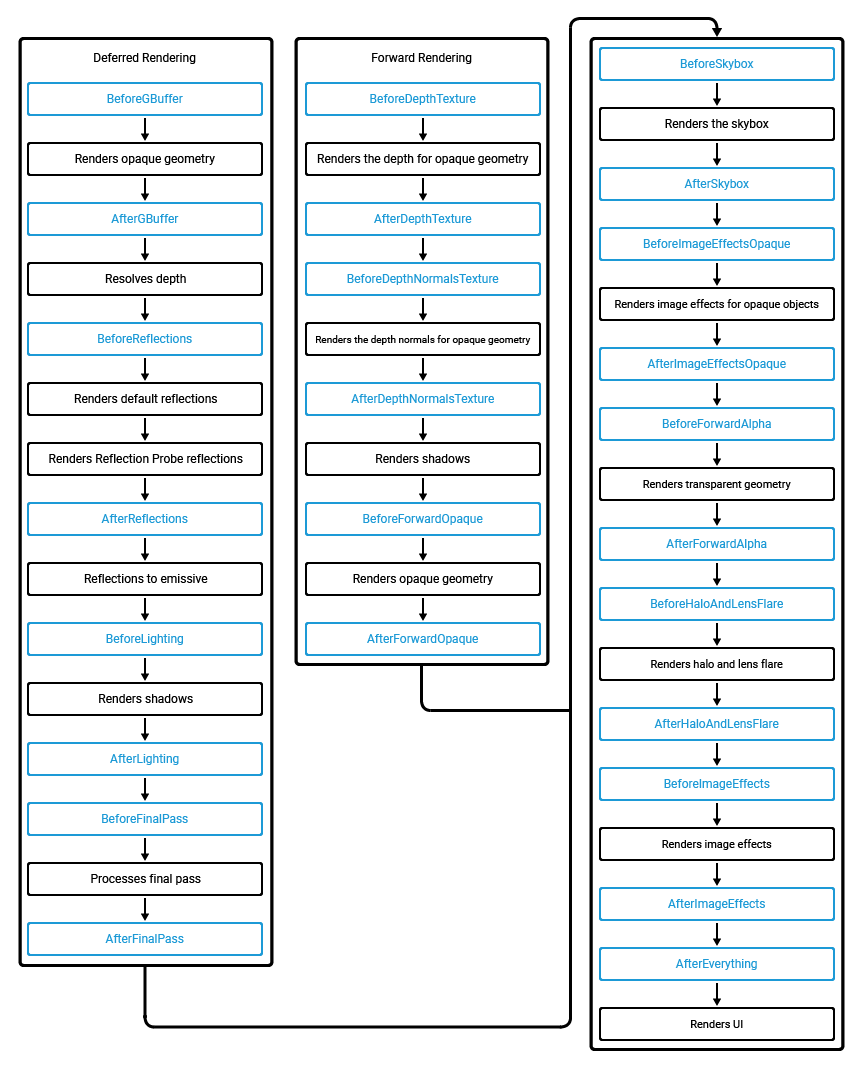
先把CommandBuffer能插入的生命周期弄过来看看:
因为我手机, PC -> HTC Vive, 微软HoloLens都用过, 所以知道手机基本五花八门, 是否能支持不止要看API版本, 还要看GPU, 比如找到iOS的Doc :
Apple GPU Hardware
Together, the A7, A8, A9, A10, and A11 GPUs create a new generation of graphics hardware that support both Metal and OpenGL ES 3.0. To get the most out of a 3D, graphics-dominated app running on the these GPUs, use Metal. Metal provides extremely low-overhead access to these GPUs, enabling incredibly high performance for your sophisticated graphics rendering and computational tasks. Metal eliminates many performance bottlenecks—such as costly state validation—that are found in traditional graphics APIs. Both Metal and OpenGL ES 3.0 incorporate many new features, such as multiple render targets and transform feedback, that have not been available on mobile processors before. This means that advanced rendering techniques that have previously been available only on desktop machines, such as deferred rendering, can now be used in iOS apps. Refer to the Metal Programming Guide for more information about what features are visible to Metal apps.
安卓就更不用说了, 那么在不同的渲染路径下, 他们能通用的只有从SkyBox开始的步骤了, 很大概率在做的时候要两种渲染路径都做...
创建CommandBuffer(代码来自官方代码, 全部省略), 非常简单 :
  buf.m_AfterLighting = new CommandBuffer();
  buf.m_AfterLighting.name = "Deferred custom lights";
  cam.AddCommandBuffer(CameraEvent.AfterLighting, buf.m_AfterLighting);
它是假光照, 所以放在系统光照完了之后再进行叠加渲染即可, 然后下面就是更新各种数据, 让灯光的位置和数据可以被更新 :
        // construct command buffer to draw lights and compute illumination on the scene
        foreach(var o in system.m_Lights)
        {
            // light parameters we'll use in the shader
            param.x = o.m_TubeLength;
            param.y = o.m_Size;
            param.z = 1.0f / (o.m_Range * o.m_Range);
            param.w = (float)o.m_Kind;
            buf.m_AfterLighting.SetGlobalVector(propParams, param);
            // light color
            buf.m_AfterLighting.SetGlobalColor(propColor, o.GetLinearColor());

            // draw sphere that covers light area, with shader
            // pass that computes illumination on the scene
            var scale = Vector3.one * o.m_Range * 2.0f;
            trs = Matrix4x4.TRS(o.transform.position, o.transform.rotation, scale);
            buf.m_AfterLighting.DrawMesh(m_SphereMesh, trs, m_LightMaterial, 0, 0);
        }
这样就完成了一个渲染流程, CommandBuffer可以说的就完了...完了...
确实没有什么好说的, 它提供了很多Draw, Blit方法, 提供了插入各个生命周期的功能, 你可以用来代替普通的后处理, 也可以储存临时变量跨生命周期来使用, 很好很强大的功能, 根据使用者的不同能发挥不同的效果...比如说Unity自带的FrameDebugger, 你把每个生命周期的图片都存下来, 就能做了...
我来试一下, 先创建几个CommandBuffer, 放在不同的生命周期里 :
using UnityEngine;
using UnityEngine.Rendering;

public class CommandBufferTest : MonoBehaviour
{
    public Shader imageShader;

    void Start()
    {
        var cam = Camera.main;
        var mat = new Material(imageShader);

        {
            var tex0 = Shader.PropertyToID("GetTex0");

            CommandBuffer cmd1 = new CommandBuffer();
            cmd1.name = "GetTex0";

            cmd1.GetTemporaryRT(tex0, Screen.width + 1, Screen.height + 1, 0, FilterMode.Bilinear, RenderTextureFormat.ARGB32);   // 同样大小的RT分到的是同一个RT...
            cmd1.Blit(BuiltinRenderTextureType.GBuffer0, tex0);
            cmd1.SetGlobalTexture(Shader.PropertyToID("_Tex0"), tex0);
            cmd1.ReleaseTemporaryRT(tex0);

            cam.AddCommandBuffer(CameraEvent.AfterGBuffer, cmd1);
        }

        {
            var tex1 = Shader.PropertyToID("GetTex1");

            CommandBuffer cmd2 = new CommandBuffer();
            cmd2.name = "GetTex1";

            cmd2.GetTemporaryRT(tex1, Screen.width + 2, Screen.height + 2, 0, FilterMode.Bilinear, RenderTextureFormat.ARGB32);   // 同样大小的RT分到的是同一个RT...
            cmd2.Blit(BuiltinRenderTextureType.CameraTarget, tex1);
            cmd2.SetGlobalTexture(Shader.PropertyToID("_Tex1"), tex1);
            cmd2.ReleaseTemporaryRT(tex1);

            cam.AddCommandBuffer(CameraEvent.BeforeLighting, cmd2);
        }

        {
            CommandBuffer cmd3 = new CommandBuffer();
            cmd3.name = "_PostEffect";

            cmd3.Blit(BuiltinRenderTextureType.CurrentActive, BuiltinRenderTextureType.CameraTarget, mat);
            cam.AddCommandBuffer(CameraEvent.AfterImageEffects, cmd3);
        }
    }
}
cmd1在Gbuffer渲染完成后获取GBuffer0贴图, cmd2在光照之前获取输出贴图, 然后设置到全局变量_Tex0, _Tex1里面去了, 然后cmd3在后处理阶段使用了这两张贴图, 输出到屏幕上, 就跟FrameDebug一样显示了不同生命周期下的输出了, Shader见下图, 把GBuffer0渲染在左半边, 光照前的输出在右半边 :
        sampler2D _MainTex;
        sampler2D _Tex0;
        sampler2D _Tex1;

        fixed4 frag (v2f i) : SV_Target
        {
            if (i.uv.x < 0.5)
            {
                return float4(tex2D(_Tex0, float2(i.uv.x * 2.0, i.uv.y)).rgb, 1);
            }
            else
            {
                return float4(tex2D(_Tex1, float2((i.uv.x - 0.5) * 2.0, i.uv.y)).rgb,1);
            }
        }
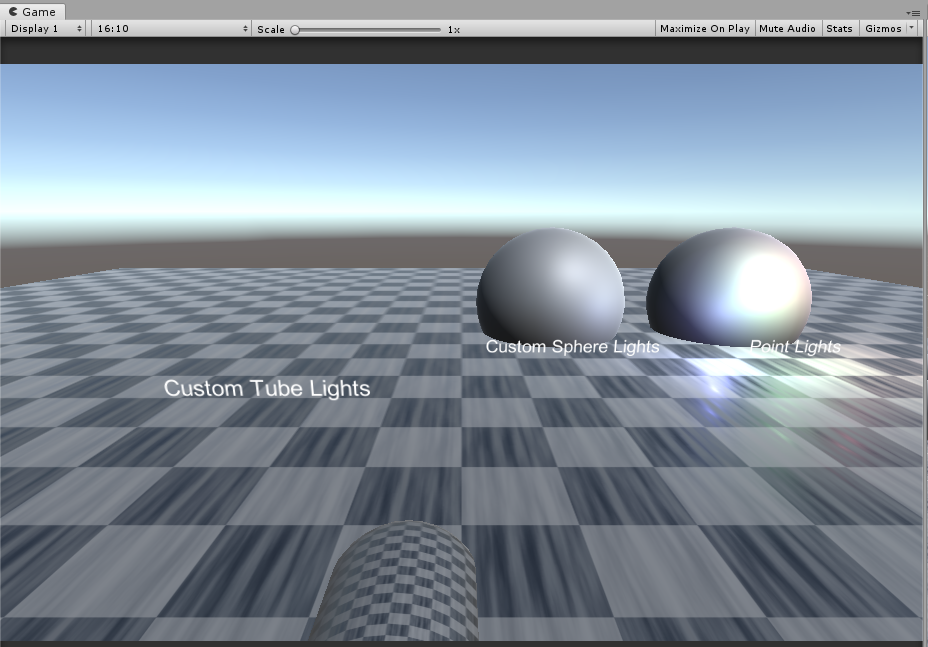
场景原图和输出图 :

这就是跨越生命周期获取的信息了. 以单纯只使用Shader是做不到的, 即使Gbuffer可以获取, 可是光照前的图像是无法获取的, 明白了这点就知道它的妙用了. 打开FrameDebugger可以看到 :
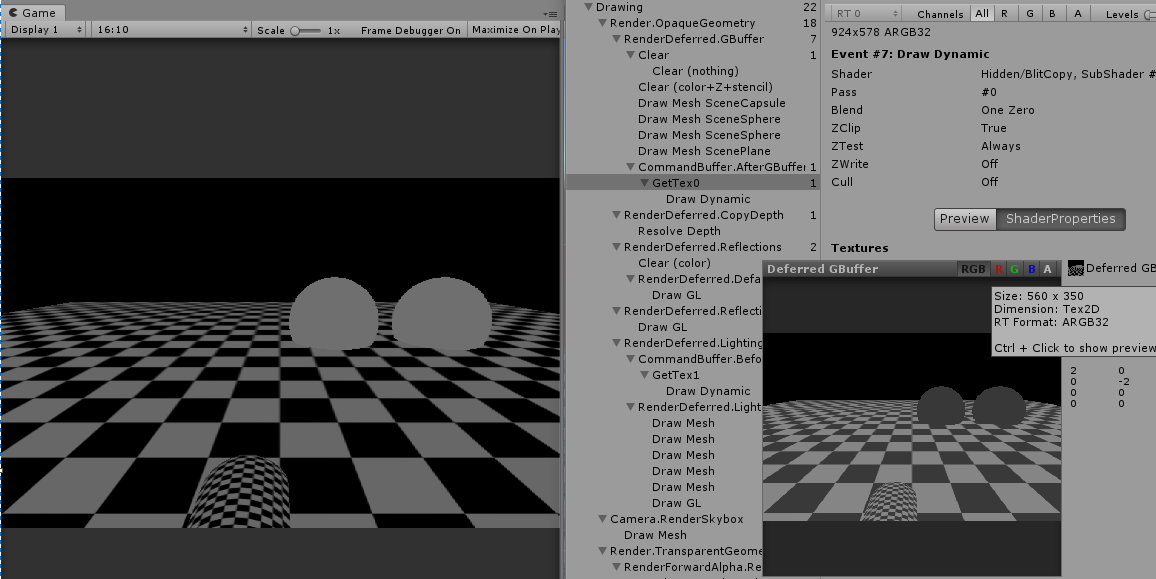
这里获取GBuffer0跟右边显示的不一样, 右边显示的GBuffer0的跟我获取的是相反的, 而GBuffer1才是我获取的, 貌似BuiltinRenderTextureType.GBuffer0, BuiltinRenderTextureType.GBuffer1被他搞反了......
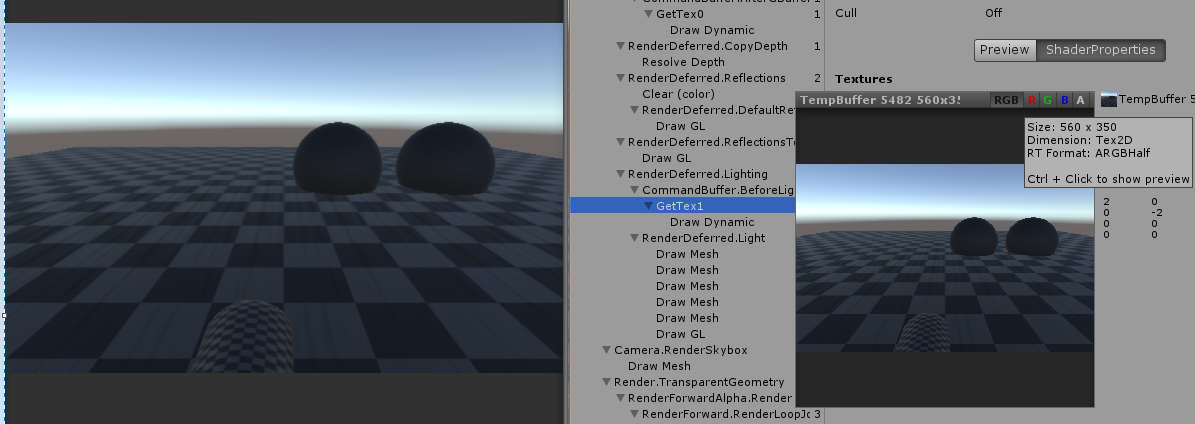
不管怎样, 获取未光照时的效果是正确的.
补充一些函数的特点 :
1. CommandBuffer的Blit会导致RenderTarget被改变
CommandBuffer.Blit(source, dest, mat) // 会导致RenderTarget改变
2. CommandBuffer怎样实现GL的全屏幕绘制 :
// GL
    Graphics.SetRenderTarget(destination);

    GL.PushMatrix();
    GL.LoadOrtho();

    GL.Begin(GL.QUADS);
    {
        // Quad ...
    }
    GL.End();

// ComandBuffer -- 这里如果是OpenGL的话需要反向y轴
    quad = new Mesh();
    quad.vertices = new Vector3[]
    {
        new Vector3(-1f, y1, 0f), // Bottom-Left
        new Vector3(-1f, y2, 0f), // Upper-Left
        new Vector3( 1f, y2, 0f), // Upper-Right
        new Vector3( 1f, y1, 0f)  // Bottom-Right
    };

    quad.uv = new Vector2[]
    {
        new Vector2(0f, 0f),
        new Vector2(0f, 1f),
        new Vector2(1f, 1f),
        new Vector2(1f, 0f)
    };

    quad.colors = new Color[]
    {
        ...
    };

    quad.triangles = new int[] { 0, 1, 2, 2, 3, 0 };
    CommandBuffer.SetRenderTarget(...)
    CommandBuffer.DrawMesh(quad, Matrix4x4.identity, ...);
=================================================================================
补一些计算过程, 可能以后其它地方会用到 :
1. 简单光照计算(自身为光源)
    struct v2f {
        float4 pos : SV_POSITION;
        float4 uv : TEXCOORD0;
        float3 ray : TEXCOORD1;
    };

    // Common lighting data calculation (direction, attenuation, ...)
    void DeferredCalculateLightParams(
        unity_v2f_deferred_instanced i,
        out float3 outWorldPos,
        out float2 outUV,
        out half3 outLightDir,
        out float outAtten,
        out float outFadeDist)
    {
        i.ray = i.ray * (_ProjectionParams.z / i.ray.z);
        float2 uv = i.uv.xy / i.uv.w;

        // read depth and reconstruct world position
        float depth = SAMPLE_DEPTH_TEXTURE(_CameraDepthTexture, uv);
        depth = Linear01Depth(depth);
        float4 vpos = float4(i.ray * depth, 1);
        float3 wpos = mul(unity_CameraToWorld, vpos).xyz;

        float fadeDist = UnityComputeShadowFadeDistance(wpos, vpos.z);

        float3 lightPos = float3(unity_ObjectToWorld[0][3], unity_ObjectToWorld[1][3], unity_ObjectToWorld[2][3]);
        float3 tolight = wpos - lightPos;
        half3 lightDir = -normalize(tolight);

        float att = dot(tolight, tolight) * (距离平方倒数); // 光源的最远照亮距离
        float atten = tex2D (_LightTextureB0, att.rr).UNITY_ATTEN_CHANNEL;

        atten *= UnityDeferredComputeShadow(tolight, fadeDist, uv);

        outWorldPos = wpos;
        outUV = uv;
        outLightDir = lightDir;
        outAtten = atten;
        outFadeDist = fadeDist;
    }