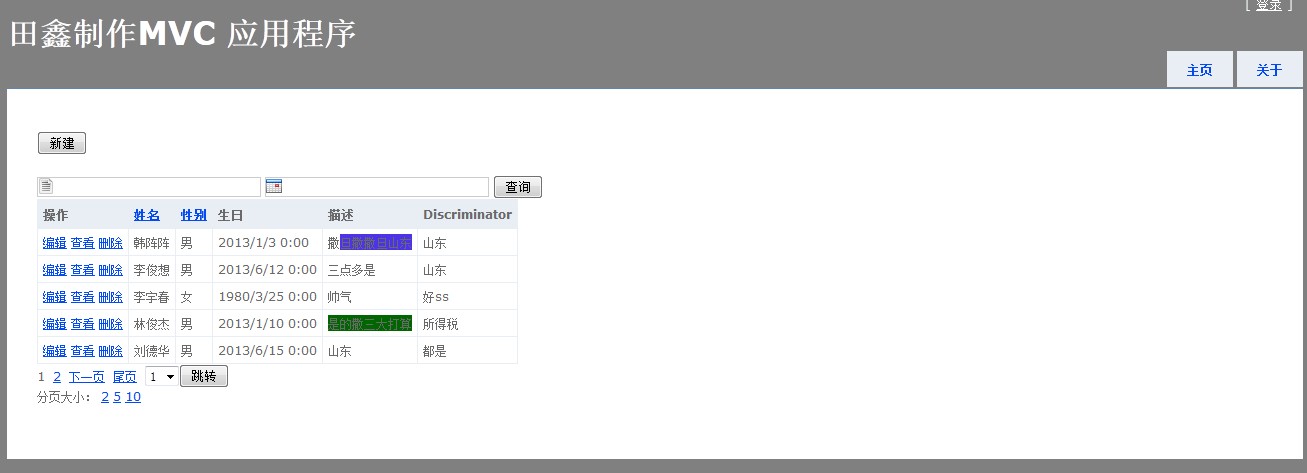
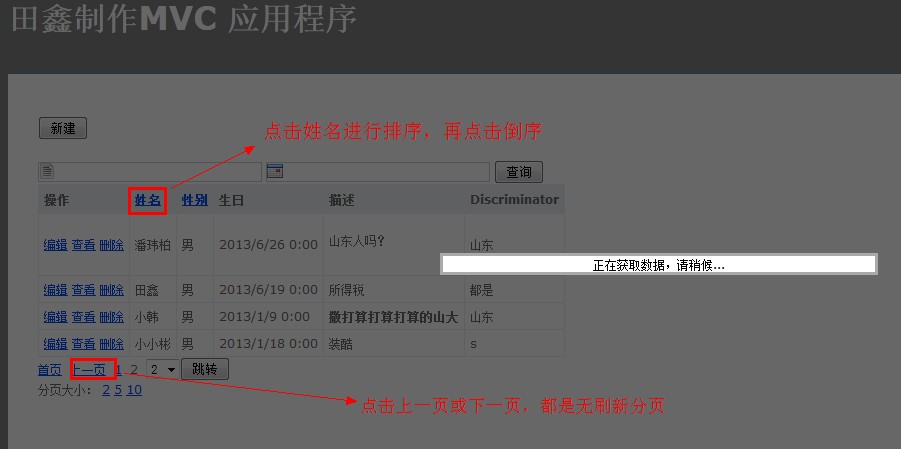
一、项目之前得添加几个组件artDialog、MVCPager、kindeditor-4.0。先上几个效果图。


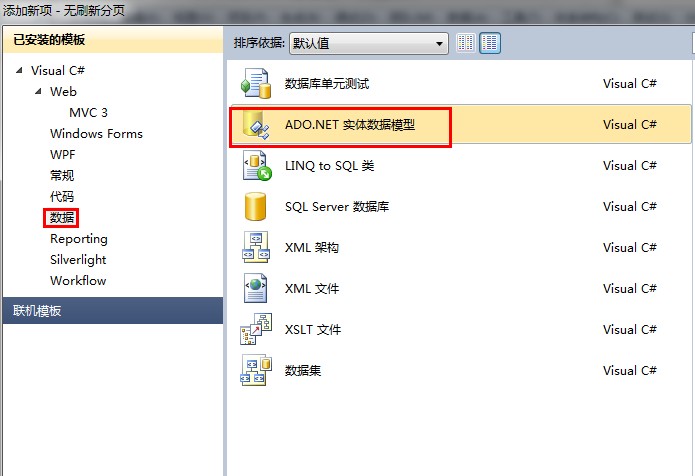
1、首先建立一个数据库,添加一个Peoples表之后在项目中右键添加“新建项”,选择你刚才建立的数据库和表。
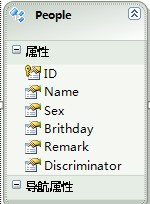
2、加完之后项目中会有个Peoples.edmx,这里面包括数据上下文和实体属性。
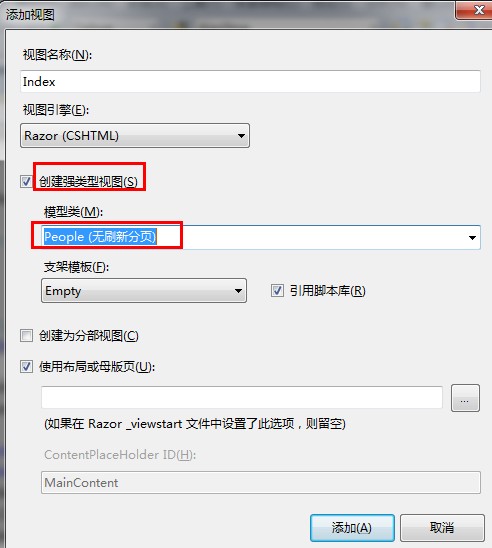
3、在Controllers右键添加“PersonController.cs”,选择强类型视图,生成对应的视图
4、由于是无刷新的,必须得建立一个分部视图,最好是在Shared文件夹下添加"_fenye",显示加载数据的页面,添加以下代码。
(1)、@model Webdiyer.WebControls.Mvc.PagedList<无刷新分页.People>,返回的是MVCPager中的PagedList。
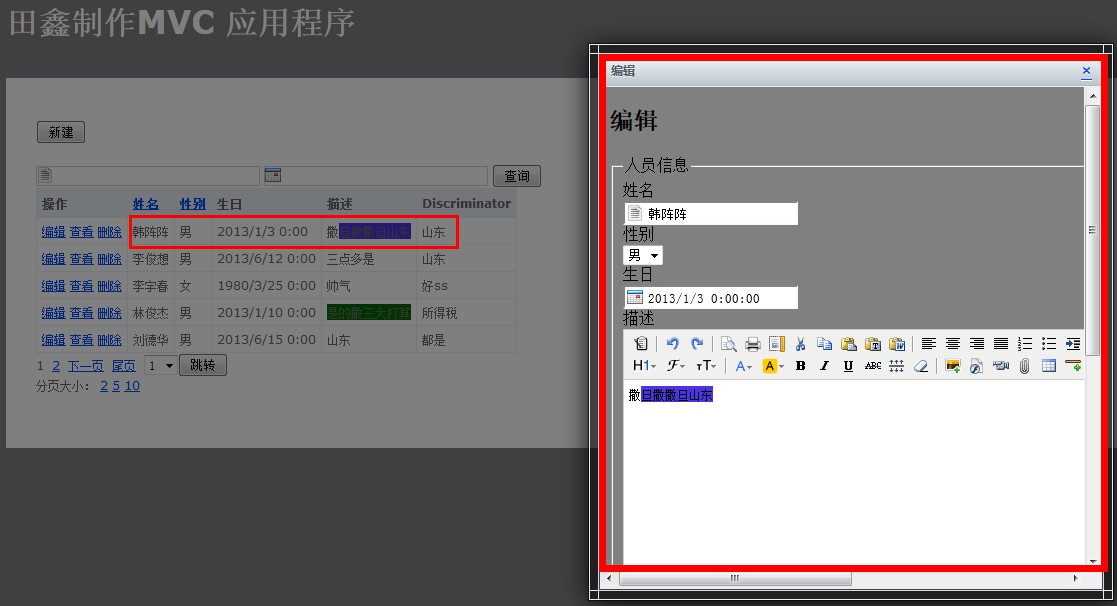
(2)、JS中,用的是前面介绍的artDialog组件,增改查的功能,他会弹出一个Dialog。方便实用,还有一些窗口的抖动效果。
(3)、加入一个DIV,因为更新数据的时候显示在哪个DIV,new AjaxOptions { UpdateTargetId = "tableID" }。
(4)、使用的是Ajax.BeginForm,MVC自己提供的无刷新,和Jquery中的$.Ajax()是一个性质。
(5)、@Ajax.ActionLink()里有个new{......},写他的目的是因为,点击完查询之后,文本框的值就没有了,排序和分页大小也没有了。所以必须得赋值。
(6)、@Html.AjaxPager用的就是MVCPager的dll。


@model Webdiyer.WebControls.Mvc.PagedList<无刷新分页.People>
@using Webdiyer.WebControls.Mvc
@{
    ViewBag.Title = "Index";
}
<script type="text/javascript">
    $(function () {
        //添加
        $("#Add").click(function () {
            art.dialog.open("/Person/Create", { title: "添 加", lock: true, opacity: 0.5,  500, height: 500 })
        });
        $(".Edit").click(function () {
            art.dialog.open("/Person/Edit/" + $(this).attr("value"), { title: "编辑", lock: true, opacity: 0.5,  500, height: 500 })
        });
        $(".Display").click(function () {
            art.dialog.open("/Person/Details/" + $(this).attr("value"), { title: "查看", lock: true, opacity: 0.5,  500, height: 500 })
            //            //或者用Jquery-UI的dialog
        });
        $(".deleteID").click(function () {
            var ids = $(this).attr("hideID");
            var link = $(this);
            if (confirm("是否删除?")) {
                $.post("/Person/Delete", { id: ids }, function (data) {
                    if (data == "OK") {
                        alert("删除成功!");
                        link.parent().parent().fadeOut("slow");
                        link.parent().parent().fadeIn("slow");
                        link.parent().parent().fadeOut("slow");
                    }
                });
            }
            return false;
        });
    });
</script>
<div id="tableID">
    @using (Ajax.BeginForm("Index", new AjaxOptions { UpdateTargetId = "tableID" }))
    {
        <table>
            <tr>
                <th>
                    操作
                </th>
                <th>
                    @Ajax.ActionLink("姓名", "Index", new { OrderBy = ViewBag.OrderName, pagesize = ViewBag.page }, new AjaxOptions { UpdateTargetId = "tableID" })
                </th>
                <th>
                    @Ajax.ActionLink("性别", "Index", new { OrderBy = ViewBag.OrderSex, pagesize = ViewBag.page }, new AjaxOptions { UpdateTargetId = "tableID" })
                </th>
                <th>
                    生日
                </th>
                <th>
                    描述
                </th>
                <th>
                    Discriminator
                </th>
            </tr>
            @foreach (var item in Model)
            {
                <tr>
                    <td>
                        @*@Html.ActionLink("Edit", "Edit", new { id = item.ID }) |   *@ <a href ="javascript:void(0)" class="Edit" value="@item.ID">
                            编辑</a> <a href ="javascript:void(0)" class="Display" value="@item.ID">查看</a>
                        @Html.ActionLink("删除", "Delete", new { id = item.ID }, new { @class = "deleteID", hideID = item.ID })
                    </td>
                    <td>
                        @item.Name
                    </td>
                    <td>
                        @(item.Sex ? "男" : "女")
                    </td>
                    <td>
                        @String.Format("{0:g}", item.Brithday)
                    </td>
                    <td>
                        @Html.Raw(item.Remark)
                    </td>
                    <td>
                        @item.Discriminator
                    </td>
                </tr>
            }
        </table>


        @Html.AjaxPager(Model, new PagerOptions()
   {
       PageIndexParameterName = "id",
       ShowDisabledPagerItems = false,
       ShowPageIndexBox = true
   }, new AjaxOptions() { UpdateTargetId = "tableID", OnBegin = "AjaxStart", OnComplete = "AjaxStop" }, new { OrderBy = ViewBag.current })
    }
    分页大小:
    @Ajax.ActionLink("2", "", new { pagesize = 2 }, new AjaxOptions { UpdateTargetId = "tableID", OnBegin = "AjaxStart", OnComplete = "AjaxStop" })
    @Ajax.ActionLink("5", "", new { pagesize = 5 }, new AjaxOptions { UpdateTargetId = "tableID", OnBegin = "AjaxStart", OnComplete = "AjaxStop" })
    @Ajax.ActionLink("10", "", new { pagesize = 10 }, new AjaxOptions { UpdateTargetId = "tableID", OnBegin = "AjaxStart", OnComplete = "AjaxStop" })
</div>
<div id="result">
</div>
5、前面说的是一个局部页,当然是要嵌套在一个普通的View中,在这里是在Index中。
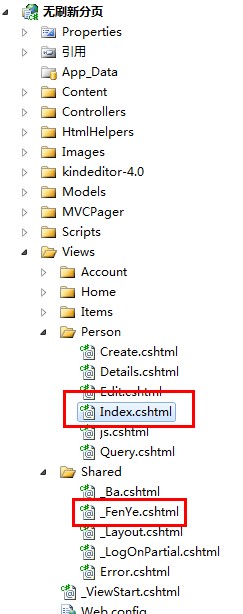
6、Index里面的内容:
(1)、JS引用部分,引用了一些MVC如果无刷新的话必须添加的JS,前五个全部是,blockUI.JS是AjaxStart()的效果,加载完毕内容后的效果,还有
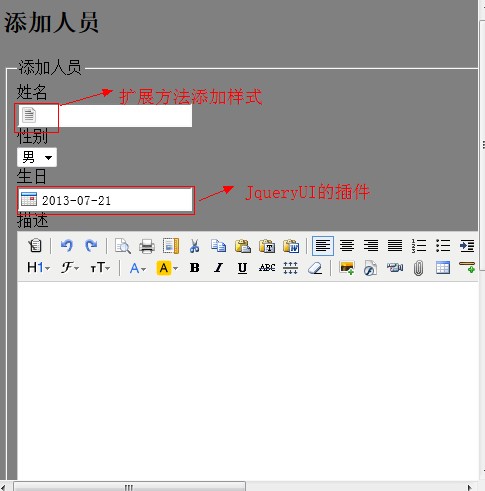
artDialog.JS是对话框的,还有个Jquery-UI的,因为功能里"生日"字段用了一个datepicker。
(2)、还记得这个效果吗?两种方式:1、TextBox写扩展方法2、直接给加样式。如:<input type="text" id="nameT" name="Name" style="background-image: url(/Images/string.png);background-repeat: no-repeat;padding-left: 22px;"/>

@model Webdiyer.WebControls.Mvc.PagedList<无刷新分页.People>
@using Webdiyer.WebControls.Mvc
@{
    ViewBag.Title = "Index";
}
<link  href="@Url.Content("~/Content/jquery-ui-1.9.1.custom.min.css")" rel="stylesheet"  type="text/css" />
<script src="@Url.Content("~/Scripts/jquery-1.4.4.min.js")" type="text/javascript"></script>
<script src="@Url.Content("~/Scripts/jquery.unobtrusive-ajax.js")" type="text/javascript"></script>
<script src="@Url.Content("~/Scripts/MicrosoftAjax.js")" type="text/javascript"></script>
<script src="@Url.Content("~/Scripts/MicrosoftMvcAjax.js")" type="text/javascript"></script>
<script src="@Url.Content("~/Scripts/blockUI.js")" type="text/javascript"></script>
<script src="@Url.Content("~/Scripts/artDialog/artDialog.js?skin=default")" type="text/javascript"></script>
<script src="@Url.Content("~/Scripts/artDialog/plugins/iframeTools.js")" type="text/javascript"></script>
<script src="@Url.Content("~/Scripts/jquery-ui.min.js")" type="text/javascript"></script>
<script type="text/javascript">
    function AjaxStart() { $.blockUI({ message: '正在获取数据,请稍候...' }); }
    function AjaxStop() { $.unblockUI(); }
</script>
<p>
    <input type="submit" id="Add" value="新建" />
    <br />

    @using (Ajax.BeginForm("Index", new AjaxOptions { UpdateTargetId = "tableID" }))
    {
        <input type="text" id="nameT" name="Name"  style="background-image: url(/Images/string.png);background-repeat: no-repeat;padding-left: 22px;"/>
        <input type="text" id="Brithday" name="Brithday" value="@ViewBag.CurrentBrithday" style="background-image: url(/Images/date.png);background-repeat: no-repeat;padding-left: 22px;"/>
        <input type="submit" class="Query" value="查询"  name="SubAction" />

    }
     @Html.Partial("_FenYe")
</p>
(3)、前台完事,现在去Controller里,写代码了。其实MVC是这样一个请求:浏览器-->先到Controller里-->Models-->在View中加载数据。
1、因为有一个功能是这样的,点击姓名可以排序,再点击倒序。所以用到了OrderBy。
2、返回的数据必须是ToPagedList。以便分页。
3、最后返回去的View是“_fenye”,分部视图PartialView。
MvcApplication34Entities1 persons = new MvcApplication34Entities1();

        public ActionResult Index(int? id, string OrderBy, string name,int pagesize = 5)
        {
            ViewBag.current = OrderBy;
            ViewBag.page = pagesize;
            ViewBag.Name = name;
            ViewBag.OrderName = string.IsNullOrEmpty(OrderBy)?"Name Desc":"";
            ViewBag.OrderSex = string.IsNullOrEmpty(OrderBy) ? "Sex" : "Sex Desc";
            var per3= persons.People.OrderBy(p => p.ID)
                .WhereIf(p=>p.Name.Contains(name),!string.IsNullOrEmpty(name))
                .ToPagedList(id ?? 1, pagesize);
            if (Request.IsAjaxRequest())
            {
                switch (OrderBy)
                {
                    case "Name Desc":
                        var per = persons.People
                        .OrderByDescending(p => p.Name)
                        .WhereIf(p => p.Name.Contains(name), !string.IsNullOrEmpty(name))
                        .ToPagedList(id ?? 1, pagesize);
                        return PartialView("_FenYe", per);
                    case "Sex":
                        var per1 = persons.People
                       .OrderBy(p => p.Sex)
                       .WhereIf(p => p.Name.Contains(name), !string.IsNullOrEmpty(name))
                       .ToPagedList(id ?? 1, pagesize);
                        return PartialView("_FenYe", per1);
                    case "Sex Desc":
                        var per4 = persons.People
                       .OrderByDescending(p => p.Sex)
                       .WhereIf(p => p.Name.Contains(name), !string.IsNullOrEmpty(name))
                       .ToPagedList(id ?? 1, pagesize);
                        return PartialView("_FenYe", per4);
                    default:
                        var per2 = persons.People
                       .OrderBy(p => p.Name)
                       .WhereIf(p => p.Name.Contains(name), !string.IsNullOrEmpty(name))
                       .ToPagedList(id ?? 1, pagesize);
                        return PartialView("_FenYe", per2);
                }

            }
            else
            {
                return View(per3);
            }


        }
        [HttpPost]
        public ActionResult Index(int? id, string name, FormCollection collections,string OrderBy,int pagesize = 5)
        {
            ViewBag.CurrentName = name;
            //ViewBag.CurrentBrithday = Brithday;

            //    var per = persons.People
            //    .Where(p=>p.Name.Contains(name))
            //    .OrderBy(p => p.Name)
            //    .ToPagedList(id ?? 1, pagesize);
            //    return PartialView("_FenYe", per);

                var per = persons.People
               .Where(p => p.Name.Contains(name))
               .OrderBy(p => p.Name)
               .ToPagedList(id ?? 1, pagesize);


                return PartialView("_FenYe", per);
        }
7、前面已经实现了Index。接下来实现增删改查,也比较容易。
(1)增加Controller和View,使用SaveChanges()进行数据库的保存!
        public ActionResult Create()
        {

            return View();
        }


        //
        // POST: /Person/Create
        [ValidateInput(false)]
        [HttpPost]
        public ActionResult Create(FormCollection collection)
        {
            try
            {

                // TODO: Add insert logic here
                People p = new People();
                TryUpdateModel(p, collection);
                persons.AddToPeople(p);
                persons.SaveChanges();
                return Content("<script>alert('添加成功!');window.parent.location.href='/Person/Index'</script>");

            }
            catch
            {
                return View();
            }
        }
@model 无刷新分页.People

@{
    ViewBag.Title = "Create";
    Layout = "~/Views/Shared/_Ba.cshtml";
}


<h2>添加人员</h2>
@using (Html.BeginForm()) {
    @Html.ValidationSummary(true)
    <fieldset>
        <legend>添加人员</legend>

        <div class="editor-label">
            @Html.LabelFor(model => model.Name)
        </div>
        <div class="editor-field">
            @Html.TextBoxFor(model => model.Name)
            @Html.ValidationMessageFor(model => model.Name)
        </div>

        <div class="editor-label">
            @Html.LabelFor(model => model.Sex)
        </div>
        <div class="editor-field">
            @*@Html.EditorFor(model => model.Sex)*@
            @Html.DropDownList("Sex", new[] {new SelectListItem{Value="true",Text="男"},
           new SelectListItem{Value="false",Text="女"}})
            @Html.ValidationMessageFor(model => model.Sex)
        </div>

        <div class="editor-label">
            @Html.LabelFor(model => model.Brithday)
        </div>
        <div class="editor-field">
            @Html.TextBoxFor(model => model.Brithday)
            @Html.ValidationMessageFor(model => model.Brithday)
        </div>

        <div class="editor-label">
            @Html.LabelFor(model => model.Remark)
        </div>
        <div class="editor-field">
            @Html.TextAreaFor(model => model.Remark, new { @rows = 10, cols = "80" })
            @Html.ValidationMessageFor(model => model.Remark)
        </div>

        <div class="editor-label">
            @Html.LabelFor(model => model.Discriminator)
        </div>
        <div class="editor-field">
            @Html.TextBoxFor(model => model.Discriminator)
            @Html.ValidationMessageFor(model => model.Discriminator)
        </div>

        <p>
            <input type="submit" value="添加" />
        </p>
    </fieldset>
}
(2)编辑Controller和View,先从前台获得一个ID进行编辑。
        [ValidateInput(false)]
        public ActionResult Edit(int? id)
        {

           var p1 = persons.People.Where(pe => pe.ID == id).FirstOrDefault();
            return View(p1);
        }

        //
        // POST: /Person/Edit/5

        [HttpPost]
        [ValidateInput(false)]
        public ActionResult Edit(int? id,FormCollection collection)
        {

            try
            {
                // TODO: Add update logic here
                var p = persons.People.Where(t => t.ID == id).FirstOrDefault();
                TryUpdateModel(p, collection);
                persons.SaveChanges();
                return Content("<script>alert('修改成功!');window.parent.location.href='/Person/Index'</script>");
            }
            catch
            {
                return View();
            }
        }
@model 无刷新分页.People

@{
    ViewBag.Title = "Edit";
    Layout = "~/Views/Shared/_Ba.cshtml";
}

<h2>编辑</h2>

<script src="@Url.Content("~/Scripts/jquery.validate.min.js")" type="text/javascript"></script>
<script src="@Url.Content("~/Scripts/jquery.validate.unobtrusive.min.js")" type="text/javascript"></script>

@using (Html.BeginForm()) {
    @Html.ValidationSummary(true)
    <fieldset>
        <legend>人员信息</legend>

        @Html.HiddenFor(model => model.ID)

        <div class="editor-label">
            @Html.LabelFor(model => model.Name)
        </div>
        <div class="editor-field">
            @Html.TextBoxFor(model => model.Name)
            @Html.ValidationMessageFor(model => model.Name)
        </div>

        <div class="editor-label">
            @Html.LabelFor(model => model.Sex)
        </div>
        <div class="editor-field">
            @Html.DropDownList("sex", new[]{new SelectListItem{Text="男",Value="true"},new SelectListItem{Text="女",Value="false"}})
            @Html.ValidationMessageFor(model => model.Sex)
        </div>

        <div class="editor-label">
            @Html.LabelFor(model => model.Brithday)
        </div>
        <div class="editor-field">
            @Html.TextBoxFor(model => model.Brithday)
            @Html.ValidationMessageFor(model => model.Brithday)
        </div>

        <div class="editor-label">
            @Html.LabelFor(model => model.Remark)
        </div>
        <div class="editor-field">
            @Html.TextAreaFor(model => model.Remark, new { @rows = 10, cols = "80" })
            @Html.ValidationMessageFor(model => model.Remark)
        </div>

        <div class="editor-label">
            @Html.LabelFor(model => model.Discriminator)
        </div>
        <div class="editor-field">
            @Html.TextBoxFor(model => model.Discriminator)
            @Html.ValidationMessageFor(model => model.Discriminator)
        </div>

        <p>
            <input type="submit" value="保存" />
        </p>
    </fieldset>
}
(3)删除就不需要View了,在"_fenye"里使用的是Jquery.Post(),方法,接着删除对应的该行,使用fadeOut、fadeIn、fadeOut的方式,删除就可以实现一个闪动效果。
        public ActionResult Delete(int id)
        {
            try
            {
                // TODO: Add delete logic here
                var p = persons.People.Where(t => t.ID == id).FirstOrDefault();
                persons.DeleteObject(p);
                persons.SaveChanges();
                return Content("OK");
            }
            catch
            {
                return View();
            }
        }
二、总结:
MVC中基本的增删改查,分页功能就全部实现了,对于初学者是一份宝贵的资料,如果对您有帮助。那就关注我吧,右下角的“推荐”,给更多的MVC+EF初学者参考和学习!
附件下载地址: 无刷新分页项目代码