Django + Uwsgi + Nginx 的生产环境部署之实战篇
部署理论篇:https://www.cnblogs.com/tjw-bk/p/13964888.html
-
为什么要部署?
使用runserver可以使我们的django项目很便捷的在本地运行起来,但这只能在局域网内访问,如果在生产环境部署django,就要多考虑一些问题了。比如静态文件处理,安全,效率等等。
-
前期准备:
- 确保有一个能够用runserver正常启动的django项目
- 项目已上传到linux
- linux上已部署好python环境,且已安装好项目所需的模块
1.django的settings配置
# 1.修改配置
# 正式上线关闭调试模式, 不会暴露服务器信息
DEBUG = False
# 2.允许的主机
ALLOWED_HOSTS = ['xxx.com','127.0.0.1']
# 3.前端修改接口地址
http://127.0.0.1:8000/ => http://xxx.com/
# 4.MySQL数据库根据实际情况配置(注意地址)

# 5.缓存配置, 改为默认, 最简单形式(配置redis)

# 6.收集静态文件 静态资源收集位置
STATIC_ROOT = os.path.join(BASE_DIR, 'static')
# 7.命令行执行
python manage.py collectstatic
2. 安装uwsgi配置uWSGI
安装uwsgi
- uwsgi是python的一个模块,安装uwsgi只需简单的pip命令就可以了
pip3 install uwsgi
基于uwsgi+django的实现
1.使用命令启动uwsgi
第一步:进入django项目
第二步:命令测试启动
uwsgi --http 192.168.56.100:8888 --file bushu/wsgi.py --static-map=/static=static
参数说明:
-
http 这个就和runserver一样指定IP 端口
-
file 这个文件就里有一个反射如果你在调用他的时候没有指定Web Server就使用默认的
-
static 做一个映射,指定静态文件
-
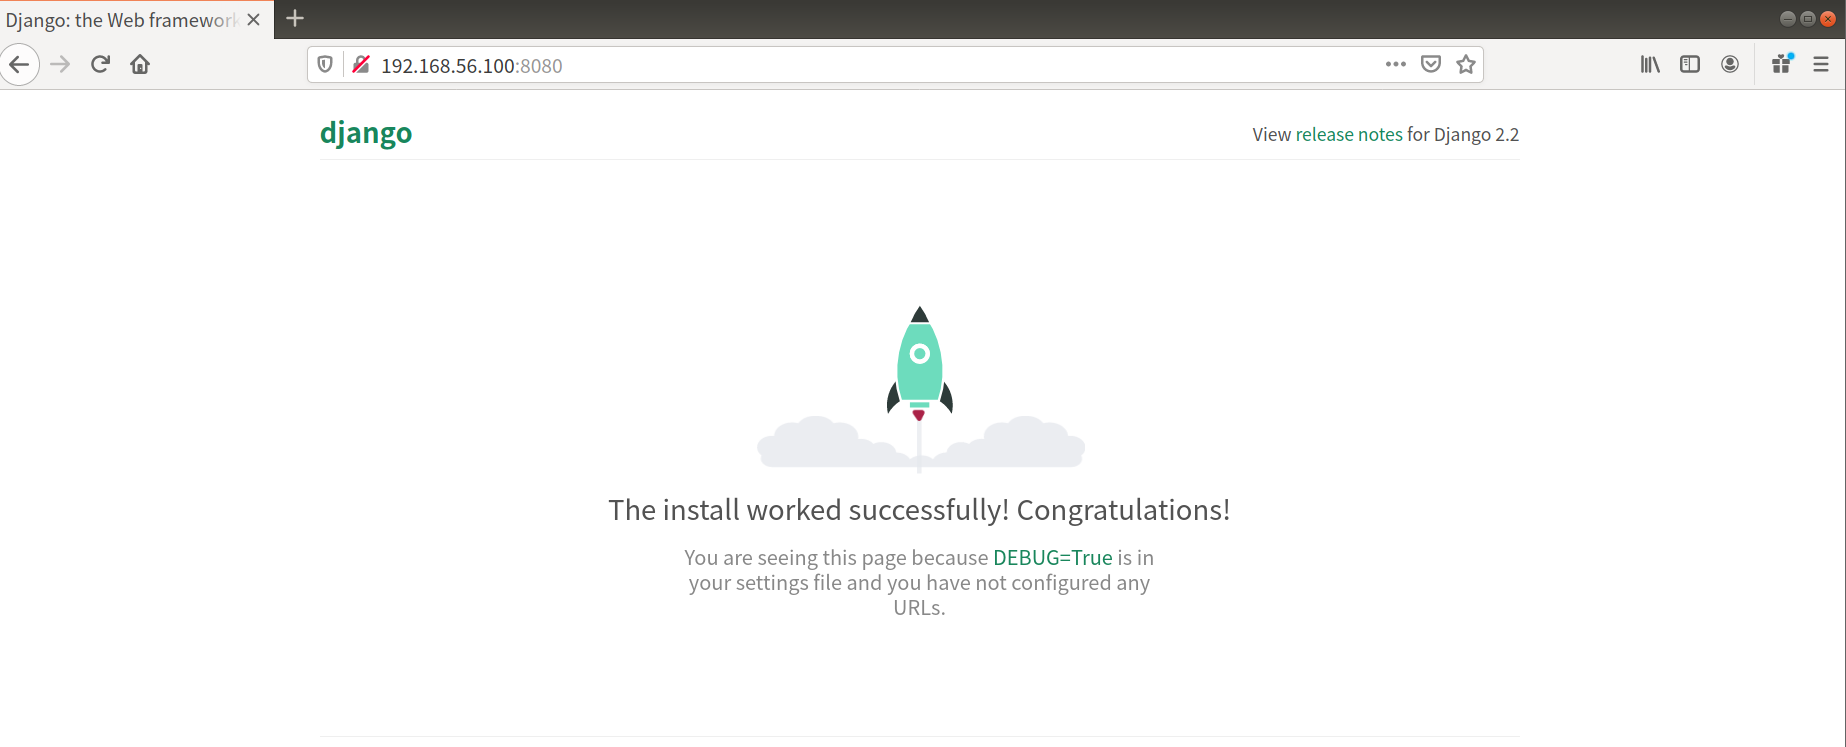
此时,访问http://192.168.56.100:8080/,如图所示,表示项目启动成功
-

3.使用uwsgi配置文件启动django项目
安装uwsgi
'''1. 安装uwsgi'''
[root@linux-node1 /]# workon syl
[root@linux-node1 /]# pip3 install uwsgi # 安装uwsgi
[root@linux-node1 /]# whereis uwsgi # 查看uwsgi安装路径
uwsgi: /root/.virtualenvs/syl/bin/uwsgi
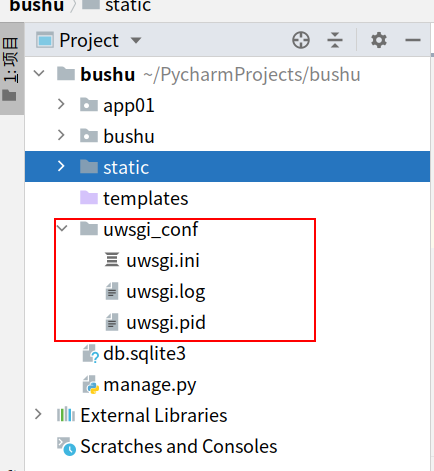
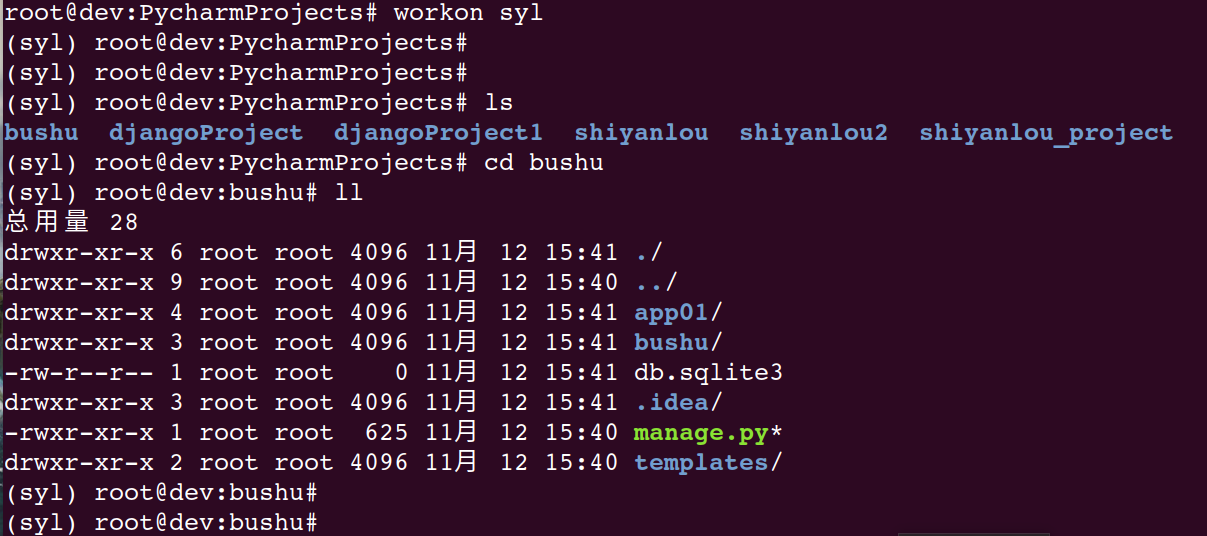
第一步:在django项目同级目录创建uwsgi_conf目录,用于存放配置脚本等等
(syl) root@dev:bushu# ls
app01  bushu  db.sqlite3  manage.py  templates
(syl) root@dev:bushu#
(syl) root@dev:bushu# mkdir script
(syl) root@dev:bushu# ls
app01  bushu  db.sqlite3  manage.py  script  templates
(syl) root@dev:bushu#
第二步:进入/uwsgi_conf目录,创建一个uwsgi.ini文件
;[root@linux-node1 /]# vim uwsgi_conf/uwsgi.ini

[uwsgi]
# 使用Nginx连接时使用,Django程序所在服务器地址和端口号
socket = 127.0.0.1:8888
# socket = 0.0.0.0:3031
# 项目目录绝对路径
chdir = /root/PycharmProjects/bushu
# 项目中wsgi.py文件的目录,相对于项目目录
wsgi-file = /root/PycharmProjects/bushu/bushu/wsgi.py
# 进程数(机器核数的1倍)
processes = 4
# 线程数
threads = 20
# uwsgi服务器的角色
master = True
# 存放进程编号的文件
pidfile = /root/PycharmProjects/bushu/uwsgi_conf/uwsgi.pid
# 日志文件
daemonize = /root/PycharmProjects/bushu/uwsgi_conf/uwsgi.log
# 指定依赖的虚拟环境
virtualenv = /root/.virtualenvs/syl
module = bushu.wsgi/
# 指定IP端口
http = 192.168.56.100:8888
第三步:使用uwsgi启动django:一定要在这个项目目录中
'''3. 使用uwsgi启动django:一定要在这个项目目录中'''

(syl) root@dev:uwsgi_conf # uwsgi --ini uwsgi.ini  	# 启动uwsgi的 django项目
# 访问项目:http://192.168.56.100:8080/
参数说明:
-
http 这个就和runserver一样指定IP 端口
-
file 这个文件就里有一个反射如果你在调用他的时候没有指定Web Server就使用默认的
-
static 做一个映射,指定静态文件
-
此时,访问http://192.168.56.100:8080/,如图所示,表示项目启动成功

至此,uwsgi+django就完美结合了,但是,光有uwsgi还不够,uwsgi处理动态请求能力高,但对于静态请求(如static文件,css,js文件等)处理能力差,此时就要结合nginx一起使用
4.安装配置nginx
linux/unbunt nginx 卸载重装:http://www.chenxm.cc/article/246.html
1、安装nginx(Ubuntu安装)
[root@linux-node1 /]# sudo apt update			  #  更新apt
[root@linux-node1 /]# sudo apt install nginx 	    # 安装nginx
[root@linux-node1 /]# sudo systemctl status nginx 	# 查看nginx状态
(syl) root@dev:uwsgi_conf # whereis nginx			#查询nginx安装目录
nginx: /usr/sbin/nginx /usr/lib/nginx /etc/nginx /usr/share/nginx /usr/share/man/man8/nginx.8.gz


安装nginx(centos安装)

yum -y install nginx

#测试是否安装完成,命令启动nginx


/etc/init.d/nginx start
2、配置nginx+uwsgi启动
首先创建配置文件,nginx的默认配置目录为/etc/nginx/conf.d
cd /etc/nginx/conf.d/
创建django.conf文件 以*.conf结尾的文件都可以作为nginx的配置文件
vim django.conf
创建完成之后把下面这些配置保存到django.conf中 wq保存并退出
更多linux编辑文件命令可看博客:https://www.cnblogs.com/tjw-bk/p/13968478.html
# 这个server标识我要配置了
server {
     listen 8080; # 我要监听那个端口
     server_name 192.168.56.100; # 你访问的路径前面的url名称
     ## 指定静态文件路径
     location /static {
          alias /PycharmProjects/bushu/static;
     }
     # 指定项目路径uwsgi
     # 这个location就和咱们Django的url(r'^admin/', admin.site.urls)
     location / {
          # 导入一个Nginx模块他是用来和uWSGI进行通讯的
          include uwsgi_params; uwsgi_pass 127.0.0.1:8888;
          # 设置连接uWSGI超时时间
          uwsgi_connect_timeout 30;
          uwsgi_ignore_client_abort on;
     }
}
下面这个更简洁一些
server {
     listen 8888;
     server_name 192.168.56.100;
     location /static {
          alias /root/PycharmProjects/bushu/static;
     }
     location / {
          include uwsgi_params;
          uwsgi_pass 127.0.0.1:8888;
          uwsgi_ignore_client_abort on;
     }
}
最后一步,开启nginx
/etc/init.d/nginx status
/etc/nginx/nginx.conf.d nginx主配置文件解读
user www-data;
worker_processes auto;
pid /run/nginx.pid;
include /etc/nginx/modules-enabled/*.conf;
events {
     worker_connections 768; # 链接数量
}
http {
     sendfile on;
     tcp_nopush on;
     tcp_nodelay on;
     keepalive_timeout 65;
     types_hash_max_size 2048;
     access_log /var/log/nginx/access.log;  # 客户浏览器访问nginx服务记录(客户端访问异常时可以查看)
     error_log /var/log/nginx/error.log;   # nginx错误日志(nginx启动时报错的日志)
     include /etc/nginx/conf.d/*.conf;	# nginx扩展配置文件
     include /etc/nginx/sites-enabled/*;
}
nginx相关命令
-
启动Nginx通过Nginx访问
/etc/init.d/nginx start /etc/init.d/nginx stop -
这里有个命令configtest,Nginx配置是重启生效的,如果你修改完了,不知道对不对又担心影响其他人可以使用它测试
/etc/init.d/nginx configtest -
如果是生产环境的话Nginx正在运行,就不要直接stop start 或者 restart 直接reload就行了 对线上影响最低
/etc/init.d/nginx reload
4、uwsgi和nginx 启动、关闭、查看日志
1.启动并查看nginx日志
[root@linux-node1 demo2]# systemctl status nginx  	# 开启nginx
root@dev:~# systemctl stop nginx.service  #关闭nginx

root@dev:uwsgi_conf# tail -f /var/log/nginx/access.log 	# 查看nginx接入日志

root@dev:uwsgi_conf# tail -f /var/log/nginx/error.log 		# 查看nginx错误日志

#检查Nginx的配置文件的语法错误输出将提示您问题所在以及行号。
root@dev:conf.d# nginx -t -c /etc/nginx/nginx.conf
nginx: the configuration file /etc/nginx/nginx.conf syntax is ok
nginx: configuration file /etc/nginx/nginx.conf test is successful
2.启动并查看uwsgi日志
root@dev:uwsgi_conf# cd /PycharmProjects/bushu/uwsgi_conf # 进入实验楼目录

[root@linux-node1 demo2]# uwsgi --ini uwsgi.ini # 启动uwsgi的 django项目

# http://192.168.56.100:8080/ 访问项目

[root@linux-node1 demo2]# uwsgi --stop uwsgi.pid 	# 关闭uwsgi

[root@dev:uwsgi_conf# tail -f uwsgi.log		# 查看uwsgi日志
(syl) root@dev:uwsgi_conf# ps -ef|grep uwsgi 	# 查看uwsgi服务是否启动
   root 92328 89266 0 14:37 pts/1 00:00:00 grep --color=auto uwsgi
(syl) root@dev:uwsgi_conf# netstat -anptu | grep 8888	 # 查看8888端口被哪一个程序占用
浏览器访问192.168.56.100:8888,出现如下页面表示启动成功
注意:
- 运行命令之前
ps -ef|grep uwsgi或ps -ef|grep nginx先查看端口是否被占用,被占用了就直接kill -9 xxx(端口号)