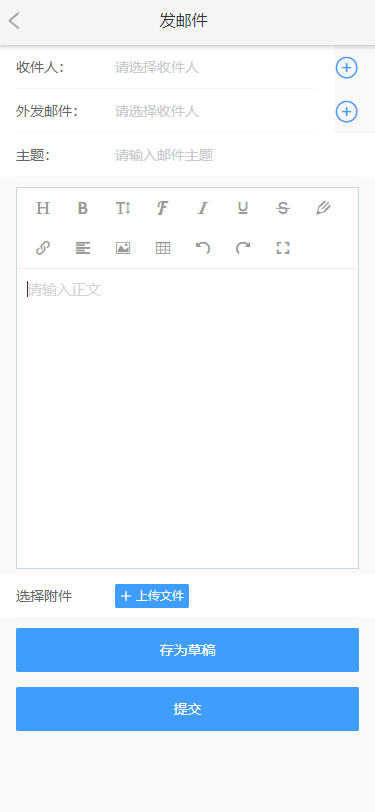
官网地址 :https://www.wangeditor.com/
原文地址:https://www.cnblogs.com/jiqing9006/p/9156957.html
注意:不支持移动端
dome:
第一步:下载
npm 安装 npm i wangeditor --save
第二步:引入使用
import E from 'wangeditor'
const editor = new E('#div1')
// 或者 const editor = new E( document.getElementById('div1') )
editor.create()

<template>
    <div id="div1"></div>
</template>

<script>
   import E from 'wangeditor'
   export default {
      data(){
        return{
           editorText:''
        }
      }
      mounted(){
        this.$nextTick(v=>{
            const editor = new E('#div1')
           editor.confing.onchange = (html) => {
               this.editorText = html  //把输入的文本内容放到editorText里
            }
            editor.config.menus = [
                'head',  // 标题
                'bold',  // 粗体
                'fontSize',  // 字号
                'fontName',  // 字体
                'italic',  // 斜体
                'underline',  // 下划线
                'strikeThrough',  // 删除线
                'foreColor',  // 文字颜色
                // 'backColor',  // 背景颜色
                'link',  // 插入链接
                // 'list',  // 序列
                'justify',  // 对齐方式
                // 'quote',  // 引用
                // 'emoticon',  // 表情
                'image',  // 插入图片
                'table',  // 表格
                // 'video',  // 插入视频
                // 'code',  // 插入代码
                'undo',  // 撤销
                'redo'  // 重复
            ];
            // 服务器地址
            editor.config.uploadImgServer = 'xxxxxxxxxxxxxxx/res/control/ueditor/jsp/controller.jsp?action=uploadimage' // 上传图片到服务器
            // 文件上传大小3M
            editor.config.uploadImgMaxSize = 3 * 1024 * 1024;
            // 限制一次最多上传 1 张图片
            editor.config.uploadImgMaxLength = 1;
            // 自定义上传文件名
            editor.config.uploadFileName = 'file';
            // 自定义 header
            editor.config.uploadImgHeaders = {
                'Access-Control-Allow-Origin':'*'
            }
            // 自定义上传参数
            editor.config.uploadImgParams = {
                userID:this.tool.getCookie('userID'),
                sessionID:this.tool.getCookie('sessionID')
            }
            // 将 timeout 时间改为 5s
            editor.config.uploadImgTimeout = 5000;
            editor.config.uploadImgHooks = {
                before: function (xhr, editor, files) {
                    // 图片上传之前触发
                    // xhr 是 XMLHttpRequst 对象,editor 是编辑器对象,files 是选择的图片文件

                    // 如果返回的结果是 {prevent: true, msg: 'xxxx'} 则表示用户放弃上传
                    // return {
                    //     prevent: true,
                    //     msg: '放弃上传'
                    // }
                    // alert("前奏");
                },
                success: function (xhr, editor, result) {
                    // 图片上传并返回结果,图片插入成功之后触发
                    // xhr 是 XMLHttpRequst 对象,editor 是编辑器对象,result 是服务器端返回的结果
                    // var url = result.data.url;
                    // alert(JSON.stringify(url));
                    // editor.txt.append(url);
                    // alert("成功");
                },
                fail: function (xhr, editor, result) {
                    // 图片上传并返回结果,但图片插入错误时触发
                    // xhr 是 XMLHttpRequst 对象,editor 是编辑器对象,result 是服务器端返回的结果
                    alert("失败");
                },
                error: function (xhr, editor) {
                    // 图片上传出错时触发
                    // xhr 是 XMLHttpRequst 对象,editor 是编辑器对象
                    // alert("错误");
                },
                // 如果服务器端返回的不是 {errno:0, data: [...]} 这种格式,可使用该配置
                // (但是,服务器端返回的必须是一个 JSON 格式字符串!!!否则会报错)
                customInsert: function (insertImg, result, editor) {
                    // 图片上传并返回结果,自定义插入图片的事件(而不是编辑器自动插入图片!!!)
                    // insertImg 是插入图片的函数,editor 是编辑器对象,result 是服务器端返回的结果
                    // 举例:假如上传图片成功后,服务器端返回的是 {url:'....'} 这种格式,即可这样插入图片:
                    var url = result.url;
                    insertImg(url);
                    // result 必须是一个 JSON 格式字符串!!!否则报错
                }
            }
            editor.create()

        })
    },
   }
</script>