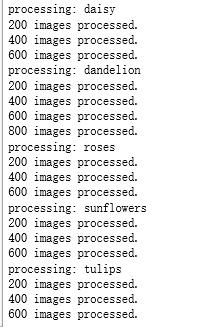
import glob
import os.path
import numpy as np
import tensorflow as tf
from tensorflow.python.platform import gfile

# 原始输入数据的目录,这个目录下有5个子目录,每个子目录底下保存这属于该
# 类别的所有图片。
INPUT_DATA = 'F:\TensorFlowGoogle\201806-github\datasets\flower_photos\'
# 输出文件地址。我们将整理后的图片数据通过numpy的格式保存。
OUTPUT_FILE = 'F:\shuju\flower_processed_data.npy'

# 测试数据和验证数据比例。
VALIDATION_PERCENTAGE = 10
TEST_PERCENTAGE = 10

# 读取数据并将数据分割成训练数据、验证数据和测试数据。
def create_image_lists(sess, testing_percentage, validation_percentage):
    sub_dirs = [x[0] for x in os.walk(INPUT_DATA)]
    is_root_dir = True
    # 初始化各个数据集。
    training_images = []
    training_labels = []
    testing_images = []
    testing_labels = []
    validation_images = []
    validation_labels = []
    current_label = 0

    # 读取所有的子目录。
    for sub_dir in sub_dirs:
        if is_root_dir:
            is_root_dir = False
            continue
        # 获取一个子目录中所有的图片文件。
        extensions = ['jpg', 'jpeg', 'JPG', 'JPEG']
        file_list = []
        dir_name = os.path.basename(sub_dir)
        for extension in extensions:
            file_glob = os.path.join(INPUT_DATA, dir_name, '*.' + extension)
            file_list.extend(glob.glob(file_glob))
        if not file_list:
            continue
        print("processing:", dir_name)
        i = 0
        # 处理图片数据。
        for file_name in file_list:
            i += 1
            # 读取并解析图片,将图片转化为299*299以方便inception-v3模型来处理。
            image_raw_data = gfile.FastGFile(file_name, 'rb').read()
            image = tf.image.decode_jpeg(image_raw_data)
            if image.dtype != tf.float32:
                image = tf.image.convert_image_dtype(image, dtype=tf.float32)
            image = tf.image.resize_images(image, [299, 299])
            image_value = sess.run(image)
            # 随机划分数据聚。
            chance = np.random.randint(100)
            if chance < validation_percentage:
                validation_images.append(image_value)
                validation_labels.append(current_label)
            elif chance < (testing_percentage + validation_percentage):
                testing_images.append(image_value)
                testing_labels.append(current_label)
            else:
                training_images.append(image_value)
                training_labels.append(current_label)
            if i % 200 == 0:
                print(i, "images processed.")
        current_label += 1
    # 将训练数据随机打乱以获得更好的训练效果。
    state = np.random.get_state()
    np.random.shuffle(training_images)
    np.random.set_state(state)
    np.random.shuffle(training_labels)

    return np.asarray([training_images, training_labels,validation_images, validation_labels,testing_images, testing_labels])

with tf.Session() as sess:
    processed_data = create_image_lists(sess, TEST_PERCENTAGE, VALIDATION_PERCENTAGE)
    # 通过numpy格式保存处理后的数据。
    np.save(OUTPUT_FILE, processed_data)
