如何在Tomcat Server上部署Spring Boot应用程序。
它包括三个步骤:
设置Spring Boot应用程序
创建Spring Boot WAR
将WAR部署到Tomcat
<project xmlns="http://maven.apache.org/POM/4.0.0"
    xmlns:xsi="http://www.w3.org/2001/XMLSchema-instance"
    xsi:schemaLocation="http://maven.apache.org/POM/4.0.0 http://maven.apache.org/xsd/maven-4.0.0.xsd">
    <modelVersion>4.0.0</modelVersion>
    <groupId>com.m</groupId>
    <artifactId>9-7-Tomcat</artifactId>
    <version>0.0.1-SNAPSHOT</version>

    <packaging>war</packaging>

    <name>spring-boot-war-deployment-example</name>
    <description>Demo project for Spring Boot</description>

    <parent>
        <groupId>org.springframework.boot</groupId>
        <artifactId>spring-boot-starter-parent</artifactId>
        <version>2.0.0.RELEASE</version>
        <relativePath /> <!-- lookup parent from repository -->
    </parent>

    <dependencies>

        <!-- DevTools in Spring Boot 项目热部署 -->
        <dependency>
            <groupId>org.springframework.boot</groupId>
            <artifactId>spring-boot-devtools</artifactId>
        </dependency>

        <dependency>
            <groupId>org.springframework.boot</groupId>
            <artifactId>spring-boot-starter-web</artifactId>
        </dependency>

        <dependency>
            <groupId>org.springframework.boot</groupId>
            <artifactId>spring-boot-starter-tomcat</artifactId>
            <scope>provided</scope>
        </dependency>

        <dependency>
            <groupId>org.springframework.boot</groupId>
            <artifactId>spring-boot-starter-test</artifactId>
            <scope>test</scope>
        </dependency>

    </dependencies>

    <properties>
        <!-- 声明项目配置依赖编码格式为 utf-8 -->
        <project.build.sourceEncoding>UTF-8</project.build.sourceEncoding>
        <project.reporting.outputEncoding>UTF-8</project.reporting.outputEncoding>
        <fastjson.version>1.2.24</fastjson.version>
        <webVersion>4.0</webVersion>
    </properties>
    <build>
        <finalName>web-services</finalName>
        <plugins>
            <plugin>
                <artifactId>maven-compiler-plugin</artifactId>
                <configuration>
                    <source>1.8</source>
                    <target>1.8</target>
                </configuration>
            </plugin>
        </plugins>
    </build>
</project>
package com.lidihuo;

import org.springframework.web.bind.annotation.GetMapping;
import org.springframework.web.bind.annotation.RestController;

@RestController
public class DemoRestController {
    @GetMapping("/hello")
    public String hello() {
        return "Hello User, have a nice day.";
    }
}
创建Spring Boot WAR
它利用了Spring Framework的Servlet 3.0支持,并允许我们在Servlet容器启动时配置应用程序。要创建用于部署的WAR,有 三个步骤:
在主类中扩展 SpringBootServletInitializer 类。
将嵌入式servlet容器标记为已提供。
将包装 JAR 更新为
在应用程序中实现上述三个步骤。
打开 SpringBootWarDeploymentExampleApplication.java 文件并初始化Tomcat所需的Servlet上下文。为实现相同目的,扩展了 SpringBootServletInitializer 接口。

public class SpringBootWarDeploymentExampleApplication extends SpringBootServletInitializer
{
}

覆盖 Configure 方法。
@Override
protected SpringApplicationBuilder configure(SpringApplicationBuilder application)
{
return application.sources(SpringBootWarDeploymentExampleApplication.class);
}
package com.lidihuo;

import org.springframework.boot.SpringApplication;
import org.springframework.boot.autoconfigure.SpringBootApplication;
import org.springframework.boot.builder.SpringApplicationBuilder;
import org.springframework.boot.web.servlet.support.SpringBootServletInitializer;

@SpringBootApplication
public class SpringBootWarDeploymentExampleApplication extends SpringBootServletInitializer {
    @Override
    protected SpringApplicationBuilder configure(SpringApplicationBuilder application) {
        return application.sources(SpringBootWarDeploymentExampleApplication.class);
    }

    public static void main(String[] args) {
        SpringApplication.run(SpringBootWarDeploymentExampleApplication.class, args);
    }
}
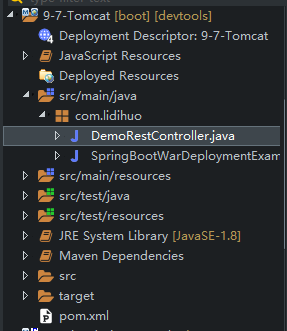
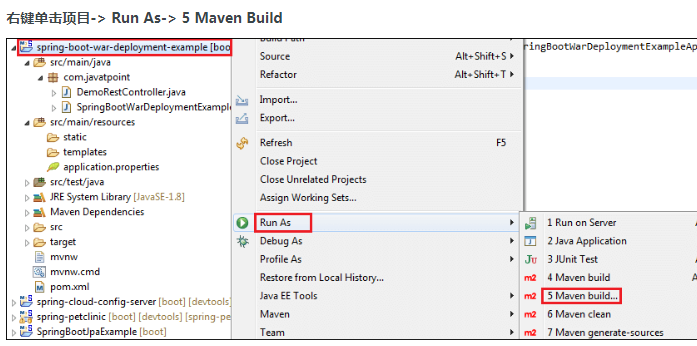
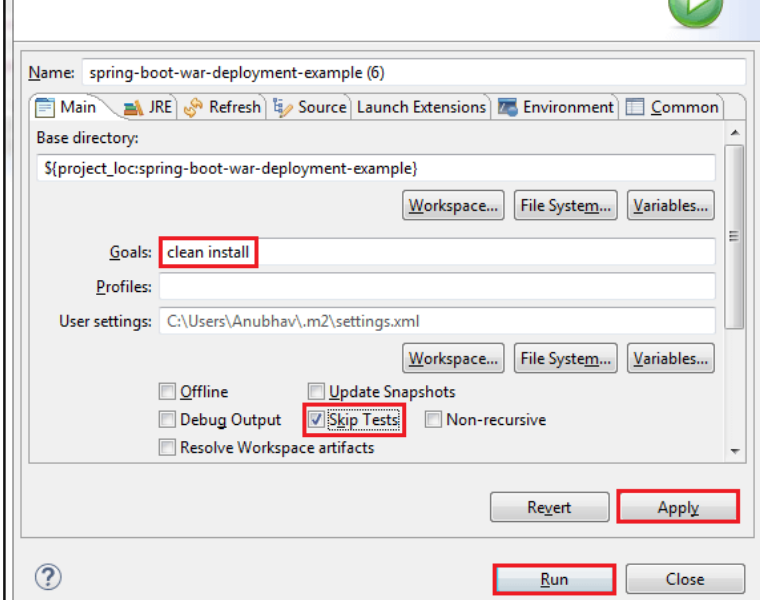
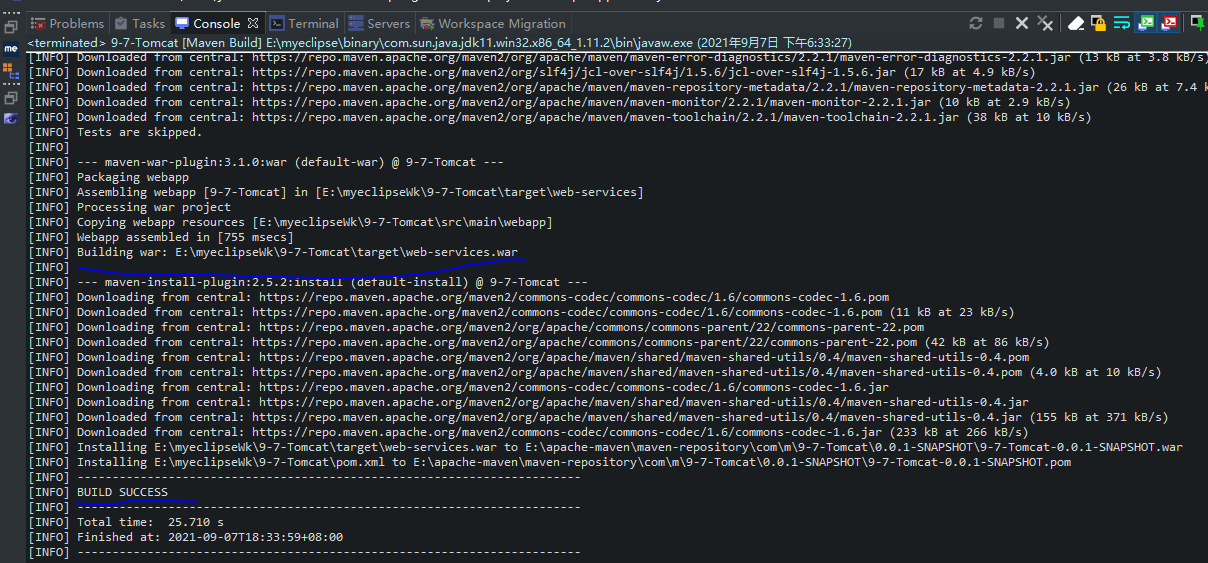
复制 路径并访问应用程序的 target 文件夹。我们在目标文件夹中找到了与pom.xml文件中指定的名称相同的WAR文件
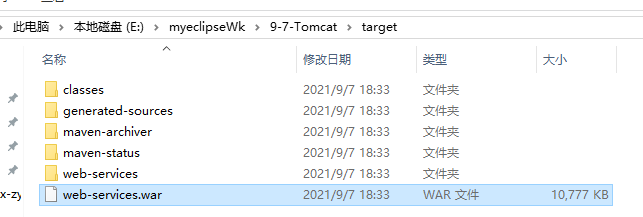
部署将WAR文件添加到Tomcat
要部署WAR文件,请按照以下步骤操作:
下载并安装 Apache Tomcat Server (如果未安装)。
复制WAR文件(web-services.war)并将其粘贴到 webapps 文件夹
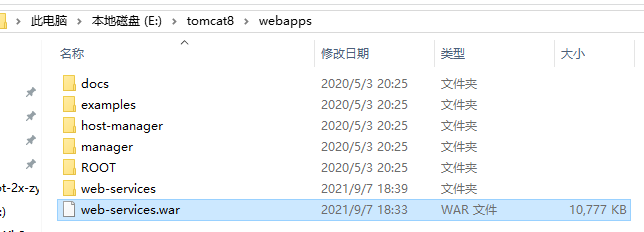
现在打开命令提示符并键入以下命令:


打开浏览器并调用URL http://localhost:8080/web-services/hello
