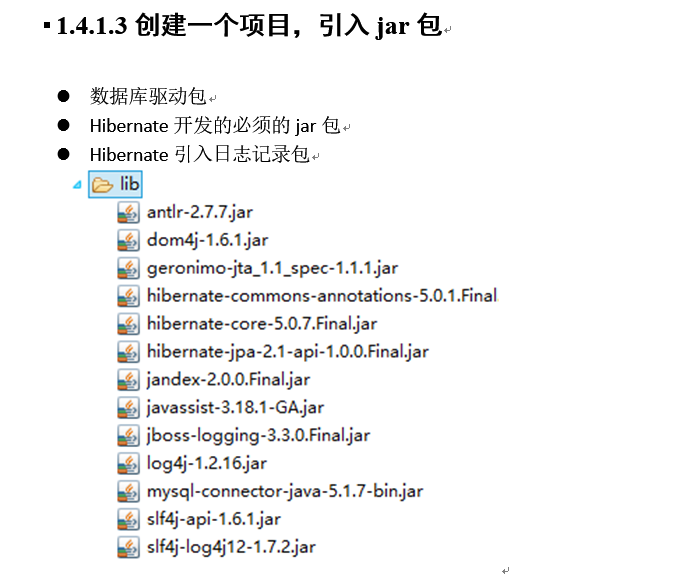
l Hibernate的入门(Hibernate的环境搭建、Hibernate的API、Hibernate的CRUD)

ORM:Object Relational Mapping(对象关系映射)。指的是将一个Java中的对象与关系型数据库中的表建立一种映射关系,从而操作对象就可以操作数据库中的表。

创建表:
CREATE TABLE `cst_customer` (
  `cust_id` bigint(32) NOT NULL AUTO_INCREMENT COMMENT '客户编号(主键)',
  `cust_name` varchar(32) NOT NULL COMMENT '客户名称(公司名称)',
  `cust_source` varchar(32) DEFAULT NULL COMMENT '客户信息来源',
  `cust_industry` varchar(32) DEFAULT NULL COMMENT '客户所属行业',
  `cust_level` varchar(32) DEFAULT NULL COMMENT '客户级别',
  `cust_phone` varchar(64) DEFAULT NULL COMMENT '固定电话',
  `cust_mobile` varchar(16) DEFAULT NULL COMMENT '移动电话',
  PRIMARY KEY (`cust_id`)
) ENGINE=InnoDB AUTO_INCREMENT=1 DEFAULT CHARSET=utf8;
创建实体类:
public class Customer {
	private Long cust_id;
	private String cust_name;
	private String cust_source;
	private String cust_industry;
	private String cust_level;
	private String cust_phone;
	private String cust_mobile;
	public Long getCust_id() {
		return cust_id;
	}
	public void setCust_id(Long cust_id) {
		this.cust_id = cust_id;
	}
	public String getCust_name() {
		return cust_name;
	}
	public void setCust_name(String cust_name) {
		this.cust_name = cust_name;
	}
	public String getCust_source() {
		return cust_source;
	}
	public void setCust_source(String cust_source) {
		this.cust_source = cust_source;
	}
	public String getCust_industry() {
		return cust_industry;
	}
	public void setCust_industry(String cust_industry) {
		this.cust_industry = cust_industry;
	}
	public String getCust_level() {
		return cust_level;
	}
	public void setCust_level(String cust_level) {
		this.cust_level = cust_level;
	}
	public String getCust_phone() {
		return cust_phone;
	}
	public void setCust_phone(String cust_phone) {
		this.cust_phone = cust_phone;
	}
	public String getCust_mobile() {
		return cust_mobile;
	}
	public void setCust_mobile(String cust_mobile) {
		this.cust_mobile = cust_mobile;
	}
	@Override
	public String toString() {
		return "Customer [cust_id=" + cust_id + ", cust_name=" + cust_name + ", cust_source=" + cust_source
				+ ", cust_industry=" + cust_industry + ", cust_level=" + cust_level + ", cust_phone=" + cust_phone
				+ ", cust_mobile=" + cust_mobile + "]";
	}
创建实体类与数据库表的映射:hibernate.cfg.xml
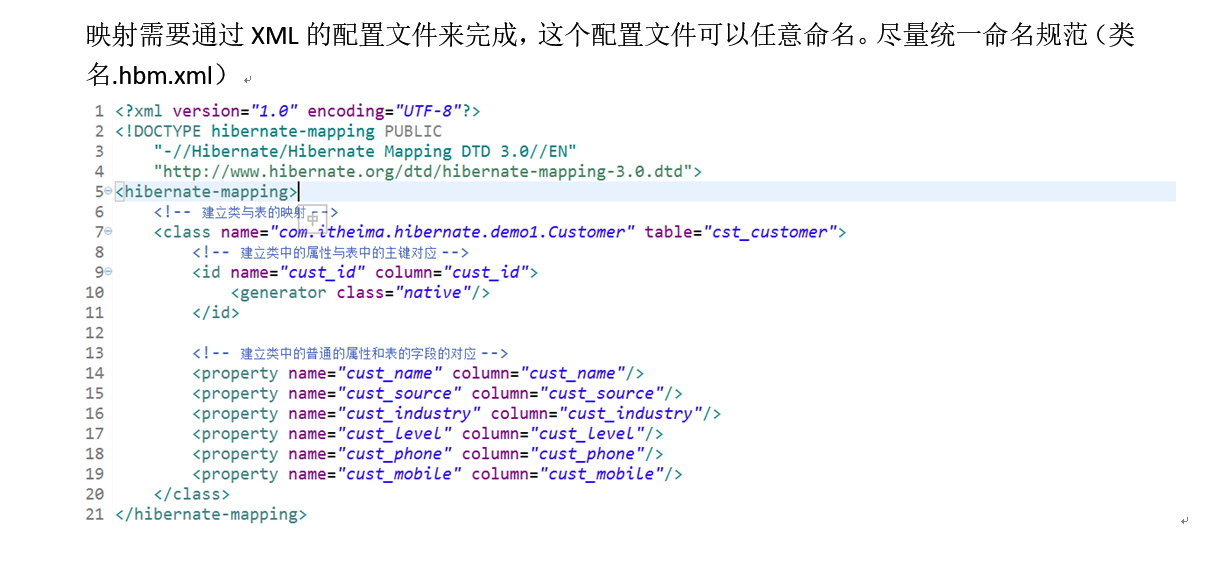
完整xml:
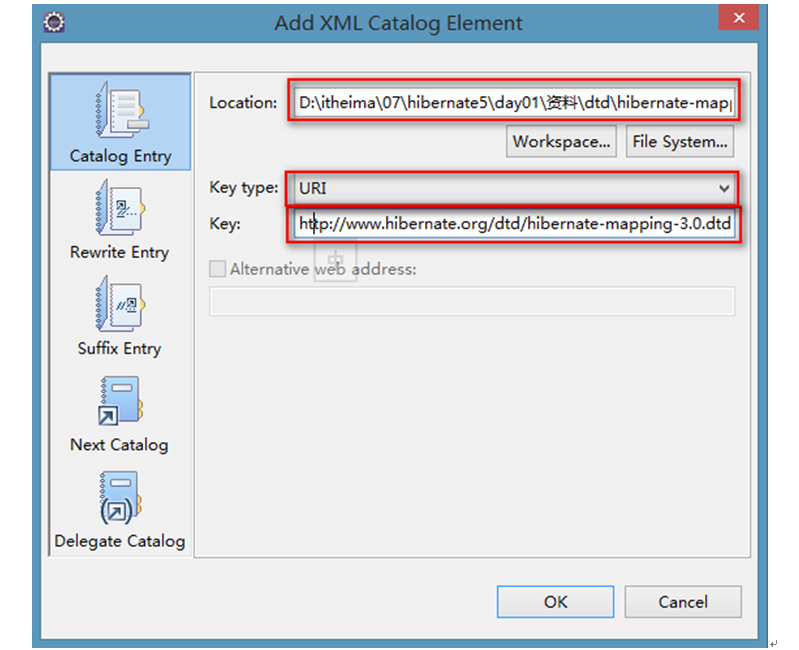
<?xml version="1.0" encoding="UTF-8"?>
<!DOCTYPE hibernate-mapping PUBLIC
"-//Hibernate/Hibernate Mapping DTD 3.0//EN"
"http://www.hibernate.org/dtd/hibernate-mapping-3.0.dtd">
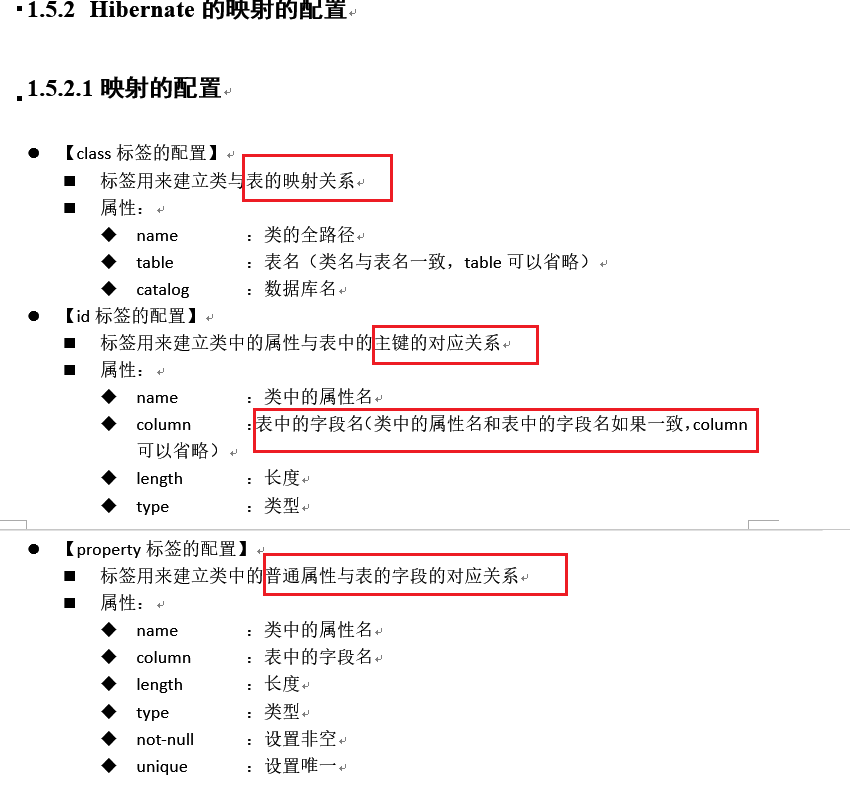
<hibernate-mapping>
<!-- 建立类与表的映射 -->
<class name="com.hibernate.demo1.Customer" table="cst_customer">
<!-- 建立类中的属性与表中的主键对应 -->
<id name="cust_id" column="cust_id">
<generator class="native"></generator>
</id>
<!-- 建立类中的普通的属性和表的字段的对应 -->
<property name="cust_name" column="cust_name" length="32" />
<property name="cust_source" column="cust_source" length="32"/>
<property name="cust_industry" column="cust_industry"/>
<property name="cust_level" column="cust_level"/>
<property name="cust_phone" column="cust_phone"/>
<property name="cust_mobile" column="cust_mobile"/>
</class>
</hibernate-mapping>


完整xml:(包括各种配置):
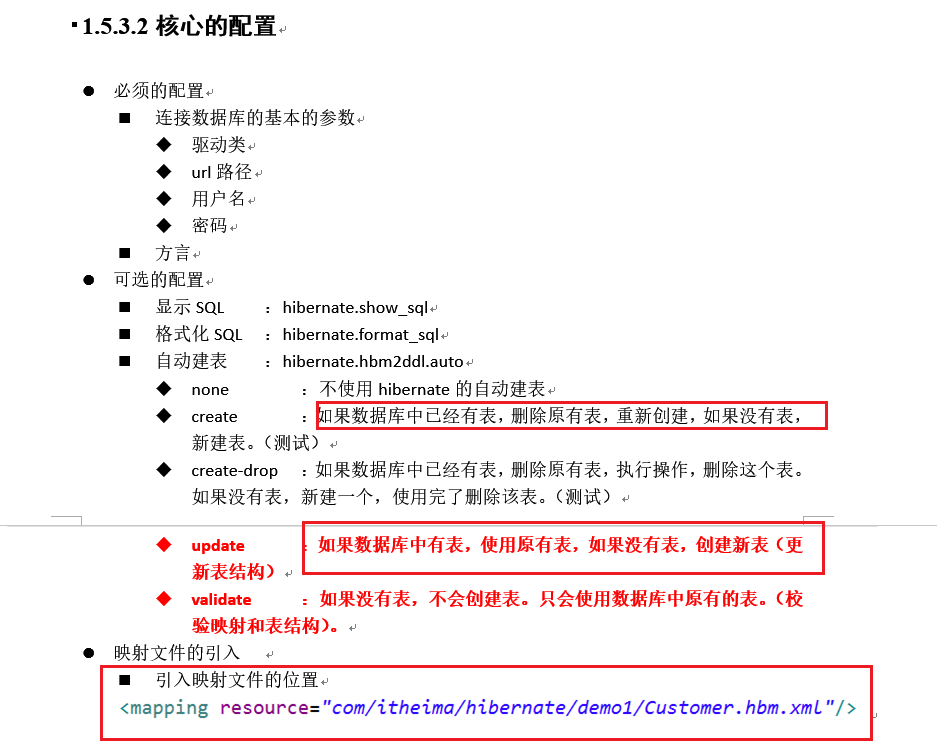
<?xml version="1.0" encoding="UTF-8"?>
<!DOCTYPE hibernate-configuration PUBLIC
	"-//Hibernate/Hibernate Configuration DTD 3.0//EN"
	"http://www.hibernate.org/dtd/hibernate-configuration-3.0.dtd">
<hibernate-configuration>
	<session-factory>
		<!-- 必须的配置===================-->
		<!--连接数据库的基本参数 -->
		<property name="hibernate.connection.driver_class">com.mysql.jdbc.Driver</property>
		<property name="hibernate.connection.url">jdbc:mysql:///hibernate</property>
		<property name="hibernate.connection.username">root</property>
		<property name="hibernate.connection.password">root</property>
		<!-- 配置Hibernate的方言 -->
		<property name="hibernate.dialect">org.hibernate.dialect.MySQLDialect</property>

		<!-- 可选配置================ -->
		<!-- 打印SQL -->
		<property name="hibernate.show_sql">true</property>
		<!-- 格式化SQL -->
		<property name="hibernate.format_sql">true</property>
		<!-- 自动创建表 -->
		<property name="hibernate.hbm2ddl.auto">update</property>

		<!-- 配置C3P0连接池 (不使用原有的连接池 可在这配置)-->
		<property name="connection.provider_class">org.hibernate.connection.C3P0ConnectionProvider</property>
		<!--在连接池中可用的数据库连接的最少数目 -->
		<property name="c3p0.min_size">5</property>
		<!--在连接池中所有数据库连接的最大数目  -->
		<property name="c3p0.max_size">20</property>
		<!--设定数据库连接的过期时间,以秒为单位,
		如果连接池中的某个数据库连接处于空闲状态的时间超过了timeout时间,就会从连接池中清除 -->
		<property name="c3p0.timeout">120</property>
		 <!--每3000秒检查所有连接池中的空闲连接 以秒为单位-->
		<property name="c3p0.idle_test_period">3000</property>

		<!-- 引入映射文件 -->
		<mapping resource="com/hibernate/demo1/Customer.hbm.xml"/>
	</session-factory>
</hibernate-configuration>
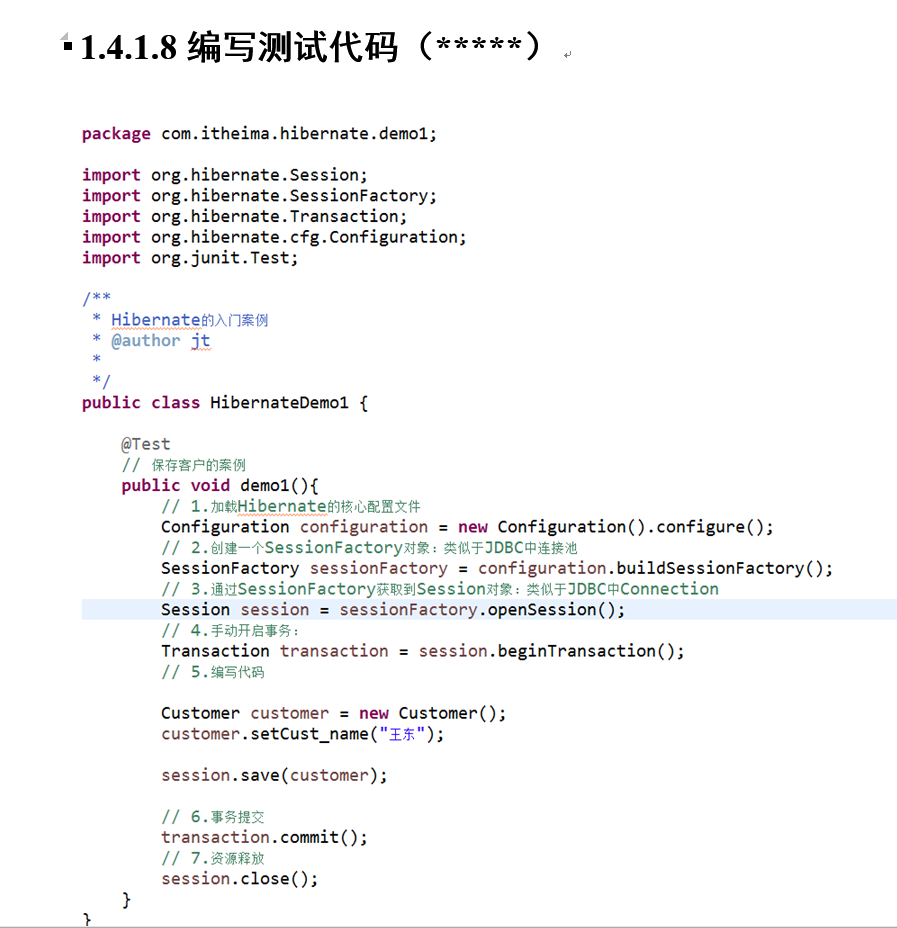
/**
* 入门测试
* @author ZWT
*
*/
public class TestDemo1 {
@Test
// 保存客户的案例
public void demo1(){
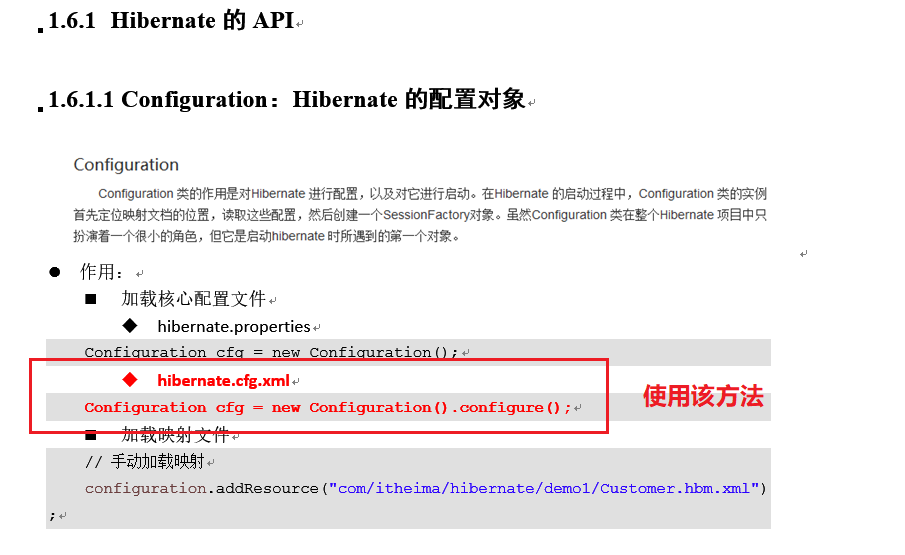
// 1.加载Hibernate的核心配置文件
Configuration configuration = new Configuration().configure();
// 手动加载映射
// configuration.addResource("com/hibernate/demo1/Customer.hbm.xml");
// 2.创建一个SessionFactory对象:类似于JDBC中连接池
SessionFactory sessionFactory = configuration.buildSessionFactory();
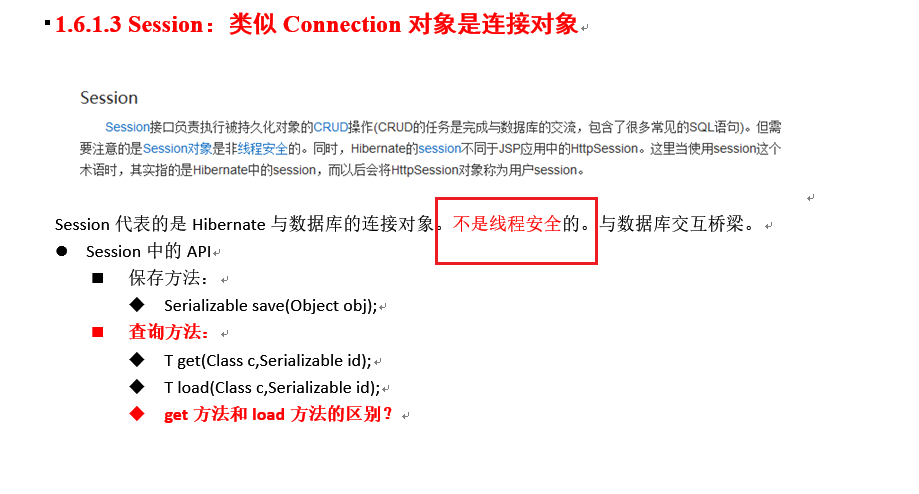
// 3.通过SessionFactory获取到Session对象:类似于JDBC中Connection
Session session = sessionFactory.openSession();
// 4.手动开启事务:
Transaction transaction = session.beginTransaction();
// 5.编写代码
Customer customer = new Customer();
customer.setCust_name("瓦活佛西");
session.save(customer);
// 6.事务提交
transaction.commit();
// 7.资源释放
session.close();
sessionFactory.close();
}
}
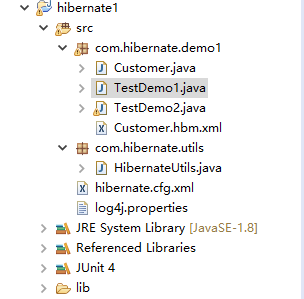
目录结构:


@Test
	//查询
	public void demo2() {
		//必须是局部的 因为session不是线程安全的
		Session session = HibernateUtils.openSession();
		Transaction tx = session.beginTransaction();
		/**
		 * get方法
		 * 	* 采用的是立即加载,执行到这行代码的时候,就会马上发送SQL语句去查询。
		 *  * 查询后返回是真实对象本身。
		 * 	* 查询一个找不到的对象的时候,返回null
		 *
		 * load方法
		 * 	* 采用的是延迟加载(lazy懒加载),执行到这行代码的时候,不会发送SQL语句,当真正使用这个对象的时候才会发送SQL语句。
		 *  * 查询后返回的是代理对象。javassist-3.18.1-GA.jar 利用javassist技术产生的代理。
		 *  * 查询一个找不到的对象的时候,返回ObjectNotFoundException
		 */
		// 使用get方法查询
		/*Customer customer = session.get(Customer.class, 500l); // 发送SQL语句
		System.out.println(customer);*/

		// 使用load方法查询
		Customer customer = session.load(Customer.class, 200l);
		System.out.println(customer);


		tx.commit();
		session.close();
	}

完整代码如下:
package com.hibernate.demo1;
import java.io.Serializable;
import java.util.Arrays;
import java.util.List;
import org.hibernate.SQLQuery;
import org.hibernate.Session;
import org.hibernate.Transaction;
import org.junit.Test;
import com.hibernate.utils.HibernateUtils;
public class TestDemo2 {
@Test
// 保存客户
public void demo1(){
//必须是局部的 因为session不是线程安全的
Session session = HibernateUtils.openSession();
Transaction tx = session.beginTransaction();
Customer customer = new Customer();
customer.setCust_name("王小西");
Serializable id = session.save(customer);
System.out.println(id);
tx.commit();
session.close();
}
@Test
//查询
public void demo2() {
//必须是局部的 因为session不是线程安全的
Session session = HibernateUtils.openSession();
Transaction tx = session.beginTransaction();
/**
* get方法
* * 采用的是立即加载,执行到这行代码的时候,就会马上发送SQL语句去查询。
* * 查询后返回是真实对象本身。
* * 查询一个找不到的对象的时候,返回null
*
* load方法
* * 采用的是延迟加载(lazy懒加载),执行到这行代码的时候,不会发送SQL语句,当真正使用这个对象的时候才会发送SQL语句。
* * 查询后返回的是代理对象。javassist-3.18.1-GA.jar 利用javassist技术产生的代理。
* * 查询一个找不到的对象的时候,返回ObjectNotFoundException
*/
// 使用get方法查询
/*Customer customer = session.get(Customer.class, 500l); // 发送SQL语句
System.out.println(customer);*/
// 使用load方法查询
Customer customer = session.load(Customer.class, 200l);
System.out.println(customer);
tx.commit();
session.close();
}
@Test
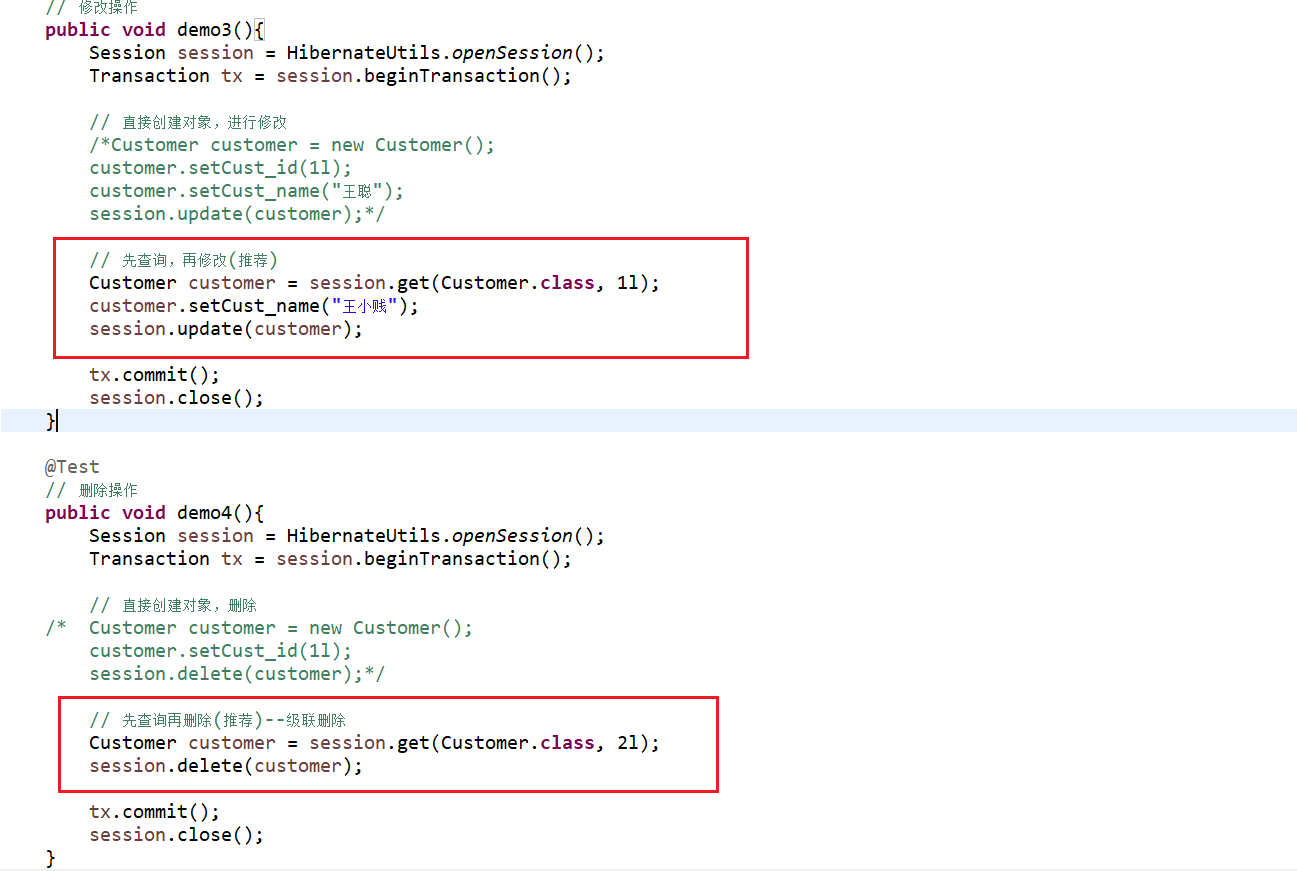
// 修改操作
public void demo3(){
Session session = HibernateUtils.openSession();
Transaction tx = session.beginTransaction();
// 直接创建对象,进行修改
/*Customer customer = new Customer();
customer.setCust_id(1l);
customer.setCust_name("王聪");
session.update(customer);*/
// 先查询,再修改(推荐)
Customer customer = session.get(Customer.class, 1l);
customer.setCust_name("王小贱");
session.update(customer);
tx.commit();
session.close();
}
@Test
// 删除操作
public void demo4(){
Session session = HibernateUtils.openSession();
Transaction tx = session.beginTransaction();
// 直接创建对象,删除
/* Customer customer = new Customer();
customer.setCust_id(1l);
session.delete(customer);*/
// 先查询再删除(推荐)--级联删除
Customer customer = session.get(Customer.class, 2l);
session.delete(customer);
tx.commit();
session.close();
}
@Test
// 保存或更新
public void demo5(){
Session session = HibernateUtils.openSession();
Transaction tx = session.beginTransaction();
/*Customer customer = new Customer();
customer.setCust_name("王凤");
session.saveOrUpdate(customer);*/
Customer customer = new Customer();
customer.setCust_id(3l);
customer.setCust_name("李如花");
session.saveOrUpdate(customer);
tx.commit();
session.close();
}
@Test
// 查询所有
public void demo6(){
Session session = HibernateUtils.openSession();
Transaction tx = session.beginTransaction();
// 接收HQL:Hibernate Query Language 面向对象的查询语言
/*Query query = session.createQuery("from Customer");
List<Customer> list = query.list();
for (Customer customer : list) {
System.out.println(customer);
}*/
// 接收SQL:
SQLQuery query = session.createSQLQuery("select * from cst_customer");
List<Object[]> list = query.list();
for (Object[] objects : list) {
System.out.println(Arrays.toString(objects));
}
tx.commit();
session.close();
}
}
附 log4j日志打印代码和工具类代码:
### direct log messages to stdout ###
log4j.appender.stdout=org.apache.log4j.ConsoleAppender
log4j.appender.stdout.Target=System.err
log4j.appender.stdout.layout=org.apache.log4j.PatternLayout
log4j.appender.stdout.layout.ConversionPattern=%d{ABSOLUTE} %5p %c{1}:%L - %m%n

### direct messages to file mylog.log ###
log4j.appender.file=org.apache.log4j.FileAppender
log4j.appender.file.File=f:mylog.log
log4j.appender.file.layout=org.apache.log4j.PatternLayout
log4j.appender.file.layout.ConversionPattern=%d{ABSOLUTE} %5p %c{1}:%L - %m%n

### set log levels - for more verbose logging change 'info' to 'debug' ###
# error warn info debug trace
log4j.rootLogger= info, stdout
package com.hibernate.utils;

import org.hibernate.Session;
import org.hibernate.SessionFactory;
import org.hibernate.cfg.Configuration;

/**
 * Hibernate的工具类
 * @author jt
 *
 */
public class HibernateUtils {

	public static final Configuration cfg;
	public static final SessionFactory sf;

	static{
		cfg = new Configuration().configure();
		sf = cfg.buildSessionFactory();
	}

	public static Session openSession(){
		return sf.openSession();
	}
}