在前一篇文章我们已经学习到了使用Electron来构建我们的文件浏览器了基础东西了,我们之前已经完成了界面功能和显示文件或文件夹的功能了,想看之前文章,请点击这个链接 。现在我们需要在之前的基础上来继续完成余下的功能,我们之前的只完成了界面和显示文件夹或文件。那么这篇文章我们需要完成如下功能:
1. 如果它是一个文件夹,我们可以对该文件夹进行双击,然后打开该文件夹。
2. 当前文件夹就是刚刚我们双击的那个文件夹。
3. 如果它内部有子文件夹的时候,我们也可以双击,然后重复第一步的操作步骤。
那么在完成这些功能之前,我们先来整理一下我们的js文件,那么在整理之前,我们先来看看我们项目的整个目录架构是一个什么样,这样使我们更加的清晰。并且了解下我们各个文件的代码及作用,哪些文件具体做哪些事情的。这有助于我们更进一步来讲解其他方面的知识,使下面讲解的内容更通俗易解。
下面是我们的整个目录架构的结构如下:
|----- 项目的根目录
|  |--- image                # 存放文件夹或文件图标
|  |--- node_modules         # 所有的依赖包
|  |--- .gitignore           # github排除文件
|  |--- app.css              # css文件
|  |--- app.js               # 功能实现代码的文件
|  |--- index.html           # html页面
|  |--- main.js              # electron界面启动代码
|  |--- package.json
如上就是我们在第一篇文章中项目目录结构,我们首先来看下我们的main.js 代码,该js文件最主要的是 启动electron桌面应用的程序,我们在package.json已经默认指定了该js文件就是我们默认要加载的文件。
package.json 代码如下:
{
  "name": "electron-filebrowser",
  "version": "1.0.0",
  "description": "",
  "main": "main.js",
  "scripts": {
    "test": "echo "Error: no test specified" && exit 1"
  },
  "author": "",
  "license": "ISC",
  "dependencies": {
    "async": "^3.1.0",
    "fs": "0.0.1-security",
    "osenv": "^0.1.5",
    "path": "^0.12.7"
  }
}
然后我们来看下我们的main.js 文件代码,该文件的代码最主要的是 处理electron界面的启动,如下代码所示:
'use strict';

// 引入 全局模块的 electron模块
const electron = require('electron');

// 创建 electron应用对象的引用

const app = electron.app;
const BrowserWindow = electron.BrowserWindow;

// 定义变量 对应用视窗的引用
let mainWindow = null;

// 监听视窗关闭的事件(在Mac OS 系统下是不会触发该事件的)
app.on('window-all-closed', () => {
  if (process.platform !== 'darwin') {
    app.quit();
  }
});

// 将index.html 载入应用视窗中
app.on('ready', () => {
  /*
   创建一个新的应用窗口,并将它赋值给 mainWindow变量。
  */
  mainWindow = new BrowserWindow({
    webPreferences: {
      nodeIntegration: true
    }
  });

  // 添加如下代码 可以调试
  mainWindow.webContents.openDevTools();

  // 载入 index.html 文件
  mainWindow.loadURL(`file://${__dirname}/index.html`);

  // 当应用被关闭的时候,释放 mainWindow变量的引用
  mainWindow.on('closed', () => {
    mainWindow = null;
  });
});
app.js 代码如下:
'use strict';

// 在应用中加载node模块
const fs = require('fs');
const osenv = require('osenv');

// 引入 aysnc模块
const async = require('async');
// 引入path模块
const path = require('path');

function getUsersHomeFolder() {
  return osenv.home();
}
// 使用 fs.readdir 来获取文件列表
function getFilesInFolder(folderPath, cb) {
  fs.readdir(folderPath, cb);
}

function inspectAndDescribeFile(filePath, cb) {
  let result = {
    file: path.basename(filePath),
    path: filePath,
    type: ''
  };
  fs.stat(filePath, (err, stat) => {
    if (err) {
      cb(err);
    } else {
      if (stat.isFile()) { // 判断是否是文件
        result.type = 'file';
      }
      if (stat.isDirectory()) { // 判断是否是目录
        result.type = 'directory';
      }
      cb(err, result);
    }
  });
}

function inspectAndDescribeFiles(folderPath, files, cb) {
  // 使用 async 模块调用异步函数并收集结果
  async.map(files, (file, asyncCB) => {
    const resolveFilePath = path.resolve(folderPath, file);
    inspectAndDescribeFile(resolveFilePath, asyncCB);
  }, cb);
}

function displayFile(file) {
  const mainArea = document.getElementById('main-area');
  const template = document.querySelector('#item-template');
  // 创建模板实列的副本
  let clone = document.importNode(template.content, true);

  // 加入文件名及对应的图标
  clone.querySelector('img').src = `images/${file.type}.svg`;
  clone.querySelector('.filename').innerText = file.file;

  mainArea.appendChild(clone);
}

// 该函数的作用是显示文件列表信息
function displayFiles(err, files) {
  if (err) {
    return alert('sorry, we could not display your files');
  }
  files.forEach(displayFile);
}

/*
 该函数的作用是:获取到用户个人文件夹的路径,并获取到该文件夹下的文件列表信息
*/
function main() {
  const folderPath = getUsersHomeFolder();

  getFilesInFolder(folderPath, (err, files) => {
    if (err) {
      console.log('对不起,您没有加载您的home folder');
    }
    console.log(files);
    /*
    files.forEach((file) => {
      console.log(`${folderPath}/${file}`);
    });
    */
    inspectAndDescribeFiles(folderPath, files, displayFiles);
  });
}

window.onload = function() {
  main();
};
如上app.js 代码就是我们页面的功能代码,代码看起来有点混乱,因此我们需要把该文件中的代码分离出来。也就是说之前我们所有功能性的代码都放在我们的app.js代码里面,这样以后业务越来越复杂的时候,js代码将来会越来越臃肿,因此现在我们需要把该文件的功能性代码逻辑拆分开来。因此我们需要把它分成三个js文件,app.js, fileSystem.js, userInterface.js.
app.js 还是负责入口文件。
fileSystem.js 负责处理对用户计算机中的文件或文件夹进行操作。
userInterface.js 负责处理界面上的交互。
因此 fileSystem.js 代码如下:
'use strict';

const fs = require('fs');
// 引入 aysnc模块
const async = require('async');
// 引入path模块
const path = require('path');
const osenv = require('osenv');

function getUsersHomeFolder() {
  return osenv.home();
}

// 使用 fs.readdir 来获取文件列表
function getFilesInFolder(folderPath, cb) {
  fs.readdir(folderPath, cb);
}

function inspectAndDescribeFile(filePath, cb) {
  let result = {
    file: path.basename(filePath),
    path: filePath,
    type: ''
  };
  fs.stat(filePath, (err, stat) => {
    if (err) {
      cb(err);
    } else {
      if (stat.isFile()) { // 判断是否是文件
        result.type = 'file';
      }
      if (stat.isDirectory()) { // 判断是否是目录
        result.type = 'directory';
      }
      cb(err, result);
    }
  });
}

function inspectAndDescribeFiles(folderPath, files, cb) {
  // 使用 async 模块调用异步函数并收集结果
  async.map(files, (file, asyncCB) => {
    const resolveFilePath = path.resolve(folderPath, file);
    inspectAndDescribeFile(resolveFilePath, asyncCB);
  }, cb);
}

module.exports = {
  getUsersHomeFolder,
  getFilesInFolder,
  inspectAndDescribeFiles
};
fileSystem.js文件把我们之前的app.js中的 getUsersHomeFolder(), getFilesInFolder(), inspectAndDescribeFile(),
及 inspectAndDescribeFiles() 函数分离出来了,并且使用 module.exports 对暴露了 getUsersHomeFolder(), getFilesInFolder(), inspectAndDescribeFiles() 这三个函数。
userInterface.js 文件中的代码如下:
'use strict';

let document;

function displayFile(file) {
  const mainArea = document.getElementById('main-area');
  const template = document.querySelector('#item-template');
  // 创建模板实列的副本
  let clone = document.importNode(template.content, true);

  // 加入文件名及对应的图标
  clone.querySelector('img').src = `images/${file.type}.svg`;
  clone.querySelector('.filename').innerText = file.file;

  mainArea.appendChild(clone);
}

// 该函数的作用是显示文件列表信息
function displayFiles(err, files) {
  if (err) {
    return alert('sorry, we could not display your files');
  }
  files.forEach(displayFile);
}

function bindDocument (window) {
  if (!document) {
    document = window.document;
  }
}

module.exports = {
  bindDocument,
  displayFiles
};
在userInterface.js中我们暴露了 bindDocument 和 displayFiles 两个函数,bindDocument该函数的作用是将window.document 上下文传递进去,displayFiles函数的作用是将所有的文件显示出来。
接下来就是我们的app.js 代码了,该文件需要引入我们刚刚 fileSystem.js 和 userInterface.js 的两个文件,因此我们的app.js 文件代码被简化成如下代码:
'use strict';

const fileSystem = require('./fileSystem');
const userInterface = require('./userInterface');

/*
 该函数的作用是:获取到用户个人文件夹的路径,并获取到该文件夹下的文件列表信息
*/
function main() {
  // 把window上下文传递进去
  userInterface.bindDocument(window);

  const folderPath = fileSystem.getUsersHomeFolder();

  fileSystem.getFilesInFolder(folderPath, (err, files) => {
    if (err) {
      console.log('对不起,您没有加载您的home folder');
    }
    fileSystem.inspectAndDescribeFiles(folderPath, files, userInterface.displayFiles);
  });
}

window.onload = function() {
  main();
};
index.html 代码和之前一样不变,如下代码:
<html>
  <head>
    <title>FileBrowser</title>
    <link rel="stylesheet" href="./app.css" />
  </head>
  <body>
    <template id="item-template">
      <div class="item">
        <img class='icon' />
        <div class="filename"></div>
      </div>
    </template>
    <div id="toolbar">
      <div id="current-folder">
      </div>
    </div>
    <!-- 该div元素是用来放置要显示的文件列表信息-->
    <div id="main-area"></div>
    <script src="./app.js" type="text/javascript"></script>
  </body>
</html>
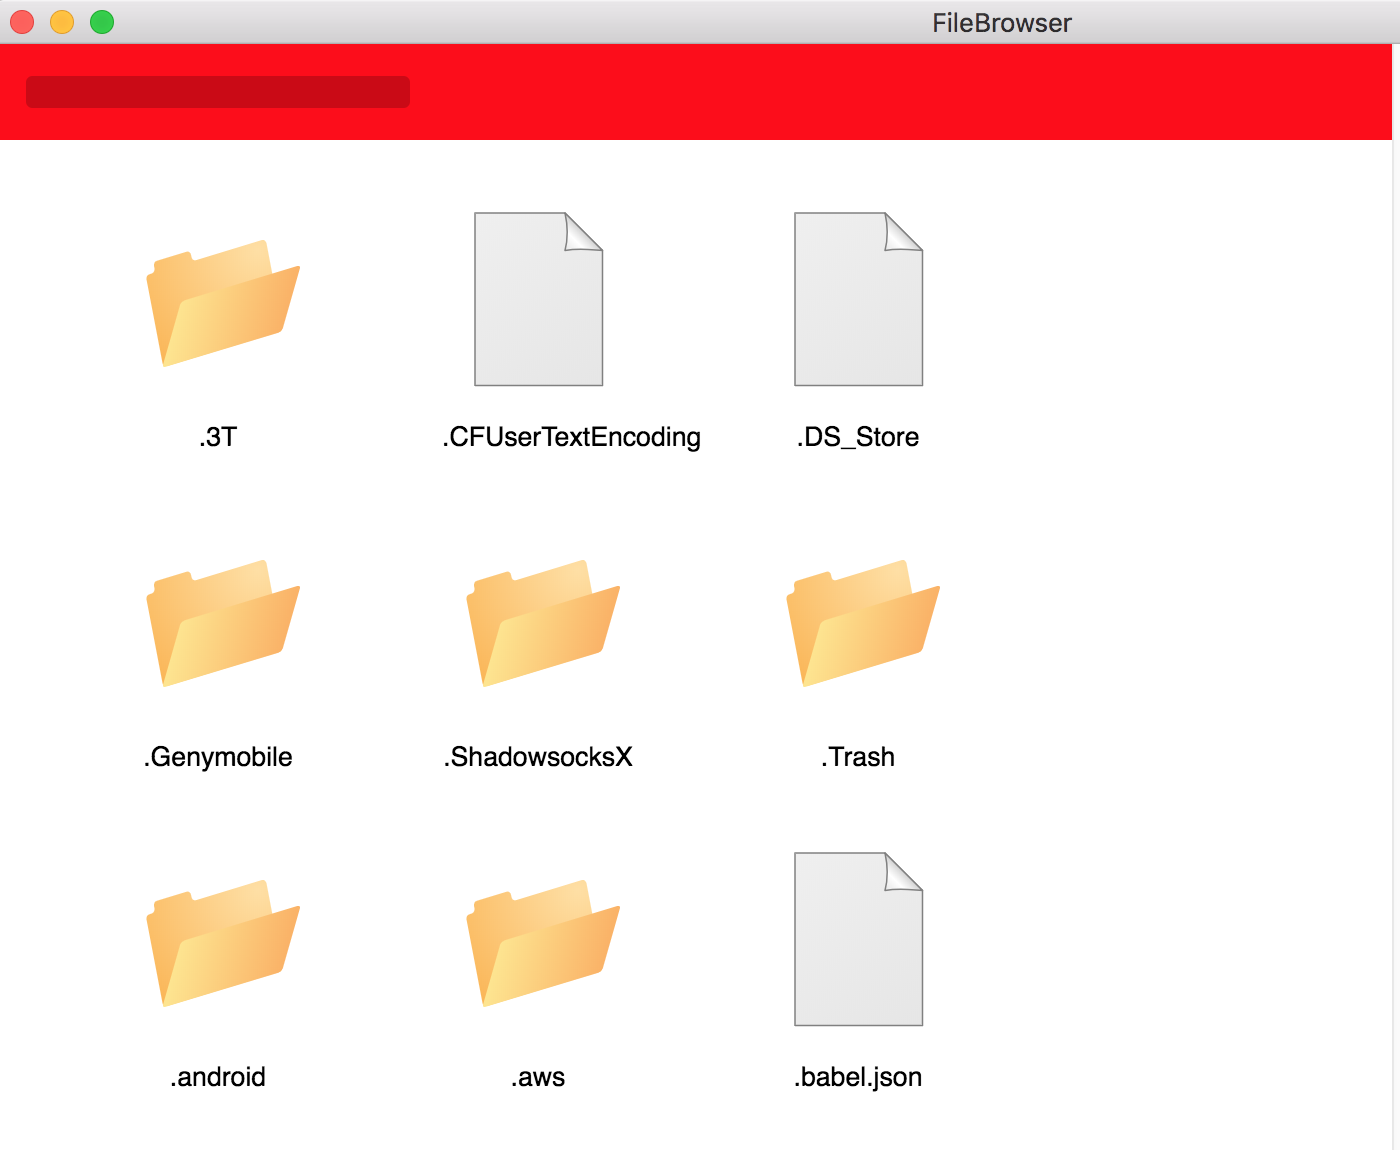
最后我们在我们的项目根目录中运行 electron . 一样也可以看到之前一样的界面,如下所示:
一:实现文件夹双击功能
那么我们如上代码重构完成后,我们现在需要实现我们对文件夹双击的功能了,那么需要实现该功能的话,我们需要在 userInterface.js 中添加如下几个函数来处理这些事情。
1. 首先新增一个 displayFolderPath 函数,该函数的作用是更新界面中的当前文件夹路径。
2. 还需要新增 clearView 函数,该函数的作用是:显示在主区域中的当前文件夹中的文件和清除文件夹。
3. 还需要新增一个 loadDirectory函数,该函数的作用是:根据指定文件夹的路径,获取计算机中该路径下的文件或文件夹信息,
并将其显示在应用界面的主区域中。
4. 修改displayFiles函数,该函数的作用是:在文件夹图标上监听事件来触发加载该文件夹中的内容。
因此我们的 userInterface.js 代码就变成如下了:
'use strict';

let document;

// 引入 fileSystem.js 中的模块代码
const fileSystem = require('./fileSystem');

// 更新当前文件夹路径的函数
function displayFolderPath(folderPath) {
  document.getElementById('current-folder').innerText = folderPath;
}

// 移除 main-area div元素中的内容
function clearView() {
  const mainArea = document.getElementById('main-area');
  let firstChild = mainArea.firstChild;
  while (firstChild) {
    mainArea.removeChild(firstChild);
    firstChild = mainArea.firstChild;
  }
}

// 更新文本框中文件夹路径,并且更新主区域中的内容
function loadDirectory(folderPath) {
  return function (window) {
    if (!document) {
      document = window.document;
    }
    // 更新最上面的文本框中的文件夹路径
    displayFolderPath(folderPath);
    fileSystem.getFilesInFolder(folderPath, (err, files) => {
      // 先清除主区域中的内容
      clearView();
      if (err) {
        throw new Error('sorry, you could not load your folder');
      }
      fileSystem.inspectAndDescribeFiles(folderPath, files, displayFiles);
    });
  }
}

function displayFile(file) {
  const mainArea = document.getElementById('main-area');
  const template = document.querySelector('#item-template');
  // 创建模板实列的副本
  let clone = document.importNode(template.content, true);

  // 加入文件名及对应的图标
  clone.querySelector('img').src = `images/${file.type}.svg`;

  // 需要判断如果该文件是目录的话,需要对目录图片绑定双击事件
  if (file.type === 'directory') {
    clone.querySelector('img').addEventListener('dblclick', () => {
      // 我们双击完成后,就需要加载该文件夹下所有目录的文件
      loadDirectory(file.path)();
    }, false);
  }

  clone.querySelector('.filename').innerText = file.file;

  mainArea.appendChild(clone);
}

// 该函数的作用是显示文件列表信息
function displayFiles(err, files) {
  if (err) {
    return alert('sorry, we could not display your files');
  }
  files.forEach(displayFile);
}

function bindDocument (window) {
  if (!document) {
    document = window.document;
  }
}

module.exports = {
  bindDocument,
  displayFiles,
  loadDirectory
};
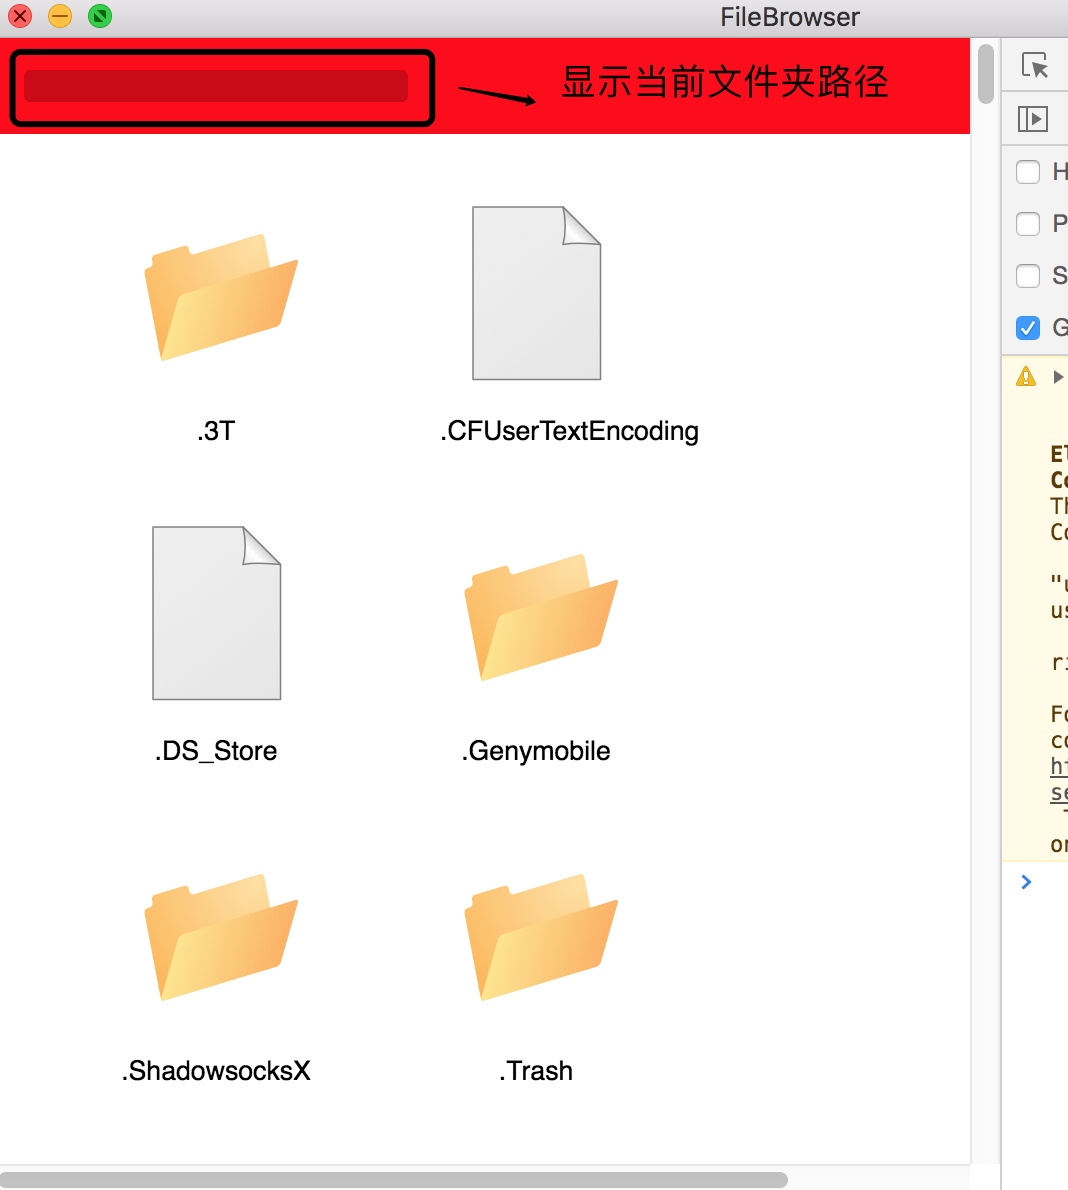
如上就是我们的 userInterface函数添加的代码,我们仔细看下也是非常简单的代码,我相信大家都能够理解掉了,首先 displayFolderPath 这个函数,该函数的作用是显示我们 左上角文本框的路径,比如如下所示的:
然后我们 clearView 这个函数,该函数的作用是:清除主区域中所有的文件或文件夹。
最后就是 loadDirectory 这个函数,该函数首先会调用displayFolderPath函数,来更新我们的左上角输入框文件路径。期次就是调用 fileSystem.inspectAndDescribeFiles 函数来重新渲染主区域中的所有文件。
给这个 displayFile 函数,判断当前目录是不是文件夹,如果是文件夹的话,对该文件夹图标绑定了双击事件,双击后我们又调用了 loadDirectory 函数,重新更新左上角输入框文件夹路径,并且重新渲染主区域中的内容。
现在我们需要修改app.js 中的代码了,让他调用 userInterface.js 文件中的loadDirectory函数。重新初始化主区域内容,且更新左上角的输入框的文件夹路径。因此我们的app.js 代码更改成如下所示:
'use strict';

const fileSystem = require('./fileSystem');
const userInterface = require('./userInterface');

/*
 该函数的作用是:获取到用户个人文件夹的路径,并获取到该文件夹下的文件列表信息
*/
function main() {
  // 把window上下文传递进去
  userInterface.bindDocument(window);

  const folderPath = fileSystem.getUsersHomeFolder();

  /*
  fileSystem.getFilesInFolder(folderPath, (err, files) => {
    if (err) {
      console.log('对不起,您没有加载您的home folder');
    }
    fileSystem.inspectAndDescribeFiles(folderPath, files, userInterface.displayFiles);
  });
  */
  userInterface.loadDirectory(folderPath)(window);
}

window.onload = function() {
  main();
};
如上所有的文件更改完成后,我们现在再来重启我们的应用程序,在项目中的根目录 运行 electron . 命运后即可重启,当我们双击应用中的某个文件夹时,就能看到工具条中当前文件夹路径发送改变了,并且该文件夹下所有子目录也会更新了。
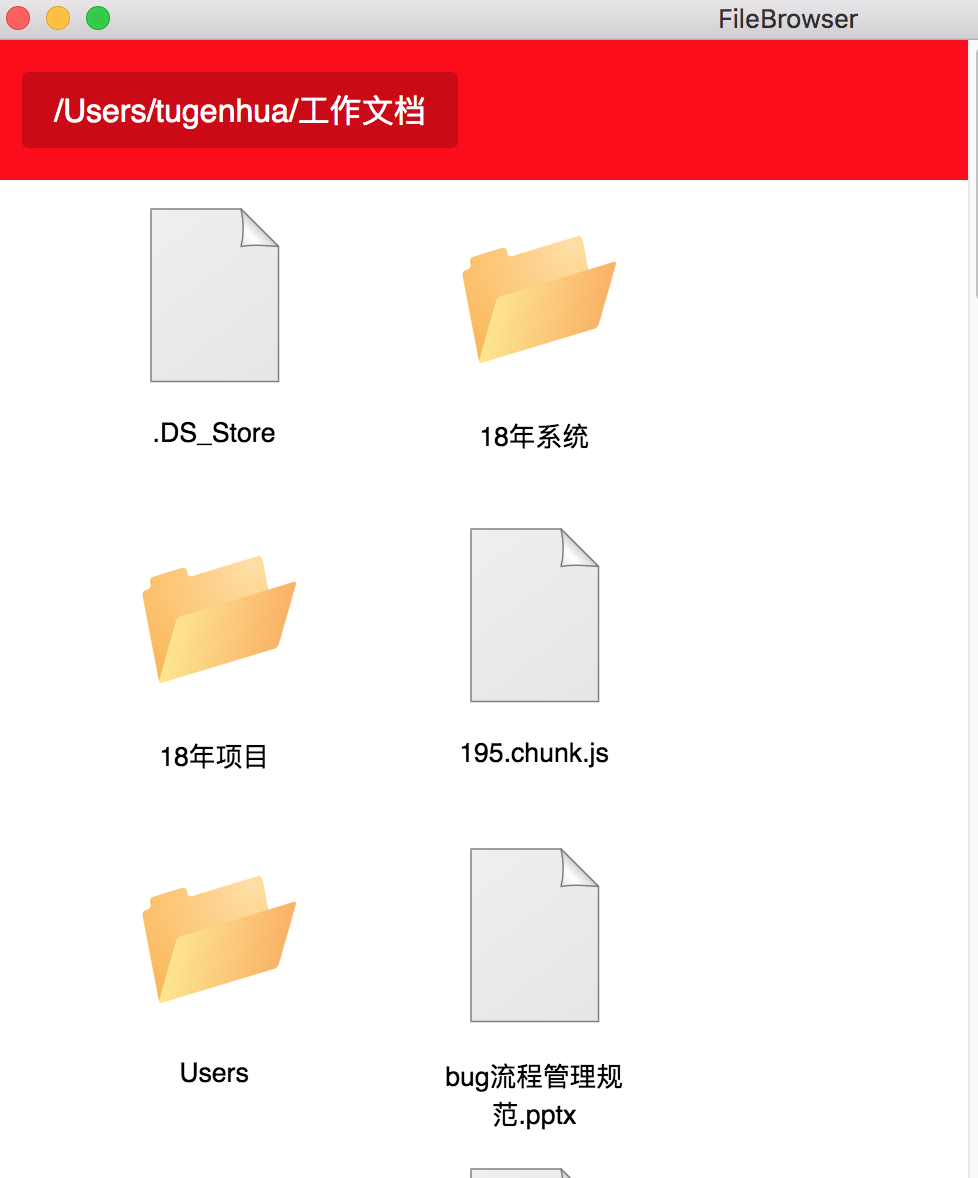
首先我们看下我们页面初始化的时候,如下所示:
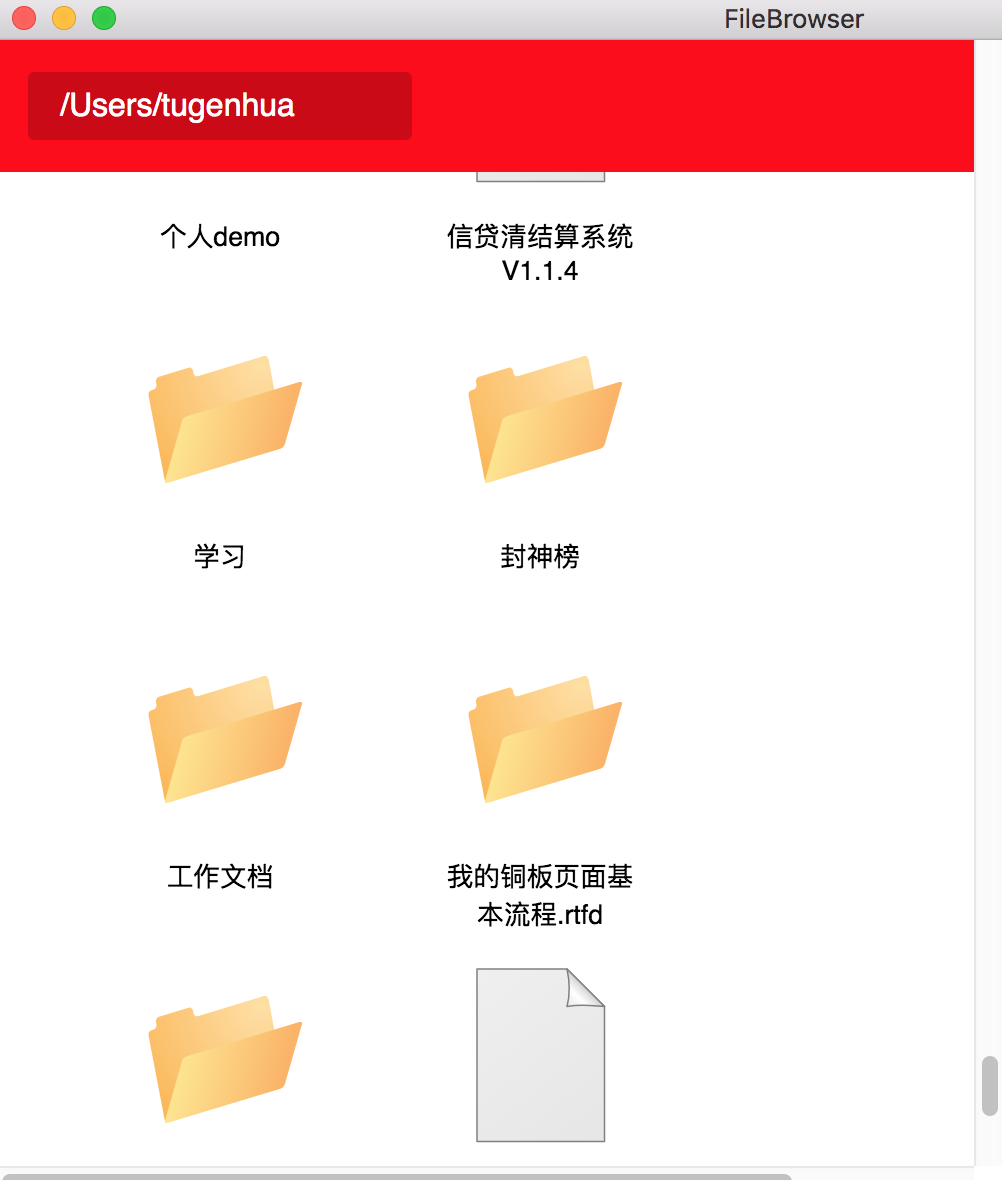
然后当我们点击我 工作文档 文件夹时候,会看到会更新工具条中的路径,并且子目录也会得到更新了。如下所示:
二:实现快速搜索
现在我们目录中有很多很多文件及文件夹,但是当我们想要找某个文件夹的时候,我们很不方便,因此我们现在需要一个搜索框,我们只要搜索下我们目录下的某个文件就能找到,因此我们现在需要这么一个功能,因此第一步我们需要在我们应用项目中的右上角添加一个搜索框。我们需要实现如下功能:
1. 在我们的工具条的右上角添加一个搜索框。
2. 引入一个内存搜索库来对文件或文件夹进行搜索。
3. 将当前文件夹中的文件和文件夹信息加入搜索索引。
4. 用户开始搜索时,会对主区域显示的文件进行过滤。
2.1 在工具条中增加搜索框
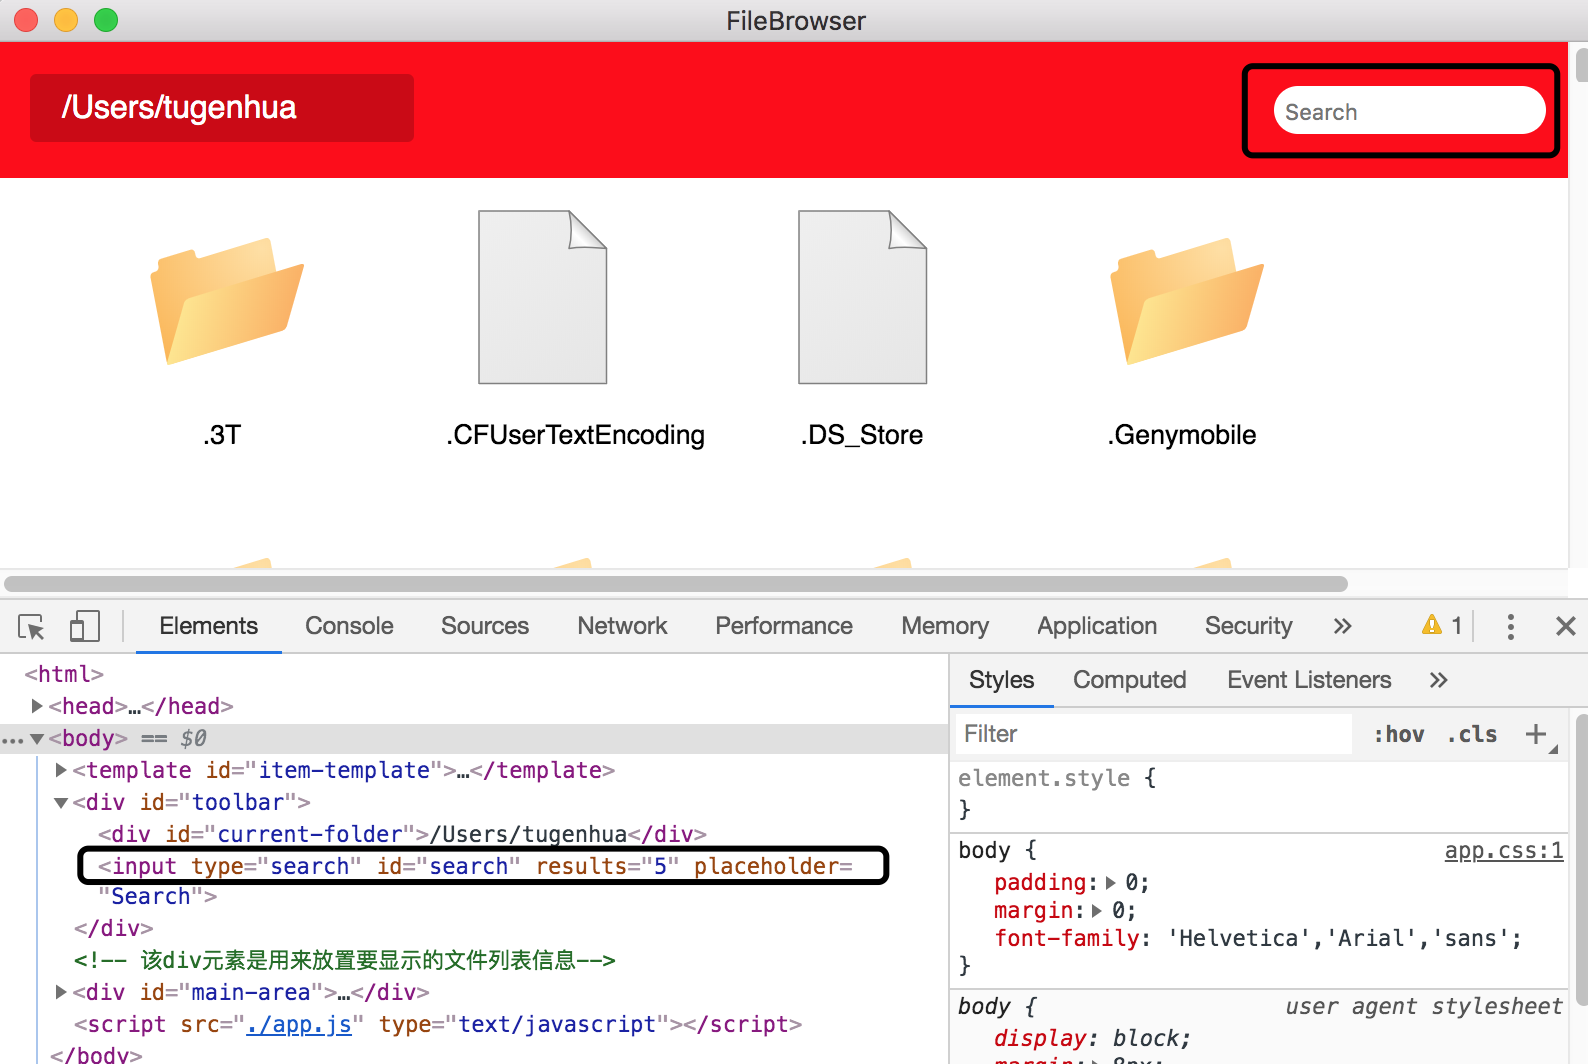
首先我们需要在 index.html 中的 current-folder div元素后面插入如下代码:
<input type="search" id="search" results="5" placeholder="Search" />
因此html部分代码变成如下:
<div id="toolbar">
  <div id="current-folder">
  </div>
  <input type="search" id="search" results="5" placeholder="Search" />
</div>
然后我们在我们的 app.css 代码中加入如下样式:
#search {
  float: right;
  padding: 0.5em;
  min-width: 10em;
  border-radius: 3em;
  margin: 2em 1em;
  border: none;
  outline: none;
}
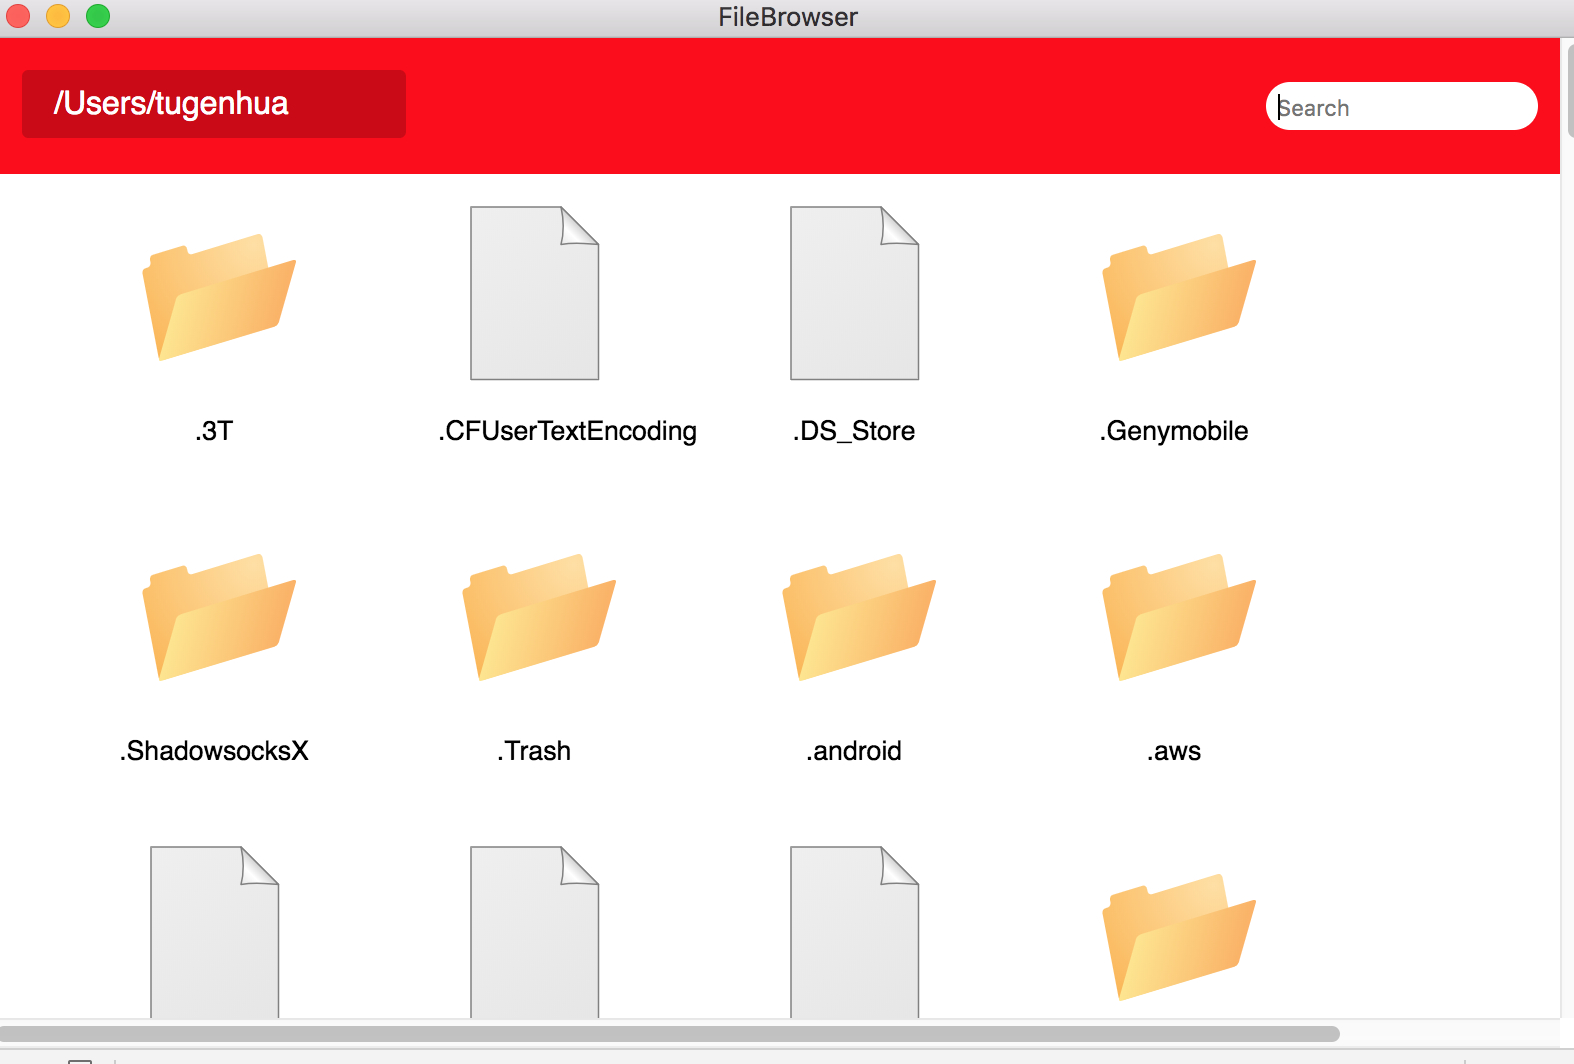
加入后,我们再来运行下我们的应用程序,使用命令 electron . ,会看到如下图所示:
2.2 引入一个内存搜索库
上面我们已经通过html+css在我们的工具条右侧添加了一个搜索框,现在我们要做的事情就是通过一个搜索库来对文件或文件夹列表进行搜索。值得幸运的是,网上已经有一款叫 Iunr.js 客户端搜索库了,它支持对文件或文件夹列表进行索引,我们可以通过索引进行搜索。因此我们需要在我们项目中根目录命令行中来安装该模块了,如下npm命令安装:
npm i lunr --save
现在我们需要在我们的项目根目录下新建一个叫 search.js 文件,该文件最主要的作用是处理搜索。
因此我们再来看下我们整个目录架构变成如下这个样子了:
|----- 项目的根目录
|  |--- image                # 存放文件夹或文件图标
|  |--- node_modules         # 所有的依赖包
|  |--- .gitignore           # github排除文件
|  |--- app.css              # css文件
|  |--- app.js               # 功能实现代码的文件的入口
|  |--- index.html           # html页面
|  |--- main.js              # electron界面启动代码
|  |--- fileSystem.js        # 处理文件操作的js
|  |--- userInterface.js     # 处理应用程序界面的js
|  |--- search.js            # 处理文件搜索的js
|  |--- package.json
想要了解 lunr 库的使用方法,请看这篇文章(http://www.uedsc.com/lunr-js.html)
因此我们的search.js 代码如下:
'use strict';

// 引入 lunr 包进来
const lunr = require('lunr');

let index;

// 重置搜索的索引函数

function resetIndex() {
  index = lunr(function() {
    this.field('file');
    this.field('type');
    this.ref('path');
  });
}

// 添加对文件的索引,用于后续的搜索
function addToIndex(file) {
  index.add(file);
}

// 对一个指定的文件进行查询
function find(query, cb) {
  if (!index) {
    resetIndex();
  }
  const results = index.search(query);
  cb(results);
}

module.exports = {
  addToIndex,
  find,
  resetIndex
};
现在我们搜索库已经引入了,并且代码也编写完成后,我们现在要做的事情就是如何来监听我们的搜索框的事件了,那么需要使用的'keyup' 事件来监听,因此我们需要在 userInterface.js 文件中添加如下一个函数,并且把该函数暴露出去。如下代码:
// 监听搜索函数
function bindSearchField(cb) {
  document.getElementById('search').addEventListener('keyup', cb, false);
}

module.exports = {
  bindDocument,
  displayFiles,
  loadDirectory,
  bindSearchField
}
如上代码就是监听搜索框 的keyup的事件了,当我们每次搜索的时候,鼠标keyup的时候,就会触发一个cb函数,那么触发cb函数的时候,我们需要获取输入框的值,然后把该值传递进去查询。如果没有值的话,那么不进行文件搜索,如果有值的话,我们需要进行文件搜索,现在要实现这个搜索,我们需要完成如下事情:
1. 当我们的搜索框没有值的时候,确保所有的文件都显示在主区域中。
2. 当搜索框中有值的时候,我们需要根据该值进行查询及过滤且显示出来。
3. 当搜索到某个文件夹的时候,我们需要将该文件夹的所有的内容显示在主区域中,并且重置该索引值。
4. 当有新文件要显示在主区域中,需要将它添加到索引中。
因此首先我们需要在我们的 userInterface.js 文件中需要引入我们的search.js ,引入后我们就可以访问search模块了。
引入完成后,我们需要改js中的 loadDirectory 函数,该函数的作用我们之前也讲解过,就是更新左侧文本框的文件路径,并且更新主区域中的内容,因此在该函数内部,我们每次调用该函数的时候都需要重置搜索索引,这样做的目的是能实现只针对当前文件夹内容进行搜索。因此loadDirectory函数代码改成如下:
// 引入search模块
const search = require('search');

// 更新文本框中文件夹路径,并且更新主区域中的内容
function loadDirectory(folderPath) {
  return function (window) {
    if (!document) {
      document = window.document;
    }

    // 添加重置搜索索引的函数调用
    search.resetIndex();

    // 更新最上面的文本框中的文件夹路径
    displayFolderPath(folderPath);
    fileSystem.getFilesInFolder(folderPath, (err, files) => {
      // 先清除主区域中的内容
      clearView();
      if (err) {
        throw new Error('sorry, you could not load your folder');
      }
      fileSystem.inspectAndDescribeFiles(folderPath, files, displayFiles);
    });
  }
}
如上更改完成后,我们需要更改下 displayFile 函数,在该函数中添加如下功能:
1. 把文件添加到搜索索引中的代码。
2. 将文件路径保存在图片元素的data-filePath属性中,这样的话,在文件过滤的时候,我们可以根据该属性值来过滤或显示元素。
因此 displayFile 函数代码变成如下:
function displayFile(file) {
  const mainArea = document.getElementById('main-area');
  const template = document.querySelector('#item-template');
  // 创建模板实列的副本
  let clone = document.importNode(template.content, true);

  // 将文件添加到搜索索引中
  search.addToIndex(file);

  // 将文件路径保存在图片元素的data-filePath属性中
  clone.querySelector('img').setAttribute('data-filePath', file.path);

  // 加入文件名及对应的图标
  clone.querySelector('img').src = `images/${file.type}.svg`;

  // 需要判断如果该文件是目录的话,需要对目录图片绑定双击事件
  if (file.type === 'directory') {
    clone.querySelector('img').addEventListener('dblclick', () => {
      // 我们双击完成后,就需要加载该文件夹下所有目录的文件
      loadDirectory(file.path)();
    }, false);
  }

  clone.querySelector('.filename').innerText = file.file;

  mainArea.appendChild(clone);
}
如上displayFile函数的作用是把所有的文件夹显示在主区域中,并且绑定了文件夹的双击事件,并且我们把文件添加到索引中了,并且将文件路径保存到图片元素的 data-filePath属性中。
现在我们需要新增一个函数用于处理在界面上显示搜索的结果的函数,该函数首先要获取到主区域中显示的文件或文件夹的路径,然后判断该路径是否满足用户在搜索框中条件,如果满足的话,直接过滤掉不满足的条件,显示出来,因此我们在 userInterface.js文件中后面新增一个函数,比如叫 filterResults函数。
function filterResults(results) {
  // 获取搜索结果中的文件路径用于对比
  const validFilePaths = results.map((result) => {
    return result.ref;
  });
  const items = document.getElementsByClassName('item');
  for (let i = 0; i < items.length; i++) {
    let item = items[i];
    let filePath = item.getElementsByTagName('img')[0].getAttribute('data-filePath');
    // 文件路径匹配搜索结果
    if (validFilePaths.indexOf(filePath) !== -1) {
      item.style = null;
    } else {
      item.style = 'display:none;'; // 如果没有匹配到,则将其掩藏掉
    }
  }
}
上面函数编写完成后,我们还需要编写一个函数用于处理重置过滤结果的情况,当我们搜索框值为空的时候,我们需要调用该函数来显示文件出来。我们可以把该函数名叫 resetFilter函数。
function resetFilter() {
  const items = document.getElementsByClassName('item');
  for (let i = 0; i < items.length; i++) {
    items[i].style = null;
  }
}
函数编写完成后,我们还需要将该两个函数暴露出去,因此代码如下:
module.exports = {
  bindDocument,
  displayFiles,
  loadDirectory,
  bindSearchField,
  filterResults,
  resetFilter
};
userInterface.js 代码已经完成后,我们现在需要在我们的app.js上更新代码,现在我们的app.js文件需要做如下事情:
1. 在界面上需要监听搜索框。
2. 将搜索关键词传给Iunr搜索工具。
3. 将搜索工具处理完的结果显示到界面上。
因此app.js 代码变成如下:
'use strict';

const fileSystem = require('./fileSystem');
const userInterface = require('./userInterface');
// 引入search模块
const search = require('./search');

/*
 该函数的作用是:获取到用户个人文件夹的路径,并获取到该文件夹下的文件列表信息
*/
function main() {
  // 把window上下文传递进去
  userInterface.bindDocument(window);

  const folderPath = fileSystem.getUsersHomeFolder();

  // 更新文本框中文件夹路径,并且更新主区域中的内容, 并且重置搜索索引的函数调用
  userInterface.loadDirectory(folderPath)(window);
  // 监听搜索框值的变化
  userInterface.bindSearchField((event) => {
    const val = event.target.value;
    if (val === '') {
      // 如果搜索框中的值为空的情况下, 重置过滤结果
      userInterface.resetFilter();
    } else {
      /*
       如果搜索框中有值的话,将该值传递到搜索模块的find函数处理并过滤结果显示在界面上
      */
      search.find(val, userInterface.filterResults);
    }
  });
}

window.onload = function() {
  main();
};
现在我们在我们文件的根目录搜索 tuge 的内容的话,可以看到如下所示的过滤:如下所示:

然后现在我们把搜索条件清空的话,我们又可以看到所有的目录了,如下所示:
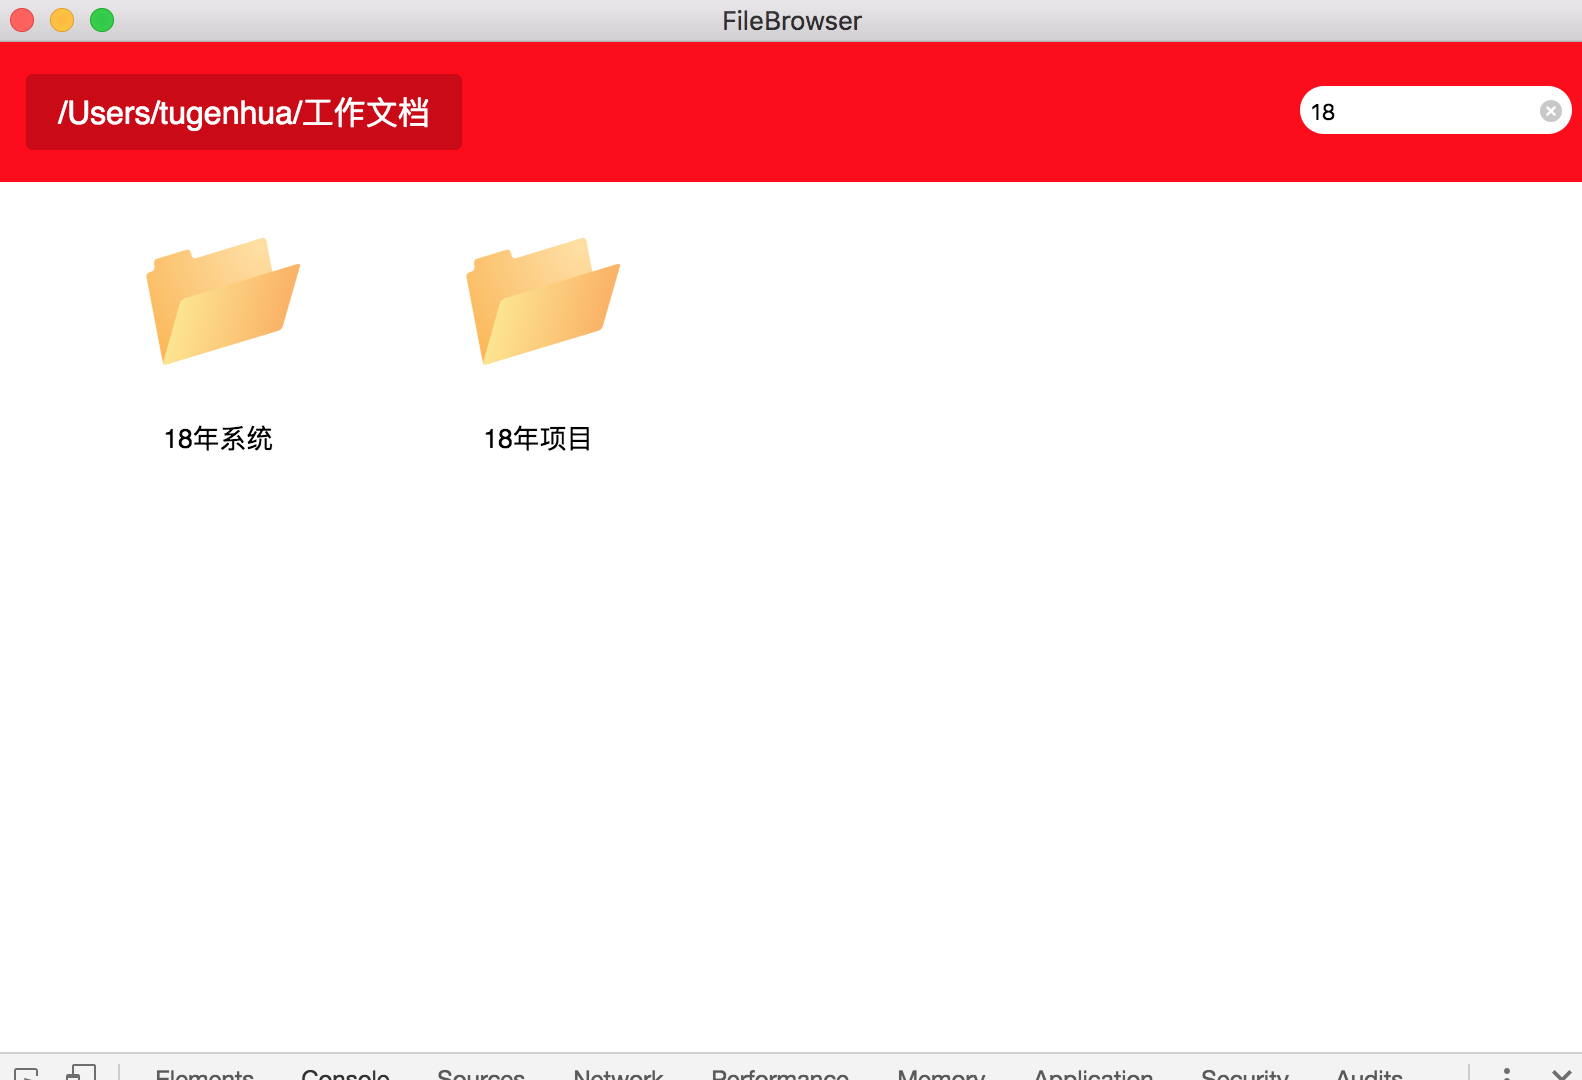
现在我们再继续点击 工作文档,进入该目录后,我们在该目录下继续搜索 18 这样的时候,我们可以看到如下所示:
我们接着清空内容后,我们就可以看到 工作文档 目录下的所有内容了,如下图所示:

三:添加后退功能
如上我们已经实现了文件或文件夹搜索功能及显示用户文件夹的详细路径,并且还可以双击文件夹进入内部的功能,现在我们还需要实现后退功能,我们双击完成后进入文件夹内部,我们这个时候想后退的话不能后退,因此我们现在要实现这样的功能。
想实现回退功能,我们又没有和浏览器那样有后退按钮,因此我们这边想实现后退功能,我们可以点击文件夹路径后退即可,也就是说我们需要实现每个文件夹路径可点击功能。比如如下图对应的路径点击即可: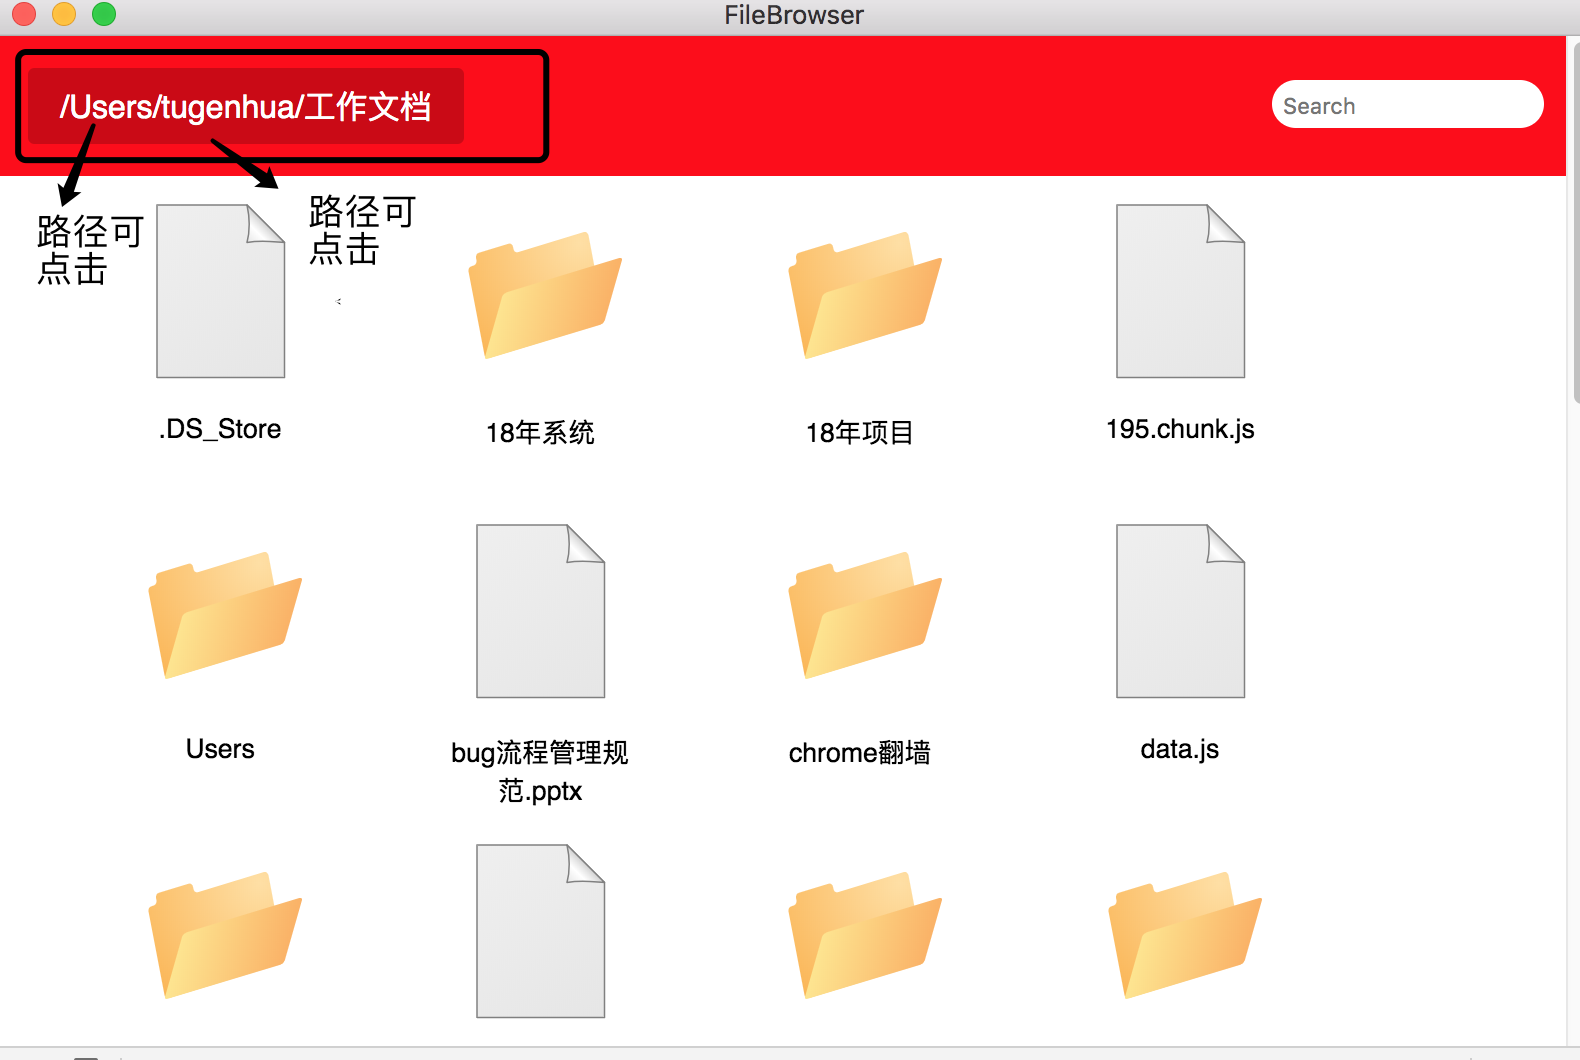
实现当前文件夹路径可单击
如上图一串路径,我们希望点击某一个路径的时候,希望切换到对应的文件夹那个地方,并且显示文件夹下的所有内容,就像网页链接一样的。我们看下我们左侧的路径的源码可以看到,它是一个div元素显示路径的,如下图所示:
我们来看下我们的工具条上显示当前文件夹路径的代码,在我们的userInterface.js中,有个函数,如下代码:
// 更新当前文件夹路径的函数
function displayFolderPath(folderPath) {
  document.getElementById('current-folder').innerText = folderPath;
}
把路径赋值给id为current-folder元素上,现在我们需要做的是,不再是把路径赋值该div元素上,而是希望把该路径传递给另一个函数去,然后该函数使用split分隔符分割('/')这样的变成一个数组,然后遍历这个数组,把它对应的文件名使用span标签,也就是每个文件夹路径使用span标签包围起来,并且在该span标签上设置一个属性,比如叫 data-path 这样的,该属性值就是该文件夹的具体路径,现在我们需要做这些事情了。
我们需要接受folderPath路径字符串的函数,比如我们现在叫 convertFolderPathIntoLinks 这个函数,把它放到我们的 userInterface.js 中,该函数最主要做的事情就是分割路径,并且把各个路径使用span标签包围起来,因此我们需要引用path模块进来,
const path = require('path');
在Mac OS 和 linux中,路径分隔符是斜杠(/), 但是在windows中,它是反斜杠(), 因此我们需要使用path模块的 path.sep 来获取分隔符。
convertFolderPathIntoLinks函数代码如下:
function convertFolderPathIntoLinks(folderPath) {
  const folders = folderPath.split(path.sep);
  const contents = [];
  let pathAtFolder = '';
  folders.forEach((folder) => {
    pathAtFolder += folder + path.sep;
    const str = `<span class="path" data-path="${pathAtFolder.slice(0, -1)}">${folder}</span>`;
    contents.push(str);
  });
  return contents.join(path.sep).toString();
}
如上函数接收 文件夹的路径作为参数,我们会根据该路径上的分隔符将其变为一个包含路径上文件名的列表,有该列表,我们就可以对其中每个文件夹名创建一个span标签。每个span标签包含一个名为path的类名以及一个data-path属性保存当前文件夹的路径。最后文件夹的名字以文本的形式包含在span标签中。我们把所有的span标签存入一个数组 contents中,最后使用 分隔符分割,把数组的内容以字符串的形式返回回来。
我们之前的 displayFolderPath 函数的代码如下:
// 更新当前文件夹路径的函数
function displayFolderPath(folderPath) {
  document.getElementById('current-folder').innerText = folderPath;
}
现在我们要把代码改成如下了:
// 更新当前文件夹路径的函数
function displayFolderPath(folderPath) {
  document.getElementById('current-folder').innerHTML = convertFolderPathIntoLinks(folderPath);
}
那么这样的话,我们的 div中的id为 current-folder 元素就包含span标签了,并且每个span标签上都有 data-path 这个属性,我们再来运行下我们的代码可以看到如下所示: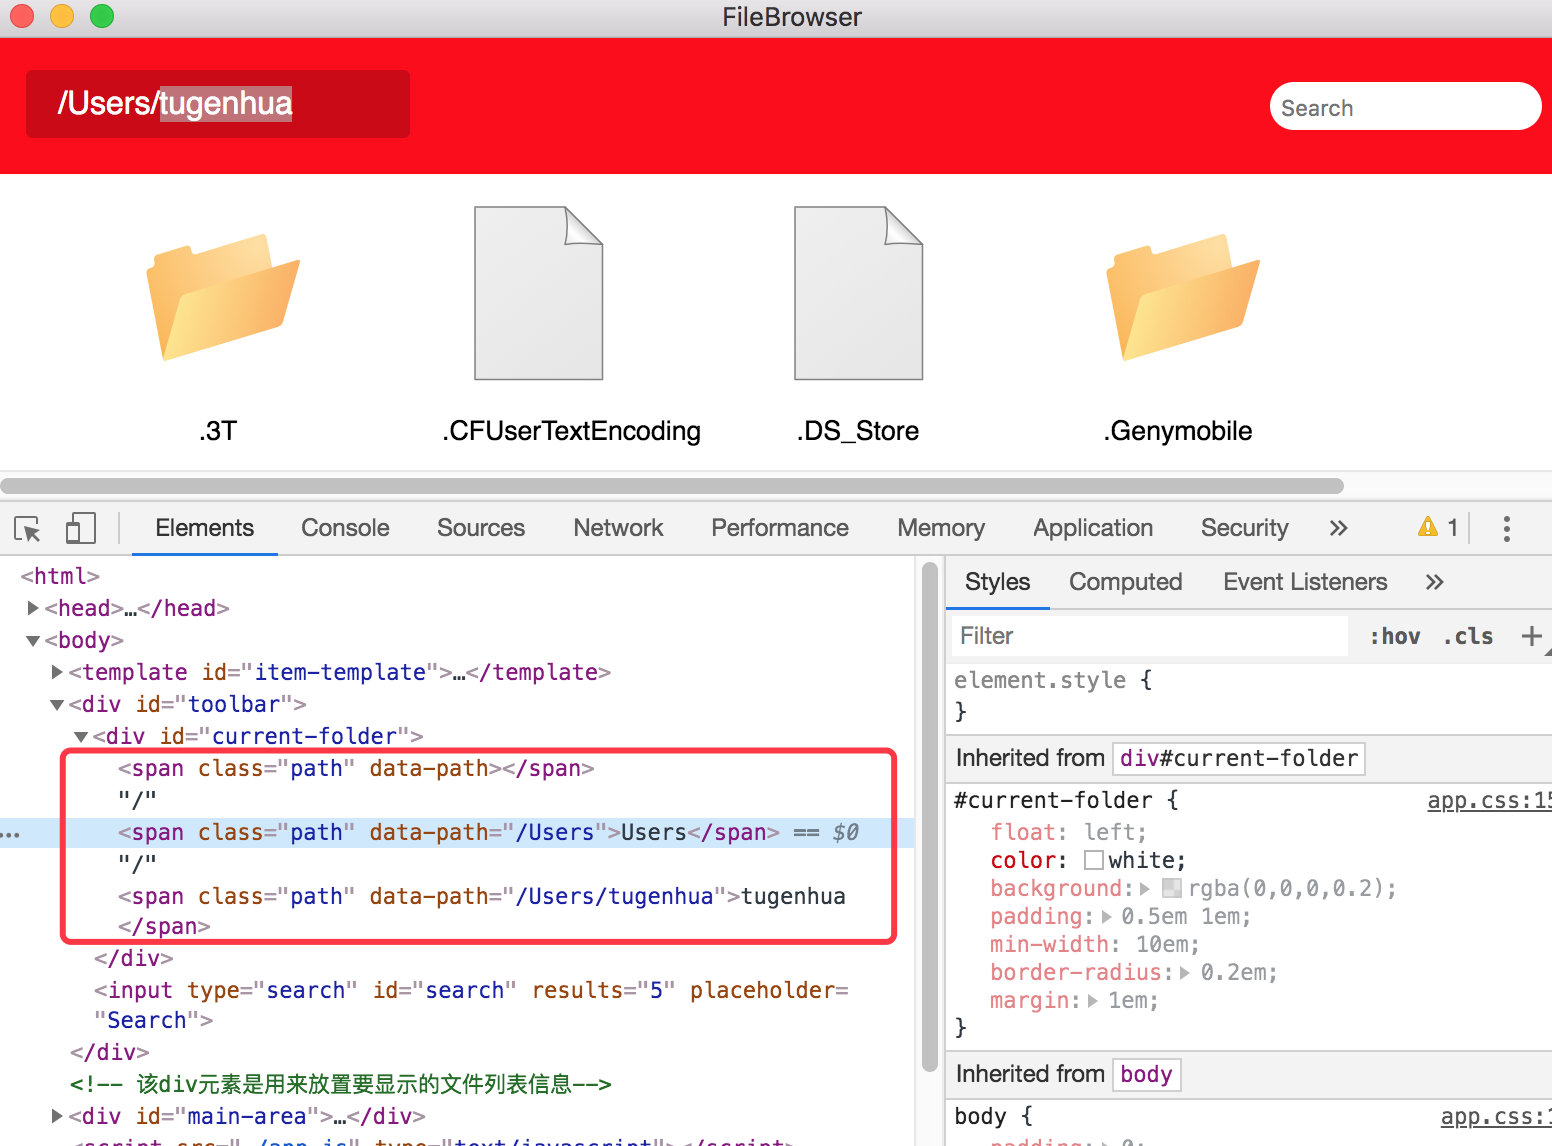
span标签我们已经弄好了,我们现在需要的是再增加一个函数,该函数的作用是用于监听单击文件夹名的操作,并将单击的文件夹路径传递给回调函数,回调函数接收到我们单击的文件夹路径后,将其传递给负责显示文件夹内容的函数。我们把该函数名取为:bindCurrentFolderPath. 因此代码添加如下:
function bindCurrentFolderPath() {
  const load = (event) => {
    const folderPath = event.target.getAttribute('data-path');
    loadDirectory(folderPath)();
  }
  const paths = document.getElementsByClassName('path');
  for (var i = 0; i < paths.length; i++) {
    paths[i].addEventListener('click', load, false);
  }
}

// 更新当前文件夹路径的函数
function displayFolderPath(folderPath) {
  document.getElementById('current-folder').innerHTML = convertFolderPathIntoLinks(folderPath);
  // 调用绑定事件
  bindCurrentFolderPath();
}
如上代码实现完成后,我们再来重新下我们的运用程序,就可以看到效果了,我们点击某一个文件夹进去的时候,再点击路径上的某一个文件夹即可返回到上一个页面,就可以看到效果了。
我们需要添加一个简单的样式,就是说就是当我们鼠标光标悬停到span元素上的时候,将鼠标光标显示为手状形式。我们需要在我们的app.css 添加如下代码:
span.path:hover {
  opacity: 0.7;
  cursor: pointer;
}
四:实现打开其他的文件(比如文本文件,视频及文档等)
我们之前所有的功能是针对文件夹来做的,现在我们还要针对文件,图片,视频,文档等这些类型的文件实现点击功能,要实现这些,我们需要实现单击文件的功能。
因此我们需要在我们的 userInterface.js 文件中,在displayFile函数中,添加else代码;如下代码:
function displayFile(file) {
  const mainArea = document.getElementById('main-area');
  const template = document.querySelector('#item-template');
  // 创建模板实列的副本
  let clone = document.importNode(template.content, true);

  // 将文件添加到搜索索引中
  search.addToIndex(file);

  // 将文件路径保存在图片元素的data-filePath属性中
  clone.querySelector('img').setAttribute('data-filePath', file.path);

  // 加入文件名及对应的图标
  clone.querySelector('img').src = `images/${file.type}.svg`;

  // 需要判断如果该文件是目录的话,需要对目录图片绑定双击事件
  if (file.type === 'directory') {
    clone.querySelector('img').addEventListener('dblclick', () => {
      // 我们双击完成后,就需要加载该文件夹下所有目录的文件
      loadDirectory(file.path)();
    }, false);
  } else {
    // 不属于文件夹以外的文件,比如文本文件,文档等
    clone.querySelector('img').addEventListener('dblclick', () => {
      fileSystem.openFile(file.path);
    })
  }

  clone.querySelector('.filename').innerText = file.file;

  mainArea.appendChild(clone);
}
如上代码,我们的else里面实现了除了文件夹以外的文件也可以进行双击操作,并且在回调函数中我们调用了 fileSystem.js 模块中的openFile函数,因此我们需要实现 openFile函数的代码。那么该函数需要调用 shell API。shell API 能够使用系统默认的应用打开URL,文件以及其他类型的文档。因此在fileSystem.js 文件中,我们需要添加如下代码:
const shell = require('electron').shell;

function openFile(filePath) {
  // 调用shell API的openItem函数
  shell.openItem(filePath);
}
并且导出函数中需要添加 openFile ,如下所示:
module.exports = {
  getUsersHomeFolder,
  getFilesInFolder,
  inspectAndDescribeFiles,
  openFile
};
现在我们基本功能已经完成了,我们现在还需要当我们鼠标移动到文件或文件夹的时候,我们需要让他变成鼠标的形式,因此我们需要在我们的app.css中加如下代码:
img:hover {
  opacity: 0.7;
  cursor: pointer;
}
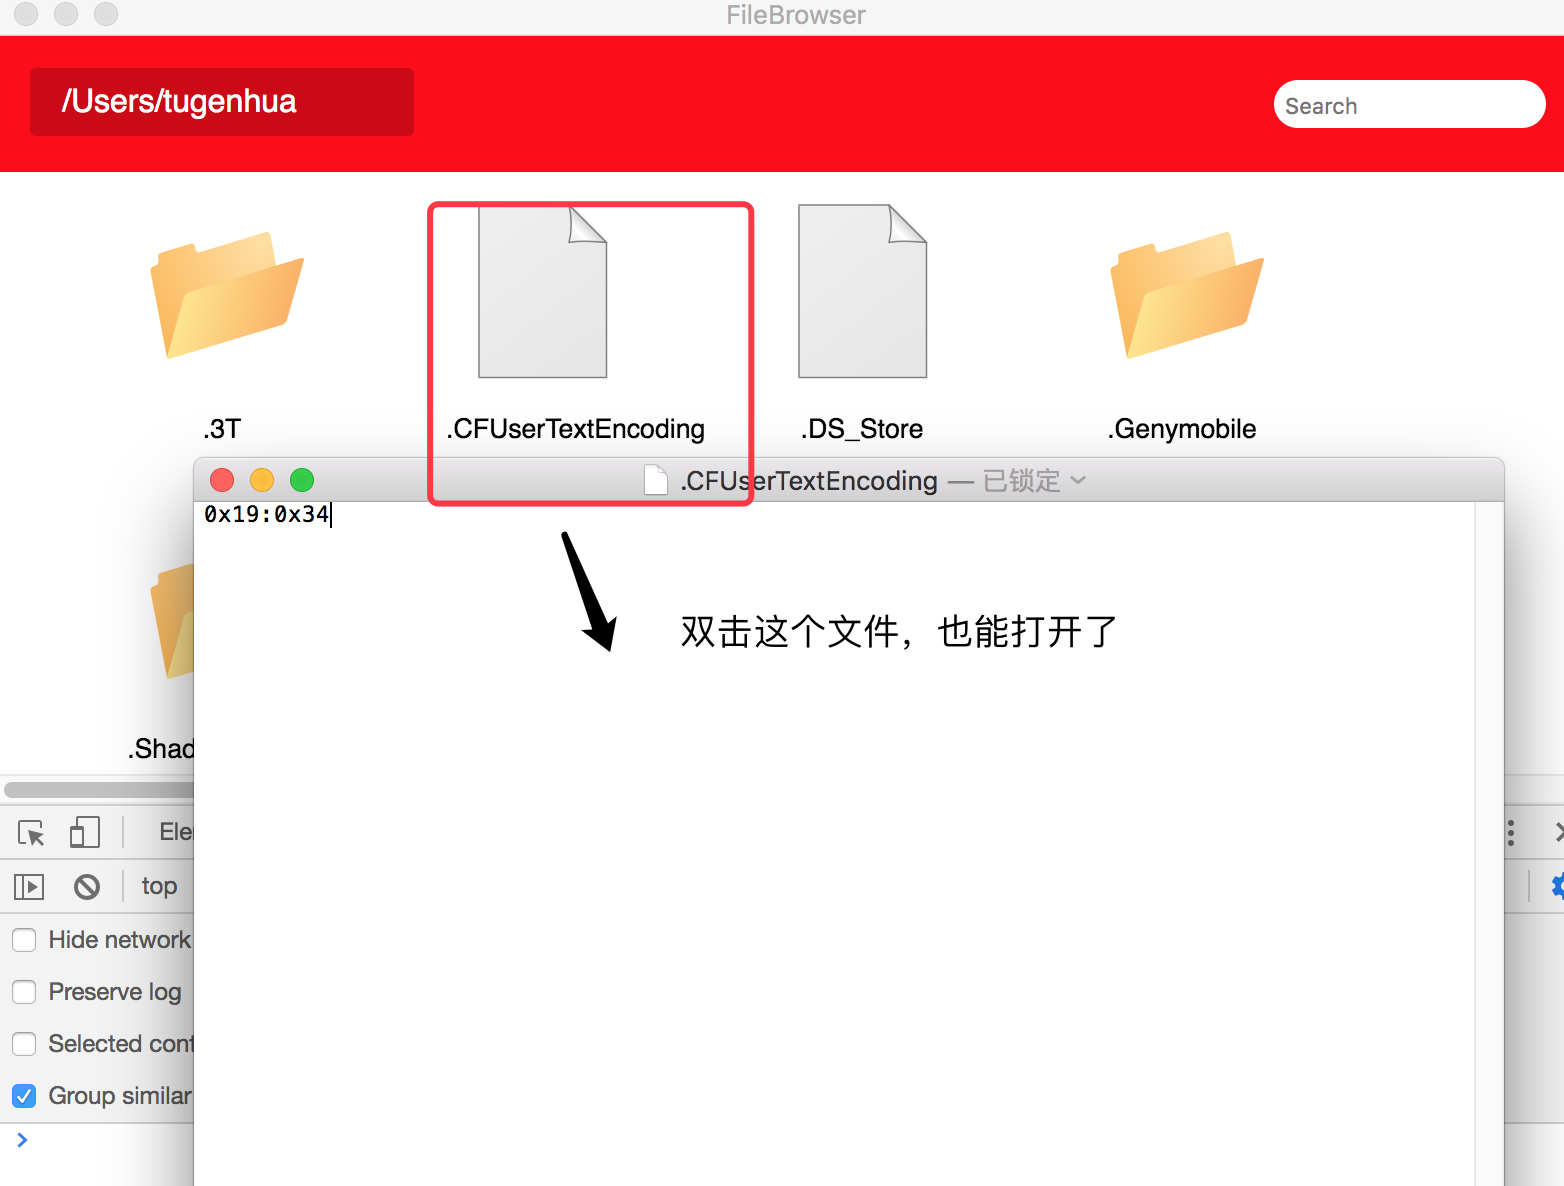
现在我们所有的代码已经完成了,我们接下来重新启动下我们的应用程序,在项目的根目录中使用命令 electron . 即可打开我们的应用程序了。我们可以双击点击不属于文件夹的文件,也可以使用我们的shell默认方式打开文件了。如下所示: