学习了几天Linux下ftp和ssh的搭建和使用,故记录一下。学习ftp和ssh的主要目的是为了连接远程主机,并且进行文件传输。废话不多说,直接开讲!
ftp服务器
1. 环境搭建
本人的系统是Archlinux,我是基于vsftpd来搭建的,首先需要安装它: pacman -S vsftpd
接着对其配置文件进行编辑,打开/etc/vsftpd.conf(也可能在/etc/vsftdp/.vsftpd.conf)
以下是我的配置文件内容:
# Example config file /etc/vsftpd.conf
#
# The default compiled in settings are fairly paranoid. This sample file
# loosens things up a bit, to make the ftp daemon more usable.
# Please see vsftpd.conf.5 for all compiled in defaults.
#
# READ THIS: This example file is NOT an exhaustive list of vsftpd options.
# Please read the vsftpd.conf.5 manual page to get a full idea of vsftpd's
# capabilities.
#
# Allow anonymous FTP? (Beware - allowed by default if you comment this out).
anonymous_enable=YES
#
# Uncomment this to allow local users to log in.
#local_enable=YES
#
# Uncomment this to enable any form of FTP write command.
write_enable=YES
#
# Default umask for local users is 077. You may wish to change this to 022,
# if your users expect that (022 is used by most other ftpd's)
#local_umask=022
#
# Uncomment this to allow the anonymous FTP user to upload files. This only
# has an effect if the above global write enable is activated. Also, you will
# obviously need to create a directory writable by the FTP user.
anon_upload_enable=YES
anon_other_write_enable=YES
#
# Uncomment this if you want the anonymous FTP user to be able to create
# new directories.
#anon_mkdir_write_enable=YES
#
# Activate directory messages - messages given to remote users when they
# go into a certain directory.
#dirmessage_enable=YES
#
# Activate logging of uploads/downloads.
#xferlog_enable=YES
#
# Make sure PORT transfer connections originate from port 20 (ftp-data).
connect_from_port_20=YES
#
# If you want, you can arrange for uploaded anonymous files to be owned by
# a different user. Note! Using "root" for uploaded files is not
# recommended!
#chown_uploads=YES
#chown_username=whoever
#
# You may override where the log file goes if you like. The default is shown
# below.
#xferlog_file=/var/log/vsftpd.log
#
# If you want, you can have your log file in standard ftpd xferlog format.
# Note that the default log file location is /var/log/xferlog in this case.
#xferlog_std_format=YES
#
# You may change the default value for timing out an idle session.
#idle_session_timeout=600
#
# You may change the default value for timing out a data connection.
#data_connection_timeout=120
#
# It is recommended that you define on your system a unique user which the
# ftp server can use as a totally isolated and unprivileged user.
#nopriv_user=ftpsecure
#
# Enable this and the server will recognise asynchronous ABOR requests. Not
# recommended for security (the code is non-trivial). Not enabling it,
# however, may confuse older FTP clients.
#async_abor_enable=YES
#
# By default the server will pretend to allow ASCII mode but in fact ignore
# the request. Turn on the below options to have the server actually do ASCII
# mangling on files when in ASCII mode.
# Beware that on some FTP servers, ASCII support allows a denial of service
# attack (DoS) via the command "SIZE /big/file" in ASCII mode. vsftpd
# predicted this attack and has always been safe, reporting the size of the
# raw file.
# ASCII mangling is a horrible feature of the protocol.
#ascii_upload_enable=YES
#ascii_download_enable=YES
#
# You may fully customise the login banner string:
#ftpd_banner=Welcome to blah FTP service.
#
# You may specify a file of disallowed anonymous e-mail addresses. Apparently
# useful for combatting certain DoS attacks.
#deny_email_enable=YES
# (default follows)
#banned_email_file=/etc/vsftpd.banned_emails
#
# You may specify an explicit list of local users to chroot() to their home
# directory. If chroot_local_user is YES, then this list becomes a list of
# users to NOT chroot().
# (Warning! chroot'ing can be very dangerous. If using chroot, make sure that
# the user does not have write access to the top level directory within the
# chroot)
#chroot_local_user=YES
#chroot_list_enable=YES
# (default follows)
#chroot_list_file=/etc/vsftpd.chroot_list
#
# You may activate the "-R" option to the builtin ls. This is disabled by
# default to avoid remote users being able to cause excessive I/O on large
# sites. However, some broken FTP clients such as "ncftp" and "mirror" assume
# the presence of the "-R" option, so there is a strong case for enabling it.
#ls_recurse_enable=YES
#
# When "listen" directive is enabled, vsftpd runs in standalone mode and
# listens on IPv4 sockets. This directive cannot be used in conjunction
# with the listen_ipv6 directive.
listen=YES
#
# This directive enables listening on IPv6 sockets. To listen on IPv4 and IPv6
# sockets, you must run two copies of vsftpd with two configuration files.
# Make sure, that one of the listen options is commented !!
#listen_ipv6=YES
anon_root=/var/ftp
在以上的配置文件中,我们允许匿名用户登录,并且其有删除和上传的权限,不过这些操作仅限于在权限为777的目录下进行。我们配置匿名用户默认进入的目录为/var/ftp,此外,我们要创建一个目录upload权限为777,匿名用户可以在其中任意的操作文件。这些操作如下(本机中):
mkdir -p /var/upload
chmod 777 /var/ftp/upload
至此,我们的环境搭建完成。
2. 使用示例
首先,配置好ftp服务器之后,需要重启,Archlinux下是
system restart vsftpd
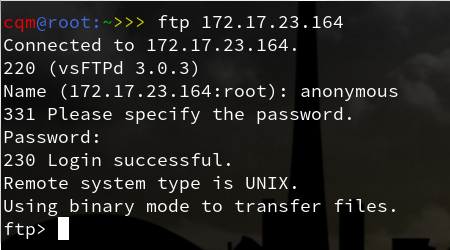
其中,172.17.23.164是要连接的ftp服务器的IP地址
接着我们匿名登录,即用户名为anonymous,密码为空即可
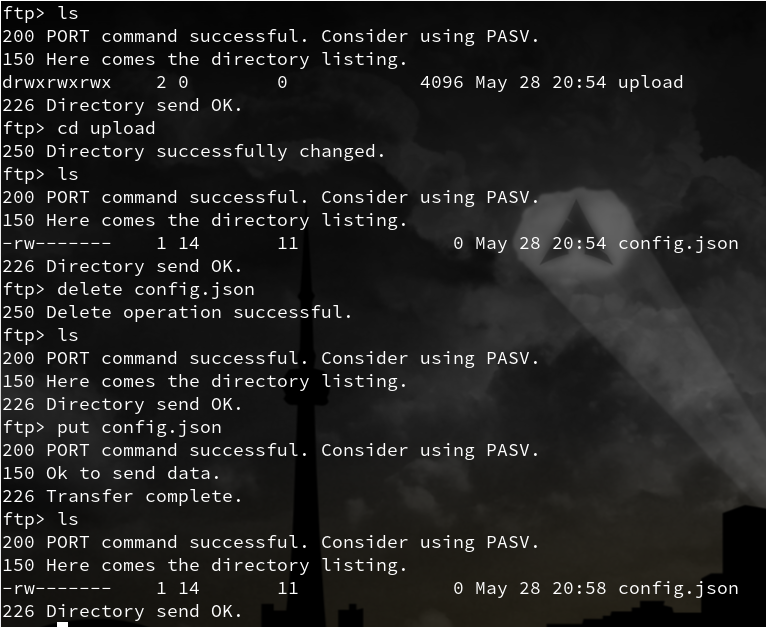
这里我们用到了一些基本的命令,ls,cd等,put、get为上传/下载命令,这些百度都能轻易得知。
上图可知,我们能够在upload目录中随意操作!
ssh服务器
1. 环境搭配
安装openssh,Archlinux下直接:
pacman -S openssh
它的配置文件为/etc/ssh/sshd_config,配置后如下:
#    $OpenBSD: sshd_config,v 1.101 2017/03/14 07:19:07 djm Exp $

# This is the sshd server system-wide configuration file.  See
# sshd_config(5) for more information.

# This sshd was compiled with PATH=/usr/bin:/bin:/usr/sbin:/sbin

# The strategy used for options in the default sshd_config shipped with
# OpenSSH is to specify options with their default value where
# possible, but leave them commented.  Uncommented options override the
# default value.

Port 22
#AddressFamily any
#ListenAddress 0.0.0.0
#ListenAddress ::

#HostKey /etc/ssh/ssh_host_rsa_key
#HostKey /etc/ssh/ssh_host_dsa_key
#HostKey /etc/ssh/ssh_host_ecdsa_key
#HostKey /etc/ssh/ssh_host_ed25519_key

# Ciphers and keying
#RekeyLimit default none

# Logging
#SyslogFacility AUTH
#LogLevel INFO

# Authentication:

#LoginGraceTime 2m
PermitRootLogin prohibit-password
#StrictModes yes
#MaxAuthTries 6
#MaxSessions 10

#PubkeyAuthentication yes

# The default is to check both .ssh/authorized_keys and .ssh/authorized_keys2
# but this is overridden so installations will only check .ssh/authorized_keys
AuthorizedKeysFile    .ssh/authorized_keys

#AuthorizedPrincipalsFile none

#AuthorizedKeysCommand none
#AuthorizedKeysCommandUser nobody

# For this to work you will also need host keys in /etc/ssh/ssh_known_hosts
#HostbasedAuthentication no
# Change to yes if you don't trust ~/.ssh/known_hosts for
# HostbasedAuthentication
#IgnoreUserKnownHosts no
# Don't read the user's ~/.rhosts and ~/.shosts files
#IgnoreRhosts yes

# To disable tunneled clear text passwords, change to no here!
#PasswordAuthentication yes
#PermitEmptyPasswords no

# Change to no to disable s/key passwords
ChallengeResponseAuthentication no

# Kerberos options
#KerberosAuthentication no
#KerberosOrLocalPasswd yes
#KerberosTicketCleanup yes
#KerberosGetAFSToken no

# GSSAPI options
#GSSAPIAuthentication no
#GSSAPICleanupCredentials yes

# Set this to 'yes' to enable PAM authentication, account processing,
# and session processing. If this is enabled, PAM authentication will
# be allowed through the ChallengeResponseAuthentication and
# PasswordAuthentication.  Depending on your PAM configuration,
# PAM authentication via ChallengeResponseAuthentication may bypass
# the setting of "PermitRootLogin without-password".
# If you just want the PAM account and session checks to run without
# PAM authentication, then enable this but set PasswordAuthentication
# and ChallengeResponseAuthentication to 'no'.
UsePAM yes

#AllowAgentForwarding yes
#AllowTcpForwarding yes
#GatewayPorts no
#X11Forwarding no
#X11DisplayOffset 10
#X11UseLocalhost yes
#PermitTTY yes
PrintMotd no # pam does that
#PrintLastLog yes
#TCPKeepAlive yes
#UseLogin no
#PermitUserEnvironment no
#Compression delayed
#ClientAliveInterval 0
#ClientAliveCountMax 3
#UseDNS no
#PidFile /run/sshd.pid
#MaxStartups 10:30:100
#PermitTunnel no
#ChrootDirectory none
#VersionAddendum none

# no default banner path
#Banner none

# override default of no subsystems
Subsystem    sftp    /usr/lib/ssh/sftp-server

# Example of overriding settings on a per-user basis
#Match User anoncvs
#    X11Forwarding no
#    AllowTcpForwarding no
#    PermitTTY no
#    ForceCommand cvs server
这里需要注意的是:
1. 打开port端口,将Port 22注释去除
2. 设置允许以root登录,将PermitRootLogin prohibit-password的注释去除
至此,最简单的配置完成了!
2. 密钥
一般而言,如果知道远程服务器的ip地址(假设是1.1.1.1)以及其某个用户(假设是root)的密码为000000,则可以直接:
ssh root@1.1.1.1
接着根据提示输入密码即可
但是每次都要输入密码未免太烦,于是可以采用ssh密钥机制
将ssh密钥理解为指纹,客户端的指纹在服务器端留下备份,访问的时候服务器查看客户端指纹,发现存在列表中,就可以免去登录了。
要做到这些,首先需要生成客户端自己的指纹:
ssh-keygen -t rsa
一路回车,会看到在.ssh目录下生成了密钥id_rsa和公钥id_rsa.pub,接着需要将公钥上传至服务器主机.ssh下authorized_keys中即可
一种做法是:
scp .ssh/id_rsa.pub root@1.1.1.1:/root/
这个命令将公钥上传到了服务器的/root目录下,接着进入服务器(输密码):
echo id_rsa.pub >> .ssh/authorized_keys