偶然看到一个公众号的文章,对移动目标检测系统的设计,这是一种极为简便,容易实现的目标检测,因为它不需要训练神经网络,也不需要制作训练集,前提是背景不能变化,最适用于固定摄像头的环境,比如说路口的车辆目标检测,智能生产线上对产品的检测等。缺点是针对不同的使用环境需要适当的调整一些参数,找到的轮廓与实际轮廓也有一点差异。
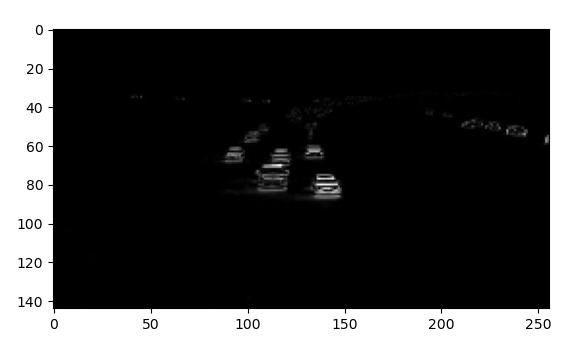
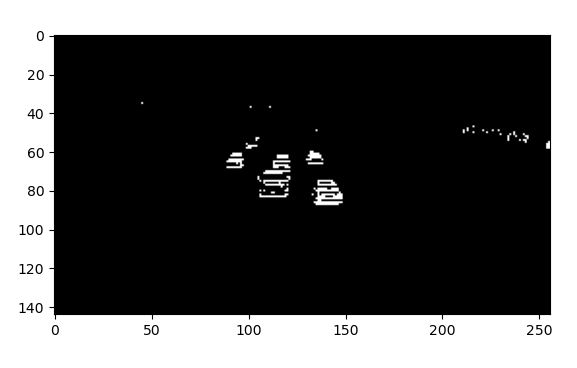
大概了解了一下整个系统的实现过程,对于一段视频,将视频拆分为一帧帧的图像,提取相邻两帧图片进行灰度化操作,再两帧做差,可以得到相邻两帧的图像差异,人眼可能察觉不到这些细微的差异,可像素做差后再进行图像二值化,再对图片进行膨胀操作,可以得到某些移动物体的详细轮廓信息,然后通过轮廓提取,提取出在位置和面积满足一定条件的轮廓,在原图片中绘制出这些轮廓的包围区域;对所有相邻帧全部执行这一系列的操作,然后将这些图片拼成一幅视频,实现移动目标连续检测。
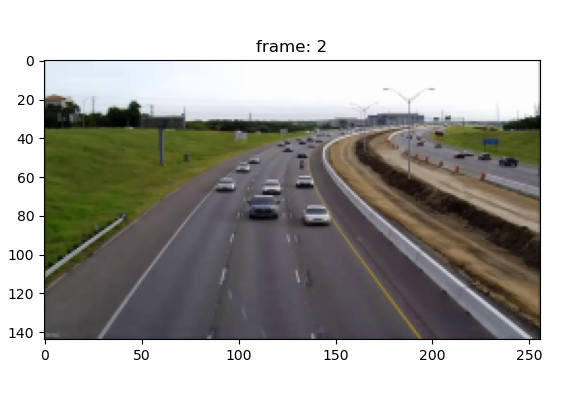
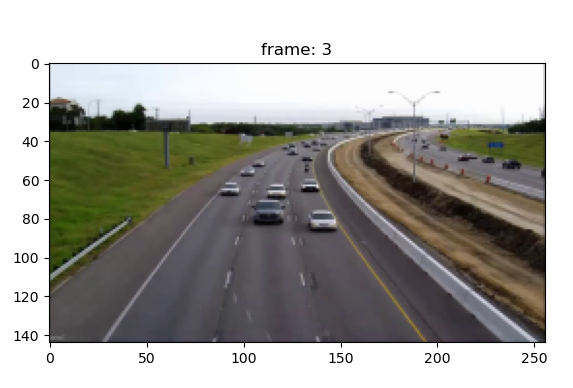
随便取出相邻两帧图片
灰度化后相邻帧做差:
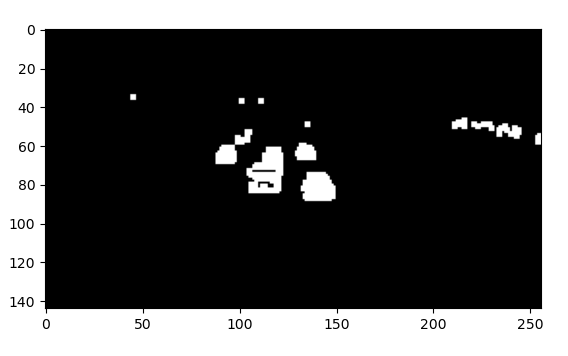
二值化、膨胀操作
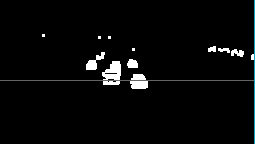
设置检测区域,车辆经过直线后才进行检测
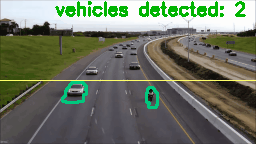
整体效果:上方的数字表示的是当前经过图片中黄线后检测到的车辆数量
总结:帧差法虽然实现起来简单,可是具有它的局限性,摄像头与背景要保证持相对静止,一旦两者存在相对运动,这种方式就不使用了。
代码实现:
import os
import re
import cv2 # opencv library
import numpy as np
from os.path import isfile, join
import matplotlib.pyplot as plt

# get file names of the frames
col_frames = os.listdir('frames/')

# sort file names
col_frames.sort(key=lambda f: int(re.sub('D', '', f)))

# empty list to store the frames
col_images=[]

for i in col_frames:
    # read the frames
    img = cv2.imread('frames/'+i)
    # append the frames to the list
    col_images.append(img)


# kernel for image dilation
kernel = np.ones((4,4),np.uint8)

# font style
font = cv2.FONT_HERSHEY_SIMPLEX

# directory to save the ouput frames
pathIn = "contour_frames_3/"

for i in range(len(col_images)-1):

    # frame differencing
    grayA = cv2.cvtColor(col_images[i], cv2.COLOR_BGR2GRAY)
    grayB = cv2.cvtColor(col_images[i+1], cv2.COLOR_BGR2GRAY)
    diff_image = cv2.absdiff(grayB, grayA)

    # image thresholding
    ret, thresh = cv2.threshold(diff_image, 30, 255, cv2.THRESH_BINARY)

    # image dilation
    dilated = cv2.dilate(thresh,kernel,iterations = 1)

    # find contours
    rwa,contours, hierarchy = cv2.findContours(dilated.copy(), cv2.RETR_TREE,cv2.CHAIN_APPROX_NONE)

    # shortlist contours appearing in the detection zone
    valid_cntrs = []
    for cntr in contours:
        x,y,w,h = cv2.boundingRect(cntr)
        if (x <= 200) & (y >= 80) & (cv2.contourArea(cntr) >= 25):
            if (y >= 90) & (cv2.contourArea(cntr) < 40):
                break
            valid_cntrs.append(cntr)

    # add contours to original frames
    dmy = col_images[i].copy()
    cv2.drawContours(dmy, valid_cntrs, -1, (127,200,0), 2)

    cv2.putText(dmy, "vehicles detected: " + str(len(valid_cntrs)), (55, 15), font, 0.6, (0, 180, 0), 2)
    cv2.line(dmy, (0, 80),(256,80),(100, 255, 255))
    #cv2.imshow("show",dmy)
    #cv2.waitKey(100)
    cv2.imwrite(pathIn+str(i)+'.png',dmy)

# specify video name
pathOut = 'vehicle_detection_v3.mp4'

# specify frames per second
fps = 14.0

frame_array = []
files = [f for f in os.listdir(pathIn) if isfile(join(pathIn, f))]
files.sort(key=lambda f: int(re.sub('D', '', f)))

for i in range(len(files)):
    filename=pathIn + files[i]

    #read frames
    img = cv2.imread(filename)
    height, width, layers = img.shape
    size = (width,height)

    #inserting the frames into an image array
    frame_array.append(img)

    out = cv2.VideoWriter(pathOut, cv2.VideoWriter_fourcc(*'DIVX'), fps, size)

    for i in range(len(frame_array)):
        # writing to a image array
        out.write(frame_array[i])

    out.release()