还是像以前一样用一个简单的案例来解释vuex
首先,新建一个模板demo
1 vue init webpack-simple demo
我们需要两个组件:一个输入组件和一个显示组件
在src文件夹中新建一个components文件夹,添加一个showInfo.vue
1 <template>
2     <h1>{{ msg }}</h1>
3 </template>
4
5 <script>
6 export default {
7     props: ['msg']
8 }
9 </script>
然后,再添加一个changeInfo.vue
1 <template>
2     <input type="text" :value="msg">
3 </template>
4
5 <script>
6 export default {
7     props: ['msg']
8 }
9 </script>
修改App.vue:
 1 <template>
 2   <div>
 3     <show-info :msg="msg"></show-info>
 4     <change-info :msg="msg"></change-info>
 5   </div>
 6 </template>
 7
 8 <script>
 9 import showInfo from './components/showInfo'
10 import changeInfo from './components/changeInfo'
11
12 export default {
13   components: {
14     showInfo,
15     changeInfo
16   },
17   data() {
18     return {
19       msg: 'Hello Vue!'
20     }
21   }
22 }
23 </script>
运行起来或许是这样的:
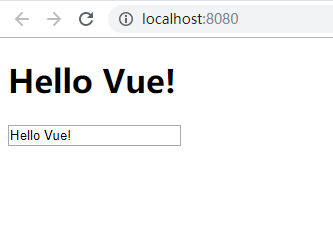
缺点是信息传递仍然是使用绑定:msg="msg",而且由于vue组件之间传输信息的限制,现在修改输入组件的文本并不会改变显示组件的值。
现在来使用vuex来传递变量信息,首先安装vuex:
1 npm install vuex --save
然后在src文件夹下新建vuex文件夹,并添加store.js
 1 import Vue from 'vue'
 2 import Vuex from 'vuex'
 3 Vue.use(Vuex)
 4
 5 // 添加两个常量state和mutations
 6 const state = {
 7     msg: 'Hello Vue!'
 8 }
 9
10 const mutations = {
11     changeMessage(state, msg) {
12         state.msg = msg
13     }
14 }
15
16 // 初始化已经创建的常量
17 export default new Vuex.Store({
18     state: state,
19     mutations: mutations
20 })
注意,在ES6中{state: state, mutations: mutations}可以简写为{state, mutations}
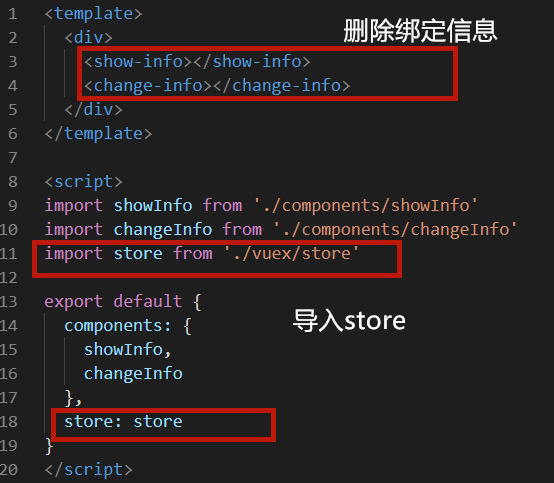
然后修改App.vue:
然后,在src/components/showInfo.vue中需要使用计算属性来代替props:
 1 <template>
 2     <h1>{{ msg }}</h1>
 3 </template>
 4
 5 <script>
 6 export default {
 7     computed: {
 8         msg() {
 9             return this.$store.state.msg
10         }
11     }
12 }
13 </script>
在changeInfo.vue中需要额外添加changeMsg方法:
 1 <template>
 2     <input type="text" :value="msg" @keyup="changeMsg">
 3 </template>
 4
 5 <script>
 6 export default {
 7     computed: {
 8         msg() {
 9             return this.$store.state.msg
10         }
11     },
12     methods: {
13         changeMsg(e) {
14             this.$store.commit('changeMessage', e.target.value)
15         }
16     }
17 }
18 </script>
来看一下运行效果:

然而,现在的代码是非常不好维护的,想象一下下面两个场景:
1) 在一个大规模的应用中如果不同的组件都使用了$this.store.state.somevalue,一旦我们修改了somevalue的名字,就需要修改所有用到它的组件。
2) 如果有一个需要计算的值,例如计数器counter,如果其他的组件需要对它执行+1操作的话就得在组件中添加一个单独的方法,导致代码冗余。
首先,为了解决第一个问题,我们需要在vuex中引入一个getters.js文件:
1 export default {
2     getMessage(state) {
3         return state.msg
4     }
5 }
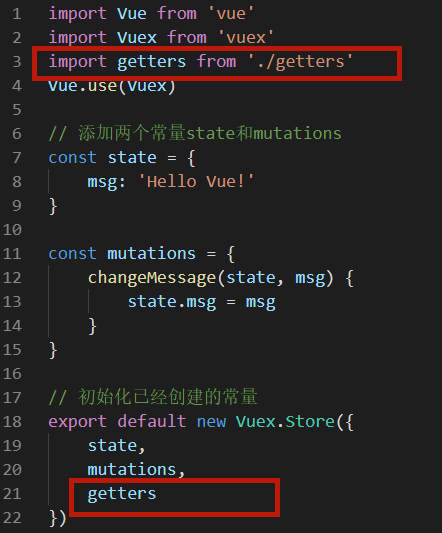
然后在store.js中引入getters.js
然后在两个组件中修改引用store.state.msg方法
1 computed: {
2     msg() {
3         return this.$store.getters.getMessage
4     }
5 }
遗憾的是this.$store.getters这个符号仍然很长,我们一般都希望使用短一点的名字来表示变量,好消息是vue提供了mapGetters来帮助我们映射变量名,仅仅只需要引入并修改计算属性:
 1 <!-- showInfo.vue -->
 2 <template>
 3     <h1>{{ getMessage }}</h1>
 4 </template>
 5
 6 <script>
 7 import { mapGetters } from 'vuex'
 8 export default {
 9     computed: mapGetters(['getMessage'])
10 }
11 </script>
不过一个更好的方法是使用对象来代替mapGetters中的数组:
 1 <!-- showInfo.vue -->
 2 <template>
 3     <h1>{{ msg }}</h1>
 4 </template>
 5
 6 <script>
 7 import { mapGetters } from 'vuex'
 8 export default {
 9     computed: mapGetters({
10         msg: 'getMessage'
11     })
12 }
13 </script>
现在,让我们来体验一下这种修改的好处吧。如果我们需要将输入的所有字母转化为大写,只需要做一处修改src/vuex/getters.js:
1 export default {
2     getMessage(state) {
3         return (state.msg).toUpperCase()
4     }
5 }
这就像魔法一样神奇!接着来解决第二个问题。
首先在store.js中添加counter属性和相应的方法:

因此,在getters.js文件中:
1 export default {
2     getMessage(state) {
3         return (state.msg).toUpperCase()
4     },
5     getCounter(state) {
6         return (state.counter)
7     }
8 }
同时,在显示组件showInfo.vue上显示counter:
 1 <template>
 2     <div>
 3         <h1>{{ msg }}</h1>
 4         <div>The message was changed {{ counter }} times</div>
 5     </div>
 6 </template>
 7
 8 <script>
 9 import { mapGetters } from 'vuex'
10 export default {
11     computed: mapGetters({
12         msg: 'getMessage',
13         counter: 'getCounter'
14     })
15 }
16 </script>
然后,在src/vuex中添加actions.js来管理函数调用的动作:
1 export default {
2     CHANGE_MSG({ commit }, msg) {
3         commit('changeMessage', msg)
4     },
5     ADD_COUNTER({ commit }) {
6         commit('addCounter')
7     }
8 }
然后像引用getters.js一样在store.js中引用actions.js(同样也用mapActions映射函数名),最后在changeInfo.vue组件中引用这两个action:
 1 <!-- changeInfo.vue -->
 2 <template>
 3     <input type="text" :value="msg"
 4     @keyup="chMsg($event.target.value)"
 5     @keyup.enter="addCnt">
 6 </template>
 7
 8 <script>
 9 import { mapGetters } from 'vuex'
10 import { mapActions } from 'vuex'
11 export default {
12     computed: mapGetters({
13         msg: 'getMessage'
14     }),
15     methods: mapActions({
16         chMsg: 'CHANGE_MSG',
17         addCnt: 'ADD_COUNTER'
18     })
19 }
20 </script>