相信使用过android手机的朋友都见过下面样子的选项卡,本文我们尝试做的演示。
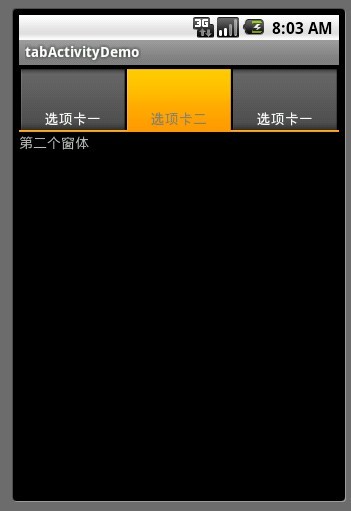
这个选项卡页面,或者说是标签卡。分为两部分:
一个顶部的按钮(可点击的)的切换卡部分
一个主内容区(上图显示“第二个窗体”字体的)的主显示区。
我们想实现的效果是点击切换的选项卡卡部分,主显示区的内容随之改变。那么我们看下页面布局代码
xmlns:android="http://schemas.android.com/apk/res/android"
android:id="@android:id/tabhost"
android:layout_width="fill_parent"
android:layout_height="fill_parent">
<LinearLayout
android:orientation="vertical"
android:layout_width="fill_parent"
android:layout_height="fill_parent">
<TabWidget android:id="@android:id/tabs"
android:layout_width="fill_parent"
android:layout_height="wrap_content"
android:paddingLeft="1dip"
android:paddingRight="1dip"
android:paddingTop="4dip"
/>
<FrameLayout android:id="@android:id/tabcontent"
android:layout_width="fill_parent"
android:layout_height="1dip"
android:layout_weight="1"
/>
</LinearLayout>
</TabHost>
如上面的代码所示:
整个窗体在一个TabHost元素下。TabHost是根元素。他包含了一个子布局对象LinearLayout,这个布局对象的方向为“vertical”,注意这个垂直方向。它指示了如何排列这个布局对象的子对象,也就是它指示了TabWidget 和FrameLayout 这两个控件的排列。我们目前的排列是 TabWidget 在上,FrameLayout 在下。如果想实现“选项卡标签在底部的效果”,尝试下relativeLayout吧。
TabWidget 就是标签卡对象。就是用来切换的那个顶部标签卡。注意id必须为@android:id/tabs
FrameLayout 是内容区域,当标签卡变化时,这里的内容会随之变化。注意id必须为@android:id/tabcontent
布局构建完毕后。下一步要做的,就是如何为这个布局添加子选项卡了。
首先,让我们的activty继承自TabActivity
在onCreate时获得tabHost对象,并添加选项卡
我们看下AddTabPage1()方法的具体实现。
internt1.setClass(this,Act1.class);
TabSpec tabSpec = _tabHost.newTabSpec("act1");
//指定选项卡的显示名称
tabSpec.setIndicator("选项卡一");
//指定跳转方向
tabSpec.setContent(internt1);
_tabHost.addTab(tabSpec);
如上面的代码所示,我们构建了一个TabSpec 对象,并调用_tabHost.addTab(tabSpec);方法,将这个对象加入到选项卡集合中。
TabSpec 是一个 选项卡对象,或者说是 TabSpec 描述一个选项卡的。通过tabSpec.setIndicator 指定选项卡的显示名称。
tabSpec.setContent(internt1); 指定跳转方向,在这里指定了当顶部的标签卡被指定时,执行的Intent 对象。我们常常使用Intent 来做窗体间的跳转。
完成了上述步骤后,就可以具体实现 具体的选项卡 里的布局(内容)了。
下面贴出完成的Activity代码
import android.app.Activity;
import android.app.TabActivity;
import android.content.Intent;
import android.os.Bundle;
import android.widget.TabHost;
import android.widget.TabHost.TabSpec;
public class ActTabActivityDemo1 extends TabActivity {
private TabHost _tabHost;
/** Called when the activity is first created. */
@Override
public void onCreate(Bundle savedInstanceState) {
super.onCreate(savedInstanceState);
setContentView(R.layout.main);
_tabHost = getTabHost();
AddTabPage1();
AddTabPage2();
AddTabPage1();
}
private void AddTabPage1() {
// TODO Auto-generated method stub
Intent internt1 = new Intent();
internt1.setClass(this,Act1.class);
TabSpec tabSpec = _tabHost.newTabSpec("act1");
//指定选项卡的显示名称
tabSpec.setIndicator("选项卡一");
//指定跳转方向
tabSpec.setContent(internt1);
_tabHost.addTab(tabSpec);
}
private void AddTabPage2() {
// TODO Auto-generated method stub
Intent internt1 = new Intent();
internt1.setClass(this,Act2.class);
TabSpec tabSpec = _tabHost.newTabSpec("act2");
tabSpec.setIndicator("选项卡二");
tabSpec.setContent(internt1);
_tabHost.addTab(tabSpec);
}
}