获取微信手机号
查看链接:https://developers.weixin.qq.com/miniprogram/dev/framework/open-ability/getPhoneNumber.html
获取用户信息、openId
https://developers.weixin.qq.com/miniprogram/dev/framework/open-ability/login.html
获取openid的具体流程是
1. 调用 wx.login() 获取 临时登录凭证code 。
2. 根据code, 调用 auth.code2Session 接口,换取 用户唯一标识 OpenID 、微信开放平台帐号下的UnionID 、会话密钥 session_key
参考:https://developers.weixin.qq.com/miniprogram/dev/api-backend/open-api/login/auth.code2Session.html
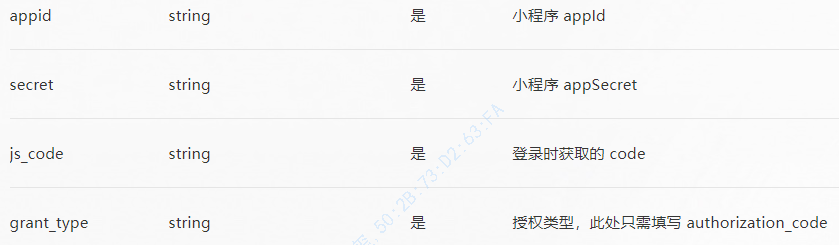
例子:https://api.weixin.qq.com/sns/jscode2session?appid=小程序appId&secret=小程序appSecret(小程序管理后台,管理员才有权限看到)&js_code=JSCODE&grant_type=authorization_code(授权类型,此处写死authorization_code即可)
备注:前端也能直接调用https://api.weixin.qq.com/sns/jscode2session获取openId,不过一般都是通过请求后端服务获取,原因appSecret暴露给前端不安全
相关代码
import { jsCode2Session } from './services/index'

App({
  onLaunch() {
    // 异步请求获取数据,添加全局Promise,其他页面方便获取用户信息和opneId
    this.userInfoReadyCallback = new Promise(resovle => {
      let openid;
      let userInfo;

      // 获取用户信息
      wx.getSetting().then(res => {
        if (!res.authSetting['scope.userInfo']) return (userInfo = {})
        // 已经授权,可以直接调用 getUserInfo 获取头像昵称,不会弹框
        wx.getUserInfo().then(res => {
          userInfo = res.userInfo
          this.globalData.userInfo = userInfo
          if (!openid || openid === undefined) return
          resovle({ openid, userInfo })
        })
      })

      // 获取用户的openid
      wx.login().then(res => {
        // 调用后端接口获取openId、unionid(如果有)
        jsCode2Session({ jsCode: res.code }).then(rs => {
          openid = rs.data.openid
          this.globalData.openId = openid
          if (!userInfo) return
          resovle({ openid, userInfo })
        }).catch(e => {
          console.log('获取openid失败!')
          openid = ''
          if (!userInfo) return
          resovle({ openid, userInfo })
        })
      })
    })
  }
})
// 未授权,弹窗授权按钮,引导用户授权
<view wx:if="{{!userInfo.nickName}}">
  <view class="mask-dialog">
    <text>获取头像昵称</text>
    <button open-type="getUserInfo" bindgetuserinfo="getUserInfo">确定</button>
  </view>
</view>

// 授权后的回调
getUserInfo(e) {
  const userInfo = e.detail.userInfo
  app.globalData.userInfo = userInfo
  this.setData({ userInfo })
}
微信接收服务消息
指南: https://developers.weixin.qq.com/miniprogram/dev/framework/open-ability/subscribe-message.html
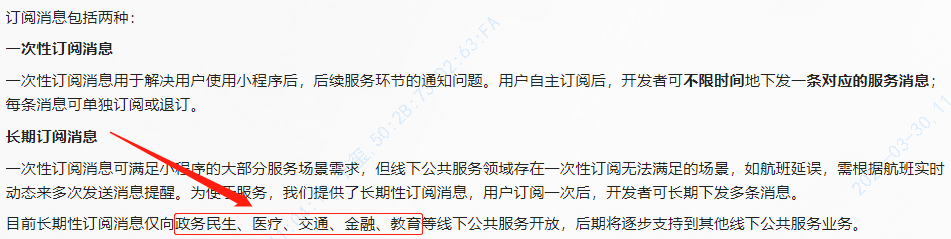
在微信上,如果需要接收小程序推送的服务消息,具体流程如下:
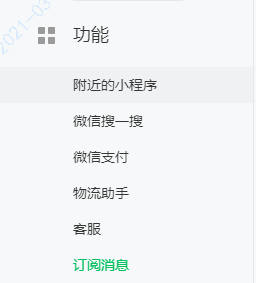
1. 首先在小程序管理平台上创建模板(创建过程就不细说了,基本)
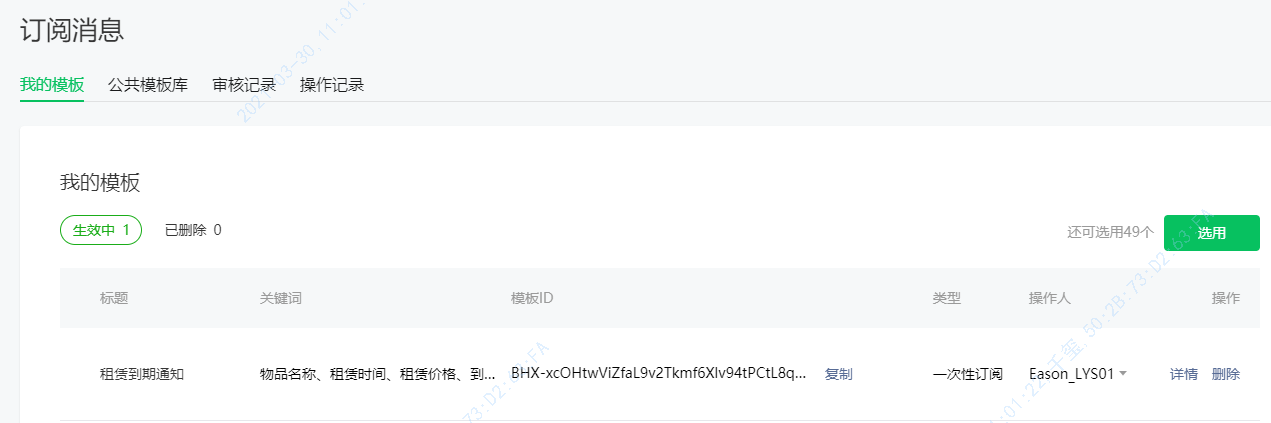
一些细节需要注意:
2. 代码层面
// 这个接口,只在点击事件或是支付完成后调用才有效。其它事件使用无效
  wx.requestSubscribeMessage({
      tmplIds: ['BHX-xcOHtwViZfaL9v2Tkmf6Xlv94tPCtL8qVpfcaLA'],
      success(msg) {
        console.log(msg)
      },
      fail(msg, errCode) {
        console.log('msg', msg, msg.errCode)
      }
    })
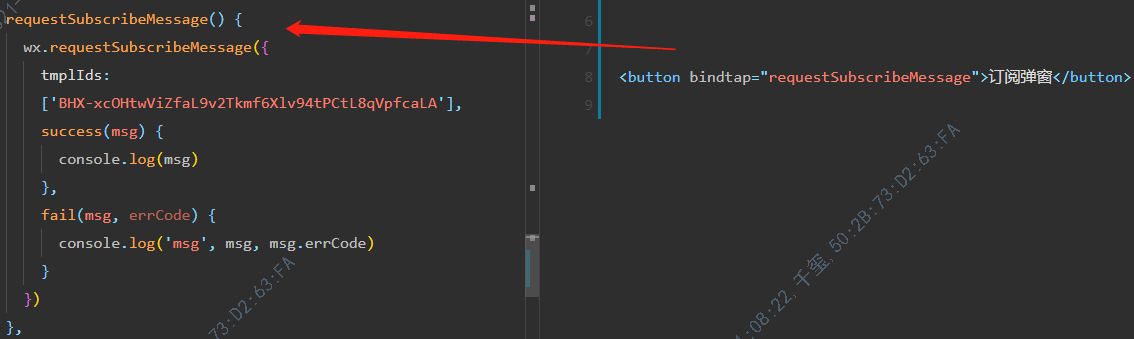
3. 点击按钮,会弹窗授权(后端就可以写代码根据业务逻辑推送,微信就可以接收服务消息)

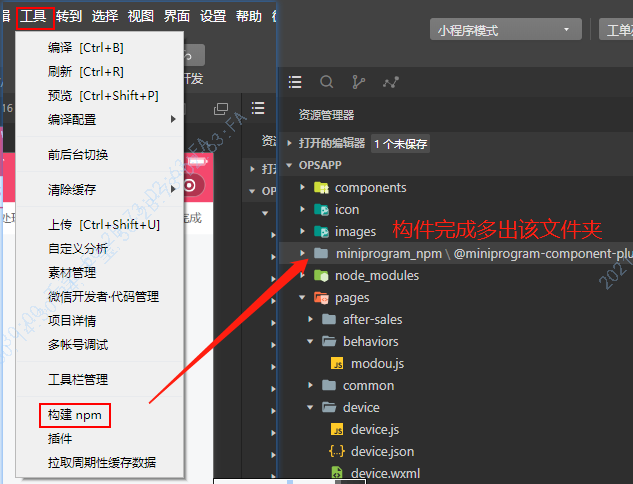
使用npm
https://developers.weixin.qq.com/miniprogram/dev/devtools/npm.html
例子:使用 tabs
1. 安装:cnpm install @miniprogram-component-plus/tabs -S
2. page.json:
{
  "usingComponents": { "mp-tabs": "@miniprogram-component-plus/tabs" }
}
3. 构件npm:
请求接口的url配置
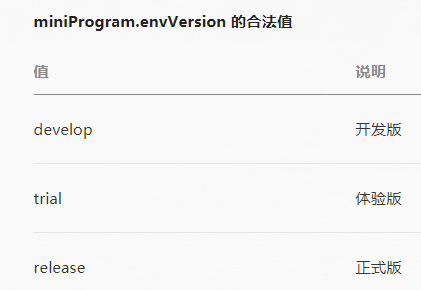
Object wx.getAccountInfoSync()可以获取当前账号的信息,里面有字段区分当前环境

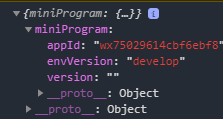
代码可以这样写:
const urlConfig = {
  // 开发版地址配置
  develop: {
    apiBaseUrl: 'https://ybstest.qxfoodom.com/',
    connectUrl: 'wxs://ybstest.qxfoodom.com:443/ws/mqtt'
  },
  // 体验版地址配置
  trial: {
    apiBaseUrl: 'https://ybstest.qxfoodom.com/',
    connectUrl: 'wxs://ybstest.qxfoodom.com:443/ws/mqtt'
  },
  // 正式版地址配置
  release: {
    apiBaseUrl: 'https://ybs.qxfoodom.com/',
    connectUrl: 'wxs://ybstest.qxfoodom.com:443/ws/mqtt'
  },
  // 兜底处理
  other: {
    apiBaseUrl: 'https://ybs.qxfoodom.com/',
    connectUrl: 'wxs://ybstest.qxfoodom.com:443/ws/mqtt'
  }
}

const getUrlConfig = () => {
  const accountInfo = wx.getAccountInfoSync()
  console.log(accountInfo)
  const envVersion = accountInfo.miniProgram.envVersion
  return urlConfig[envVersion] || urlConfig.other
}

const config = getUrlConfig()

export {
  config
}
备注:据说审核版本的值不确定,很可能导致审核不通过
使用mqtt
https://github.com/mqttjs/MQTT.js
地址必须是 wxs(对应https) 或 wx(http) 开头,否侧报错:
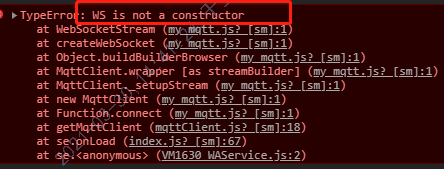
import mqtt from './my_mqtt.js';

// 连接选项
const options = {
  clean: true, // 保留回话
  connectTimeout: 15000, // 超时时间
  keepalive: 20,
  username: 'admin',
  password: 'public',
}

let mqttClient
const getMqttClient = () => {
  if (mqttClient) return mqttClient
  mqttClient = mqtt.connect('wxs://ybstest.com:443/ws/mqtt', options);

  mqttClient.on('connect', () => {
    console.log('connect:', mqttClient.options.href);
  });

  mqttClient.on('close', () => {
    console.log('close..........')
  });

  mqttClient.on('reconnect', () => {
    console.log('reconnect..........')
  });

  mqttClient.on('disconnect', () => {
    console.log('disconnect..........')
  });

  mqttClient.on('error', () => {
    console.log('error..........')
  });

  return mqttClient
};

export default getMqttClient;

// // 订阅消息
// mqttClient.subscribe(`/device/upload/${deviceSn}`, { qos: 0 }, err => {
//   if (err) console.log(err);
// });

// 订阅消息后,才能接收消息
// mqttClient.on('message', (topic, message) => {
//   try {
//     const obj = JSON.parse(message.toString());
//     console.log('收到信息:', obj);
//   } catch (error) {
//     console.error(error);
//   }
// });

// 无需订阅消息,链接成功即可发送消息
// mqttClient.publish('/device/push/${deviceSn}', JSON.stringify({
//   deviceSn: '设备SN',
//   mqttActionEnum: 'BASE_DIRECTION_CONTROL',
//   DIRECTION: 'LEFT', // RIGHT UP DOWN
//   timestamp: +new Date()
// }));
其他使用技巧
-
页面的Page构造,改为 Component构造器;可以使用behaviors等高级属性,可以使用Component构造器, 如果这样做,生命周期方法需要写在methods中
-
使用svg图片:<image mode="widthFix" class="svg-gongdan" src="../../icon/icon_gongdan.svg" />
- 使用 iconfont 字体图标:/**app.wxss**/ @import './iconfont.wxss'; (iconfont.wxss就是下载下来的字体图标样式)
微信小程序下载视频保存到本地
文件下载接口: https://developers.weixin.qq.com/miniprogram/dev/api/network/download/wx.downloadFile.html
保存视频到系统相册:https://developers.weixin.qq.com/miniprogram/dev/api/media/video/wx.saveVideoToPhotosAlbum.html
用户授权:https://developers.weixin.qq.com/miniprogram/dev/api/open-api/authorize/wx.authorize.html
获取用户已经授权的接口: https://developers.weixin.qq.com/miniprogram/dev/api/open-api/setting/wx.openSetting.html
handleDownload(e) {
  let fileName = new Date().valueOf();
   // 单次下载允许的最大文件为 200MB
  wx.downloadFile({
    url: '下载地址:xxxx',
    filePath: wx.env.USER_DATA_PATH + '/' + fileName + '.mp4', // 指定文件下载后存储的路径 (本地路径)
    success: res => {
      let filePath = res.filePath; // 传入 filePath 时会返回,跟传入的 filePath 一致

      // 保存视频到系统相册
      wx.saveVideoToPhotosAlbum({
        filePath,
        success: file => {
          wx.showToast({
            title: '下载成功',
            icon: 'success',
            duration: 2000
          })
        },
        fail: err => {
          if (err.errMsg === 'saveVideoToPhotosAlbum:fail auth deny') {
          wx.authorize({
              scope: 'scope.writePhotosAlbum', // 保存到相册 授权
              success () {
                // 再次保存
              }
            })
          }
        }
      })
    }
  })
}
遇到问题
- 小程序iOS Promise不支持finally语法 TypeError: undefined is not a function .finally is not a function;Promise.finally()在实际使用中ios真机上不生效,安卓及模拟器正常
- 小程序的textarea组件,不能再scroll-view组件上使用,会出textarea输入的字体悬浮在页面上的问题

开发工具使用
下载地址: https://developers.weixin.qq.com/miniprogram/dev/devtools/download.html
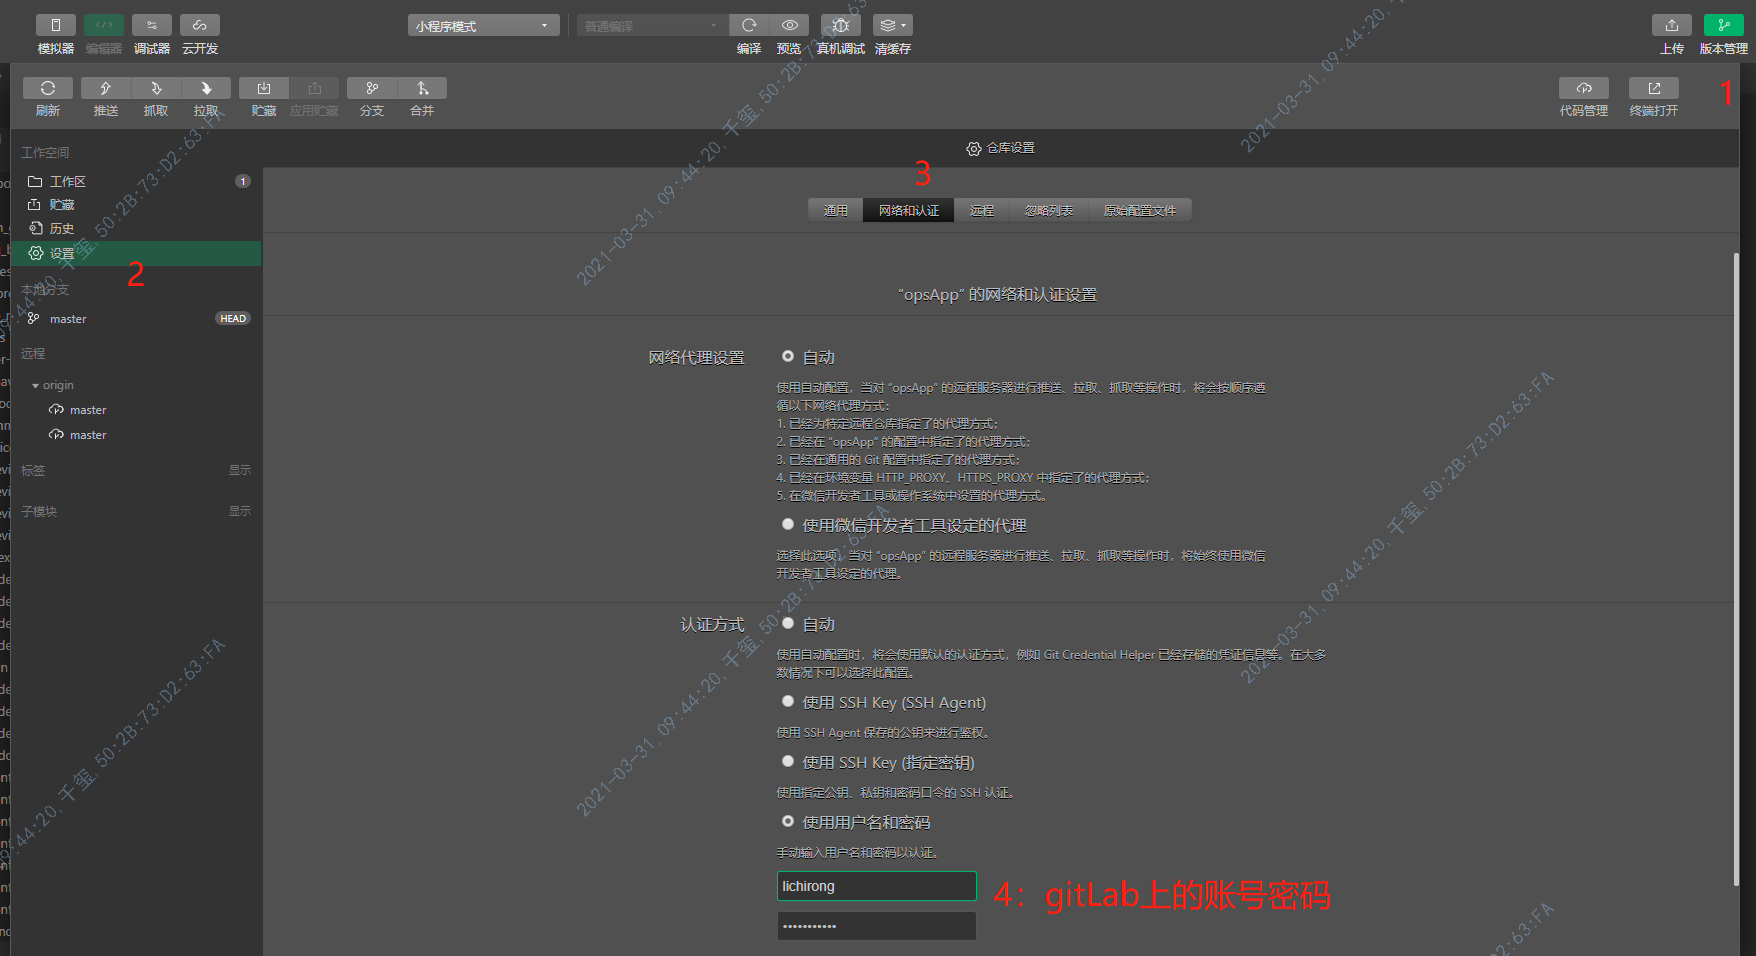
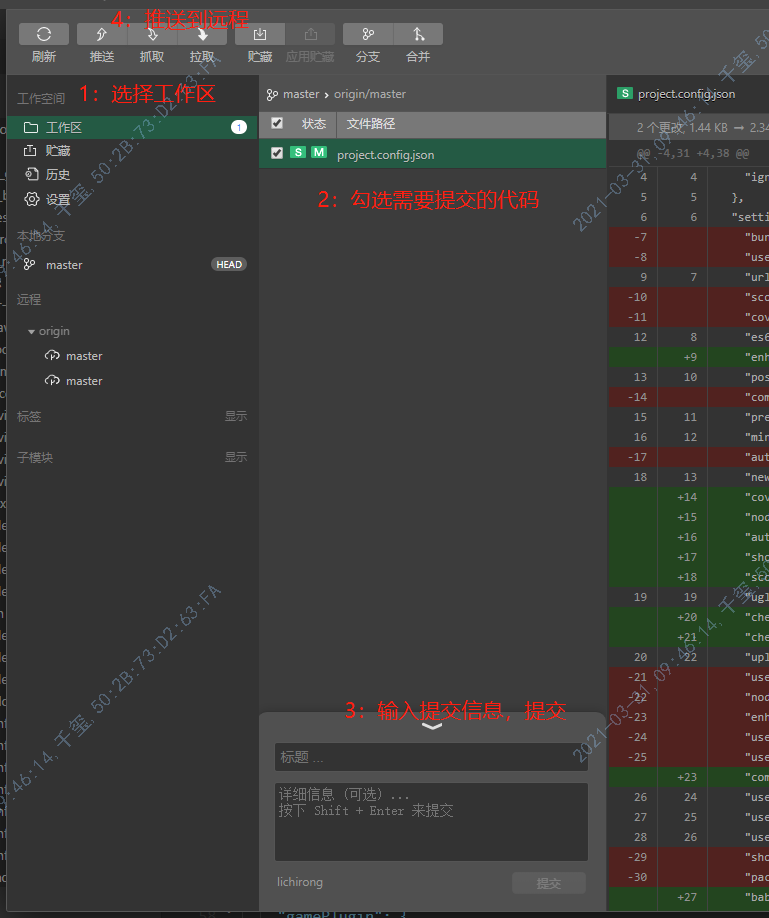
代码提交
提交之前,先配置好“网络和认证”
开发避开域名校验
请求接口,需要在小程序管理后台配置服务器域名,否侧会报错,如果需要开发时避开这个限制,可以如下设置:

编译某一个页面配置
点击保存文件后,开发者工具会自动编译,会默认跳转到首页,如果想跳转到某一个页面可以如下配置:

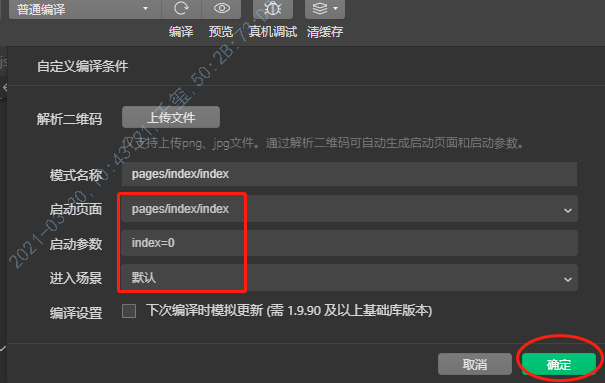
备注: 可以设置进入的场景值,具体的场景值说明地址: https://developers.weixin.qq.com/miniprogram/dev/framework/app-service/scene.html
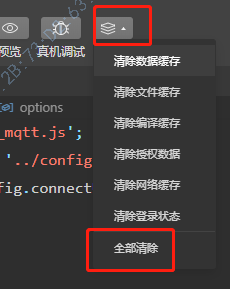
清除缓存
有些时候,需要测试微信授权,可以清除缓存,,具体如下
其他
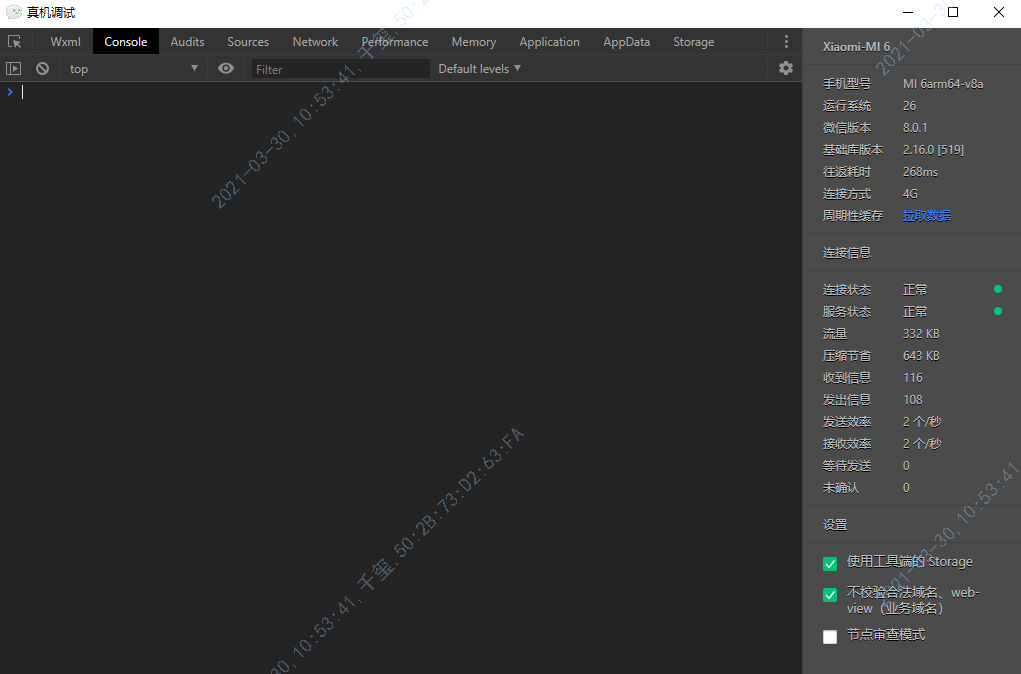
真机调试: 点击后,可以在手机上真机调试,开发工具会弹出调试面板
预览: 点击后会生成二维码,扫码后自动显示当前页面