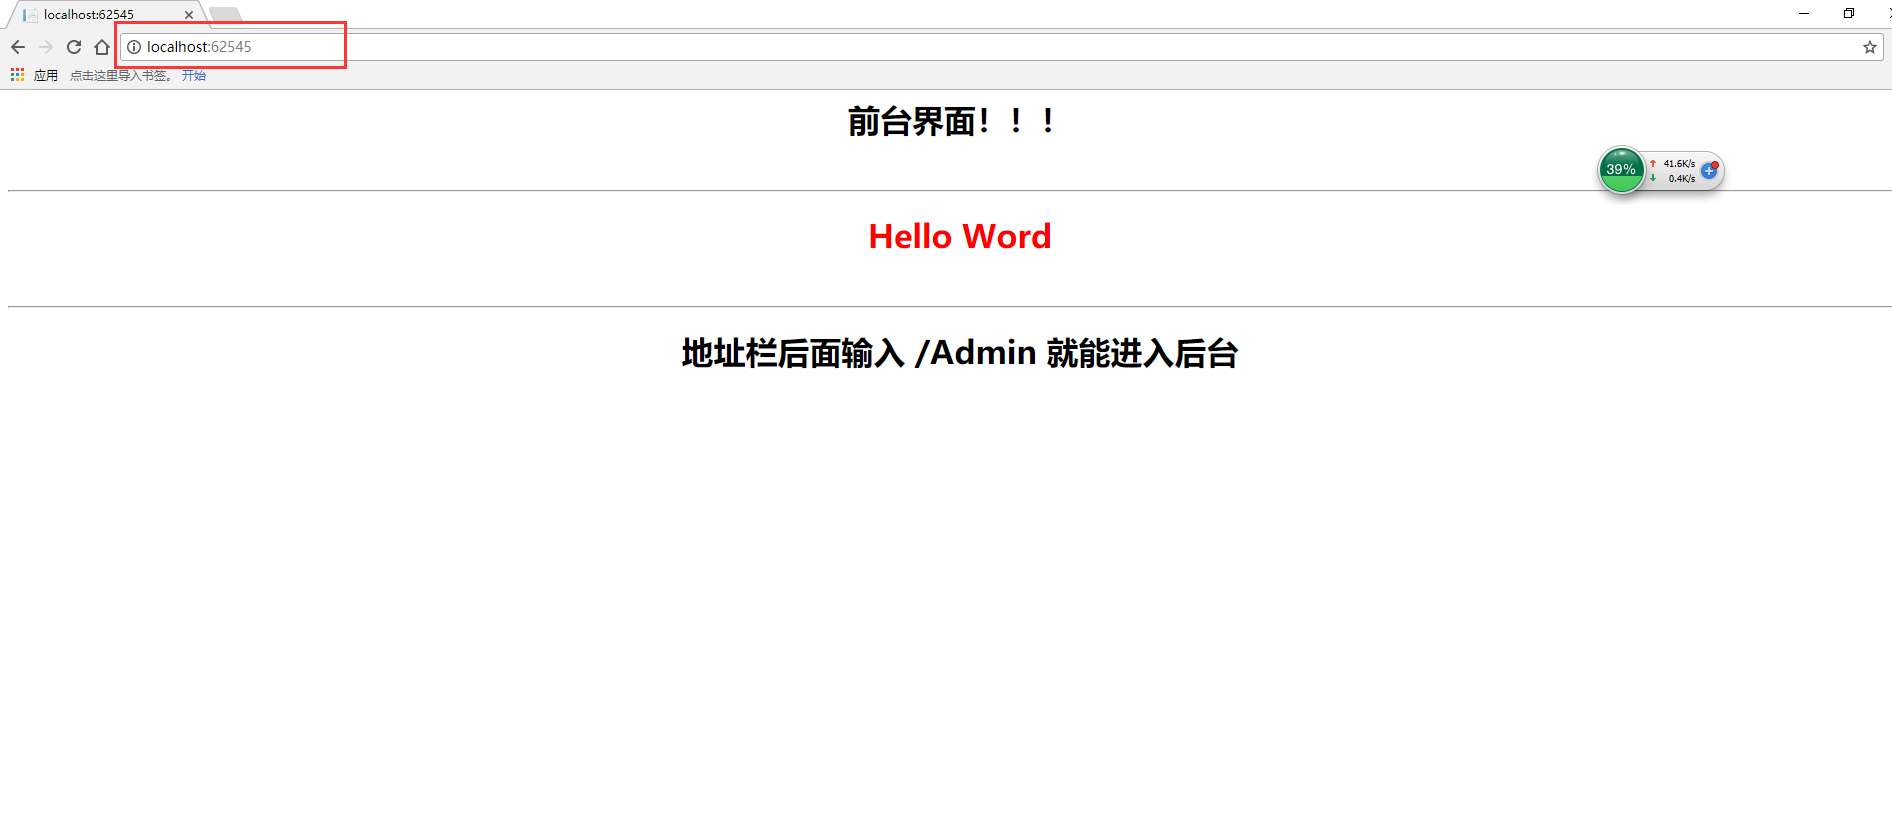
上一篇 Asp.Net 中Grid详解两种方法使用LigerUI加载数据库数据填充数据分页 了解了LigerUI 中Grid的基本用法 现在结合上一篇的内容做一个简单的后台管理,当然也有前台的页面。支持登录验证。
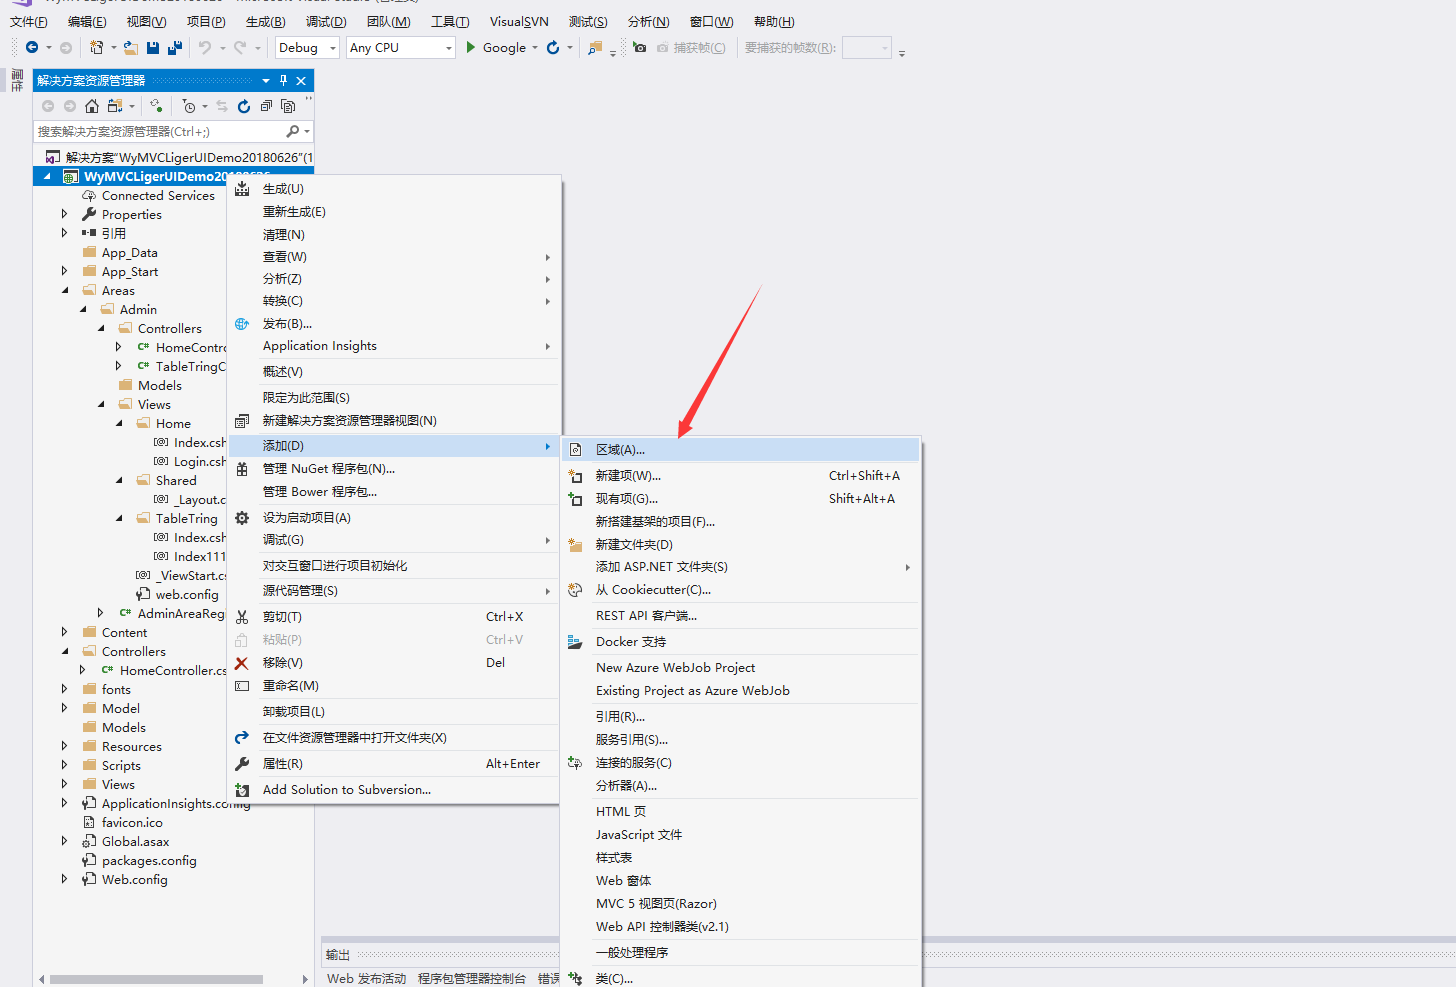
1、打开VS新建一个MVC项目,右键点击项目新建一个区域Admin作为后台部分
2、既然要做登录限制我们在App_Start下面新建一个类 继承Controller作为基处理控制器。
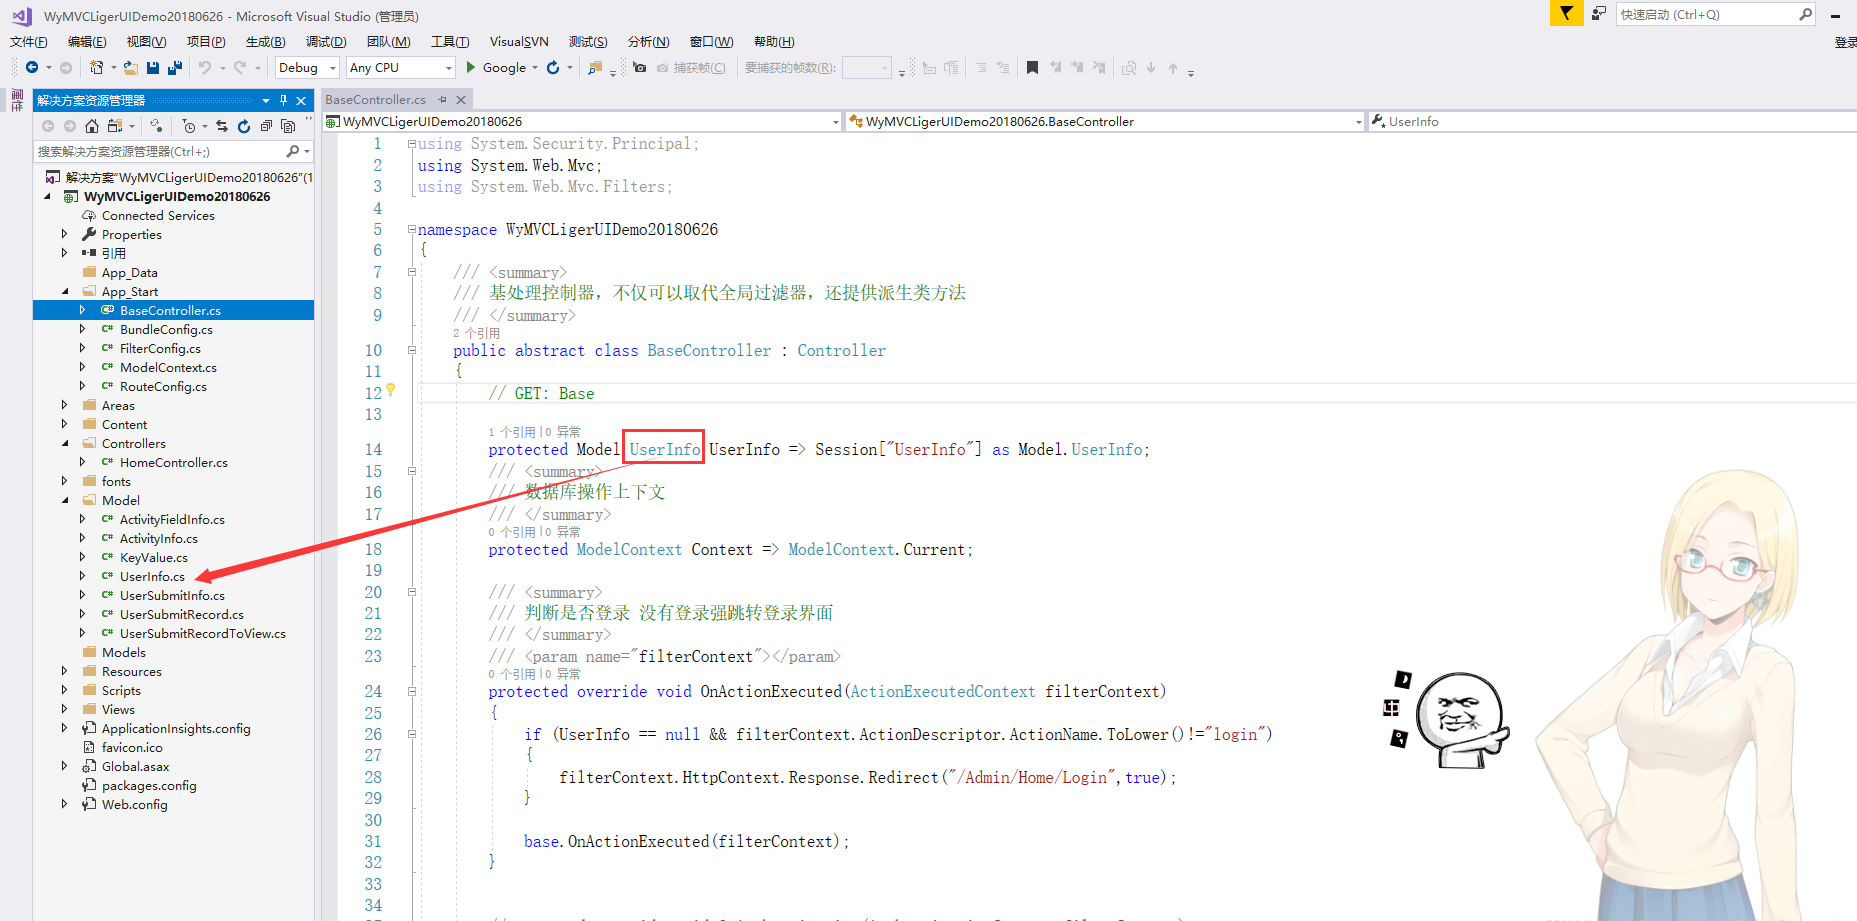
里面Session就是储存用户的登录信息,登陆过的用户跟没有登录的用户就是在这个里面判断,后面建的控制器都是继承这个BaseController,OnActionExecuted重写这个方法判断登录,下面是代码
using System.Security.Principal;
using System.Web.Mvc;
using System.Web.Mvc.Filters;

namespace WyMVCLigerUIDemo20180626
{
    /// <summary>
    /// 基处理控制器,不仅可以取代全局过滤器,还提供派生类方法
    /// </summary>
    public abstract class BaseController : Controller
    {
        // GET: Base

        protected Model.UserInfo UserInfo => Session["UserInfo"] as Model.UserInfo;
        /// <summary>
        /// 数据库操作上下文
        /// </summary>
        protected ModelContext Context => ModelContext.Current;

        /// <summary>
        /// 判断是否登录 没有登录强跳转登录界面
        /// </summary>
        /// <param name="filterContext"></param>
        protected override void OnActionExecuted(ActionExecutedContext filterContext)
        {
            if (UserInfo == null && filterContext.ActionDescriptor.ActionName.ToLower()!="login")
            {
                filterContext.HttpContext.Response.Redirect("/Admin/Home/Login",true);
            }

            base.OnActionExecuted(filterContext);
        }
    }
}
下面是UserInfo类就是一个ID、用户名、密码
using Qwit.ORM;

namespace WyMVCLigerUIDemo20180626.Model
{
    /// <summary>
    /// 管理员信息
    /// </summary>
    [Table("User")]
    public class UserInfo:ITablesCreateCompleted
    {

        public int Id { get; set; }

        public string Name { get; set; }

        public string Pass { get; set; }
        /// <summary>
        ///
        /// </summary>
        /// <param name="context"></param>
        public void OnTablesCreated(EntityContext context)
        {
            //创建表的时候调用此方法,用于创建视图和默认数据


        }
    }
}
3、在区域Areas里面的Admin下的控制器Controller新建一个控制器Home。Home作为后台的首页,Login是登陆界面并添加相应的视图
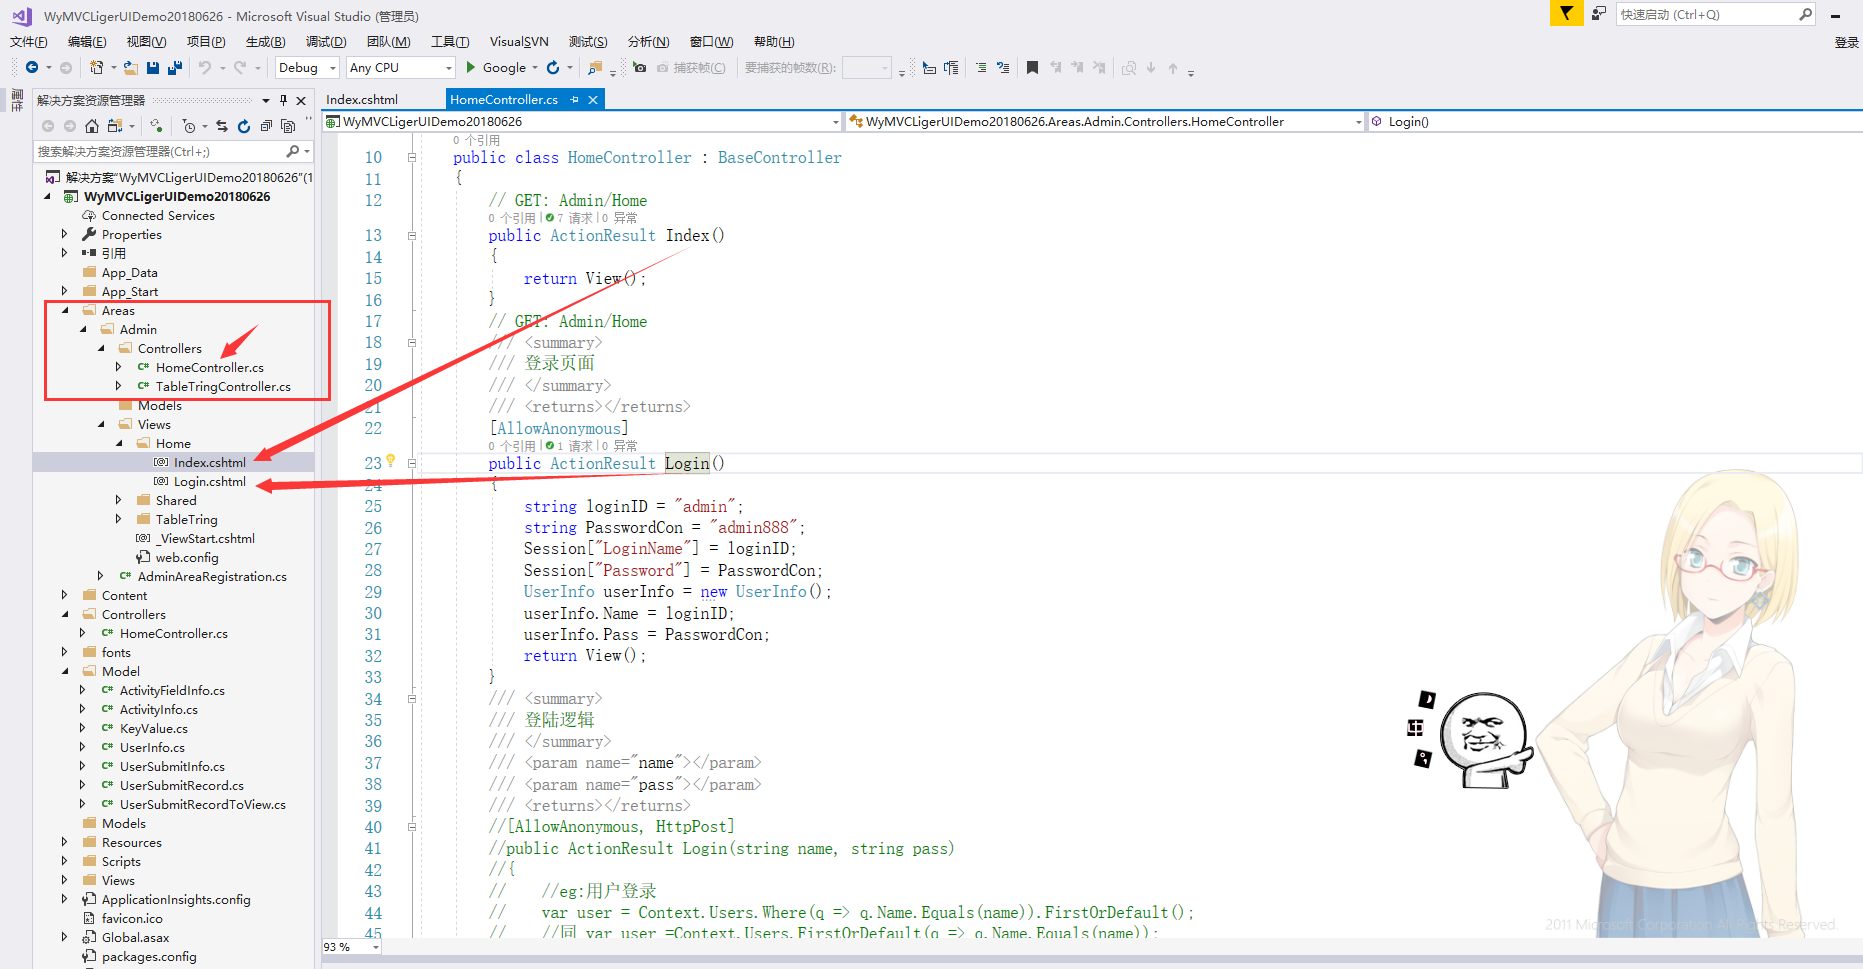
下面是后台Home控制器中的代码
using System;
using System.Collections.Generic;
using System.Linq;
using System.Web;
using System.Web.Mvc;
using WyMVCLigerUIDemo20180626.Model;

namespace WyMVCLigerUIDemo20180626.Areas.Admin.Controllers
{
    public class HomeController : BaseController
    {
        // GET: Admin/Home
        public ActionResult Index()
        {
            return View();
        }
        // GET: Admin/Home
        /// <summary>
        /// 登录页面
        /// </summary>
        /// <returns></returns>
        [AllowAnonymous]
        public ActionResult Login()
        {
            string loginID = "admin";
            string PasswordCon = "admin888";
            Session["LoginName"] = loginID;
            Session["Password"] = PasswordCon;
            UserInfo userInfo = new UserInfo();
            userInfo.Name = loginID;
            userInfo.Pass = PasswordCon;
            return View();
        }
        /// <summary>
        /// 登陆逻辑
        /// </summary>
        /// <param name="name"></param>
        /// <param name="pass"></param>
        /// <returns></returns>
        //[AllowAnonymous, HttpPost]
        //public ActionResult Login(string name, string pass)
        //{
        //    //eg:用户登录
        //    var user = Context.Users.Where(q => q.Name.Equals(name)).FirstOrDefault();
        //    //同 var user =Context.Users.FirstOrDefault(q => q.Name.Equals(name));

        //    //推荐采用异步操作,即
        //    //var user =await Context.Users.FirstOrDefaultAsync(q => q.Name.Equals(name));

        //    if (user != null)
        //    {
        //        if (user.Pass.Equals(pass))
        //        {
        //            //密码正确,登陆成功
        //        }
        //    }


        //    return Json(new Models.AjaxResult { Result = true });
        //}
        [HttpPost]
        public ActionResult LoginTow()
        {


            string namelogin = Request["txtName"].ToString();
            string pass = Request["txtPass"].ToString();
            if (Session["LoginName"].ToString() == namelogin && Session["Password"].ToString() == pass)
            {
                var user = new UserInfo() { Name = namelogin, Pass = pass };
                Session["UserInfo"] = user;
                return Content("SU");


            }
            else
            {
                return Content("ER");
            }

        }
    }
}
Login是对应的登录视图 里面设置的Session,登录的账号密码,这里是写死的没有链接数据库,怕写的多以后再补上,LoginTow这个是登陆方法 前台Ajax请求的地址,看得到返回的不是View是一些文本 登录成功失败都返回相应的字符。下面是登陆界面
<!DOCTYPE html>
<html>
<head>
    <meta name="viewport" content="width=device-width" />
    <title>管理员登录</title>
    <link href="/resources/bootstrap/css/bootstrap.css" rel="stylesheet" type="text/css" />
    <link href="/resources/dropkick/dropkick.css" rel="stylesheet" type="text/css" />
    <link href="/resources/easyui/easyui.css" rel="stylesheet" type="text/css" />
    <link href="/resources/css/default.css" rel="stylesheet" type="text/css" />
    <link href="/resources/css/themes.css" rel="stylesheet" type="text/css" />
    <script src="/resources/js/jquery.1.11.3.min.js"></script>
    <script src="/resources/bootstrap/js/bootstrap.min.js"></script>
    <script src="/resources/dropkick/jquery.dropkick-min.js"></script>
    <script src="/resources/easyui/jquery.easyui.min.js"></script>
    <script src="/resources/js/pop.js"></script>
    <script src="/resources/js/myfunctions.js"></script>
    <script src="/resources/js/frame.js"></script>
    <script src="/resources/js/ajaxfileupload.js"></script>
    <style>
        .stymain {
             500px;
            height: 300px;
            margin: 0 auto;
            margin-top: 200px;
            border: 1px solid #808080;
            background: #eeeeee;
            padding: 5px;
            border-radius: 5px;
        }
    </style>
    <script>
        $(document).ready(function () {
            $("#btnsubmit").click(function () {
                if ($("#txtLoginID").val() == "") {
                    alert("请填写用户名!");
                    return;
                }
                if ($("#txtPassword").val() == "") {
                    alert("请输入密码!");
                    return;
                }
                $.ajax({
                    type: "POST",
                    url: "LoginTow",
                    data: {
                        txtName: $("#txtLoginID").val(),
                        txtPass: $("#txtPassword").val()
                    },
                    success: function (data) {
                        if (data = "SU") {
                            setTimeout("location.href='/Admin/Home/Index';", 500);
                            //location.href("/Home/Index");
                        }
                        if (data == "ER") {
                            alert("用户名密码错误!!");
                            return;
                        }

                    }

                });
            })
        })
    </script>
</head>
<body>
    <div class="stymain">
        <div class="section-title">管理员登录</div>
        <div class="form-horizontal">
            <div class="form-group col-sm-12">
                <label class="fg-text control-label">用户名</label>
                <div class="fg-input">
                    <input type="text" class="form-control" name="txtLoginID" id="txtLoginID" placeholder="请填写用户名">
                </div>
            </div>
            <div class="form-group col-sm-12">
                <label class="fg-text control-label">密码</label>

                <div class="fg-input">
                    <input type="password" class="form-control" name="txtPassword" id="txtPassword" placeholder="请填写密码">
                </div>
            </div>
        </div>
        <div class="form-btns">
            <button type="submit" name="btnsubmit" id="btnsubmit" class="btn btn-success"><span class="glyphicon glyphicon-ok"></span> 登录</button>
        </div>
    </div>
</body>
</html>
里面的代码通俗易懂引用的css是网上随便找了一个后台框架的css。懒得去写样式哈哈。Ajax请求后台的LoginTow方法。
4、后台首页部分
@{
    Layout = null;
}

<!DOCTYPE html>

<html>
<head>
    <meta name="viewport" content="width=device-width" />
    <title>后台界面</title>
    <link href="~/Scripts/lib/ligerUI/skins/Aqua/css/ligerui-all.css" rel="stylesheet" type="text/css" />
    <link rel="stylesheet" type="text/css" id="mylink" />
    <link rel="stylesheet" type="text/css" href="~/Scripts/homeMain.css" />
    <script src="~/Scripts/lib/jquery/jquery-1.9.0.min.js" type="text/javascript"></script>
    <script src="~/Scripts/lib/ligerUI/js/ligerui.all.js" type="text/javascript"></script>
    <script src="~/Scripts/lib/jquery.cookie.js"></script>
    <script src="~/Scripts/lib/json2.js"></script>
    <script src="~/Scripts/lib/indexdata.js"></script>
    <script src="~/Scripts/homeMain.js" type="text/javascript"></script>
    <script>
        $(function () {
            $("#l-link").on("click", function () {
                $("#l-link").css("background-color", "blue");
                $(this).css("background-color", "yellow");
            })
        });
    </script>
    @{
        string url = HttpContext.Current.Request.Url.Host;
        int url22 = HttpContext.Current.Request.Url.Port;
        string UrlOK = "http:"+url+"/"+url22+ "/TableTring/index";

    }
</head>
<body style="padding:0px;background:#EAEEF5;">
    <div id="pageloading"></div>
    <div id="topmenu" class="l-topmenu">
        <div style="text-align:center;">
            <h1>XXX后台管理系统</h1>
        </div>
    </div>
    <div id="layout1" style="99.2%; margin:0 auto; margin-top:4px; ">
        <div position="left" title="菜单列表" id="accordion1">
            <div title="菜单一">
                <a class="l-link" href="javascript:f_addTab('1','表格分页','http://localhost:62545/Admin/TableTring/index')">表格分页</a>
                <a class="l-link" href="javascript:f_addTab('2','1子菜单二','http://www.cnblogs.com/w5942066/')">1子菜单二好</a>
                <a class="l-link" href="javascript:f_addTab('3','1子菜单三','http://localhost:62545/Admin/TableTring/index')">1子菜单三很好</a>
                <a class="l-link" href="javascript:f_addTab('4','1子菜单四','http://localhost:62545/Admin/TableTring/index')">1子菜单四相当好</a>
            </div>
            <div title="菜单二">
                <a class="l-link" href="javascript:f_addTab('5','2子菜单一','http://localhost:62545/Admin/TableTring/index')">2子菜单一</a>
                <a class="l-link" href="javascript:f_addTab('6','2子菜单二','http://localhost:62545/Admin/TableTring/index')">2子菜单二</a>
                <a class="l-link" href="javascript:f_addTab('7','2子菜单三','http://localhost:62545/Admin/TableTring/index')">2子菜单三</a>
                <a class="l-link" href="javascript:f_addTab('8','2子菜单四','http://localhost:62545/Admin/TableTring/index')">2子菜单四</a>
            </div>
            <div title="菜单三">
                <a class="l-link" href="javascript:f_addTab('9','3子菜单一',' http://localhost:62545/Admin/TableTring/index')">3子菜单一</a>
                <a class="l-link" href="javascript:f_addTab('10','3子菜单二','http://localhost:62545/Admin/TableTring/index')">3子菜单二</a>
                <a class="l-link" href="javascript:f_addTab('11','3子菜单三','http://localhost:62545/Admin/TableTring/index')">3子菜单三</a>
                <a class="l-link" href="javascript:f_addTab('12','3子菜单四','http://localhost:62545/Admin/TableTring/index')">3子菜单四</a>
            </div>
            <div title="菜单四">
                <a class="l-link" href="javascript:f_addTab('13','4子菜单一','http://localhost:62545/Admin/TableTring/index')">4子菜单一</a>
                <a class="l-link" href="javascript:f_addTab('14','4子菜单二','http://localhost:62545/Admin/TableTring/index')">4子菜单二</a>
                <a class="l-link" href="javascript:f_addTab('15','4子菜单三','http://localhost:62545/Admin/TableTring/index')">4子菜单三</a>
                <a class="l-link" href="javascript:f_addTab('16','4子菜单四','http://localhost:62545/Admin/TableTring/index')">4子菜单四</a>
            </div>
        </div>
        <div position="center" id="framecenter">
            <div tabid="home" title="我的主页">
                @*<iframe frameborder="0" name="home" id="home" >*@
                @*</iframe>*@
                <div tabid="home" title="我的主页">
                    <iframe frameborder="0" name="home" id="home" src="http://www.cnblogs.com/w5942066/"></iframe>
                </div>
            </div>
        </div>

    </div>
    <div style="height:32px; line-height:32px; text-align:center;">
        <h4>版权信息!Admin Test  Copyright © 2011-2014</h4>
    </div>
    <div style="display:none"></div>
</body>
</html>
里面的HomeMain的js跟css文件是里面原有的样式跟js,为了页面清爽我单独拿了出来。里面LigerUI所需要的js都要添加,我是把下载下来的LigerUI里面Source文件夹下面的Lib文件直接拷贝到项目中的Script文件夹下面。
HomeMain的css跟js写在Script文件夹下面 ,还要把里面的一个图片拷贝进来不然运行的时候回报错(不是什么大错就是找不到加载中这个图片的路径)。首页布局里面很清楚的看得出来上、左右,下(版权)。<div tabid="home" title="我的主页">这个下面写的是默认的界面 不可以被关闭。
可以是html文件 也可以外接一个连接。接互联网上的网址 有时出来 有时候出不来 一般都是不允许的,框架里面是不允许显示别的网址里面的东西(要是可以那这个框架岂不是跟浏览器一样了哈哈)。里面的菜单可以写死 也可以保存在数据库里面后台获取拼接出来看个人的爱好。
里面的菜单所对应的界面想列表页面都是访问的url+端口+Admin+控制器+方法 这里不要忘记了加Admin我弄的时候就是没有加上Admin给我找了一晚上的错误,案例手里面写上@UrlOK也应该可以 但是路径前面会加上以前的Url这里下来还要研究一下。

HomeMain.js
var tab = null;
var accordion = null;
var tree = null;
var tabItems = [];
$(function () {
    //布局
    $("#layout1").ligerLayout({
        leftWidth: 190,
        height: '100%',
        heightDiff: -34,
        space: 0,
        onHeightChanged: f_heightChanged,
        onLeftToggle: function () {
            tab && tab.trigger('sysWidthChange');
        },
        onRightToggle: function () {
            tab && tab.trigger('sysWidthChange');
        }
    });

    var height = $(".l-layout-center").height();

    //Tab
    tab = $("#framecenter").ligerTab({
        height: height,
        showSwitchInTab: true,
        showSwitch: true,
        onAfterAddTabItem: function (tabdata) {
            tabItems.push(tabdata);
            saveTabStatus();
        },
        onAfterRemoveTabItem: function (tabid) {
            for (var i = 0; i < tabItems.length; i++) {
                var o = tabItems[i];
                if (o.tabid == tabid) {
                    tabItems.splice(i, 1);
                    saveTabStatus();
                    break;
                }
            }
        },
        onReload: function (tabdata) {
            var tabid = tabdata.tabid;
        }
    });

    //面板
    $("#accordion1").ligerAccordion({
        height: height - 24, speed: null
    });

    $(".l-link").hover(function () {
        $(this).addClass("l-link-over");
    }, function () {
        $(this).removeClass("l-link-over");
    });
    //树
    //$("#tree1").ligerTree({
    //    data: indexdata,
    //    checkbox: false,
    //    slide: false,
    //    nodeWidth: 120,
    //    attribute: ['nodename', 'url'],
    //    render: function (a) {
    //        if (!a.isnew) return a.text;
    //        return '<a href="' + a.url + '" target="_blank">' + a.text + '</a>';
    //    },
    //    onSelect: function (node) {
    //        if (!node.data.url) return;
    //        if (node.data.isnew) {
    //            return;
    //        }
    //        var tabid = $(node.target).attr("tabid");
    //        if (!tabid) {
    //            tabid = new Date().getTime();
    //            $(node.target).attr("tabid", tabid)
    //        }
    //        f_addTab(tabid, node.data.text, node.data.url);
    //    }
    //});

    function openNew(url) {
        var jform = $('#opennew_form');
        if (jform.length == 0) {
            jform = $('<form method="post" />').attr('id', 'opennew_form').hide().appendTo('body');
        } else {
            jform.empty();
        }
        jform.attr('action', url);
        jform.attr('target', '_blank');
        jform.trigger('submit');
    };


    tab = liger.get("framecenter");
    accordion = liger.get("accordion1");
    tree = liger.get("tree1");
    $("#pageloading").hide();

    css_init();
    pages_init();
});
function f_heightChanged(options) {
    if (tab)
        tab.addHeight(options.diff);
    if (accordion && options.middleHeight - 24 > 0)
        accordion.setHeight(options.middleHeight - 24);
}
function f_addTab(tabid, text, url) {
    tab.addTabItem({
        tabid: tabid,
        text: text,
        url: url,
        callback: function () {
            //addShowCodeBtn(tabid);
        }
    });
}
//function addShowCodeBtn(tabid) {
//    var viewSourceBtn = $('<a class="viewsourcelink" href="javascript:void(0)">查看源码</a>');
//    var jiframe = $("#" + tabid);
//    viewSourceBtn.insertBefore(jiframe);
//    viewSourceBtn.click(function () {
//        showCodeView(jiframe.attr("src"));
//    }).hover(function () {
//        viewSourceBtn.addClass("viewsourcelink-over");
//    }, function () {
//        viewSourceBtn.removeClass("viewsourcelink-over");
//    });
//}
function showCodeView(src) {
    $.ligerDialog.open({
        title: '源码预览',
        url: 'dotnetdemos/codeView.aspx?src=' + src,
         $(window).width() * 0.9,
        height: $(window).height() * 0.9
    });

}

function pages_init() {
    var tabJson = $.cookie('liger-home-tab');
    if (tabJson) {
        var tabitems = JSON2.parse(tabJson);
        for (var i = 0; tabitems && tabitems[i]; i++) {
            f_addTab(tabitems[i].tabid, tabitems[i].text, tabitems[i].url);
        }
    }
}
function saveTabStatus() {
    $.cookie('liger-home-tab', JSON2.stringify(tabItems));
}
function css_init() {
    var css = $("#mylink").get(0), skin = getQueryString("skin");
    $("#skinSelect").val(skin);
    $("#skinSelect").change(function () {
        if (this.value) {
            location.href = "index.htm?skin=" + this.value;
        } else {
            location.href = "index.htm";
        }
    });


    if (!css || !skin) return;
    skin = skin.toLowerCase();
    $('body').addClass("body-" + skin);
    $(css).attr("href", skin_links[skin]);
}
function getQueryString(name) {
    var now_url = document.location.search.slice(1), q_array = now_url.split('&');
    for (var i = 0; i < q_array.length; i++) {
        var v_array = q_array[i].split('=');
        if (v_array[0] == name) {
            return v_array[1];
        }
    }
    return false;
}
function attachLinkToFrame(iframeId, filename) {
    if (!window.frames[iframeId]) return;
    var head = window.frames[iframeId].document.getElementsByTagName('head').item(0);
    var fileref = window.frames[iframeId].document.createElement("link");
    if (!fileref) return;
    fileref.setAttribute("rel", "stylesheet");
    fileref.setAttribute("type", "text/css");
    fileref.setAttribute("href", filename);
    head.appendChild(fileref);
}
function getLinkPrevHref(iframeId) {
    if (!window.frames[iframeId]) return;
    var head = window.frames[iframeId].document.getElementsByTagName('head').item(0);
    var links = $("link:first", head);
    for (var i = 0; links[i]; i++) {
        var href = $(links[i]).attr("href");
        if (href && href.toLowerCase().indexOf("ligerui") > 0) {
            return href.substring(0, href.toLowerCase().indexOf("lib"));
        }
    }
}
f_addTab这个方法就是点击左边,内容在右边显示 调用的时候 <a class="l-link" href="javascript:f_addTab('1','表格分页','http://localhost:62545/Admin/TableTring/index')">表格分页</a>这是在框架里面显示。要在外面显示
  body,html{height:100%;}
    body{ padding:0px; margin:0;   overflow:hidden;}
    .l-link{ display:block; height:26px; line-height:26px; padding-left:10px; text-decoration:none; color:#333; list-style:none; border-bottom: 1px dashed #d2d2d2;}
    .l-link2{text-decoration:underline; color:white; margin-left:2px;margin-right:2px;}
    .l-layout-top{background:#102A49; color:White;}
    .l-layout-bottom{ background:#E5EDEF; text-align:center;}
    #pageloading{position:absolute; left:0px; top:0px; background:white url('loading.gif') no-repeat center; width:100%; height:100%;z-index:99999;}
    .l-link{ display:block; line-height:22px; height:22px; padding-left:16px; margin:4px;}
    .l-link-over{ background:#a5fcfe;}
    .l-winbar{ background:#2B5A76; height:30px; position:absolute; left:0px; bottom:0px; width:100%; z-index:99999;}
    .space{ color:#E7E7E7;}
    /* 顶部 */
    .l-topmenu{ margin:0; padding:0; height:31px; line-height:31px; background:url('lib/images/top.jpg') repeat-x bottom;  position:relative; border-top:1px solid #1D438B;  }
    .l-topmenu-logo{ color:#E7E7E7; padding-left:35px; line-height:26px;background:url('lib/images/topicon.gif') no-repeat 10px 5px;}
    .l-topmenu-welcome{  position:absolute; height:24px; line-height:24px;  right:30px; top:2px;color:#070A0C;}
    .l-topmenu-welcome a{ color:#E7E7E7; text-decoration:underline}
    .body-gray2014 #framecenter{margin-top:3px;}
    .viewsourcelink { background:#B3D9F7;  display:block; position:absolute; right:10px; top:3px; padding:6px 4px; color:#333; text-decoration:underline;}
    .viewsourcelink-over {   background:#81C0F2;}
    .l-topmenu-welcome label {color:white;  }
    #skinSelect { margin-right: 6px;}
里面有鼠标点击菜单的效果看个人爱好去调。
5、现在的路由还是前台的首页 要写了跳转到后台打开App_Start目录下的RouteConfig文件配置路由
using System;
using System.Collections.Generic;
using System.Linq;
using System.Web;
using System.Web.Mvc;
using System.Web.Routing;

namespace WyMVCLigerUIDemo20180626
{
    public class RouteConfig
    {
        public static void RegisterRoutes(RouteCollection routes)
        {
            routes.IgnoreRoute("{resource}.axd/{*pathInfo}");

            routes.MapRoute(
                name: "Default",
                url: "{controller}/{action}/{id}",
                defaults: new { controller = "Home", action = "Index", id = UrlParameter.Optional },
                 //namespaces: new[] { "WyMVCLigerUIDemo20180626.Areas.Admin.Controllers" }    //默认进入后台
                 namespaces: new[] { "WyMVCLigerUIDemo20180626.Controllers" }//默认前台
            );
        }
    }
}
我这里是先进入前台,再在前台网址里面加上/Admin 就能进入到后台,所以还要配置一下Areas区域下面Admin中的AdminAreaRegistration文件
using System.Web.Mvc;

namespace WyMVCLigerUIDemo20180626.Areas.Admin
{
    public class AdminAreaRegistration : AreaRegistration
    {
        //public override string AreaName
        //{
        //    get
        //    {
        //        return "Admin";
        //    }
        //}
        public override string AreaName => "Admin";
        public override void RegisterArea(AreaRegistrationContext context)
        {
            context.MapRoute(
                "Admin_default",
                "Admin/{controller}/{action}/{id}",
                new { controller = "Home", action = "Index", id = UrlParameter.Optional },
                 new[] { "WyMVCLigerUIDemo20180626.Areas.Admin.Controllers" } //这一句要加上
            );
        }
    }
}
为了进去能正常先把字面自带的模板去了 不要用
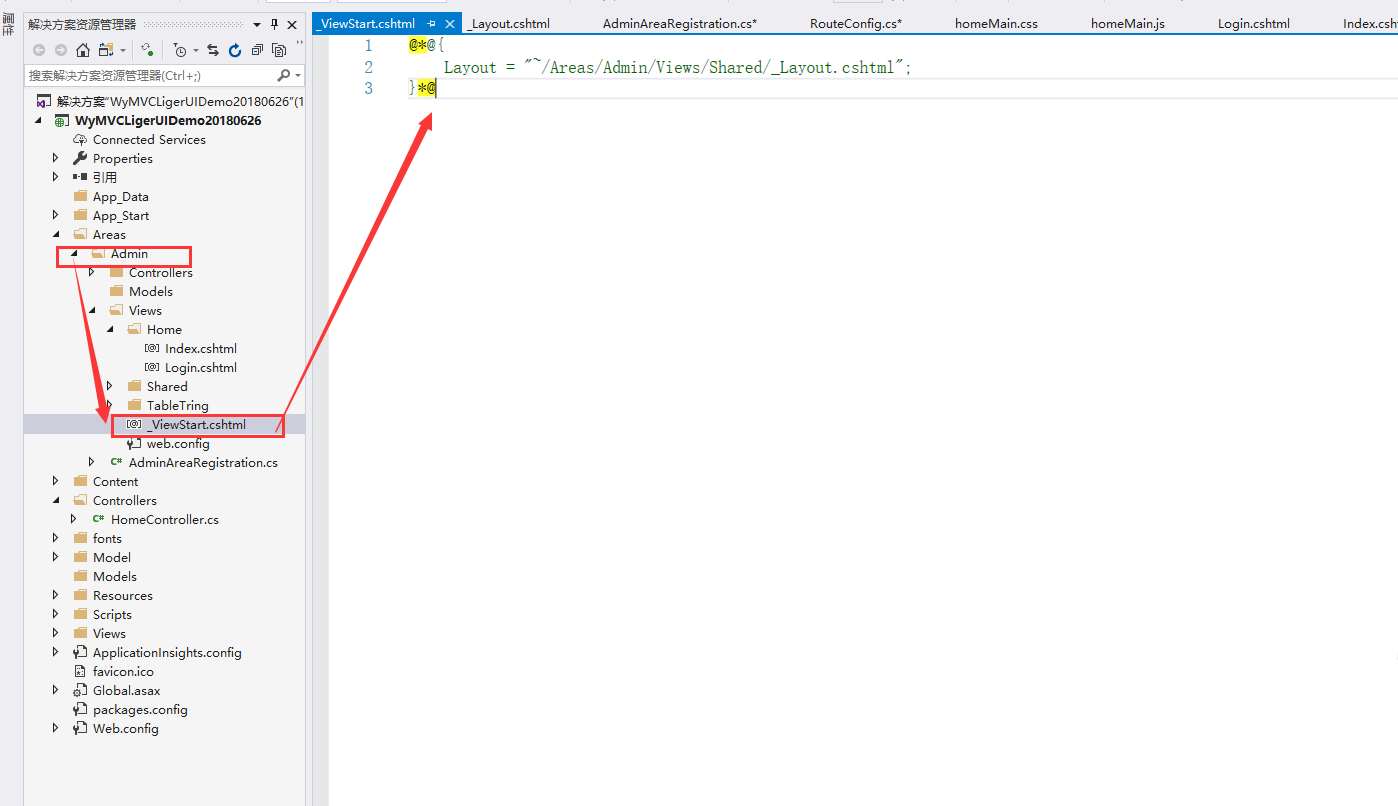
注释了或者删除了就可以,前台页面配置跟路由中的一样就可以 默认控制器Home 页面Index。一样的吧Views下面的_ViewStart.cshtml文件注释了

6、运行项目
在地址栏后面加上/Admin进入后台 写了登录验证跳转登录界面
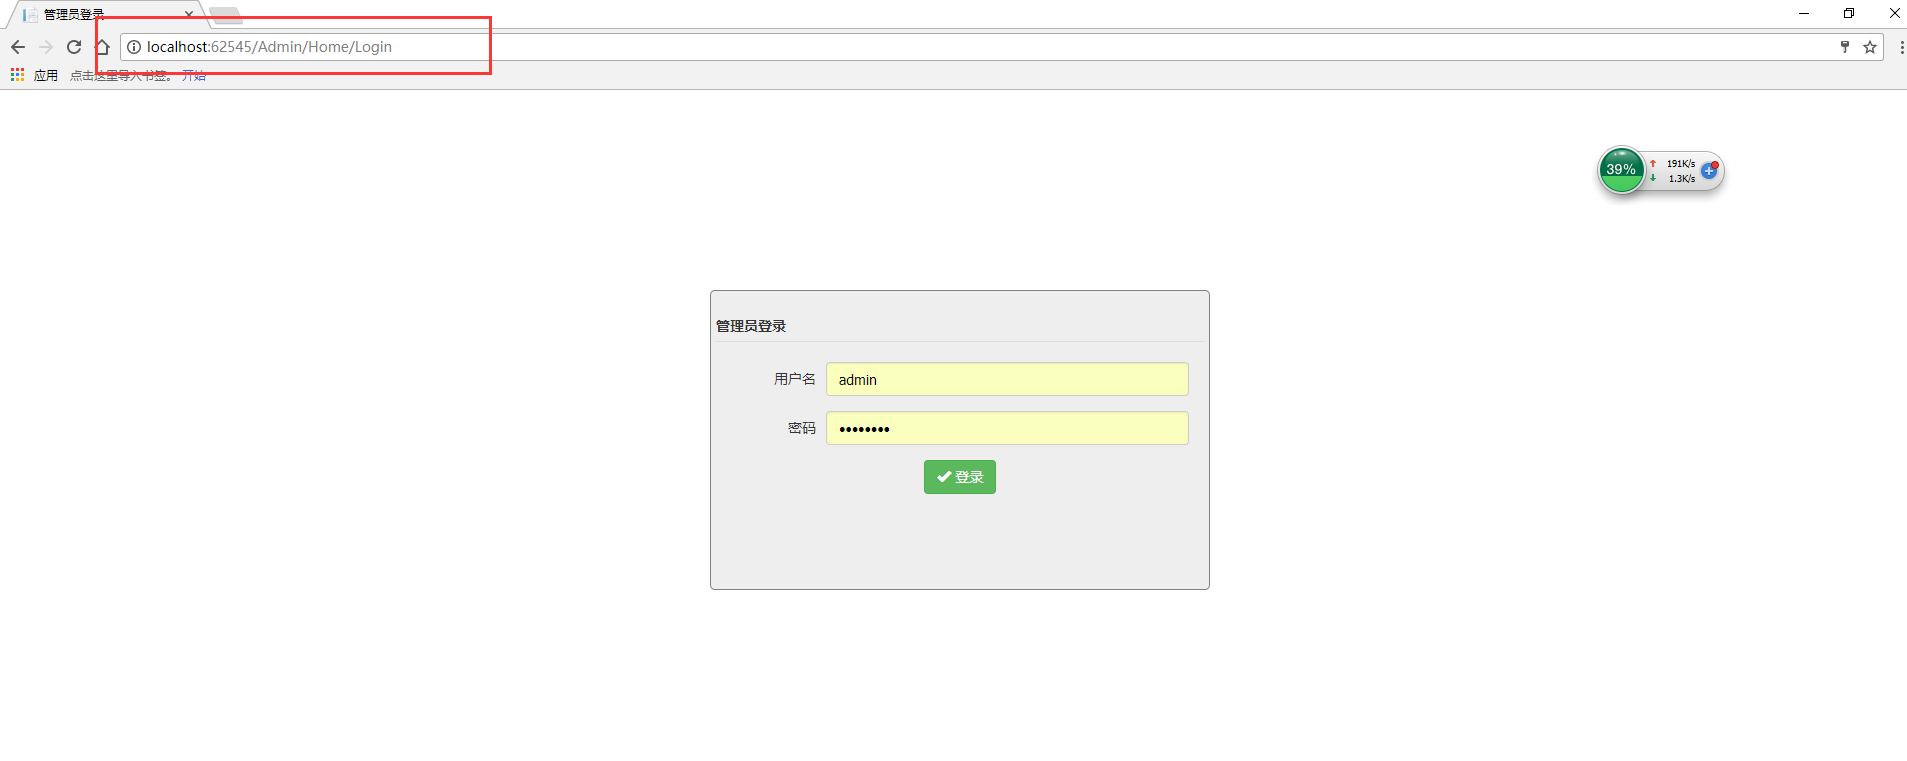
你加了/Admin后面进入到登录界面会补全的用户admin密码admin888在后台Home界面是写好了的

看分页信息

7、更改JS样式让菜单列表不充满整个左边
开始的时候界面是这个样子的

他是填充满整个左边的菜单 个人看着不舒服 左找右找才知道是JS的问题

在网页调了半天才知道是这个控制 在里面liger.all.js里面查找l-accordion-content 找到1760行把里面这个要么把前面的点删除了 要么后面加上一点内容不让他控制l-accordion-content这个样式。注视了不行会出错 还在查找中。