.NET/C# 程序从 Main 函数开始执行,基本上各种书籍资料都是这么写的。不过,我们可以写多个 Main 函数,然后在项目文件中设置应该选择哪一个 Main 函数。
你可能会觉得这样没有什么用,不过如果你的应用程序在不同的编译条件下有不同的启动代码,或者你需要持续去大范围修改启动代码,那么做一个 Main 函数的选择器是一个不错的选择。
在哪里选择 Main?
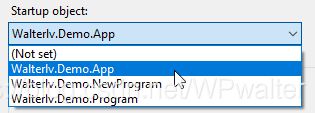
在带有 Main 函数的项目上 “右键 -> 属性 -> 应用 -> 启动对象”,可以看到我们的 Main 函数,默认值是 “未设置”。
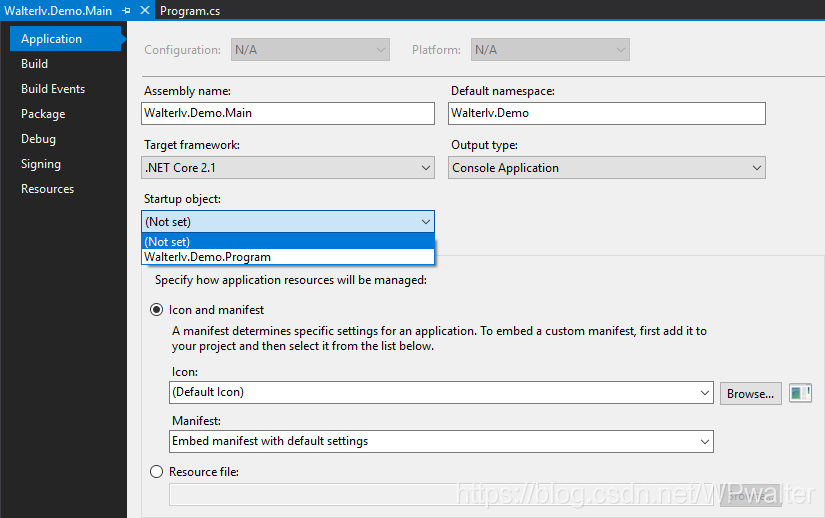
▲ 选择 Main 函数
在我们保持这个值没有设置的情况下,如果写两个 Main 函数,那么就会出现编译错误。
Error CS0017
Program has more than one entry point defined. Compile with /main to specify the type that contains the entry point.
Walterlv.Demo.Main C:UserslvyiDesktopWalterlv.Demo.MainWalterlv.Demo.MainNewProgram.cs
这时,从两个 Main 函数中选择一个就好了。
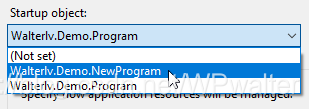
▲ 选择一个 Main 函数
我们准备一个 WPF 程序
现在,我们来一些更复杂的操作。现在把我们的项目换成一个普通的 WPF 项目。
▲ 普通 WPF 项目
把启动对象换成 Walterlv.Demo.App:
于是,我们可以启动我们的 WPF 项目。
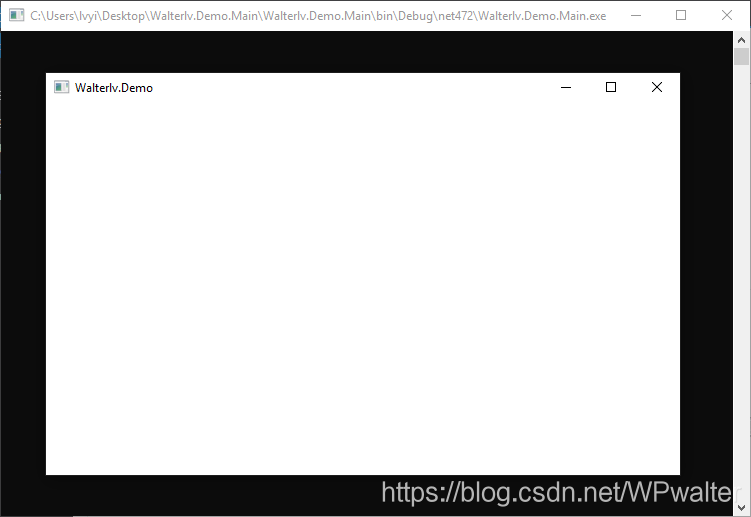
▲ 新启动的 WPF 程序
这是个 Demo 程序,代码比较简单。值得注意的是,如果使用新的 csproj 文件,其内容如下:
<Project Sdk="Microsoft.NET.Sdk">

  <PropertyGroup>
    <OutputType>Exe</OutputType>
    <TargetFramework>net472</TargetFramework>
    <LanguageTargets>$(MSBuildToolsPath)Microsoft.CSharp.targets</LanguageTargets>
    <RootNamespace>Walterlv.Demo</RootNamespace>
    <StartupObject>Walterlv.Demo.App</StartupObject>
  </PropertyGroup>

  <ItemGroup>
    <Reference Include="PresentationCore" />
    <Reference Include="PresentationFramework" />
    <Reference Include="System.Xaml" />
    <Reference Include="WindowsBase" />
  </ItemGroup>

  <ItemGroup>
    <ApplicationDefinition Include="App.xaml" SubType="Designer" Generator="MSBuild:Compile" />
    <Page Include="***.xaml" Exclude="App.xaml" SubType="Designer" Generator="MSBuild:Compile" />
    <Compile Update="***.xaml.cs" DependentUpon="%(Filename)" />
  </ItemGroup>

</Project>
你可以通过阅读 将 WPF、UWP 以及其他各种类型的旧 csproj 迁移成基于 Microsoft.NET.Sdk 的新 csproj 完成这样的新旧格式迁移。
App.xaml 中保持默认的代码即可:
<Application x:Class="Walterlv.Demo.App"
             xmlns="http://schemas.microsoft.com/winfx/2006/xaml/presentation"
             xmlns:x="http://schemas.microsoft.com/winfx/2006/xaml">
</Application>
App.xaml.cs 中的代码比较简单,就是启动一个 MainWindow:
using System.Windows;

namespace Walterlv.Demo
{
    public partial class App : Application
    {
        protected override void OnStartup(StartupEventArgs e)
        {
            var window = new MainWindow();
            window.Show();

            base.OnStartup(e);
        }
    }
}
这时,我们的 Program 和 NewProgram 还是保持之前的代码不变,因为我们的启动对象已经被设置为了 Walterlv.Demo.App,所以这里的两个 Main 函数其实并没有起作用。
根据启动对象的不同,控制不同的启动流程
现在,我们即将实现一个功能:
- 当在属性页中切换启动对象的时候,我们的启动流也能跟着改变。
具体来说,我们的 Program 启动一个 App,而 NewProgram 启动另一个 App。
于是,我们在 App.xaml.cs 之外再新建一个 App.new.xaml.cs。这两个 App 类可以共用一个 App.xaml 文件。
于是我们需要修改 csproj 的代码(以下红色表示删除的行,绿色表示新增的行):
  <Project Sdk="Microsoft.NET.Sdk">

    <PropertyGroup>
      <OutputType>Exe</OutputType>
      <TargetFramework>net472</TargetFramework>
      <LanguageTargets>$(MSBuildToolsPath)Microsoft.CSharp.targets</LanguageTargets>
      <RootNamespace>Walterlv.Demo</RootNamespace>
-     <StartupObject>Walterlv.Demo.App</StartupObject>
+     <StartupObject>Walterlv.Demo.NewProgram</StartupObject>
    </PropertyGroup>

+   <PropertyGroup Condition=" '$(StartupObject)' == 'Walterlv.Demo.Program' ">
+     <!-- 启用原启动流中的 App.xaml.cs 文件 -->
+     <AppCsPath>App.xaml.cs</AppCsPath>
+   </PropertyGroup>
+   <PropertyGroup Condition=" '$(StartupObject)' == 'Walterlv.Demo.NewProgram' ">
+     <!-- 启用新启动流中的 App.xaml.cs 文件 -->
+     <AppCsPath>App.new.xaml.cs</AppCsPath>
+   </PropertyGroup>
+
    <ItemGroup>
      <Reference Include="PresentationCore" />
      <Reference Include="PresentationFramework" />
      <Reference Include="System.Xaml" />
      <Reference Include="WindowsBase" />
    </ItemGroup>

    <ItemGroup>
      <ApplicationDefinition Include="App.xaml" SubType="Designer" Generator="MSBuild:Compile" />
      <Page Include="***.xaml" Exclude="App.xaml" SubType="Designer" Generator="MSBuild:Compile" />
      <Compile Update="***.xaml.cs" DependentUpon="%(Filename)" />

+     <!-- 删掉两个 App.xaml.cs 文件,以便后面可以重新添加 -->
+     <Compile Remove="App.xaml.cs" />
+     <Compile Remove="App.new.xaml.cs" />
+     <Compile Include="$(AppCsPath)" DependentUpon="App.xaml" SubType="Designer" />

    </ItemGroup>

  </Project>
增加的判断其实是根据 $(StartupObject) 值的不同,设置不同的 App.xaml.cs 文件与 App.xaml 文件对应。于是,我们也可以有不同的 App.xaml.cs 文件了。
比如我们的 App.new.xaml.cs 文件中的内容就与 App.xaml.cs 中的不一样。
using System.Windows;

namespace Walterlv.Demo
{
    public partial class App : Application
    {
        protected override void OnStartup(StartupEventArgs e)
        {
            var window = new MainWindow
            {
                Title = "New Walterlv Demo",
            };
            window.Show();

            base.OnStartup(e);
        }
    }
}
在新的文件中,我们修改了窗口的标题。
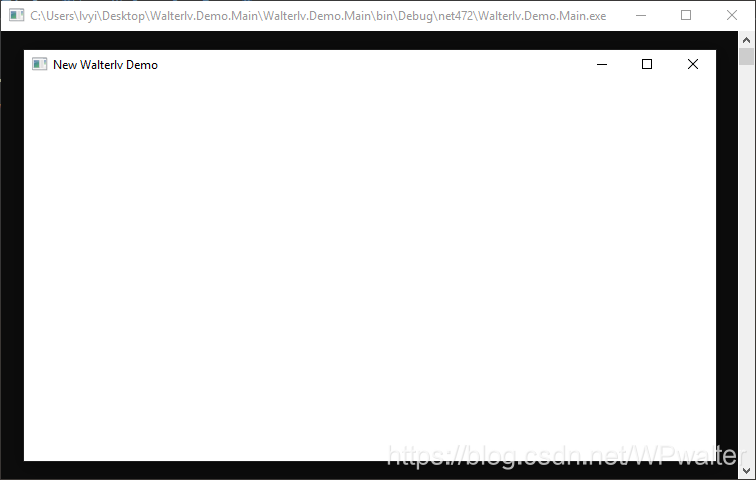
▲ 新设置的窗口标题
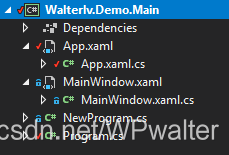
通过切换启动对象,我们的解决方案窗格中也能显示不同的 App.xaml.cs 文件。(不过需要提醒,可能需要卸载然后重新加载项目才会看到修改;否则只是能够编译通过,但看不见文件。)

▲ 可以看得见两个文件的切换
由于 window 是局部变量,所以 Main 函数中是不能修改到的。而采用了这种根据启动对象不同动态改变 App.xaml.cs 的方式解决了这个问题。
将不同的文件换成不同的条件编译符
如果你的启动流程差异并不是那么大,那么也可以使用条件编译符的定义来替代整个文件的替换。
  <PropertyGroup Condition=" '$(StartupObject)' == 'Walterlv.Demo.Program' ">
-   <AppCsPath>App.xaml.cs</AppCsPath>
+   <DefineConstants>$(DefineConstants);OLD</DefineConstants>
  </PropertyGroup>
  <PropertyGroup Condition=" '$(StartupObject)' == 'Walterlv.Demo.NewProgram' ">
-   <AppCsPath>App.new.xaml.cs</AppCsPath>
+   <DefineConstants>$(DefineConstants);NEW</DefineConstants>
  </PropertyGroup>
这时,可以通过条件编译符来控制新旧启动代码:
    using System.Windows;

    namespace Walterlv.Demo
    {
        public partial class App : Application
        {
            protected override void OnStartup(StartupEventArgs e)
            {
                var window = new MainWindow()
+   #if NEW
                {
                    Title = "New Walterlv Demo",
                };
+   #endif
                window.Show();

                base.OnStartup(e);
            }
        }
    }