上篇随笔中我们看到在restframework.views的dispatch是请求的处理入口,里面先是通过initialize_request将request进行封装,封装后的request不仅仅有原先的request,还有解析器,认证,以及渲染。
- 认证
authenticators=self.get_authenticators()
看get_authenticators干了什么:

明显的列表推导式 self.authentication_classes:

这是APIView的属性,很熟悉吧?因为几乎使用restframework的项目中几乎都会在项目的setting.py文件中配置它,比如:
<wiz_code_mirror>
7
1
REST_FRAMEWORK = {
2
'DEFAULT_AUTHENTICATION_CLASSES': (
3
'rest_framework_jwt.authentication.JSONWebTokenAuthentication',
4
'rest_framework.authentication.SessionAuthentication',
5
'rest_framework.authentication.BasicAuthentication',
6
)
7
}
容易理解,默认是读取项目setting.py的文件,dispatch中initialize_request将找到的验证器封装到request对象中,接下来
执行了initial方法


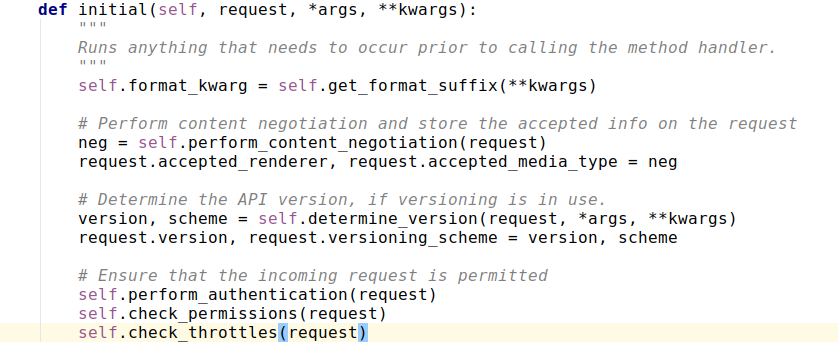
self.perform_authentication(request) 负责进行验证:
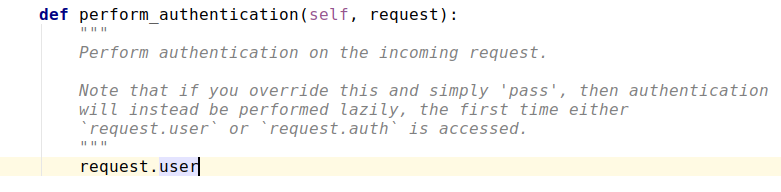

执行了request.user:


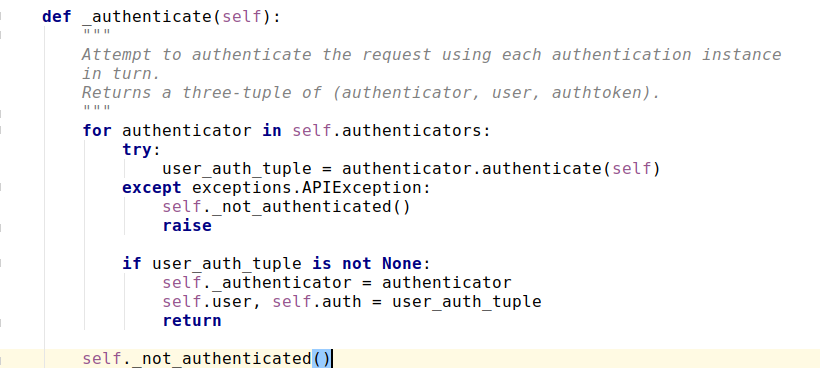
这里我们看到实际调用了self._authenticate()

解释:
- for authenticator in self.authenticators:
通过遍历找到我们的认证器 - user_auth_tuple = authenticator.authenticate(self)
执行认证器的authenticate(self)方法 所以在认证器中必须实现这个方法 返回值是一个元组
- except exceptions.APIException: self._not_authenticated() raise
如果认证类出现异常,就抛出这个异常,认证失败
- if user_auth_tuple is not None:
self._authenticator = authenticator
self.user, self.auth = user_auth_tuple
return
验证通过,将user_auth_tuple的两个元素分别赋值给request的user和auth
- self._not_authenticated()

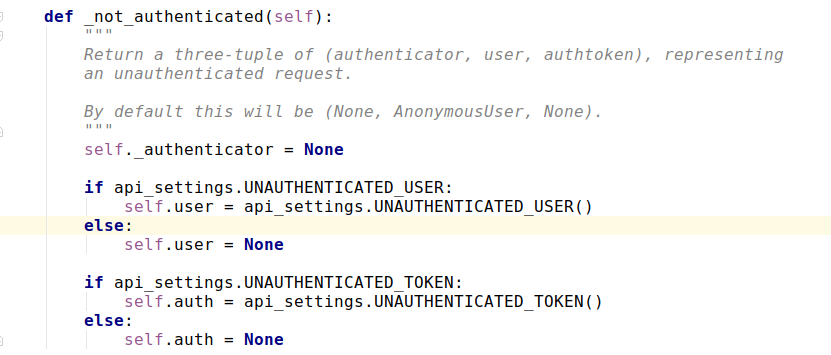
如果所有的认证器都没抛出异常,且返回值都是None,就执行这个函数,也就也是匿名用户,可在seeting.py中配置
既然我们的CBV是继承于APIView,那自然就可以在函数中定义DEFAULT_AUTHENTICATION_CLASSES,并编写我们自己的认证方式:
11
1
from rest_framework.exceptions import AuthenticationFailed
2
class MyAuthentication(object):
3
# authenticate authenticate_header 两个方法是必须有的,authenticate用来写我们自己的认证方式,authenticate_header直接写pass就行,不写会抛错,缺少authenticate_header方法
4
def authenticate(self, request):
5
self.token = request._request.GET.get('token')
6
if not self.token:
7
raise AuthenticationFailed('用户认证失败') # 如果认证失败,就抛出一个AuthenticationFailed异常
8
return ('wbj', self.token) # 如果认证通过,就行返回一个元组,第一个元素是用户身份(user),第二个是auth
9
10
def authenticate_header(self, request): # 如果不想写这个方法,可以让MyAuthentication继承于rest_framework.authentication.BaseAuthentication
11
pass
使用MyAuthentication进行身份认证:
x
1
class Book(APIView):
2
authentication_classes = [MyAuthentication, ]
3
4
def dispatch(self, request, *args, **kwargs):
5
return super().dispatch(request, *args, **kwargs)
6
7
def get(self, request):
8
# get a book
9
return HttpResponse(json.dumps({'code': '20000'}))
10
11
def post(self, request):
12
return HttpResponse(json.dumps({'code': '20000'}))
13
14
def put(self, request):
15
# update a book
16
return HttpResponse(json.dumps({'code': '20000'}))
17
18
def delete(self, request):
19
# delete a book
20
return HttpResponse(json.dumps({'code': '20000'}))
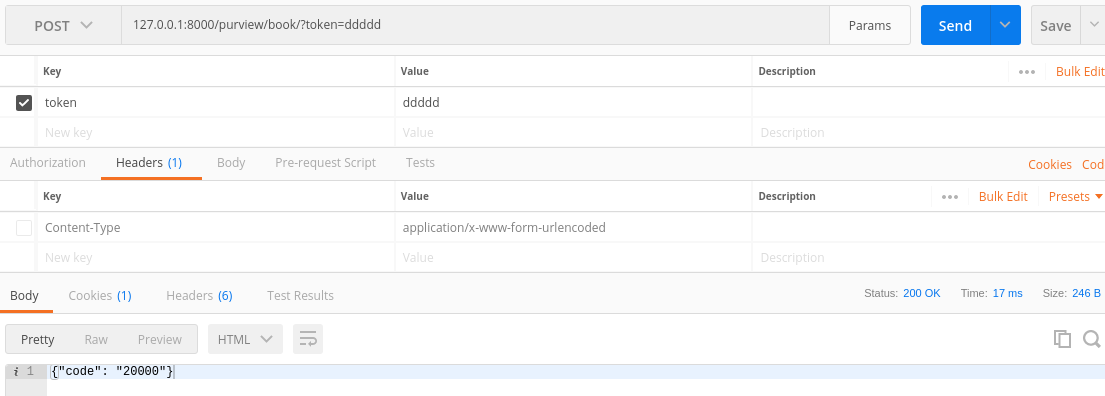
进行测试:
带token请求


不带token请求