对于@ConfigurationProperties注解默认加载全局的配置文件,但是如果所有的配置信息都写在全局的配置文件中就会很臃肿,所以需要自定义配置文件和使用@PropertiesSource注解来加载指定的配置文件。
@PropertiesSource:加载指定的配置文件
自定义一个配置文件person.properties
person.lastName=叶秋
person.age=19
person.birth=2019/10/1
person.boss=true
person.maps.k1=v1
person.maps.k2=v2
person.lists=a,b,c
person.dog.name=dog
person.dog.age=2
加上@PropertiesSource注解
@Component
@PropertySource(value = "classpath:person.properties")
@ConfigurationProperties(prefix = "person")
//@Validated
public class Person {
    private String lastName;
    ... get set toString()
}
依然运行单元测试
@RunWith(SpringRunner.class)
@SpringBootTest
public class SpringBoot02ConfigApplicationTests {
    @Autowired
    Person mPerson;
    @Test
    public void contextLoads() {
        System.out.println(mPerson);
    }
}
可以看到结果:

同时:
@PropertySource(value = "classpath:person.properties")
@ConfigurationProperties(prefix = "person")
这两个注解都要加上,并且优先加载全局配置文件信息,当在全局配置文件中不存在时,才会加载自定义的配置文件。
优先级:properties > yml > 自定义的配置文件
@ImportResource:导入Spring的配置文件
Spring Boot中没有Spring的配置文件,自己编写的配置文件无法自动识别,所以需要在配置类上使用@ImportResource注解让配置文件生效。
比如创建一个HelloService类,编写beans.xml配置文件:
<?xml version="1.0" encoding="UTF-8"?>
<beans xmlns="http://www.springframework.org/schema/beans"
       xmlns:xsi="http://www.w3.org/2001/XMLSchema-instance"
       xsi:schemaLocation="http://www.springframework.org/schema/beans http://www.springframework.org/schema/beans/spring-beans.xsd">

    <bean id="helloService" class="com.wangd.springboot02config.service.HelloService"></bean>
</beans>
想让这个bean加载进容器中,就需要@ImportResource注解:
@ImportResource(value = "classpath:beans.xml")
@SpringBootApplication
public class SpringBoot02ConfigApplication {

    public static void main(String[] args) {
        SpringApplication.run(SpringBoot02ConfigApplication.class, args);
    }

}
然后运行单元测试可以看到结果:
@Autowired
ApplicationContext ioc;

@Test
public void testHelloService(){
    System.out.println(ioc.containsBean("helloService"));
}

@Configuration
但是SpringBoot推荐的给容器添加组件的方式是使用全注解的方式:使用@Configuration和@Bean注解。
添加一个配置类,加上相应的注解:
/**
 * @Configuration 注解表明当前类是一个配置类,来代替之前的Spring的配置文件xml
 */
@Configuration
public class MyAppConfig {

    //@Bean:将方法的返回值添加到容器中,id就是方法名
    @Bean
    public HelloService helloService(){
        return new HelloService();
    }
}
然后将之前@ImportResource注解注释,运行测试方法(testHelloService)可以看到:

其他配置
1. Profile
Profile是Spring对不同环境提供不同配置功能的支持,可以通过激活,指定参数等方式快速切换环境。
格式是:application-{profile}.properties
多Profile文件
在主配置文件编写的时候,文件名可以是application-{profile}.properties/yml
假如创建了三个properties/yml文件,文件名分别是
application-dev.properties
server.port=8081
application-test.properties
server.port=8082
application.properties(默认)
server.port=8088
直接启动,会启动默认配置文件,端口为8088;
可以使用
spring.profiles.active=dev
来配置启动不同的配置文件,如上启动端口为8081。
多文档块
在yml中使用'---'可以划分文档块
server:
  port: 8088
spring:
  profiles:
    active: dev
---
server:
  port: 8089
spring:
  profiles: dev
---
server:
  port: 8082
spring:
  profiles: test  #指定属于哪个环境
需要把properties中的端口注释掉,才可以看到效果
激活指定profile的方式
- 在配置文件中指定:spring.profiles.active=dev
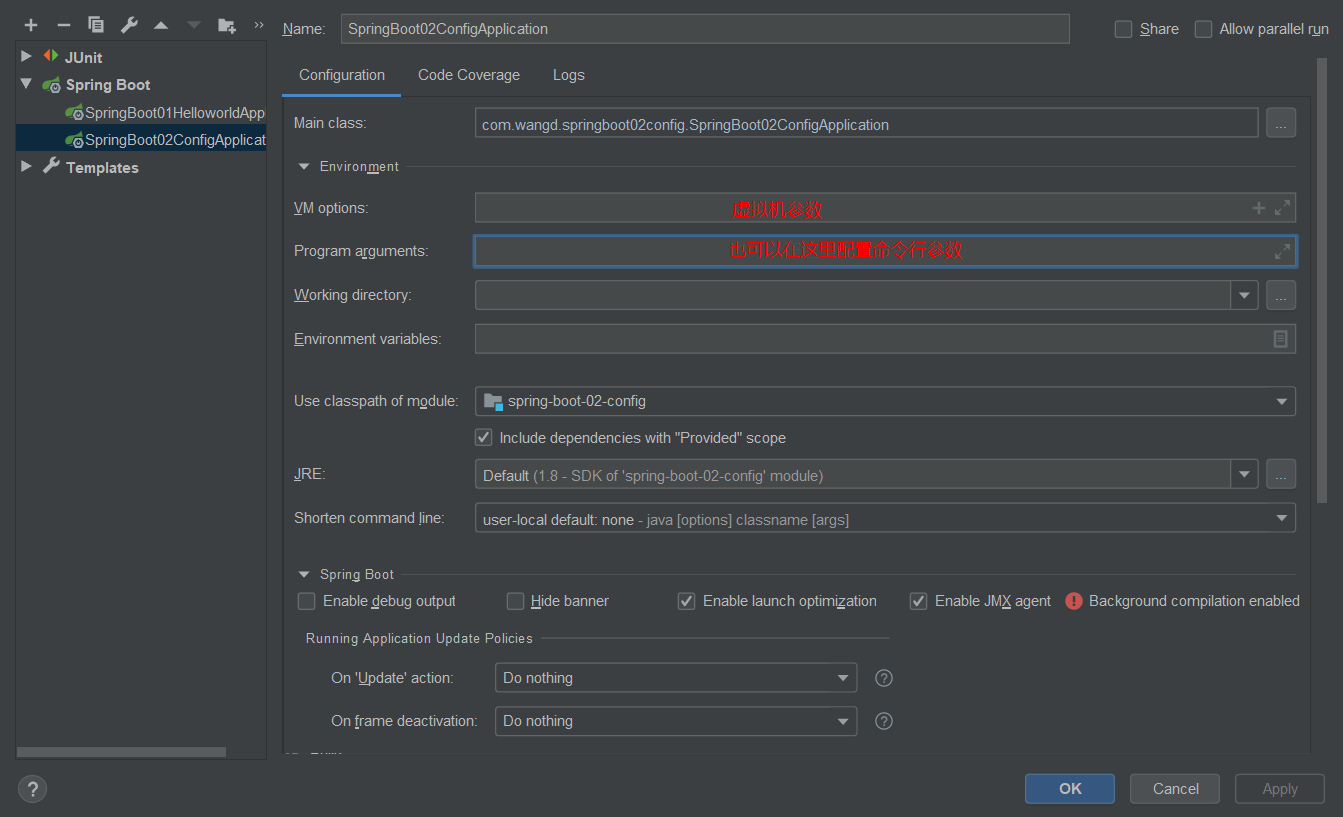
- 命令行指定:java -jar xxx.jar --spring.profiles.active=dev
- 虚拟机参数:-Dspring:profiles.active=dev
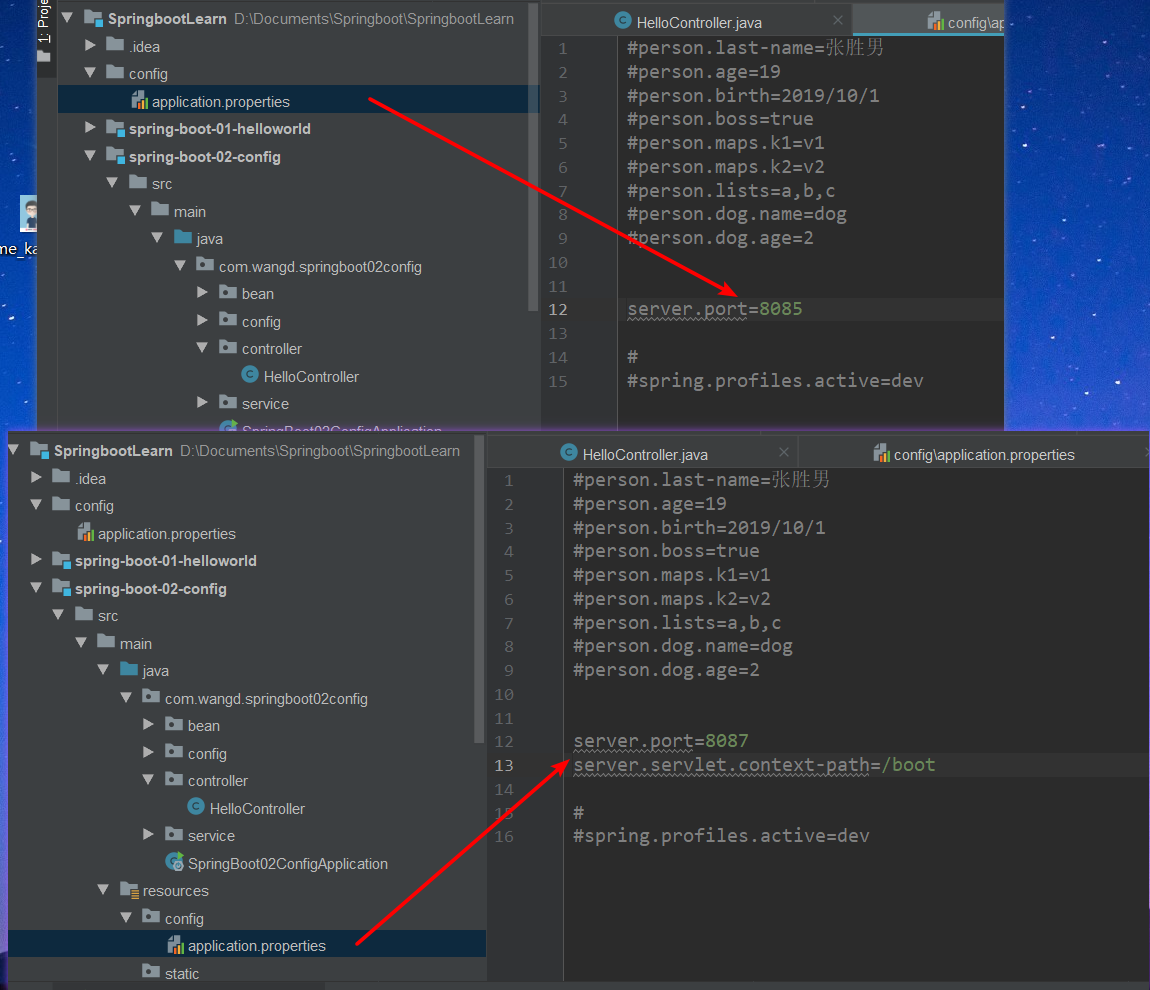
2. 配置文件加载位置
Spring Boot启动会扫描以下位置的application.properties/.yml文件作为默认配置文件:
- file:./config
- file:./
- classpath:./config
- classpath:./
以上是按照优先级从高到低的顺序,所有位置的文件都会被加载,并互补配置,即高优先级配置内容会覆盖低优先级配置内容,且高优先级没有但低优先级有的配置依然生效。
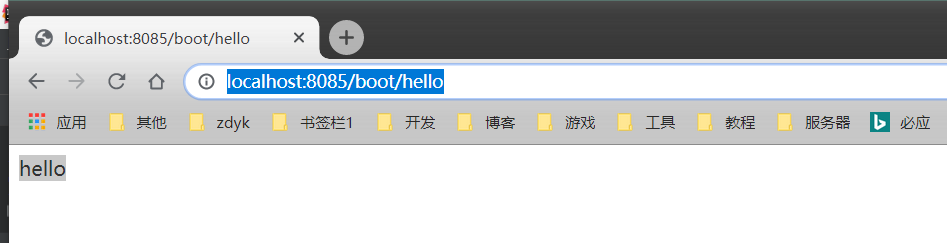
如:最高级别的端口8085,低级别的端口8087,且多了个server.servlet.context-path
然后自行编写一个HelloControler,启动项目后,端口是8085,但是访问http://localhost:8085/hello会报错,访问http://localhost:8085/boot/hello才正常,这就是互补配置。


也可以通过spring.config.location来改变默认位置:项目打包后,可以使用命令行参数的形式,启动项目的时候来指定配置文件的新位置,并且指定配置文件和默认加载的配置文件共同起作用,形成互补配置
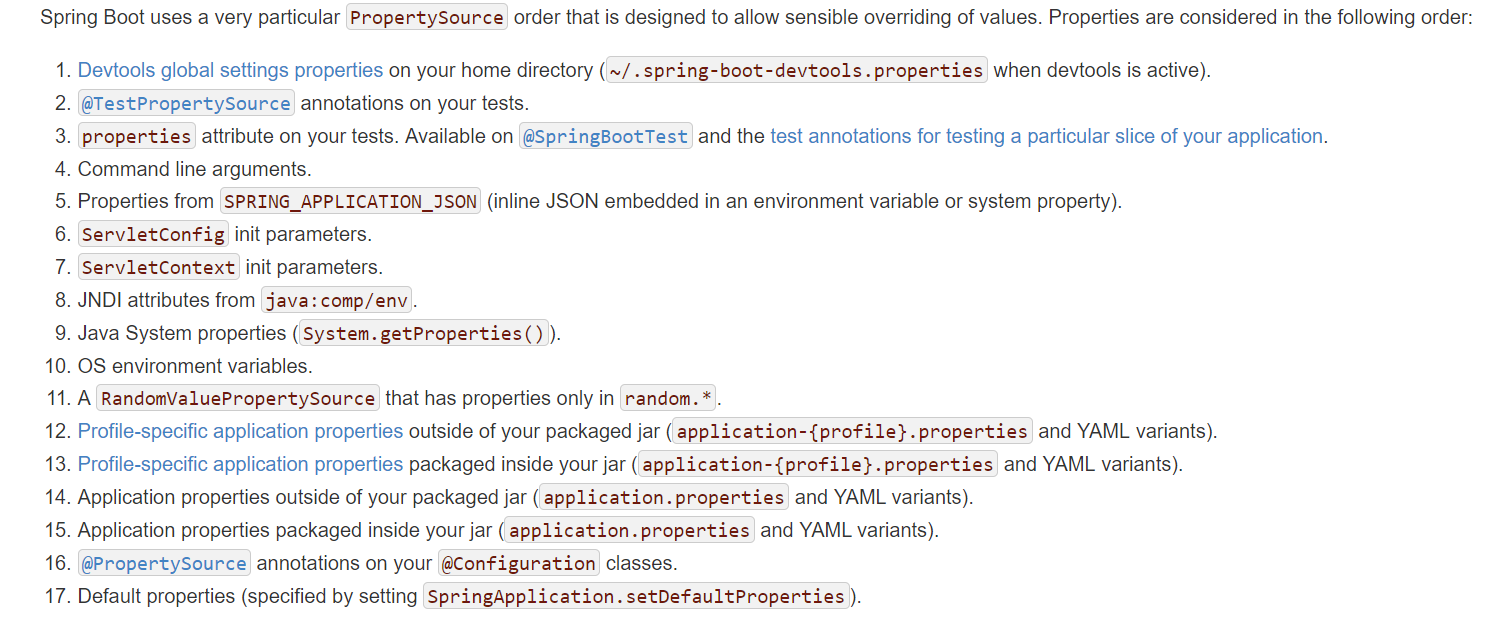
3. 外部文件加载顺序(官方文档)
https://docs.spring.io/spring-boot/docs/2.1.7.RELEASE/reference/htmlsingle/#boot-features-external-config,按照级别从高到低,互补配置。