ELK(ElasticSearch, Logstash, Kibana),三者组合在一起就可以搭建实时的日志分析平台啦!
Logstash主要用来收集、过滤日志信息并将其存储,所以主要用来提供信息。
ElasticSearch是一个基于Lucene的开源分布式搜索引擎,所以主要用来进行信息搜索。
Kibana为 Logstash 和 ElasticSearch 提供的日志信息提供了一个强大的可视化平台,可用来汇总、分析和搜索重要数据日志。
~~~~这仨都是开源的~~~~今天着重搭windows环境~~~~
一、下载安装包
1.elasticsearch-6.5.3 https://www.elastic.co/downloads/elasticsearch
2.logstash-6.5.3 https://www.elastic.co/downloads/logstash
3.kibana-6.5.3-windows-x86_64 https://www.elastic.co/cn/downloads/kibana
二、解压安装
将下载的安装包解压到安装牡蛎(我解压目录在D盘),可以放到一个目录下~
三、搭建部署
1.配置logstash
i.在logstash文件夹的下config目录创建配置文件logstash.conf
input{
  file{
      path => ["E:/logs/logsFile.log"]  # 想要收集的日志信息文件-注意全路径
      type=>"logstash_log"              # 指定一个类型
      start_position =>"beginning"      # 说明从文件最开始读
  }
}

output{
    elasticsearch{                      # 配置elasticsearch接收数据信息
    hosts=>["127.0.0.1:9200"]           # 配置elasticsearch端口信息
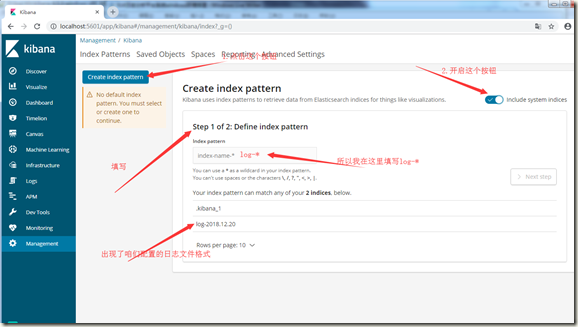
    index=>"log-%{+YYYY.MM.dd}"         # 配置Kibana新建index,比如我这里是”log-“开头,在Kibana可以写”log-*”
    }
}
ii.在bin目录下创建run.bat,写入一下脚本
logstash -f ../config/logstash.conf #我是把配置文件写到了config里所以才这么写,你们也可以把配置文件放到bin目录
iii.启动后浏览器访问http://localhost:9600,出现以下json则说明启动成功~
2.配置Elasticsearch
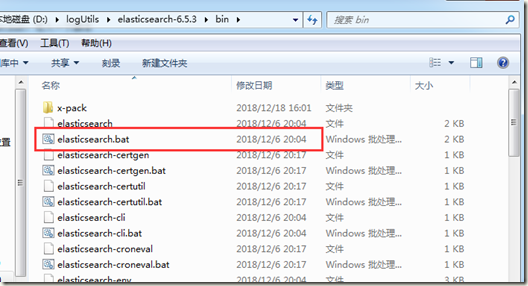
i.Elasticsearch默认端口9200,双击elasticsearch.bat即可启动~
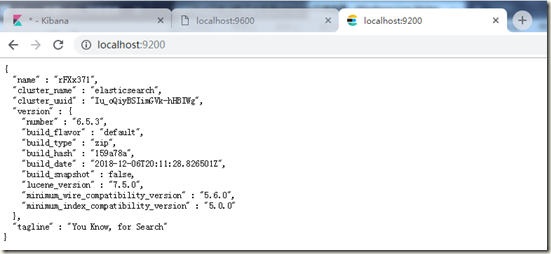
ii.启动后浏览器访问 http://localhost:9200/,出现以下json则说明启动成功~
3.配置kibana
i.修改config目录下的kibana.yml文件,在最后添加配置默认设置配置Kibana运行localhost:5601,并配置连接Elasticsearch
server.port: 5601
server.host: "0.0.0.0"
elasticsearch.url: "http://localhost:9200"
kibana.index: ".kibana"
ii.双击kibana.bat即可启动~
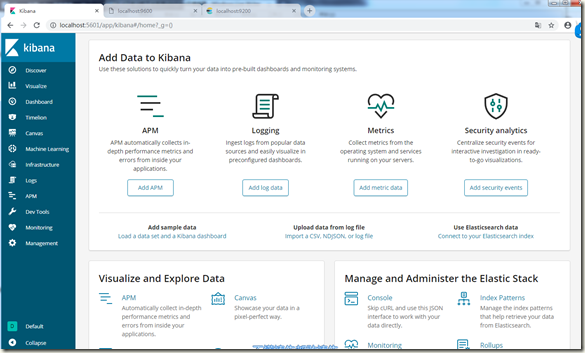
iii.启动后浏览器访问 http://localhost:5601,出现以下界面则说明启动成功~
4.配置elasticsaerch-head
i.这个我现在没有用到但是我也配置了,具体步骤就不说了,因为这个链接很详细~
ii.安装head插件 https://blog.csdn.net/qq3401247010/article/details/78742524
ii.启动后浏览器访问http://localhost:9100/,出现以下界面则说明启动成功~
四、使用
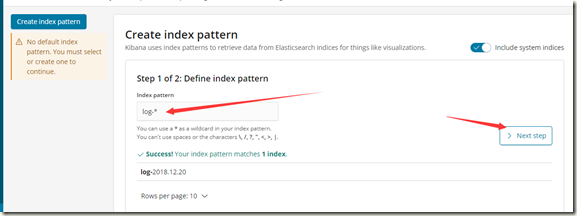
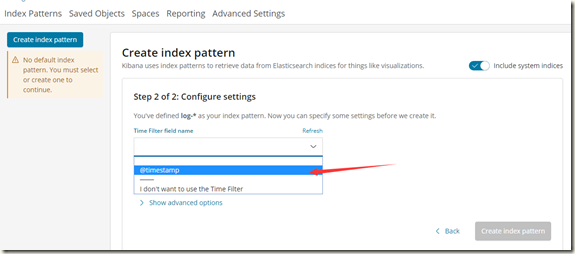
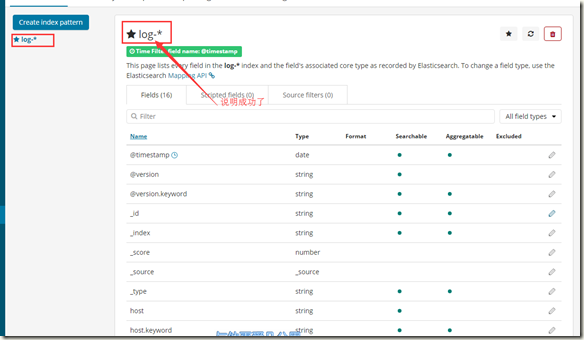
1.创建Index
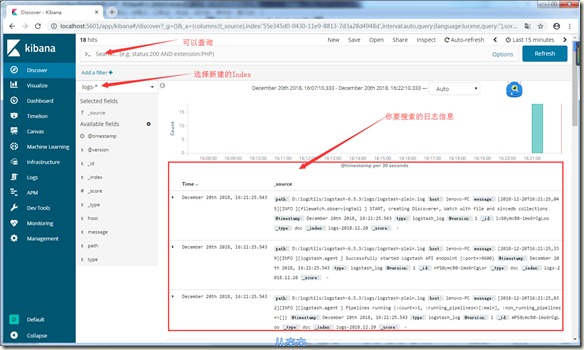
2.查看新建Index的日志
搭建好的话,之后就不用一行一行的找日志输出啦~很方便的,希望对大家有用~
现在为止最基本的搭建和使用就完成了~欢迎大家补充指正~


