声明
本篇文章纯粹为了向还不是很了解SeimiAgent的同学演示下SeimiAgent的部分能力,目标网站随意选的,并没有其他目的。
SeimiAgent简介
SeimiAgent是基于QtWebkit开发的可在服务器端后台运行的一个webkit服务,可以通过SeimiAgent提供的http接口向SeimiAgent发送一个load请求(需求加载的URL以及对这个页面接受的渲染时间或是使用什么代理等参数),通过SeimiAgent去加载并渲染想要处理的动态页面,然后将渲染好的页面直接返给调用方进行后续处理,所以运行的SeimiAgent服务是与语言无关的,任何一种语言或框架都可以通过SeimiAgent提供的标准http接口来获取服务。SeimiAgent的加载渲染环境都是通用浏览器级的,所以不用担心他对动态页面的处理能力。同时支持渲染生成页面快照(png)和PDF,亦支持自定义js脚本处理基本渲染后的页面,具体请参见官方使用说明。
正文
视频分享
为了更为直观的了解,可以先看下分享在优酷上视频,点击地址直达
下面会是图片版的详细介绍
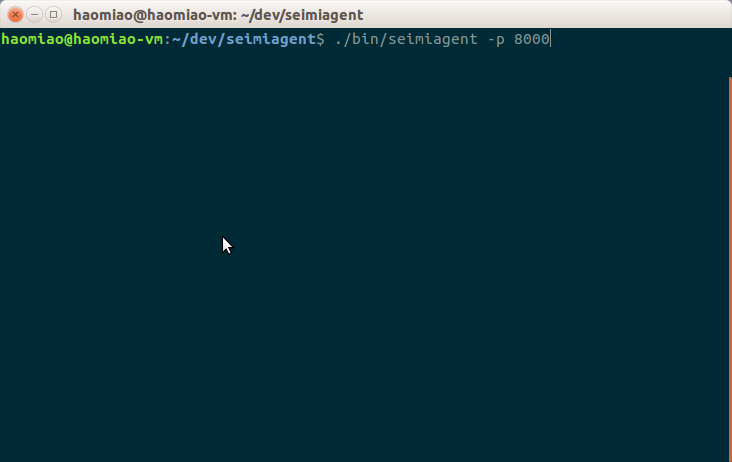
启动SeimiAgent
在SeimiAgent的目录下:
./bin/seimiagent -p 8000
登陆京东(JD)
向SeimiAgent发送登陆请求,演示中为了方便直接使用了curl与SeimiAgent进行交互。由于SeimiAgent接受标准的http指令,所以可以用任何语言来控制他。
- curl
curl -X POST -H "Accept-Charset: UTF-8" -H "Cache-Control: no-cache" -H "Postman-Token: 017ba6d3-8b1a-872e-88eb-ea663ce16313" -H "Content-Type: application/x-www-form-urlencoded" -d 'url=https://passport.jd.com/uc/login&renderTime=6000&script=$("#loginname").val("seimimaster");$("#nloginpwd").val("xxxxx");$(".login-btn>a").click();&contentType=img&useCookie=1' "http://localhost:8000/doload" -o login_jd.png

这里是告诉SeimiAgent启用cookie,并使用一段自定义的JavaScript脚本来控制页面进行登陆,并以图片的形式输出渲染结果(为了方便给大家看)。结果页面如下(文章篇幅有限文章内部使用时进行了动态截断,全图可以自行新窗口打开,去掉连接中?后的参数):

通过头部可以看出登陆成功。
其他语言与SeimiAgent交互示例
- java(okhttp)
OkHttpClient client = new OkHttpClient();

MediaType mediaType = MediaType.parse("application/x-www-form-urlencoded");
RequestBody body = RequestBody.create(mediaType, "url=https%3A%2F%2Fpassport.jd.com%2Fuc%2Flogin&renderTime=6000&script=%24(%22%23loginname%22).val(%22seimimaster%22)%3B%24(%22%23nloginpwd%22).val(%22seimi%22)%3B%24(%22.login-btn%3Ea%22).click()%3B&contentType=img&useCookie=1");
Request request = new Request.Builder()
  .url("http://localhost:8000/doload")
  .post(body)
  .addHeader("accept-charset", "UTF-8")
  .addHeader("cache-control", "no-cache")
  .addHeader("postman-token", "96caaa7b-3978-9a94-cd15-af884aa19bb4")
  .addHeader("content-type", "application/x-www-form-urlencoded")
  .build();

Response response = client.newCall(request).execute();
- python
import requests

url = "http://localhost:8000/doload"

payload = "url=https%3A%2F%2Fpassport.jd.com%2Fuc%2Flogin&renderTime=6000&script=%24(%22%23loginname%22).val(%22seimimaster%22)%3B%24(%22%23nloginpwd%22).val(%22seimi%22)%3B%24(%22.login-btn%3Ea%22).click()%3B&contentType=img&useCookie=1"
headers = {
    'accept-charset': "UTF-8",
    'cache-control': "no-cache",
    'postman-token': "17135568-b9d5-97d6-f24f-deaa3877b0c0",
    'content-type': "application/x-www-form-urlencoded"
    }

response = requests.request("POST", url, data=payload, headers=headers)
- Nodejs
var request = require("request");

var options = { method: 'POST',
  url: 'http://localhost:8000/doload',
  headers:
   { 'content-type': 'application/x-www-form-urlencoded',
     'postman-token': '6d1bc037-3f74-6a2c-d3da-426e2070bc5a',
     'cache-control': 'no-cache',
     'accept-charset': 'UTF-8' },
  form:
   { url: 'https://passport.jd.com/uc/login',
     renderTime: '6000',
     script: '$("#loginname").val("seimimaster");$("#nloginpwd").val("seimi");$(".login-btn>a").click();',
     contentType: 'img',
     useCookie: '1' } };

request(options, function (error, response, body) {
  if (error) throw new Error(error);
  //body 为图片文件流,自行处理
});
- go
package main

import (
    "fmt"
    "strings"
    "net/http"
    "io/ioutil"
)
func main() {
    url := "http://localhost:8000/doload"
    payload := strings.NewReader("url=https%3A%2F%2Fpassport.jd.com%2Fuc%2Flogin&renderTime=6000&script=%24(%22%23loginname%22).val(%22seimimaster%22)%3B%24(%22%23nloginpwd%22).val(%22seimi%22)%3B%24(%22.login-btn%3Ea%22).click()%3B&contentType=img&useCookie=1")
    req, _ := http.NewRequest("POST", url, payload)
    req.Header.Add("accept-charset", "UTF-8")
    req.Header.Add("cache-control", "no-cache")
    req.Header.Add("postman-token", "dd2d6df6-15a3-29b2-2431-b323e00de490")
    req.Header.Add("content-type", "application/x-www-form-urlencoded")
    res, _ := http.DefaultClient.Do(req)
    defer res.Body.Close()
    body, _ := ioutil.ReadAll(res.Body)

}
- C#
var client = new RestClient("http://localhost:8000/doload");
var request = new RestRequest(Method.POST);
request.AddHeader("content-type", "application/x-www-form-urlencoded");
request.AddHeader("postman-token", "614dc816-370b-ac55-097e-e581ddac601c");
request.AddHeader("cache-control", "no-cache");
request.AddHeader("accept-charset", "UTF-8");
request.AddParameter("application/x-www-form-urlencoded", "url=https%3A%2F%2Fpassport.jd.com%2Fuc%2Flogin&renderTime=6000&script=%24(%22%23loginname%22).val(%22seimimaster%22)%3B%24(%22%23nloginpwd%22).val(%22seimi%22)%3B%24(%22.login-btn%3Ea%22).click()%3B&contentType=img&useCookie=1", ParameterType.RequestBody);
IRestResponse response = client.Execute(request);
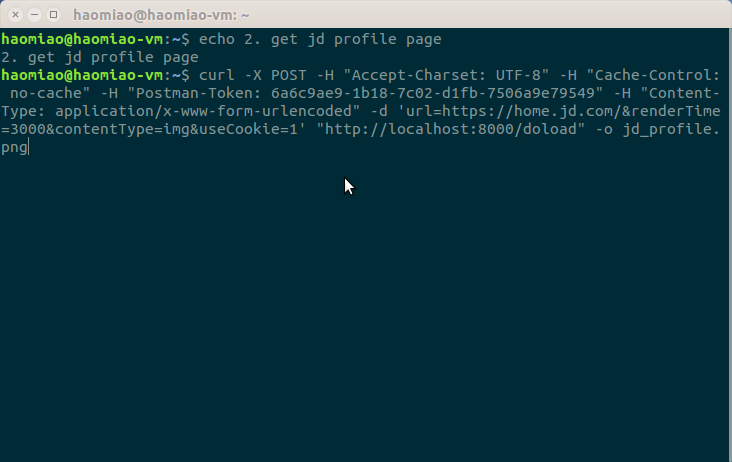
访问个人信息页
在登陆后继续访问个人信息页,验证cookie的连续性。
curl -X POST -H "Accept-Charset: UTF-8" -H "Cache-Control: no-cache" -H "Postman-Token: 6a6c9ae9-1b18-7c02-d1fb-7506a9e79549" -H "Content-Type: application/x-www-form-urlencoded" -d 'url=https://home.jd.com/&renderTime=3000&contentType=img&useCookie=1' "http://localhost:8000/doload" -o profile_jd.png
获取结果如下(文章篇幅有限文章内部使用时进行了动态截断,全图可以自行新窗口打开,去掉连接中?后的参数):

可以看到,cookie是延续有效的。
总结
通过上面,可以看到让SeimiAgent只通过一条非常简单的JavaScript脚本便完成了京东这种复杂系统的登陆以及登陆后复杂的动态页面渲染。
所以,你们懂得
来github给SeimiAgent尽情的砸star吧。