本人刚刚接触spring,看了一些教程,但是很多概念都不懂(以前没接触过,看着很抽象),所以我觉得通过动手可能会更好的理解并且掌握。看了一些小实例,但是都没有成功,终于在各种尝试之后搭建成功了,现在我就把我的过程简单地展示一下。
首先准备相应的jar包:spring-framework-3.1.2.RELEASE-with-docs中dist目录下所有jar包(有些多余,但是很方便) 还有spring-framework-3.1.2.RELEASE-dependences中的包(这个spring-framework-3.1.2.RELEASE-dependences.zip不好找,我是一个个百度下面的jar包):com.springsource.org.apache.commons.logging-1.1.1.jar
com.springsource.org.apache.log4j-1.2.15.jar
com.springsource.org.apache.commons.collections-3.2.1.jar(相关的jar包我已经传到我的文件中了,不知道怎么去插入链接)。
下载开发工具:SpringSource Tool Suite 参考http://jinnianshilongnian.iteye.com/blog/1413851这个讲的很详细,后面的有点不清晰
接下来的操作就是打开eclipse,建一个javaproject,然后导入jar包

如上,然后配置junit环境:选择上图中Add Libraries.. 然后会弹出一个对话框,选择junit,点击下方next 然后选择junit4
这样就ok了
下面就是代码了:
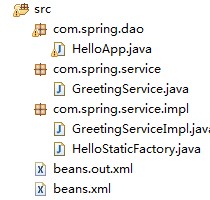
其中HelloStaticFactory.java是我自己后来加的 ,与本篇文章无关。
HelloApp.java:
package com.spring.dao;
import org.junit.Test;
import org.springframework.beans.factory.BeanFactory;
import org.springframework.beans.factory.xml.XmlBeanFactory;
import org.springframework.context.ApplicationContext;
import org.springframework.context.support.ClassPathXmlApplicationContext;
import org.springframework.core.io.FileSystemResource;
import org.springframework.test.context.TestExecutionListeners;
import com.spring.service.GreetingService;
import com.spring.service.impl.GreetingServiceImpl;
public class HelloApp {
 //这里我使用的是Junit测试的方法,也可以使用main方法来测试,使用Junit测试要导入Junit的Jar包
 @Test
 public void hello() throws Exception{
  ApplicationContext factory=new ClassPathXmlApplicationContext("beans.xml");
  GreetingService greetingService=(GreetingService)factory.getBean("greetingService");
  greetingService.sayGreeting();


}
GreetingService.java:
package com.spring.service;
public interface GreetingService {
 void sayGreeting();
}
GreetingServiceImpl.java:
package com.spring.service.impl;
import com.spring.service.GreetingService;
public class GreetingServiceImpl implements GreetingService {
 private String greeting;

 public void setGreeting(String greeting) {
  this.greeting = greeting;
 }
 public GreetingServiceImpl(){}
 public GreetingServiceImpl(String greeting){
  this.greeting=greeting;
 }

 public void sayGreeting(){
  System.out.println(greeting);
 }
}
beans.xml:
<?xml version="1.0" encoding="UTF-8"?>
<beans xmlns="http://www.springframework.org/schema/beans"
       xmlns:xsi="http://www.w3.org/2001/XMLSchema-instance"
       xsi:schemaLocation="http://www.springframework.org/schema/beans
           http://www.springframework.org/schema/beans/spring-beans-3.0.xsd">
  <bean id="greetingService" class="com.spring.service.GreetingService" >
  < property name="greeting" value="hello,world"/>
  </bean>
</beans>

按照以上方法就可以了,好好看看beans.xml更方便理解整个框架。谢谢大家!