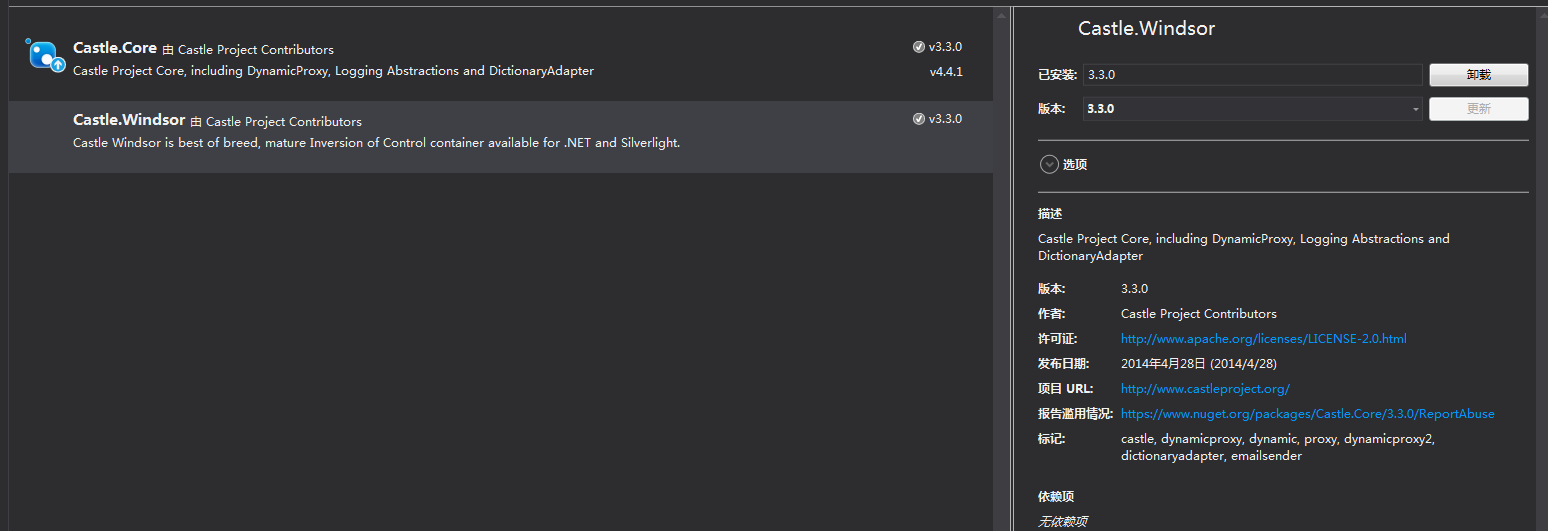
注册方式较多,大体有这么几种,学习得比较粗浅,先记录:
1、逐个注册组件
即对每个接口通过代码指定其实现类,代码:
container.Register(
    Component.For<IMyService>() //接口
	.ImplementedBy<MyService>() //实现类
);

典型应用场景:例如定义了一个日志记录接口,放到一个独立程序集中。具体实现可能有多种方式(日志以文本文件/XML文件/数据库等不同方式存储),则可以为每个实现类建立一个独立的程序集,在各程序集中将自身注册为接口的实现。这样当我们需要日志的某个存储形式时,选择对应的dll即可
2、按规则批量注册
和1比较类似,不同的是,不用逐个指定接口和实现类,而是指定一个规则,Windsor会用规则去匹配和注册当前应用中所有程序集。代码:
3、按程序集安装注册
与按照规则批量注册类似,差别在于每个程序集内部自己实现一个IWindsorInstaller接口来定义注册规则。也就是将注册规则下放到程序集。
首先,需要指定对哪些程序集进行安装注册(只指定对程序集的搜索规则):
container.Install(FromAssembly.InDirectory(new AssemblyFilter("Extensions")));//Extensions目录下的所有程序集。
其次,每个程序集内通过一个或多个实现了IWindsorInstaller接口的类,来定义哪些Interface和实现类要注册到容器。
如下代码是官网上的一个范例:
意思是当前程序集中,与RepositoriesInstaller具有相同命名空间的接口、实现,都注册到IOC容器中。
4、XML配置文件注册
用构造函数方式注册:
或通过Install方法
二、
和1比较类似,不同的是,不用逐个指定接口和实现类,而是指定一个规则,Windsor会用规则去匹配和注册当前应用中所有程序集。代码:
container.Register(Classes.FromThisAssembly()	//当前程序集,也可以调用其它方法,如FromAssemblyInDirectory()等
                    .InSameNamespaceAs<RootComponent>() //与RootComponent类具有相同的命名空间,还可以用InNamespace("Com.Spbdev")直接指定命名空间
                    .WithService.DefaultInterfaces()
                    .LifestyleTransient());	//生命周期
3、按程序集安装注册
与按照规则批量注册类似,差别在于每个程序集内部自己实现一个IWindsorInstaller接口来定义注册规则。也就是将注册规则下放到程序集。
首先,需要指定对哪些程序集进行安装注册(只指定对程序集的搜索规则):
container.Install(FromAssembly.InDirectory(new AssemblyFilter("Extensions")));//Extensions目录下的所有程序集。
其次,每个程序集内通过一个或多个实现了IWindsorInstaller接口的类,来定义哪些Interface和实现类要注册到容器。
如下代码是官网上的一个范例:
public class RepositoriesInstaller : IWindsorInstaller
{
	public void Install(IWindsorContainer container, IConfigurationStore store)
	{
		container.Register(Classes.FromThisAssembly()
			                .Where(Component.IsInSameNamespaceAs<RepositoriesInstaller>())
			                .WithService.DefaultInterfaces()
			                .LifestyleTransient());
	}
}
意思是当前程序集中,与RepositoriesInstaller具有相同命名空间的接口、实现,都注册到IOC容器中。
4、XML配置文件注册
用构造函数方式注册:
IWindsorContainer container = new WindsorContainer("dependencies.config");
或通过Install方法
container.Install(
    Configuration.FromXmlFile("dependencies.config"));
二、
安装的配置
安装的配置比较简单,无非是寻找安装类,并执行安装并获取容器,所有的安装类都需要继承自IWindsorInstaller,此接口规定了方法如下:
void Install(IWindsorContainer container, IConfigurationStore store)此方法用于执行容器里具体类的注册,类注册将在下面学习。首先看看安装的配置:
WindsorContainer _container = new WindsorContainer();
_container.Install(
           FromAssembly.This(),
           //FromAssembly.Named("CastleWindsor"),
           //FromAssembly.Containing<ServicesInstaller>(),
           //FromAssembly.InDirectory(new AssemblyFilter("Extensions")),
           //FromAssembly.Instance(this.GetPluginAssembly())
          );
以上用install方法的每一个参数对应的配置均会被加载,如果即传入了FromAssembly.This()又传入了 FromAssembly.Named("CastleWindsor"),那么程序集CastleWindsor里的实现类将会被重复注册抛错,所以得小心不能重复注册相同的实现类。
实现类的配置
实现类的配置多种多样,根据实际需求可组合出不同的配置方式,以下就学习下一些常见的配置,高级配置可自行参考官方文档http://docs.castleproject.org/Windsor.Fluent-Registration-API-Extensions.ashx
要想配置实现类到容易必须新建一个安装类并在安装类的install方法下配置,如下:
<pre name="code" class="csharp">    public class ChargeInstaller : IWindsorInstaller
    {
        public void Install(IWindsorContainer container, IConfigurationStore store)
        {
            //container.Register(
            //    Component.For<IPrinter>().ImplementedBy<WenZhouPrinter>(),
            //    Component.For<ICharge>().ImplementedBy<WenZhouCharge>());

            //container.Register(Classes.FromThisAssembly().InNamespace("CastleWindsor.IEntity").WithService.DefaultInterfaces());

            WenZhouPrinter wz = new WenZhouPrinter();
            container.Register(
                    Component.For<LoggingInterceptor>().LifeStyle.Transient,
                    Component.For<IFactory>().ImplementedBy<PrintFactory>(),
                    Component.For<IPrinter>().UsingFactoryMethod(p => p.Resolve<IFactory>().GetPrint()),
                    Component.For<ICharge>().ImplementedBy<WenZhouCharge>()
                    .DependsOn(Dependency.OnValue("twitterApiKey", "123"))
               );

            //继承两个接口
            //        container.Register(
            //              Component.For<IUserRepository, IRepository>()
            //              .ImplementedBy<MyRepository>()
            //);
            //简单工厂
            //container
            //   .Register(
            //      Component.For<IMyService>()
            //         .UsingFactoryMethod(
            //            () => MyLegacyServiceFactory.CreateMyService())
            //   );

            // 泛型配置
            //container.Register(
            //    Component.For(typeof(IRepository<>)
            //        .ImplementedBy(typeof(NHRepository<>)
            //);

            //实体生命周期
            //container.Register(
            //   Component.For<IMyService>()
            //      .ImplementedBy<MyServiceImpl>()
            //      .LifeStyle.Transient
            //.Named("myservice.default")
            //   );


            //取先注册的
            //container.Register(
            //    Component.For<IMyService>().ImplementedBy<MyServiceImpl>(),
            //    Component.For<IMyService>().ImplementedBy<OtherServiceImpl>()
            //);

            //强制取后注册的
            //container.Register(
            //    Component.For<IMyService>().ImplementedBy<MyServiceImpl>(),
            //    Component.For<IMyService>().Named("OtherServiceImpl").ImplementedBy<OtherServiceImpl>().IsDefault()
            //);

            //注册已经存在的
            //var customer = new CustomerImpl();
            //container.Register(
            //    Component.For<ICustomer>().Instance(customer)
            //    );
        }
    }
配置中可以使用UsingFactoryMethod来将对应的接口的工厂方法注册到容器中,容器可通过该工厂方法获取实现类,以上分别有简单工厂和工厂方法的配置。
通过DependsOn(Dependency.OnValue("twitterApiKey", "123")可向实现类的字段twitterApiKey注入”123“字符串值。
通过设置IsDefault来规定多个实现类的默认获取过来的类。
添加引用 Castle.Core.dll和Castle.Windsor.dll

interface IVehicle
    {
        void Run();
    }

    class Car : IVehicle
    {
        public void Run()
        {
            Console.WriteLine("ci ci ci...");
        }
    }


class Program
    {
        private static readonly ProxyGenerator ProxyGeneratorInstance = new ProxyGenerator();
        static void Main(string[] args)
        {
            //IWindsorContainer IocContainer = new WindsorContainer(new DefaultProxyFactory(ProxyGeneratorInstance)).Install(FromAssembly.This());

            IWindsorContainer IocContainer = new WindsorContainer();
            //IocContainer.Install(FromAssembly.This());

            IocContainer.Register(Component.For<IVehicle, Car>().ImplementedBy<Car>());


            Car car = IocContainer.Resolve<Car>();
            if (car != null)
            {
                car.Run();
            }

            //WindsorContainer container = WindsorInit.GetContainer();
            //var _test = container.Resolve<IVehicle>(new Castle.MicroKernel.Arguments(new { }));
            //if (_test != null)
            //    _test.Run();

            Console.ReadKey();

        }
    }