spring-boot入门
了解SpringBoot
为什么学习SpringBoot
java一直被人诟病的一点就是臃肿、麻烦。当我们还在辛苦的搭建项目时,可能Python程序员已经把功能写好了,究其原因注意是两点:
- 复杂的配置,
项目各种配置其实是开发时的损耗, 因为在思考 Spring 特性配置和解决业务问题之间需要进行思维切换,所以写配置挤占了写应用程序逻辑的时间。 - 一个是混乱的依赖管理。
项目的依赖管理也是件吃力不讨好的事情。决定项目里要用哪些库就已经够让人头痛的了,你还要知道这些库的哪个版本和其他库不会有冲突,这难题实在太棘手。并且,依赖管理也是一种损耗,添加依赖不是写应用程序代码。一旦选错了依赖的版本,随之而来的不兼容问题毫无疑问会是生产力杀手。
SpringBoot的特点
Spring Boot 主要目标是:
- 为所有 Spring 的开发者提供一个非常快速的、广泛接受的入门体验
- 开箱即用(启动器starter-其实就是SpringBoot提供的一个jar包),但通过自己设置参数(.properties),即可快速摆脱这种方式。
- 提供了一些大型项目中常见的非功能性特性,如内嵌服务器、安全、指标,健康检测、外部化配置等
- 绝对没有代码生成,也无需 XML 配置。
快速入门
建立Maven工程
添加依赖
SpringBoot提供了一个名为spring-boot-starter-parent的工程,里面已经对各种常用依赖(并非全部)的版本进行了管理,
我们的项目需要以这个项目为父工程,这样我们就不用操心依赖的版本问题了,需要什么依赖,直接引入坐标即可!
添加父工程坐标
<parent>
    <groupId>org.springframework.boot</groupId>
    <artifactId>spring-boot-starter-parent</artifactId>
    <version>2.0.0.RELEASE</version>
</parent>
添加Web启动器
为了让SpringBoot帮我们完成各种自动配置,
我们必须引入SpringBoot提供的自动配置依赖,我们称为启动器。因为我们是web项目,这里我们引入web启动器
<dependencies>
    <dependency>
        <groupId>org.springframework.boot</groupId>
        <artifactId>spring-boot-starter-web</artifactId>
    </dependency>
</dependencies>
管理JDK版本
默认情况下,maven工程的jdk版本是1.5,而我们开发使用的是1.8,因此这里我们需要修改jdk版本,只需要简单的添加以下属性即可
<properties>
    <java.version>1.8</java.version>
</properties>
启动类
@SpringBootApplication
public class org.ranger.Application {
    public static void main(String[] args) {
        SpringApplication.run(org.ranger.Application.class, args);
    }
}
添加Controller
@Controller
public class IndexController {
    @ResponseBody
    @RequestMapping("/hello")
    public Object hello(){
        return "hello,spring boot~!";
    }

    @ResponseBody
    @RequestMapping("/index")
    public String index(){
        return "index";
    }
}
Java配置
回顾历史
在以前我们配置一个bean该怎么做呢?
在xml配置文件中添加标签,例如配置数据库连接池
<!-- 配置连接池 -->
<bean id="dataSource" class="com.alibaba.druid.pool.DruidDataSource"
      init-method="init" destroy-method="close">
    <property name="url" value="${jdbc.url}" />
    <property name="username" value="${jdbc.username}" />
    <property name="password" value="${jdbc.password}" />
</bean>
使用Java配置
Java配置主要是使用Java注解和类
@Configuration:声明一个类作为配置类,代替xml文件@Bean:声明在方法上,根据方法的返回值加入Bean容器,代替<bean/>标签@Value:属性注入PropertySource:指定外部属性文件
我们使用Java配置来配置数据库连接池,首先引入连接池依赖
 <dependency>
            <groupId>com.alibaba</groupId>
            <artifactId>druid</artifactId>
            <version>1.1.9</version>
        </dependency>
创建配置文件类
@PropertySource("jdbc.properties")
@Configuration
public class JDBCConfig {
    @Value("${jdbc.url}")
    private String url;
    @Value("${jdbc.driverClassName}")
    private String driverClassName;
    @Value("${jdbc.username}")
    private String username;
    @Value("${jdbc.password}")
    private String password;
    private String url1;

    @Bean
    public DataSource dataSource(){
        DruidDataSource dataSource = new DruidDataSource();
        dataSource.setUrl(url1);
        dataSource.setDriverClassName(driverClassName);
        dataSource.setUsername(username);
        dataSource.setPassword(password);

        return dataSource;
    }
}
SpringBoot的属性注入
上面我们使用了@Value注解来注入属性,这种方式可行但不能注入复杂的类型
SpringBoot中提供了另外一种属性注入的方式,这种方式既可以注入基本数据类型也可注入复杂数据类型
使用@ConfigurationProperties(prefix="jdbc")
application.yml中配置相应的属性值:
jdbc:
  url: jdbc:mysql://127.0.0.1:3306/leyou
  driverClassName: com.mysql.jdbc.Driver
  username: cyp
  password: cyp
@ConfigurationProperties(prefix = "jdbc")
public class JDBCProperties {
    private String url;
    private String driverClassName;
    private String username;
    private String password;

    public String getUrl() {
        return url;
    }

    public void setUrl(String url) {
        this.url = url;
    }

    public String getDriverClassName() {
        return driverClassName;
    }

    public void setDriverClassName(String driverClassName) {
        this.driverClassName = driverClassName;
    }

    public String getUsername() {
        return username;
    }

    public void setUsername(String username) {
        this.username = username;
    }

    public String getPassword() {
        return password;
    }

    public void setPassword(String password) {
        this.password = password;
    }
}
使用:通过@EnableConfigurationProperties(JdbcProperties.class)来声明要使用JdbcProperties这个类的对象
可以使用以下方式注入JDBCProperties对象
-
@Autowired注入
@Autowired private JdbcProperties prop; -
构造函数注入
private JdbcProperties prop; public JdbcConfig(Jdbcproperties prop){ this.prop = prop; } -
声明有@Bean的方法参数注入
@Bean
public Datasource dataSource(JdbcProperties prop){
   // TODO
}
本例中,我们采用第三种方式。
@Configuration
@EnableConfigurationProperties(JDBCProperties.class)
public class JDBCConfig {
    @Bean
    public DataSource dataSource(JDBCProperties jdbc){
        DruidDataSource dataSource = new DruidDataSource();
        dataSource.setUrl(jdbc.getUrl());
        System.out.println(jdbc.getUrl());
        dataSource.setDriverClassName(jdbc.getDriverClassName());
        dataSource.setUsername(jdbc.getUsername());
        dataSource.setPassword(jdbc.getPassword());

        return dataSource;
    }
}
自动配置原理
使用了 SpringBoot之后,以前很多繁琐的配置文件都不需要我们自己写了,这是怎么做到的呢,这一切都依赖于SpringBoot的自动配置
SpringBoot应用是从main方法开始的,main方法所在的类有一个@SpringBootApplication注解。
@SpringBootApplication
查看该注解的源码
@Target(ElementType.TYPE)
@Retention(RetentionPolicy.RUNTIME)
@Documented
@Inherited
@SpringBootConfiguration
@EnableAutoConfiguration
@ComponentScan(excludeFilters = {
		@Filter(type = FilterType.CUSTOM, classes = TypeExcludeFilter.class),
		@Filter(type = FilterType.CUSTOM, classes = AutoConfigurationExcludeFilter.class) })
public @interface SpringBootApplication {
这里重点的注解有3个:
- @SpringBootConfiguration
- @EnableAutoConfiguration
- ComponentScan
@SpringBootConfiguration
查看这个注解的源码
@Target(ElementType.TYPE)
@Retention(RetentionPolicy.RUNTIME)
@Documented
@Configuration
public @interface SpringBootConfiguration {

}
通过这段我们可以看出,在这个注解上面,又有一个@Configuration注解。通过上面的注释阅读我们知道:
这个注解的作用就是声明当前类是一个配置类,然后Spring会自动扫描到添加了@Configuration的类,并且读取其中的配置信息。
而@SpringBootConfiguration是来声明当前类是SpringBoot应用的配置类,项目中只能有一个。所以一般我们无需自己添加。
@EnableAutoConfiguration
SpringBoot内部对大量的第三方库或Spring内部库进行了默认配置,这些配置是否生效,取决于我们是否引入了对应库所需的依赖,如果有那么默认配置就会生效。
@ComponentScan
/**
 * Configures component scanning directives for use with @{@link Configuration} classes.
 * Provides support parallel with Spring XML's {@code <context:component-scan>} element.
 *
 * <p>Either {@link #basePackageClasses} or {@link #basePackages} (or its alias
 * {@link #value}) may be specified to define specific packages to scan. If specific
 * packages are not defined, scanning will occur from the package of the
 * class that declares this annotation.
 *
 * <p>Note that the {@code <context:component-scan>} element has an
 * {@code annotation-config} attribute; however, this annotation does not. This is because
 * in almost all cases when using {@code @ComponentScan}, default annotation config
 * processing (e.g. processing {@code @Autowired} and friends) is assumed. Furthermore,
 * when using {@link AnnotationConfigApplicationContext}, annotation config processors are
 * always registered, meaning that any attempt to disable them at the
 * {@code @ComponentScan} level would be ignored.
 *
 * <p>See {@link Configuration @Configuration}'s Javadoc for usage examples.
 *
 * @author Chris Beams
 * @author Juergen Hoeller
 * @author Sam Brannen
 * @since 3.1
 * @see Configuration
 */
@Retention(RetentionPolicy.RUNTIME)
@Target(ElementType.TYPE)
@Documented
@Repeatable(ComponentScans.class)
public @interface ComponentScan {
大概的意思:
配置组件扫描的指令。提供了类似与context:component-scan标签的作用
通过basePackageClasses或者basePackages属性来指定要扫描的包。如果没有指定这些属性,那么将从声明这个注解的类所在的包开始,扫描包及子包
而我们的@SpringBootApplication注解声明的类就是main函数所在的启动类,因此扫描的包是该类所在包及其子包。因此,一般启动类会放在一个比较前的包目录中。
默认配置原理
通过刚才的学习,我们知道@EnableAutoConfiguration会开启SpringBoot的自动配置,并且根据你引入的依赖来生效对应的默认配置。那么问题来了:
- 这些默认配置是在哪里定义的呢?
- 为何依赖引入就会触发配置呢?
其实在我们的项目中,已经引入了一个依赖:spring-boot-autoconfigure,其中定义了大量自动配置类
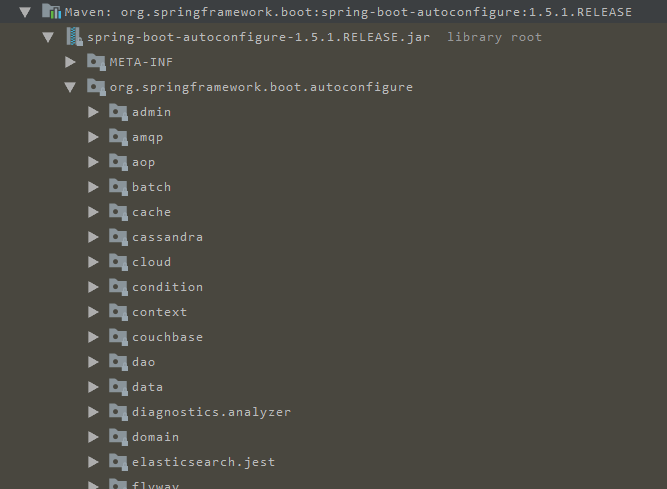
这里面几乎涵盖了所有的主流框架
SpringBoot为我们提供了默认配置,而默认配置生效的条件一般有两个:
- 你引入了相关依赖
- 你自己没有配置
1)启动器
所以,我们如果不想配置,只需要引入依赖即可,而依赖版本我们也不用操心,因为只要引入了SpringBoot提供的stater(启动器),就会自动管理依赖及版本了。
2)全局配置
另外,SpringBoot的默认配置,都会读取默认属性,而这些属性可以通过自定义application.properties文件来进行覆盖。这样虽然使用的还是默认配置,但是配置中的值改成了我们自定义的。
实践:加密数据库密码
引入依赖
<dependency>
    <groupId>com.github.ulisesbocchio</groupId>
    <artifactId>jasypt-spring-boot-starter</artifactId>
    <version>1.16</version>
</dependency>
配置加密密钥
jasypt.encryptor.password=ranger
获取加密后的数据
@RunWith(SpringJUnit4ClassRunner.class)
@SpringBootTest(classes = Application.class)
public class EncryptTest {
    @Autowired
    StringEncryptor encryptor;

    @Test
    public void encry(){
        //加密username
        String username = encryptor.encrypt("cyp");
        System.out.println(username);
        //加密password
        String password = encryptor.encrypt("cyp");
        System.out.println(password);


    }
}
配置文件中配置