一、流程图效果
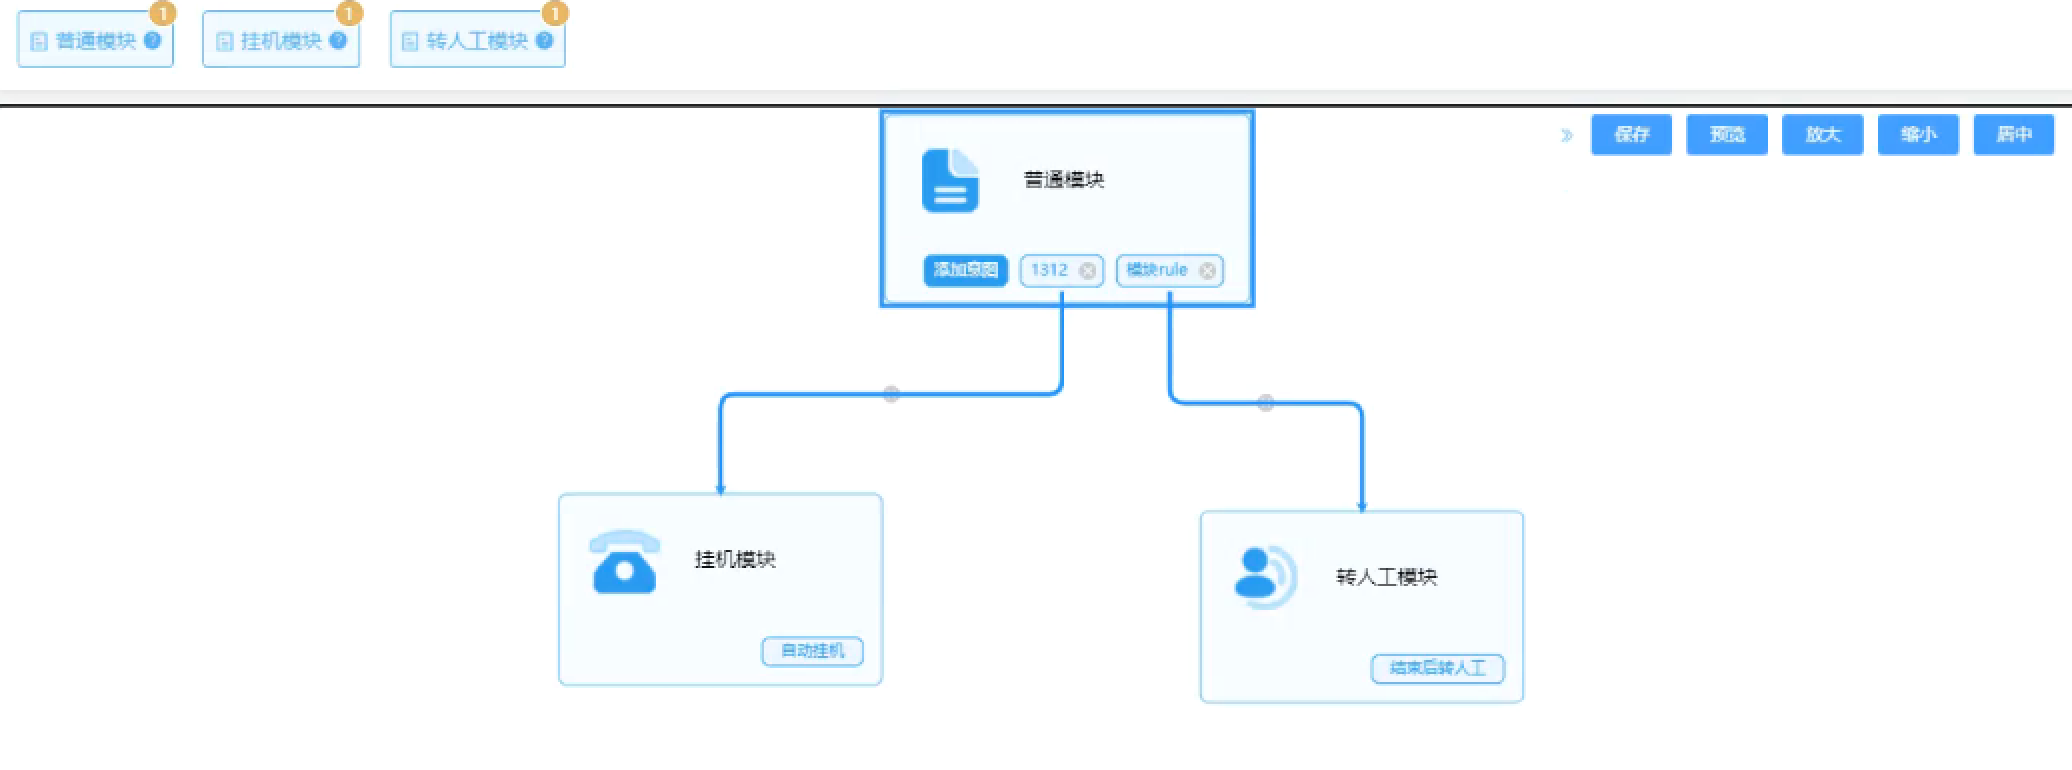
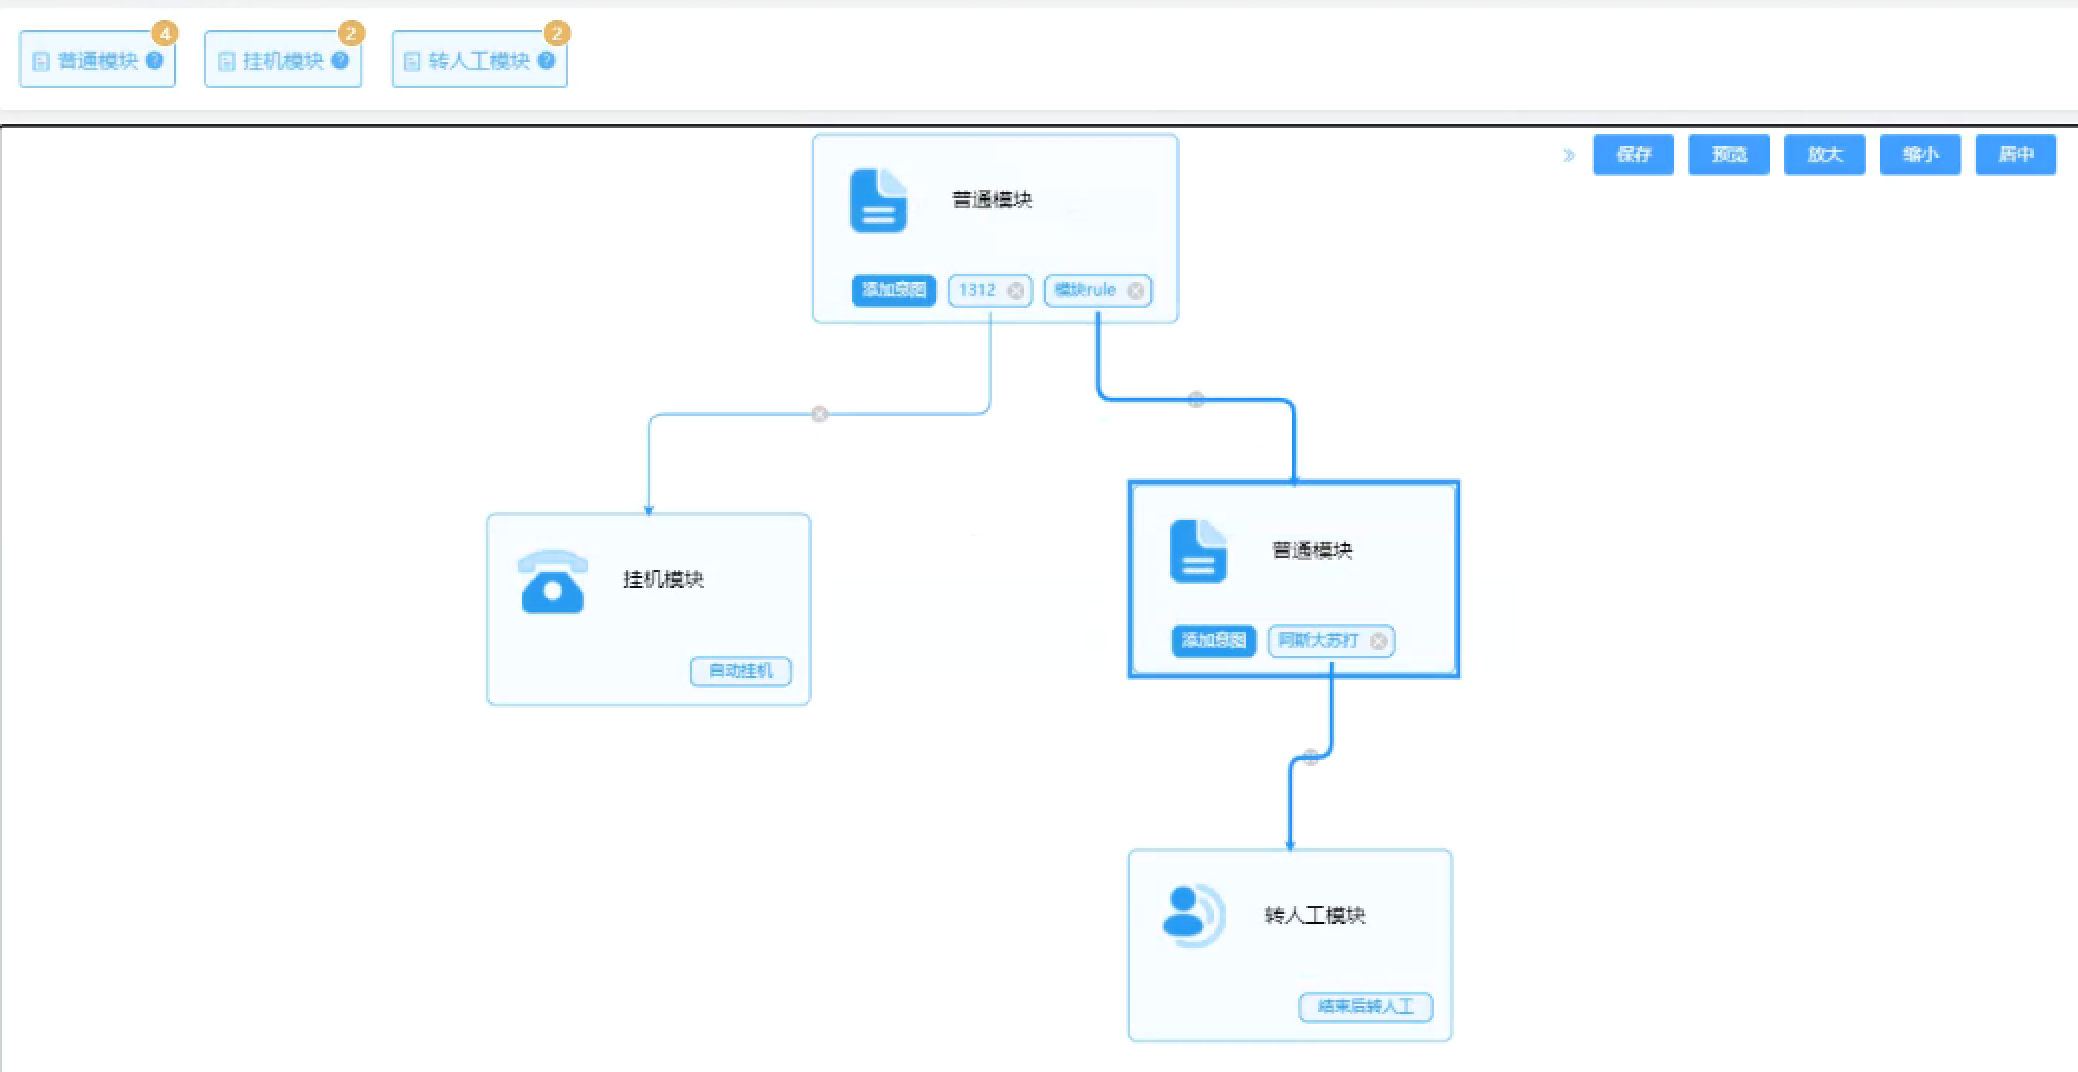
最近一段时间在研究go.js,它是一款前端开发画流程图的一个插件,也是一个难点,要说为什么是难点,首先,它是依赖画布canvas知识开发。其次,要依赖于内部API开发需求,开发项目需求的时候就要花费大量的时间去熟悉go.js的API,然后才能进行开发。话不多说,我就先把我最近做的项目案例效果图展示一下:


看到效果图大家可能会想这个挺简单的,会想没什么难点,其实真正开发的时候才会知道的、才会领悟到。
二、为什么选go.js流程图插件去开发项目?
在项目开发一期的时候我用的不是go.js,而用的是一款轻便的流程插件jsplumb.js,它也集成了各种功能性API,但是在开发二期的时候它的内部功能已经满足不了需求了,所以我就开始在网上查找流程插件,看了很多插件,比如:G6,D3 等这些可视化流程插件都是不能满足需求。要说为什么不能满足需求,原因如下:
一、首先,看到效果图里的内置多点和其他模块单点连线问题,其他插件是无法这个满足需求的,可能我没有深入去了解其他的流程插件吧,但是go.js里内置点连线可以让开发者很快的理解代码逻辑,不用耗费大量的时间去想点与点的连线。
二、代码上的数据结构问题,其他插件里的API数据字段繁琐量多,不够清晰明了,而go.js里的数据结构就两个重要字段,一是所有模块的字段集合二是连线字段集合,根据需求可以随意加字段。
三、项目开发
(一)、首先直接使用go.js,画布中是有水印的

其实这个问题不大,替换一行代码就可以去除水印
引入go.js后,直接在编辑器中全局搜索7eba17a4ca3b1a8346,找到类似这样结构的代码
a.ir=b.W[Ra("7eba17a4ca3b1a8346")][Ra("78a118b7")](b.W,ok,4,4);
注:不同的版本代码不是完全相同的,可能是a.jv(属性名是会变的) =‘xxxxx’,将这行代码替换成
a.ir=function(){return true;}; //a.属性名 要保持一致
去除水印的效果

(二)、HTML
<--第一种-->
<template>
	<div id="wrap">
		<div id="chart-wrap">
			<div id="chart-palette"></div><-- 画布一 -->
			<div id="chart-diagram"></div><-- 画布二 -->
		</div>
	</div>
</template>
如图:

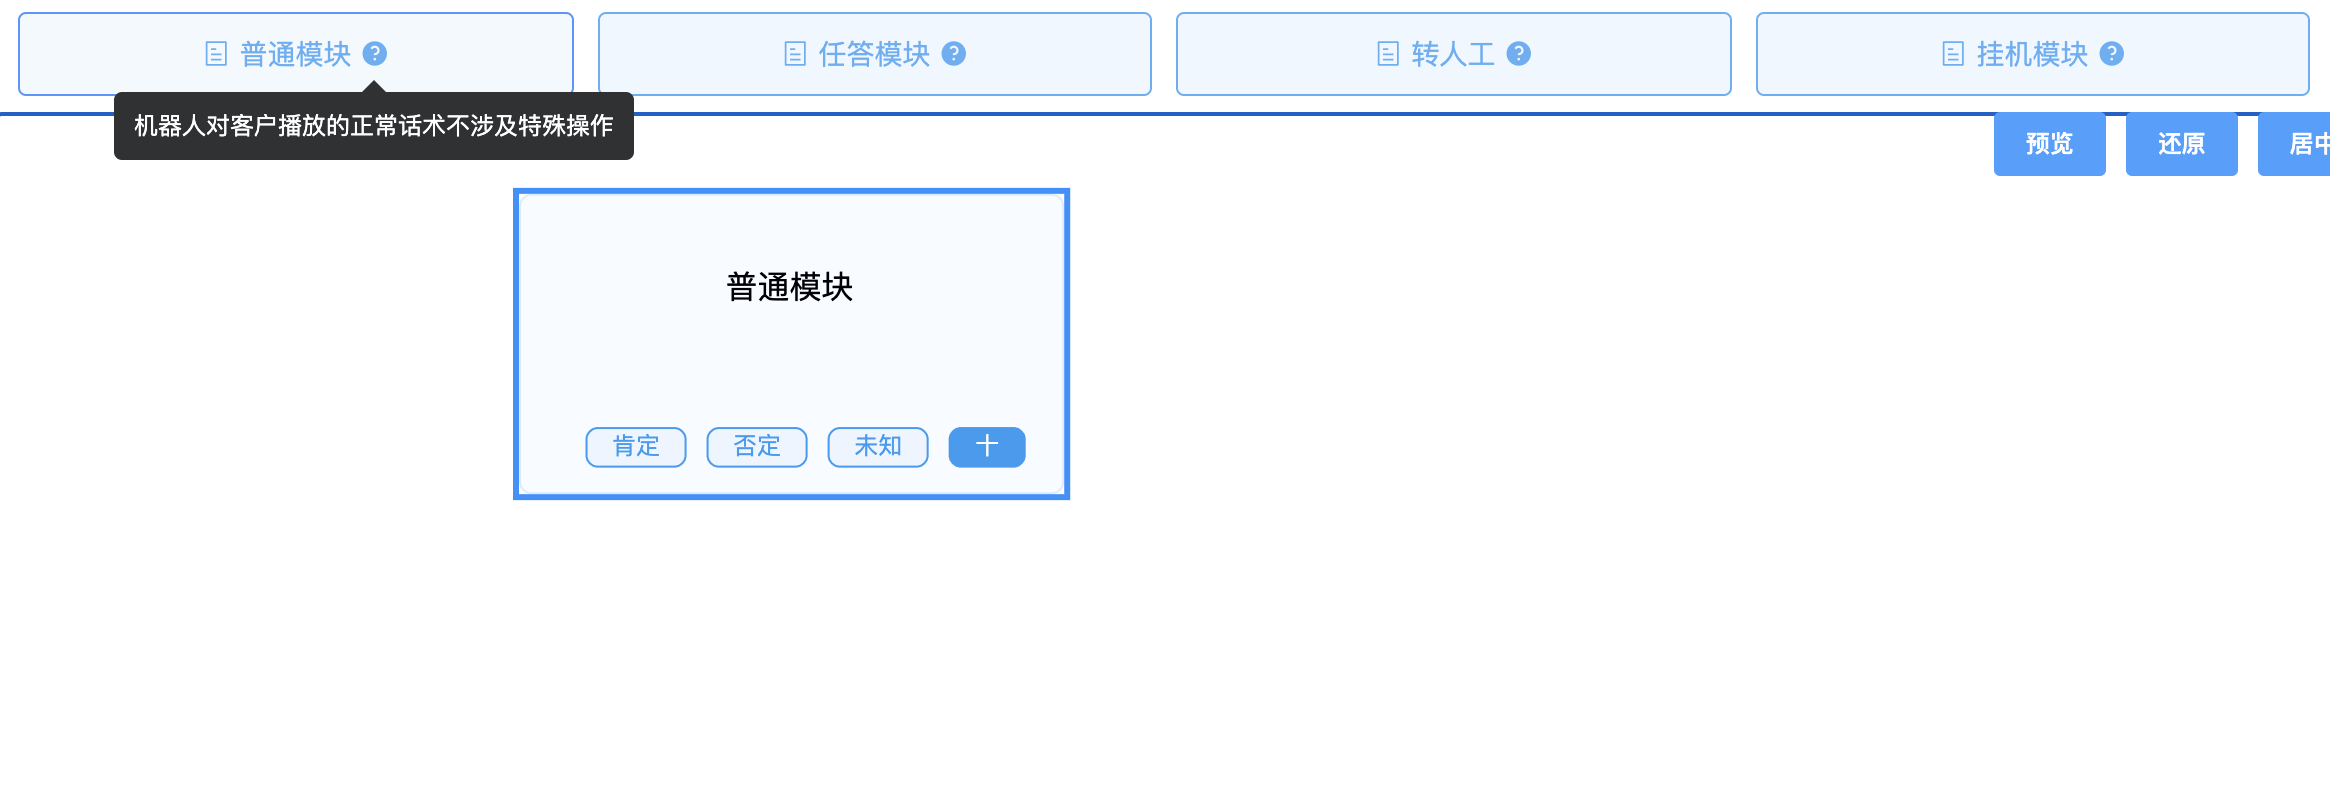
第二种
 结合vue的拖拽组件vuedraggable 实现业务需求。
<template>
	 <div id="chart-wrap">
                <div v-for="tab in tabLIst" :key="tab.id" class="tab">
              //拖动
		   <vuedraggable @end.stop="end" @start.stop="move">

                                 <i :class="tab.icon" /> {{ tab.text }}
                                 <el-tooltip effect="dark" :content="tab.tooltip" placement="top">
                                             <i class="el-icon-question" />
                                 </el-tooltip>
                    </vuedraggable>
                  </div>
		 <div id="chart-diagram"/> <--画布-->
	  </div>
</template>
如图:

(三)、画布的基本设置 。
this.diagram = $(go.Diagram, "chart-diagram",
				{
					// 画布初始位置
					initialContentAlignment: go.Spot.LeftSide, // 居中显示
					"undoManager.isEnabled": true, // 支持 Ctrl-Z 和 Ctrl-Y 操作
					// 初始坐标
					// initialPosition: new go.Point(0, 0),
					//allowSelect:false,  ///禁止选中
					// "toolManager.hoverDelay": 100, //tooltip提示显示延时
					// "toolManager.toolTipDuration": 10000, //tooltip持续显示时间
					//  isReadOnly:true,//只读

					//禁止水平拖动画布
					//禁止水平滚动条
					allowHorizontalScroll: false,
					// 禁止垂直拖动画布
					//禁止垂直滚动条
					allowVerticalScroll: false,
					allowZoom: true,//画布是否可以缩放
					"grid.visible": false, //显示网格
					// allowMove: true, //允许拖动
					// allowDragOut:true,
					allowDelete: true,//禁止删除节点
					allowCopy: true,//禁止复制
					// 禁止撤销和重做
					// "undoManager.isEnabled": false,
					// 画布比例
					// scale:1.5,
					// minScale:1.2,//画布最小比例
					// maxScale:2.0,//画布最大比例
					// 画布初始化动画时间
					// "animationManager.duration": 600,
					// 禁止画布初始化动画
					"animationManager.isEnabled": false,
					// autoScale:go.Diagram.Uniform,//自适应

					// autoScale:go.Diagram.UniformToFill,//自适应
					//    "draggingTool.dragsLink": false,//拖动线
					// autoScale:go.Diagram.None,//默认值不自适应
					// 画布边距padding
					// padding:80或者new go.Margin(2, 0)或new go.Margin(1, 0, 0, 1)
					// validCycle: go.Diagram.CycleDestinationTree,//只允许有一个父节点
					//节点模块动画  S
					// "animationManager.initialAnimationStyle":go.Animation.EaseOutExpo,
					// "animationManager.initialAnimationStyle": go.Animation.EaseInOutQuad,
					"animationManager.initialAnimationStyle": go.AnimationManager.None,
					// "animationManager.initialAnimationStyle":go.AnimationManager.AnimateLocations,
					//节点模块动画   D
					// validCycle: go.Diagram.CycleNotUndirected,

					// validCycle: go.Diagram.CycleNotDirected,
					// validCycle: go.Diagram.CycleSourceTree,
					//ismodelfied:true //禁止拖拽
					// 禁止鼠标拖动区域选中
					// "dragSelectingTool.isEnabled" : false,
					//允许使用delete键删除模块
					"commandHandler.deletesTree": true,
					// "hasHorizontalScrollbar":false,//去除水平滚动条
					// "hasVerticalScrollbar":false,//去除竖直滚动条
					// "canStart":false,
					// allowClipboard: true,
					// "toolManager.mouseWheelBehavior": go.ToolManager.WheelZoom, //有鼠标滚轮事件放大和缩小,而不是向上和向下滚动
					// layout: $(go.TreeLayout,
					// 	{ angle: 90, layerSpacing: 80 }),
				}
			);
(三)、整体画布事件及节点的监听
                // 监听连线
                this.diagram.addDiagramListener("LinkDrawn", (e) => {
                    console.log(e.subject.part);
                });
                // 监听删除
                 this.diagram.addDiagramListener("SelectionDeleted", (e) => {
                     e.subject.each(function (n) {
                         console.log(n.data.key);
                     });
                  })
                // 修改节点
                this.diagram.addDiagramListener("TextEdited", (evt) => {
                    console.log(e.subject.part);
                });
                // 监听点击
                this.diagram.addDiagramListener("ObjectSingleClicked", (e) => {

                   //这是清除高亮的
                   // e.diagram.commit((d) => {
                    //      d.clearHighlighteds();
                     // }, "no highlighteds");
                });

                // // 移动事件
                this.diagram.addDiagramListener("SelectionMoved", (e) => {
                    console.log(e.diagram.lastInput.documentPoint);
                });
(四)、连线点封装函数
 // 节点连接线
            makePort (name, align, spot, output, input) {
                var horizontal = align.equals(go.Spot.Top) || align.equals(go.Spot.Bottom)
                return $(go.Shape, {
                    fill: 'transparent', // 默认透明不现实
                    strokeWidth: 0, // 无边框
                    fromMaxLinks: 1, //
                     horizontal ? NaN : 10, // 垂直"port"则8像素宽
                    height: !horizontal ? NaN : 5, // 水平"port"则8像素
                    alignment: align, // 同其模块对齐
                    stretch: horizontal
                        ? go.GraphObject.Horizontal
                        : go.GraphObject.Vertical, // 自动同其模块一同伸缩
                    portId: name, // 声明ID
                    fromSpot: spot, // 声明连线头连出此"port"的位置
                    fromLinkable: output, // 布尔型,是否允许连线从此"port"连出
                    toLinkable: input, // 布尔型,是否允许连线从此"port"连出
                    toSpot: spot, // 声明连线尾连入此"port"的位置
                    cursor: 'pointer', // 鼠标由指针改为手指,表示此处可点击生成连线
                    mouseEnter: function (e, port) {
                        // 鼠标移到"port"位置后,高亮
                        if (!e.diagram.isReadOnly) port.fill = 'rgba(255,0,255,0.3)'
                    },
                    mouseLeave: function (e, port) {
                        // 鼠标移出"port"位置后,透明
                        port.fill = 'transparent'
                    }
                })
            }
(五)、节点连线的高亮函数。
isHighlightedFun(link) {
                return $$(go.Shape,
                      "RoundedRectangle", {
                          fill: "rgba(217,236,255,.2)",
                          stroke: "rgba(39,154,242,.1)",
                          strokeWidth: 1,
                      },
                      new go.Binding("stroke", "isHighlighted", (h) => {
                            return h ? "rgba(39,154,242,1)" : "rgba(39,154,242,.8)";
                      }).ofObject(),
                      new go.Binding("strokeWidth", "isHighlighted", (h) => {
                          return h ? 2.5 : 1.3;
                      }).ofObject(),
                )
    }
如图:


(六)、 节点连接线。(方法封装)
makePort(name, align, spot, output, input) {
                var horizontal = align.equals(go.Spot.Top) || align.equals(go.Spot.Bottom);
                return $$(go.Shape,
                      {
                          fill: "transparent",  // 默认透明
                          strokeWidth: 0,  // 无边框
                          fromMaxLinks: 1,  //最大连接数
                           horizontal ? NaN : 10,  // 垂直"port"则8像素宽
                          height: !horizontal ? NaN : 2,  // 水平"port"则8像素
                          alignment: align,  // 同其模块对齐
                          stretch: (horizontal ? go.GraphObject.Horizontal : go.GraphObject.Vertical),//自动同其模块一同伸缩
                          portId: name,  // 声明ID
                          fromSpot: spot,  // 声明连线头连出此"port"的位置
                          fromLinkable: output,  // 布尔型,是否允许连线从此"port"连出
                          toLinkable: input,  // 布尔型,是否允许连线从此"port"连出
                          toSpot: spot,  // 声明连线尾连入此"port"的位置
                          cursor: "pointer",  // 鼠标由指针改为手指,表示此处可点击生成连线
                          mouseEnter: (e, port) => {  //鼠标移到"port"位置后,高亮
                              if (!e.diagram.isReadOnly) port.fill = "rgba(255,0,255,0.3)";
                          },
                          mouseLeave: (e, port) => {// 鼠标移出"port"位置后,透明
                              port.fill = "transparent";
                          }
                      });
            }
注意:要在this.diagram.nodeTemplateMap.add 增加模块里调用。
示例:
this.diagram.nodeTemplateMap.add(type,
                      $$(go.Node, "Auto",
               this.makePort("T", go.Spot.Top, go.Spot.TopCenter, false, true)
))
以上仅供参考。先写到这,下周继续写模块分组的体验 如有不足 可以私信单聊共享技术经验。。。。。。。。。。。。。。